Read Time: 10 minutes
In-place archiving is a feature of both Exchange on-premises and Exchange Online. It gives users a secondary mailbox called the archive mailbox, where older items can be stored rather than in the local PST file. The archive mailbox is similar to the primary mailbox and can be accessed in Outlook or Outlook on the Web.
In an on-premises organization, admins also decide where the archive mailbox is stored. You can save the archive mailbox on the same database as the primary mailbox or use a different database but the same Exchange Server. Furthermore, you can save the archive mailbox on another Exchange Server in the same Active Directory.
Sometimes, you still need a backup copy of that archive outside the mailbox. This guide explains how to export Exchange archive mailbox to PST using Exchange Management Shell, Outlook’s built-in Import/Export option, Exchange Admin Center, and Microsoft Purview eDiscovery.
Why Export Exchange Archive Mailbox to PST?
There are various reasons why users want to export an archive mailbox to PST; some of them are listed below:
- Local data backup
- Server storage reduction
- Regulatory compliance
- eDiscovery and legal investigations
- Employee offboarding
- Platform migration
- Offline access in Outlook
- Disaster recovery
- Selective item export
- Granular data sharing
- Avoiding active account dependency
- Cost optimization
- Mergers and acquisitions
- Protection against accidental deletion
Methods to Export Exchange Archive Mailbox to PST
Explore the four best manual methods to export an archive mailbox to PST in On-Premises Exchange and Exchange Online. Follow any method according to your requirements and make your export hassle-free:
Method 1. Export Archive Mailbox to PST Using Outlook’s Import/Export option
There is an in-built feature within the Outlook application which you can use to export an Exchange archive mailbox to PST. Here is the process –
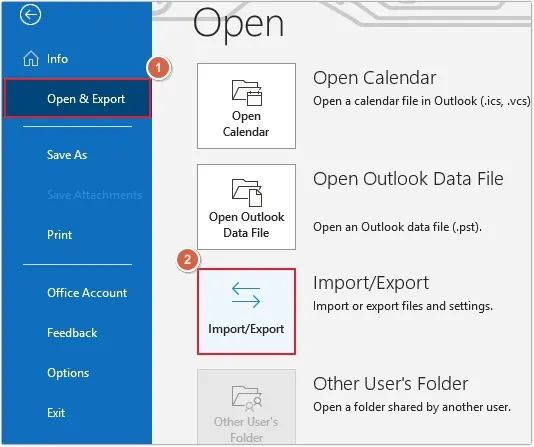
- Open Outlook and click File>> Open & Export>> Import/Export.
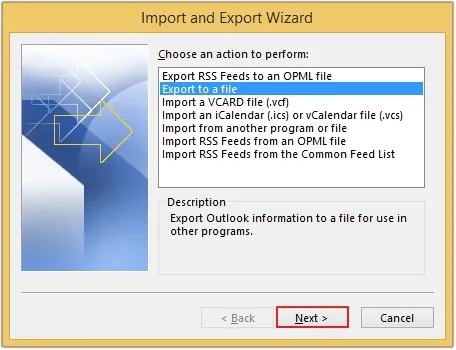
- Select Export to a file option and click Next.
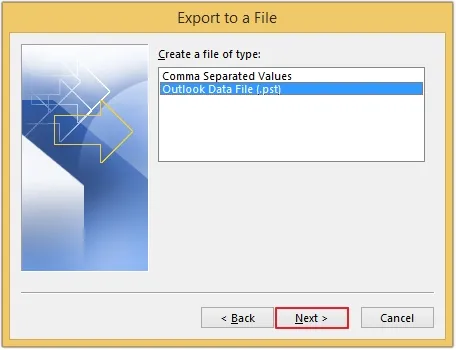
- Select Outlook data file (.pst) and click Next.
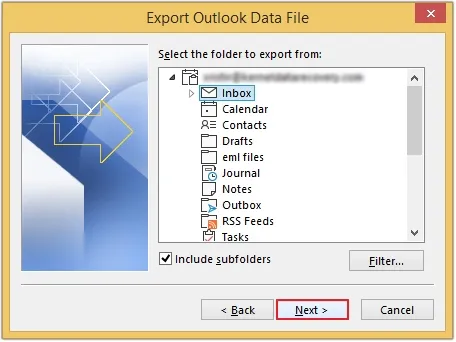
- Select the archive mailbox and click Next.
- Click on the Browse button to provide a saving location. There are different options for managing duplicate items. Choose any one and click the Finish button.
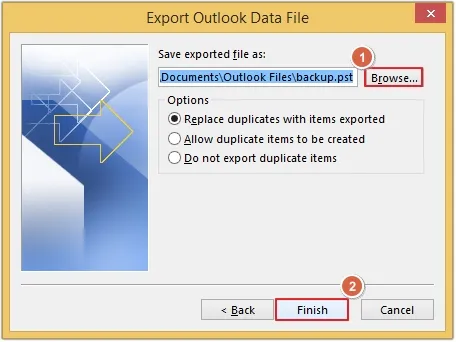
Note: You can choose to click the Filter button and trim down the data as per your specific needs, or you can select the Include Subfolder option.
After exporting the PST file, you can go to the location and find the new PST file there.
Method 2. Export Archive Mailbox to PST Using EMS (On-Premises Exchange)
You can export the archive mailbox to a PST with the Exchange Management Shell (EMS) command just like a normal Exchange mailbox. Here is are the commands:
- Before running the export command, make sure your account has the required permissions:
- Now, create a shared folder on your network and grant Read/Write permissions to the Exchange Trusted Subsystem.
- Now, open Exchange Management Shell and execute the following command:
Note: You may need to sign out and sign back in for the role assignment to take effect.
Note: Local C:\ paths do not work; you must use a UNC network path.
IsArchive is a special parameter which tells Exchange to export only the archive mailbox rather than the primary mailbox. After running the command, the export job will have a status of ‘queued.’
Finally, you can see a new PST at the shared folder location.
Method 3. Export Archive Mailbox Using eDiscovery (Exchange Online)
To export an Exchange archive mailbox, you can use Microsoft Purview eDiscovery. Make sure you are a member of the eDiscovery Manager role group and the Export role is assigned only to that group. Now, follow the steps below to execute the export:
- Log in to the Microsoft 365 Admin Center account using admin credentials.
- Click on Show all in the left pane and select Microsoft Purview.
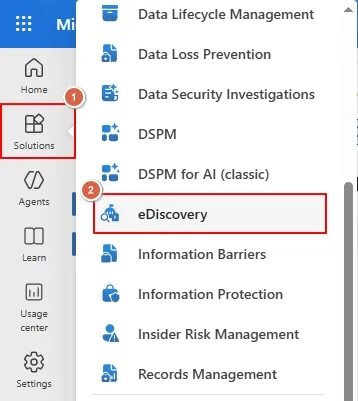
- Click on Solutions, then select eDiscovery.
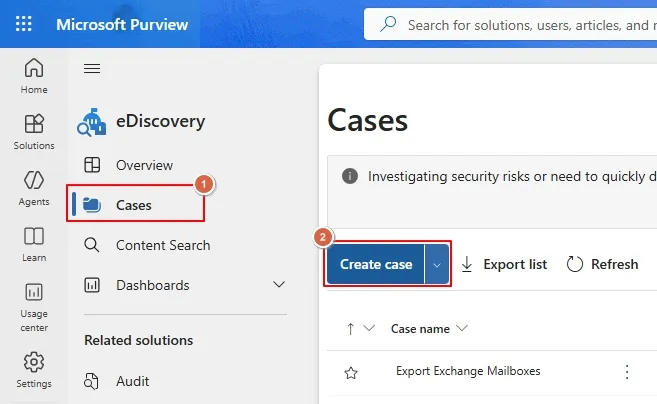
- Click Cases, then click Create case.
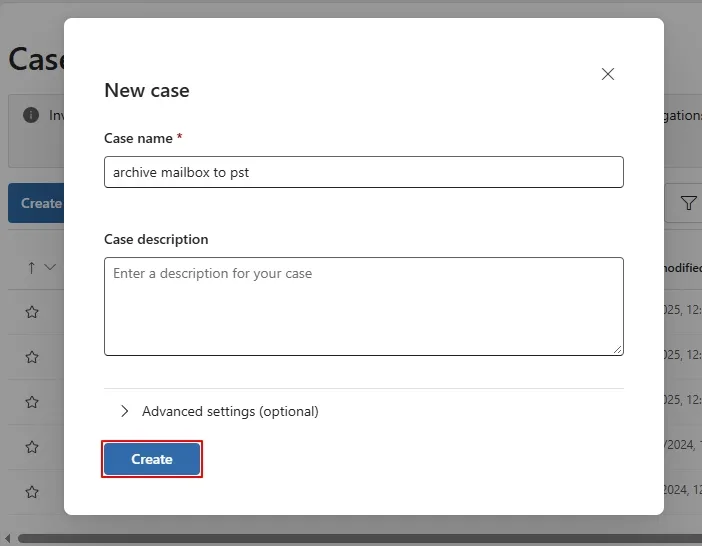
- Provide a case name or description, then click Create.
- Now, click the Create a search button.
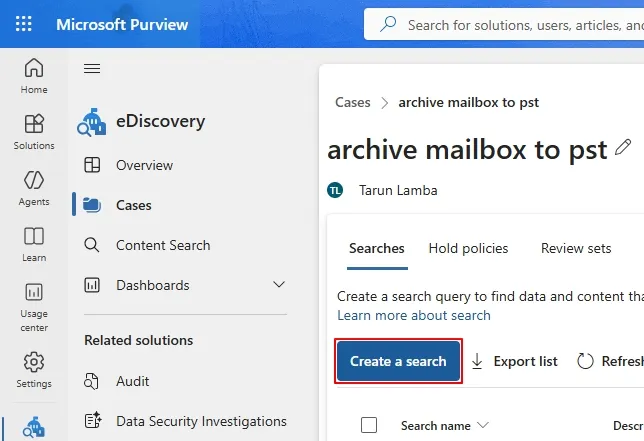
- Enter a search name or description, then click Create.
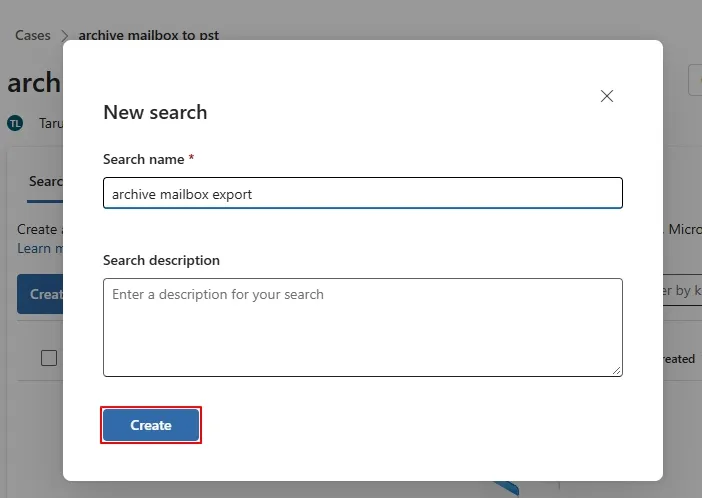
- Click on the Add sources button to add the archive mailbox.
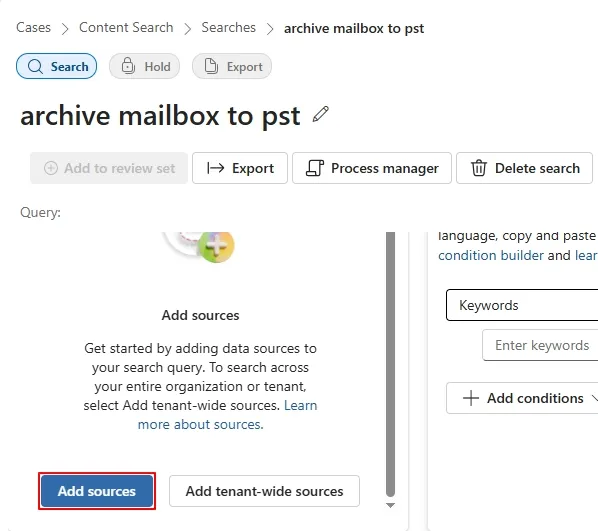
- Search for the user archive mailbox, then select the mailbox and click Manage.
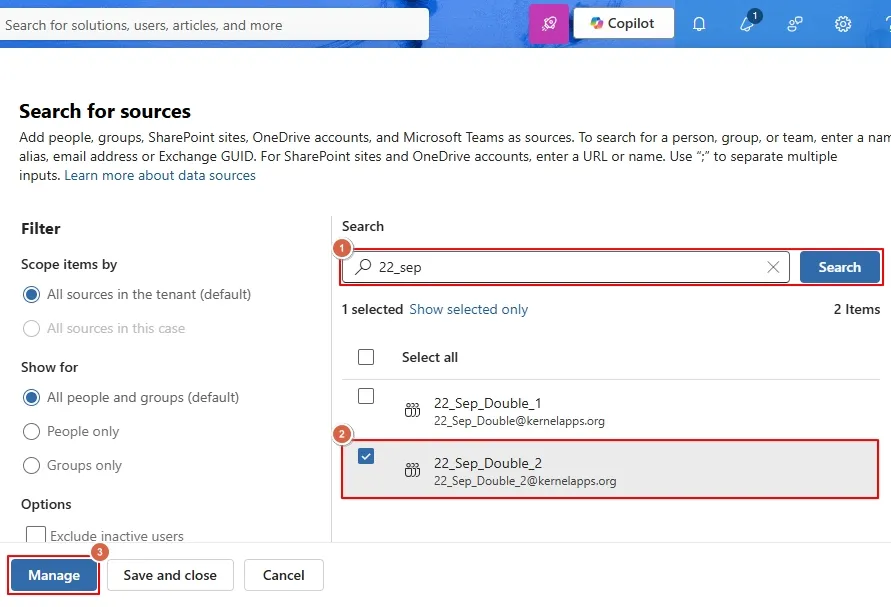
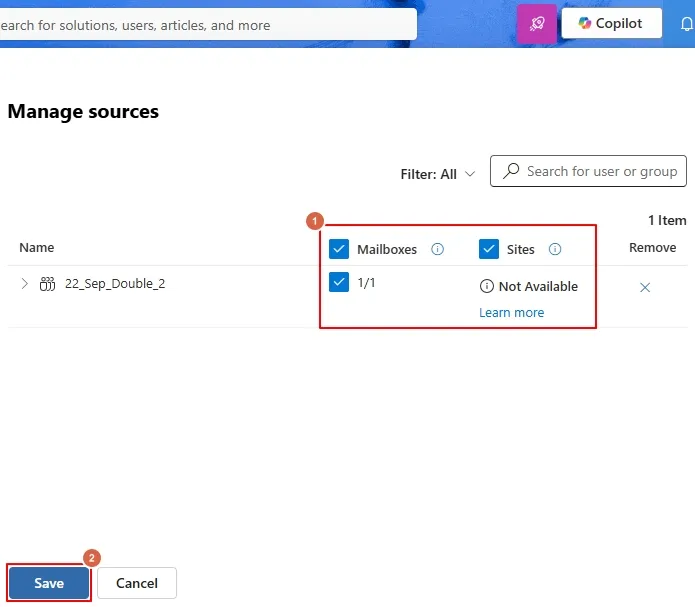
- Select what to include from Mailboxes and Sites, then click Save.
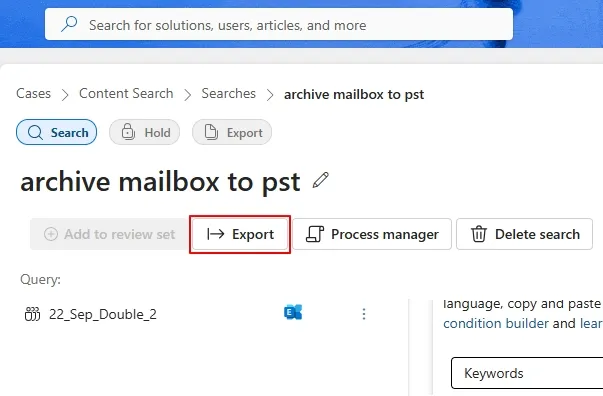
- Click on the Export button to proceed.
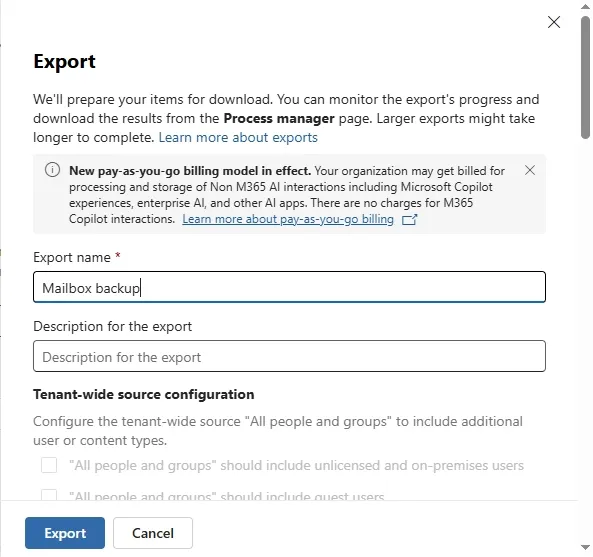
- Enter an export name and scroll down.
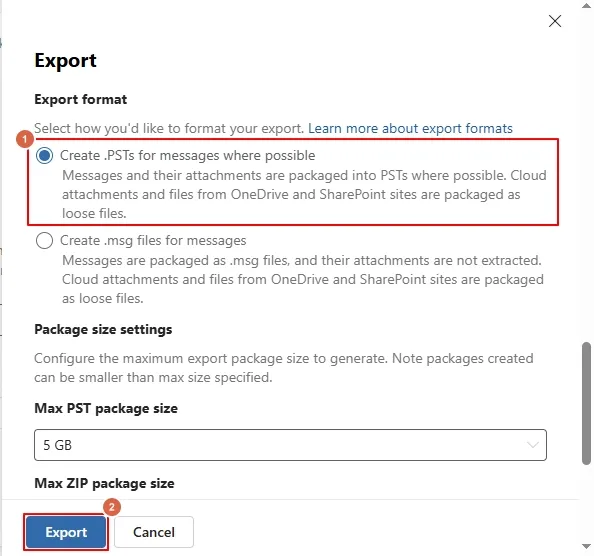
- Select Create .PSTs for messages where possible and click Export.
- Click Process manager to track export progress.
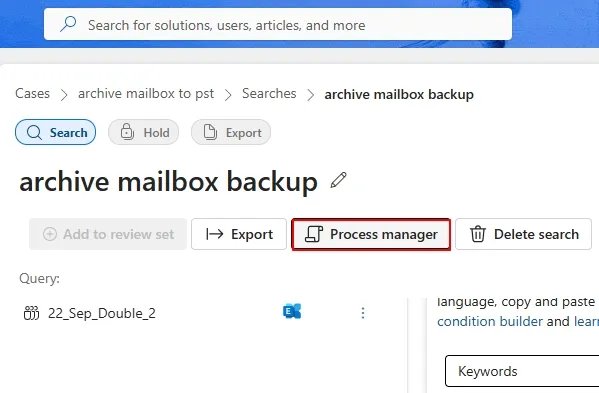
- Here, you can see the Status as In progress. Wait for the process to complete.
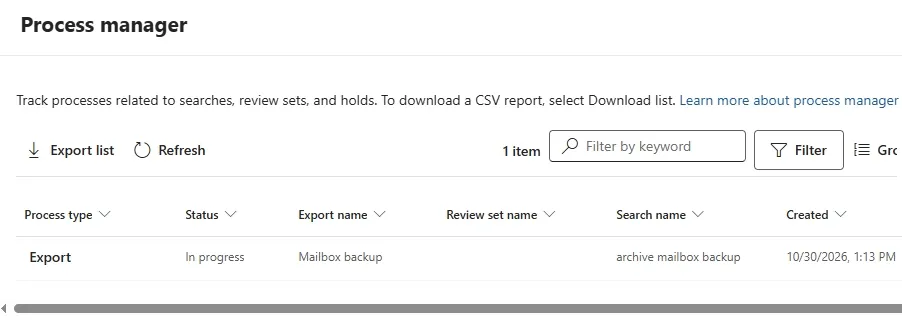
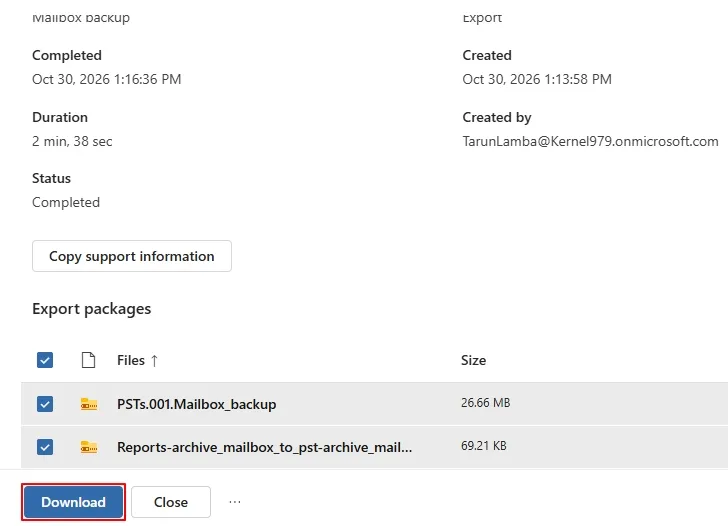
- Once the status turns Completed, click on it and scroll down to see the output PST files. Click on the Download button to save them on your device.
Method 4. Export Archive Mailbox to PST Via Exchange Admin Center (Exchange Server)
Exchange Admin Center allows users to export an archive mailbox to PST. Here are the steps for it:
Note: Assign yourself the Mailbox Import Export role (Permissions >Admin Roles >Organization Management) and create a UNC path for the PST file.
- Open Exchange Admin Center and click on Recipients >Mailboxes.
- Select the user archive mailbox, click More (…), then click Export to a PST file.
- Select Export only the contents of this mailbox’s archive.
- Enter the UNC network path and file name (eg., \\fileserver\pstexports\archive.pst).
- Choose to send an email notification when the export finishes, then click Finish.
Easy Way to Export Exchange Archive Mailbox to PST
Manual methods are ideal for one-time export of a small mailbox. But for regular, secure, and enterprise-level backup of an Exchange server, manual methods are time-consuming, risky, and unreliable. Kernel Exchange Backup and Restore allows users to export Exchange archive mailbox to PST in bulk. This Exchange server backup software exports Exchange Online, hosted Exchange, and On-Premises Exchange server data while preserving folder hierarchy, email properties, and metadata throughout the process. It supports granular-level Exchange mailbox backup with folder, item-type, and date range filters. Moreover, you can execute incremental exports via this software to save only the newly added data when you perform an export again.
Final Words
If you just need to export one archive mailbox, then Outlook is sufficient. If you are an admin using Exchange Online, then eDiscovery is the official and safest choice. If you are using Exchange On-Premises or need to export multiple mailboxes, then PowerShell is the best option using New-MailboxExportRequest -IsArchive.
However, if you regularly need to export archive mailboxes, then investing in an automated tool will save you hours.
Frequently Asked Questions
Ans. On-Premises Exchange is hosted on your own server. You manage hardware, licenses, security, updates, and backups, with a high upfront cost.
Exchange Online is Microsoft’s cloud-based Exchange as part of Microsoft 365, accessed via subscription, with automated updates and access from anywhere.
Ans. No, it will just be a copy, unless you manually delete the data from your archive mailbox.
Ans. Yes, by adding the -IsArchive switch in PowerShell or ticking Include Archive Mailbox in eDiscovery.
Ans. Exporting a 50 GB Exchange archive mailbox to a PST file typically takes between 4 and 6 hours, though it can range from a couple of hours to over a day depending on several factors.