Read time: 4 minutes
Though the permissions on an Exchange mailbox usually belong to a single account, different accounts can have a variety of permissions suitable for their tasks. For instance, when a mailbox user leaves the organization, it does not mean that its data is no longer useful. The administrator may change the permissions of that mailbox and give access to other users in different ways. For example, permissions are required for another user to send emails on behalf of another employee, so they need to be given mailbox permissions.
Mailbox permissions in Exchange online
You can grant another user read/write access to a mailbox using mailbox permissions. A user can get the ability to read emails from the mailbox, send emails on another user’s behalf, and send emails that appear to have come from that mailbox.
So, there are three types of permissions-
- Read another user’s emails.
- Send emails from another user’s account.
- Send emails on behalf of another user’s mailbox account.
All three permissions can be assigned to the active users in the organization that have Exchange Online accounts, and there are two methods to assign such permissions-
- Using Microsoft 365 Admin Center.
- Using Windows PowerShell.
Assign mailbox permissions in Exchange online using Microsoft 365 admin center.
In the Admin Center, you can set the permissions on specific mailboxes individually. Follow the steps-
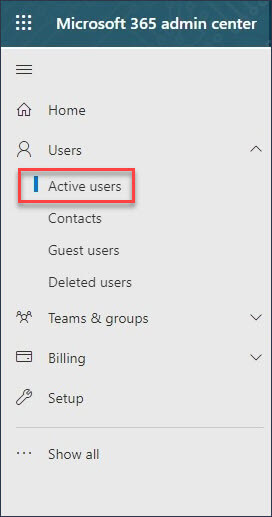
- Login to Microsoft Admin Center and click on Admin. Then, go to the Active users list in the Users section.
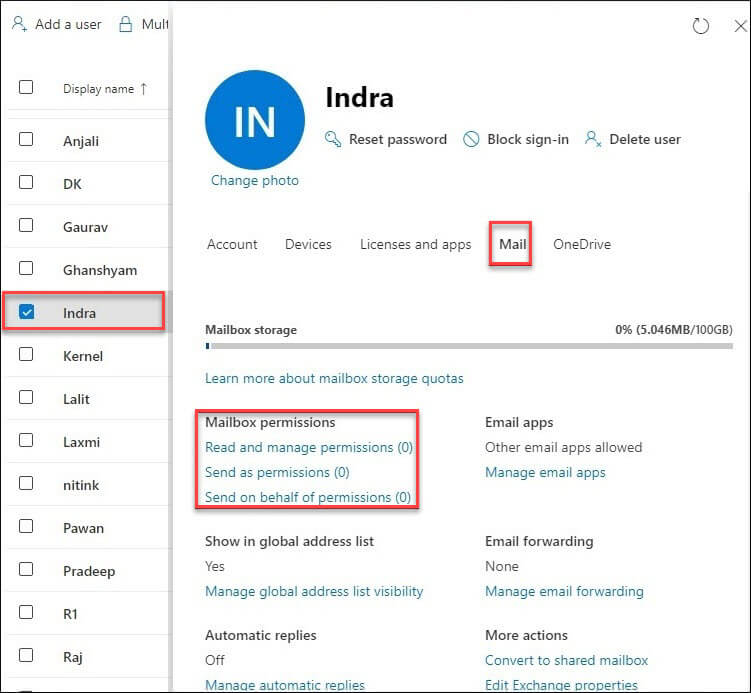
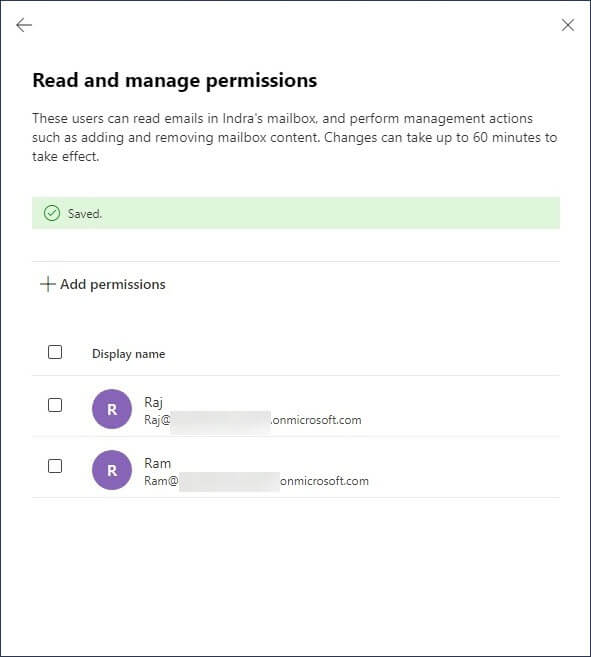
- Double-click on the account, and its settings will open. Go to its Mail category, and there will be mailbox permissions. All three permissions will be there, and you can click on one. Let’s start with ‘Read and manage permissions.’
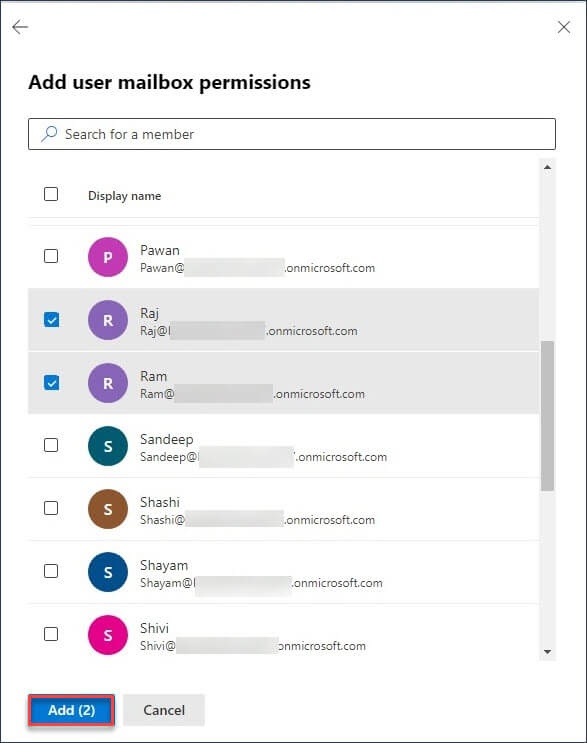
- Click on the + Add permissions option.
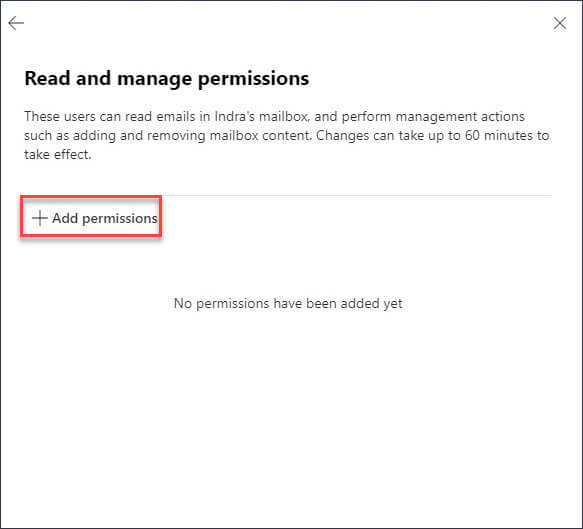
- Select the mailboxes that will get the chosen permissions. Click the Add button.
- Changes are saved. The selected mailboxes can read emails from the user mailbox and run management functions like adding and removing content.
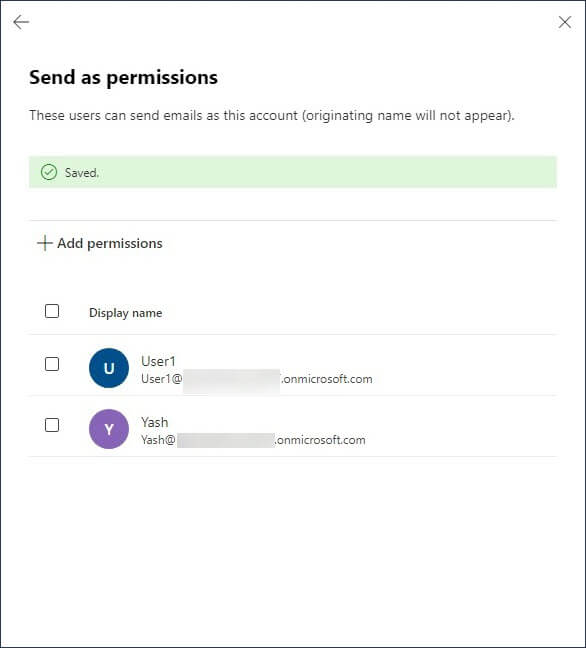
- Similarly, you can apply the ‘send as’ permissions, and the users can send emails as the original user account.
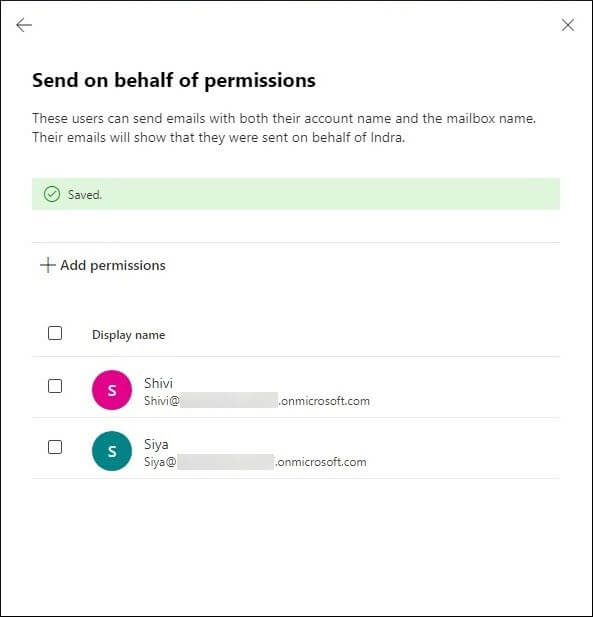
- The ‘Send of behalf’ permission helps the user to send emails with both the original account and mailbox name. The emails will show that they were sent on behalf of the original account.
Assign mailbox permissions in Exchange online using windows PowerShell
You can use PowerShell to assign mailbox permissions easily.
- Connect the Windows PowerShell with Exchange Online with the help of the following link-
https://www.nucleustechnologies.com/blog/connect-office-365-exchange-online-powershell/ - Run the new cmdlet to assign full permissions to another mailbox-
The example assigns the complete permissions of John Price’s mailbox to Patrick. both methods would help you in understanding different admin roles in Office 365 and how it affect the mailbox usage and its function.
Conclusion
Many users who were previously using Exchange on-premises have switched to Exchange Online cloud (Office 365) now. However, it is not a simple operation, particularly if you plan to manually migrate the entire Exchange infrastructure to Office 365.
Fortunately, Kernel Office 365 migration software is here to help you. It can access all mailboxes from on-premises Exchange and move them to Exchange Online accounts. It will take care of the entire migration process to migrate all the mailboxes and other data.