Read time: 6 minutes
We understand the frustration of not being able to communicate effectively, especially in today’s fast-paced digital world. After conducting our own research & experiencing the issue firsthand, we’ve discovered some practical solutions to help fix this problem. In our post, we’ll be sharing with your step-by-step instructions on how to troubleshoot and resolve the issue of Outlook not sending emails on Windows 10.
One common scenario is when Outlook cannot send emails on Windows 10 but can send them on other versions of Windows. These are a few solutions to come out of Outlook not sending emails on Windows 10 error.
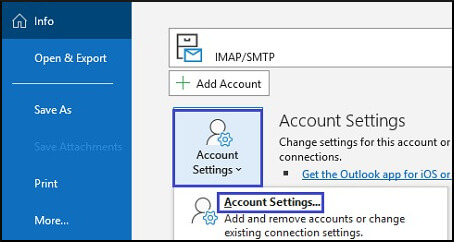
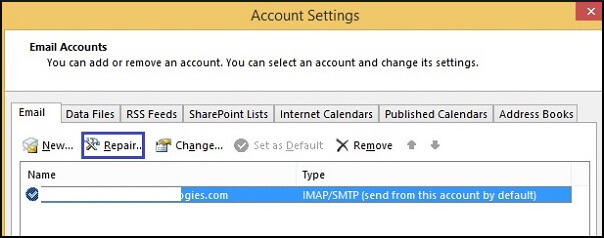
Sometimes because of a damaged Outlook profile, it cannot send emails on Windows 10. Follow the below steps to fix the damaged profile:
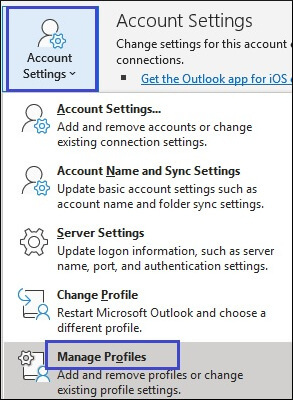
You can also create another Outlook profile to come out of this issue. Follow the below steps to create a new profile:
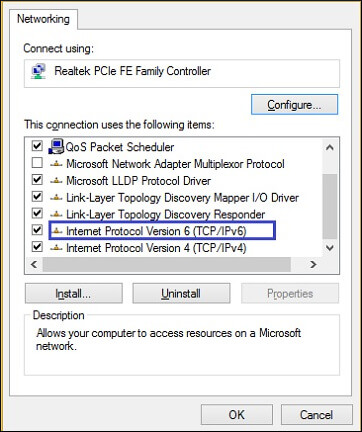
Sometimes, you haven’t set TCP/IP as your default protocol, and it can be the reason you are unable to send emails on Windows 10. Follow the below steps to enable it:
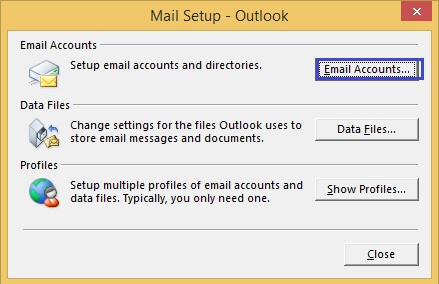
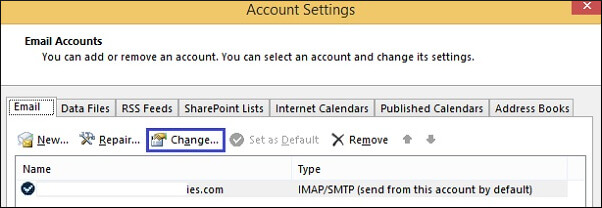
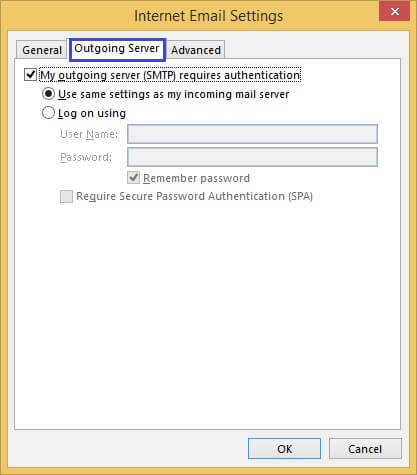
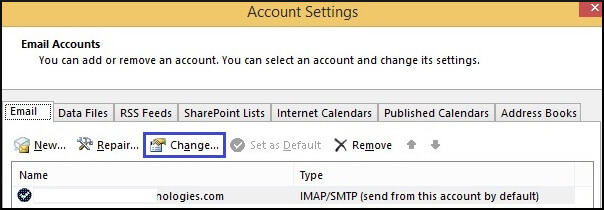
You can turn on authentication in Outlook using the below steps:
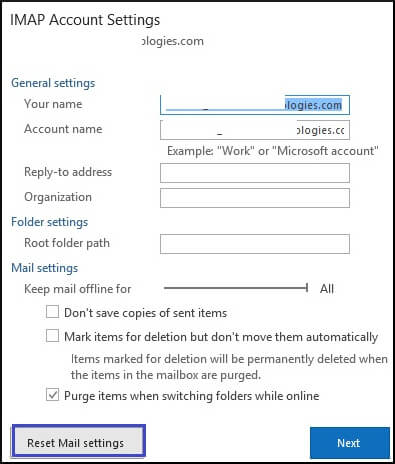
You need to check the mailbox settings of the email account that is causing the error. If the error is because of mailbox settings, you can reset mail settings using the below steps.
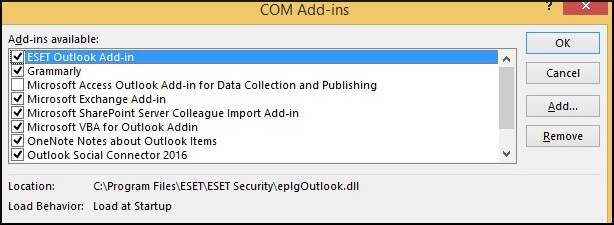
Sometimes third-party plugins for Outlook cause this issue. Disable these plugins using the steps below to fix this issue. But before that, open Outlook in safe mode using run prompt – outlook.exe / safe.

You must keep a check on your connection and see whether you are connected to your email server or not. If you are disconnected, it says “Working Offline” or “Disconnected”. To fix this, follow these steps.

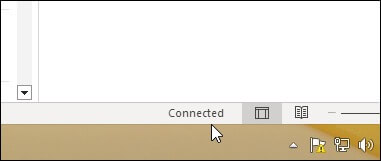
Now you can check if Outlook is ending your emails with no failure in connection.
If the error is due to a corrupt PST file, you can’t fix it using the above methods. In this case, one of the quickest and the best methods of solving the Outlook not sending emails on Windows 10 issue is by using the Kernel for Outlook PST Repair. The tool provides the simplest user interface to scan and repair corrupt PST files and save them on different platforms like Office 365, Outlook PST, Exchange, and Gmail. Using this advanced PST repair tool, you can recover the user mailbox with complete structure and folders, including inbox, drafts, journals, contacts, deleted items, etc. Overall, it’s a one-stop solution to resolve PST corruption and come out of other issues related to Outlook.
There can be different reasons for Outlook not sending emails on Windows 10. You can use the solutions mentioned in this post to fix this problem. But, if the issue is because of a corrupt PST file, you need to go with an automated PST repair tool which we discussed last. It quickly repairs damaged/corrupt PST files and stops junk emails in Outlook. Use its free demo version to learn more about the tool.


The article offers practical solutions and useful tips, ensuring that users can resolve the problem quickly and effectively. This information is valuable for users who want to ensure that their Outlook account functions smoothly and efficiently. Great article, thank you.
The article provides a useful guide for users who are facing issues with Outlook not sending emails on Windows 10. It also provides effective solutions to the problem and can help users get their Outlook account back to sending emails without any issues. Just follow the above mentioned steps to solve the issues. Thank you for helping us!