A Simple Guide to Migrate SharePoint 2010 to 2019
Aftab Alam
 |
Updated On - May 01, 2024
|
Updated On - May 01, 2024
Read time 9 minutes
For SharePoint Server 2010, Microsoft has given April 13, 2021 as the date for the end of support. The term is ‘end of support’ means Microsoft will no longer bring any updates to the particular version of the application. It is an indication to the user that they should upgrade to the latest version of the software. After the the particular date, it will be an end of its lifecycle. It does not mean that the software will stop to work, but Microsoft will no longer help you in any of the following:
If you are using SharePoint 2010, then you will get only some months to use the current version of software with Microsoft support. So, after April 13, 2021, your natural reaction will be to upgrade to the latest version of SharePoint Server 2019 and find a suitable method to do so. But, if you follow the Upgrade and Updates documentation of Microsoft, then you will find out that there is no direct method to migrate from SharePoint Server 2010 to SharePoint Server 2019, the latest version.
To upgrade to SharePoint Server 2019, you will have to upgrade either to SharePoint Server 2013 or 2016 and then finally upgrade to 2019. The table shows the available option for you:
|
End of Support software |
SharePoint Server 2013 |
SharePoint Server 2016 |
|
SharePoint Server 2010 |
SharePoint Server 2013 (on-premises) |
SharePoint Online |
|
|
SharePoint Server 2013 hybrid with SharePoint Online |
SharePoint Server 2016 (on-premises) |
|
|
|
SharePoint Cloud Hybrid Search |
As SharePoint Server 2019 is not available as a direct destination for the SharePoint Server 2010, the possible option in front of you is to use any professional software that supports all migrations irrespective of their versions and Kernel Migrator for SharePoint is the best bet you can have.
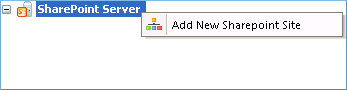
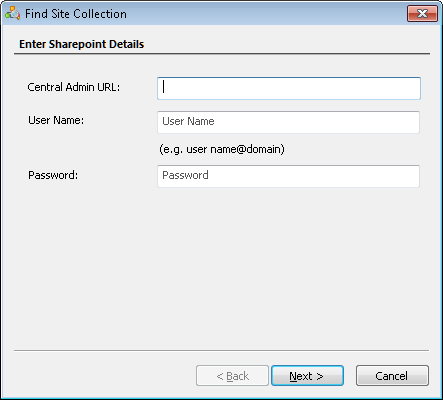
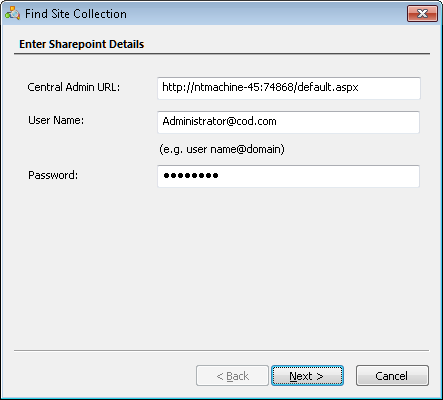
The tool adds two SharePoint servers as the source and destination and you can do the migration as easily as the copy-paste process. So, let’s go through the process of migrating the SharePoint Server 2010 to the latest SharePoint Server 2019.
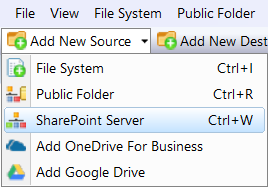
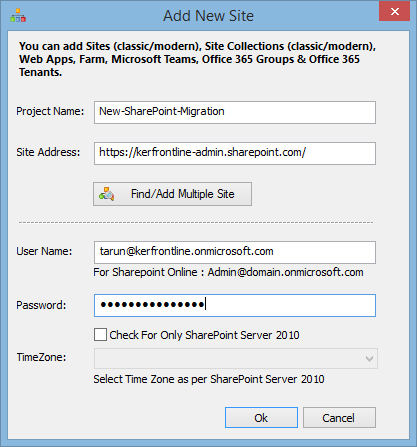


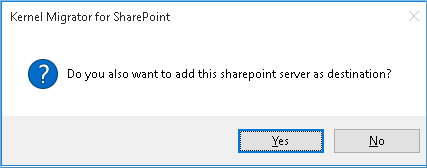
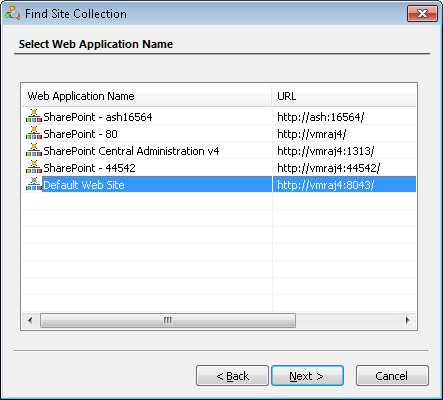
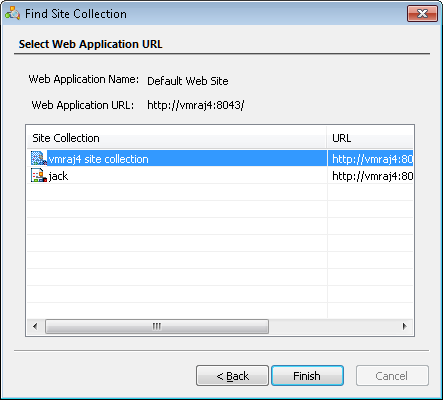
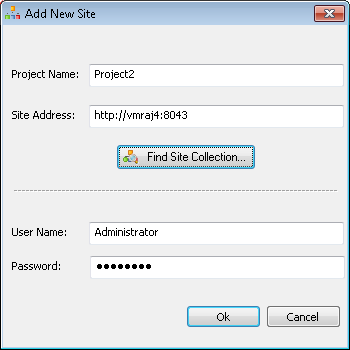
The process to add the SharePoint Server 2019 is exactly the same as adding the source site.
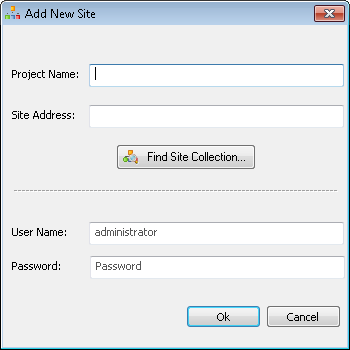

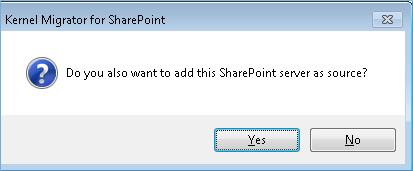
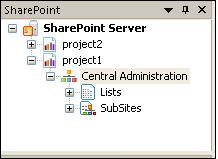
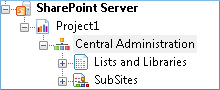
When you have added both SharePoint Servers in Source and Destination, then you can use the copy-paste method to directly place the data from SharePoint 2010 to SharePoint 2019.
You can copy an unlimited data at a time and migrate it to the desired destination. After you migrate the data, then the tool will give you a report that will show the status of the migrated data and their new URL. SharePoint Migration software gives you many additional features like a variety of filter options and an easy scheduling option that will run the migration at the time when you want to run it. You can also migrate sites, subsites, lists, libraries, documents, permissions, metadata, etc.
As there is no manual ways for the direct migration of data from SharePoint 2010 to SharePoint 2019, you need to use a professional tool like SharePoint Migrator. It is an easy-to-use tool that supports all types of migrations.


Initially, I migrated to SharePoint Server 2019 from SharePoint 2010, but I migrated from SharePoint Server 2013, then to SharePoint Server 2016, and finally to SharePoint Server 2019. But I did not know about any such tool that substantially saves my time in migration. Easy migration with this tool now.
A normal manual method cannot migrate contents from 2010 SharePoint to 2019, but the software can within minutes.