Read time 5 minutes
It’s not always easy to change the permissions of a SharePoint group, but with just a bit of knowledge & effort, you can quickly customize group permissions & grant access on a specific level. Whether you’re managing an enterprise-level application or simply want to give certain members of your team access to documents in SharePoint, our experts will take you through all the steps necessary for changing SharePoint manage groups permissions so that only those who need it have direct control over content stored in your platform.
With clear instructions broken down into simple steps, by the end, you’ll have increased security mechanisms & improved access control throughout your organization’s entire cloud environment.
SharePoint groups are collections of users with the same set of permissions for sites & content. Rather than assigning permissions to individuals one at a time, groups make it convenient to assign the same level to many users simultaneously.
Note: To change SharePoint manage groups permissions, you need to have appropriate permissions yourself. You must be a SharePoint site owner or have full control permissions to perform this task. You should also understand the implications of customizing permissions in SharePoint & be careful when making any changes.
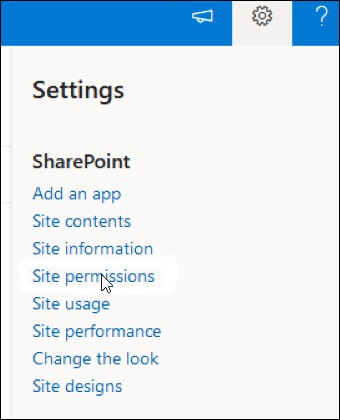
The first step in SharePoint manage groups permissions is to create a new group. To create a new group in SharePoint, follow the steps below:
To add users to a group on your website or team site, begin by accessing the Share or Members button.
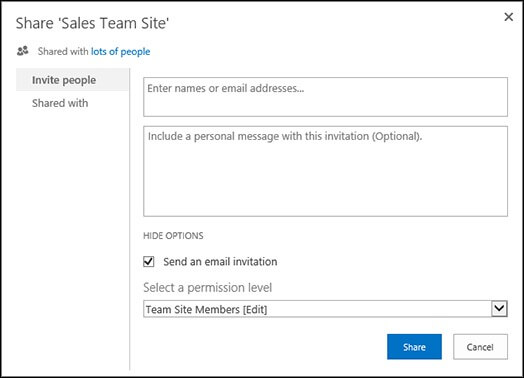
Repeat these above steps for any additional names you wish to add. By following these technical steps, users can efficiently add new members to their SharePoint group or website.
To remove users from a group, go through the steps below:
It’s important to note that removing a user from a group will not delete their account, but only revokes their access to the resources associated with that group. After completing these steps, the selected users will no longer have access to the group’s resources.
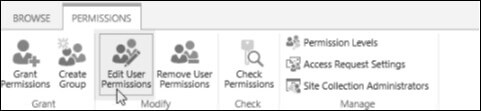
To assign a new permission level to a group, proceed as follows:
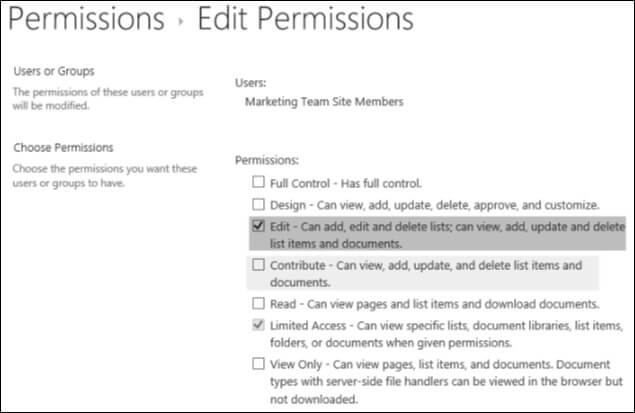
With these given steps, the group with the new permission level will now have access to additional features & privileges in the assigned site.
You have successfully figured out how to change SharePoint manage groups permissions With a bit of patience, some trial & error and our expert guide, you will be able to take full advantage of the features that SharePoint offers. By now, you should feel empowered with greater control over the group permission settings in your chosen site.
Furthermore, for any of your SharePoint migration needs, you can use the Kernel Migrator for SharePoint tool with its easy to use interface & advanced capabilities. The SharePoint Migration tool allows users to save time, money & effort throughout the migration process. So go ahead & explore this user-friendly solution to make sure your data migration is quick, safe & consistent.
A – It refers to the ability to manage a set of users together within a SharePoint site. By assigning a particular group with a set of permissions, you can grant them access to specific items or areas within the site. These permissions can be adjusted depending on the needs of the group & the site.
On the Permission Set Group page, users can find a tab labeled “Permission Sets in Group”. Click on that tab to access all the permission sets currently assigned to the group. If you need to add a new permission set, tap on the “Add Permission Set” button & follow the prompts.