Read time 7 minutes
“My 10-year-old son accidentally erased all my photos from my Nikon Coolpix B500. I also forgot to back up my data (total bummer!). I got in contact with Nikon ASAP as my precious images and videos are on it. They stated that they couldn’t do anything about recovering the photos and suggested me to look for third-party data recovery options. I have tried a couple of them by now but with no luck. What should I do now? Please suggest any comments or suggestions are welcome.”
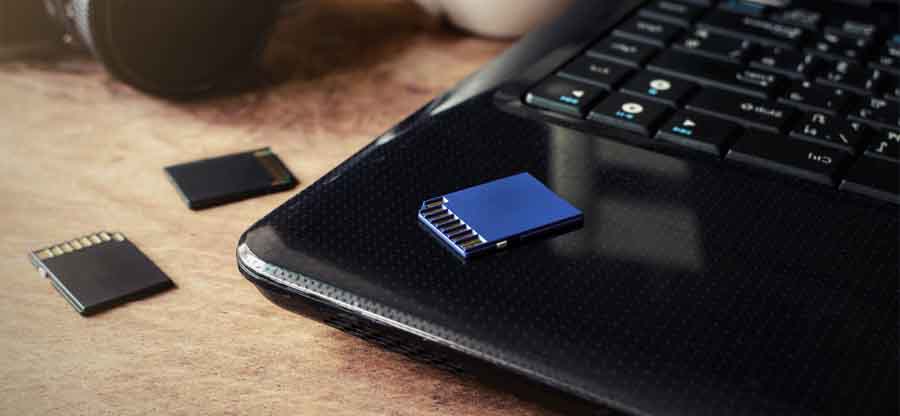
Mishaps like these are pretty common, and data loss can happen to anyone. What should one do in such a situation? In this blog post, we will be discussing the reasons and reliable ways to recover your lost data. Memory cards are a popular storage medium for many users. Many devices come equipped with them such as digital cameras, cellphones, other small devices. The memory cards come in different shapes and sizes, such as:
- Compact Flash (CF) – PCMCIA PC card
- Secure Digital Card (SD card) – used in Camcorders, digital cameras, mobile phones
- Mini SD Card – a Smaller version of SD cards
- Micro SD Card – Smallest memory card (dimensions: 15mmX20mmX1.4mm)
- Multi-Media Card – used in place of SD cards (better transfer speeds than SD)
- Sony Memory Sticks – used with high-resolution digital cameras (theoretical transfer rate up to 480 Mb/s)
- Smart Media – used in older devices (storage space < 128 Mb)
- xD-Picture Card – Flash memory for digital cameras (primarily used in Fujifilm and Olympus cameras)
Read Also : Recover Data From Flash Drive
Now let come back to the core issue of this post, i.e., data recovery from a memory card. Other than the accidental deletion of data as described in the prelude, there is some other data loss as outlined below:
- Physical / Firmware damage to the memory card
- Manual errors
- Malware and viruses
- Memory card formatting (external hard drive not formatted error!)
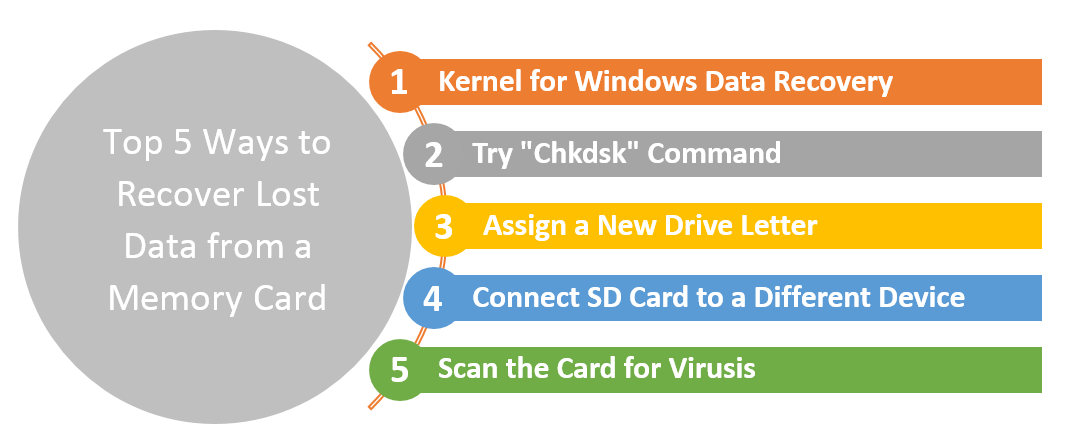
Let us now discuss some methods to overcome this gruesome issue. We have jotted down a total of five ways based on which you can try recovering your data from a memory card. The following infographics shows all of these five methods (four manual and one automated method):
Manual methods
It is recommended that the user should first try the manual methods before moving on to the automated tool. These are described below:
- Try “Chkdsk” command
- Head to the Start button and hit “Run.”
- Next, type “cmd” in the dialog box and press enter (Run as Administrator).
- Type “chkdsk x:/f” (replace the letter “x” in the command with the drive letter that you want to format) in the command prompt and press the enter button.
- This process will take some time as the CHKDSK process starts to repair your files.
- Assign a new drive letter
Sometimes it might be the case that system detects the hard drive, but it is inaccessible. To overcome this issue, one can try renaming the drive. To do so, just follow the steps outlined below:
- Hold +R keys to open Run option. Then type diskmgmt.msc in the text box and hit Enter.
- Now right click on the drive, then select “Change Drive Letters and Paths.”
- Next, click on “Add/Change” option and hit “Ok.”
- Connect SD card to a different system
- Scan the card for viruses
If this process ends without an error, then restart your PC before attempting to read your files of the memory card. If it does not succeed, then proceed to the next method.
If by doing this, you somehow gain access to the drive, then quickly copy the contents and save it somewhere safe, either on a new external drive or the same PC.
This is the easiest of all methods. Just connect the affected memory card to another system. Next, restart your system and check if it can read it.
It might be the case that the memory card is infected by malware. Hence try scanning the card for any bugs/viruses. Worth a try!
Automated method
If you are reading this section, then it means that you are out of options. Therefore, you need a professional recovery tool. Fortunately, one such tool at your disposal is Kernel for Windows data recovery software. It offers plenty of features to be considered as the best tool for Windows data recovery. It comes jam-packed with useful features, and a few are listed below:
- Recovery of lost & deleted files
- Easy recovery from removable drives
- Easy configuration of setting before scanning
- Preview option before saving the file(s)
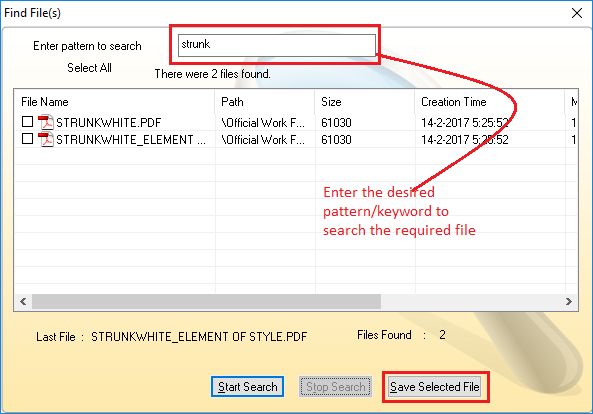
- Find your files (by specific names or extensions) with the “Find” option
- Efficient file filters
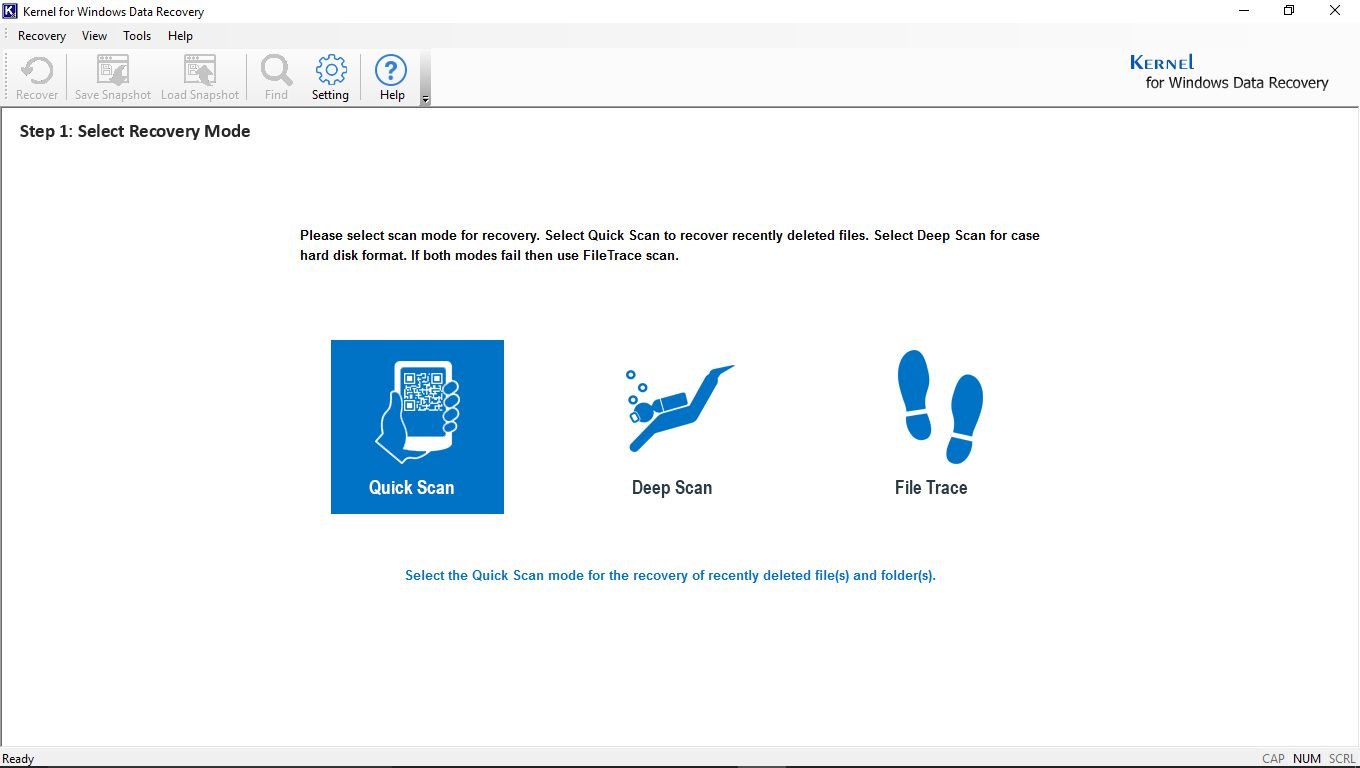
Now let’s take a firsthand look at Kernel for Windows Data Recovery tool.
- After the installation, the welcome windows will show you three scan modes to choose from. “Quick Scan” is the fastest of all and is for recovering the recently deleted or lost files only. The “File Trace” mode scans all the sectors like “Deep Scan” mode but is little more advanced than the latter. Before running the scan “File Trace” lets you select the File types (specific extensions) for precise recovery.
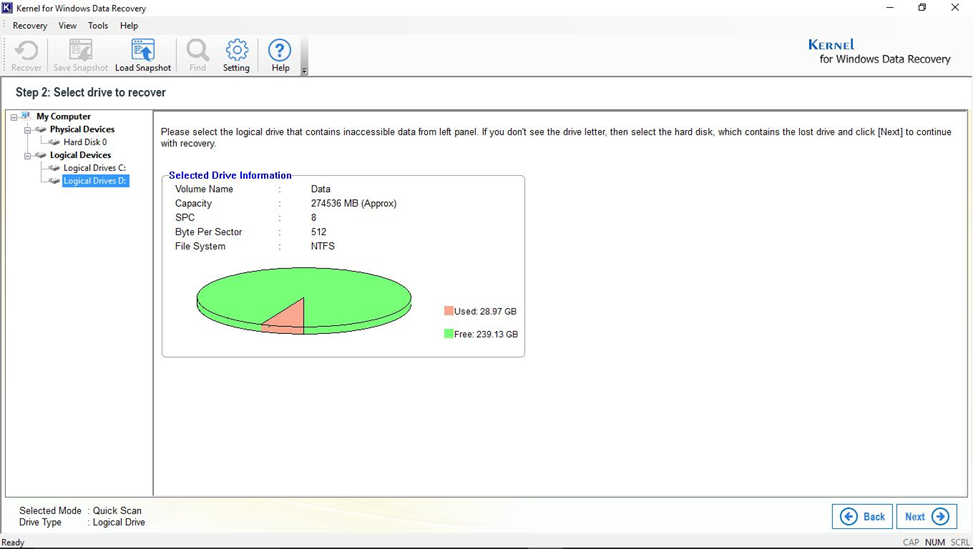
- Next, choose the drive to scan from the tree view in the left pane and hit “Next.”
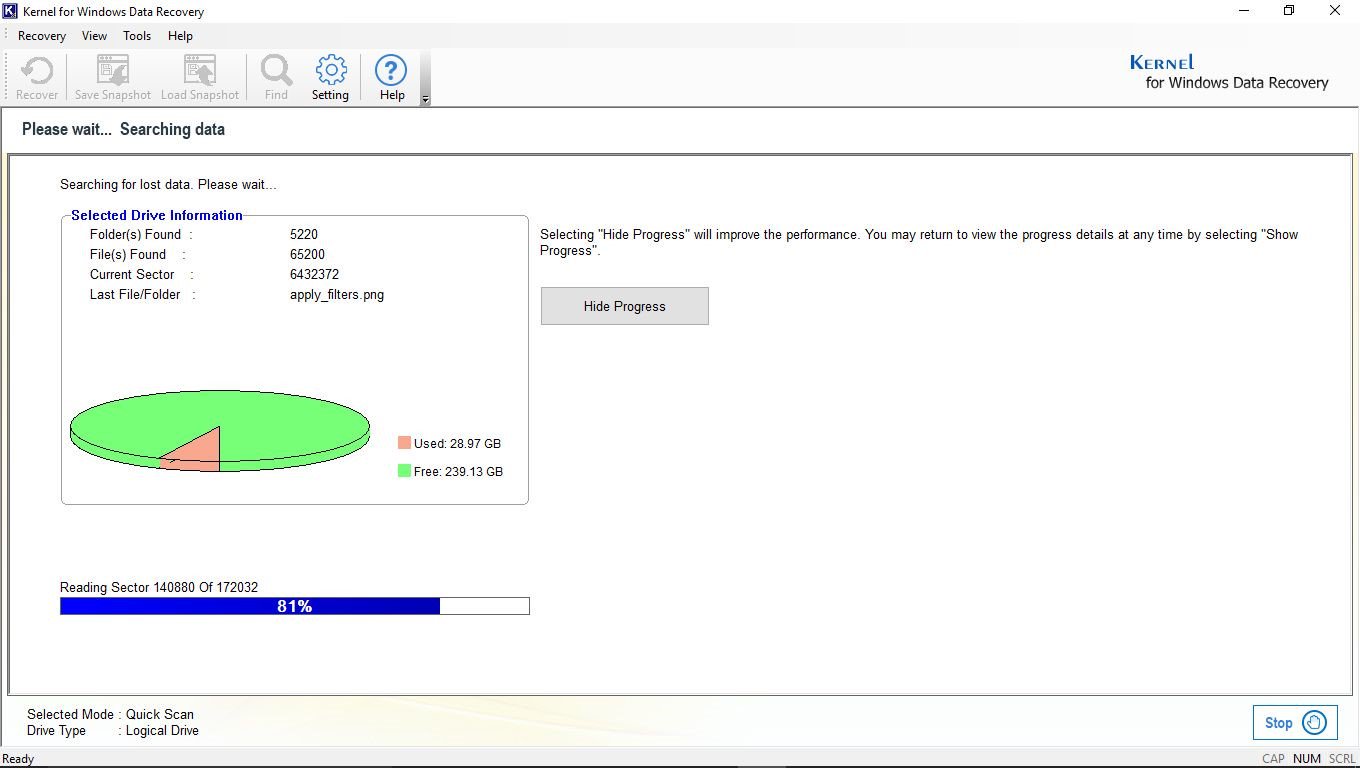
- Wait for the scan process to finish and hit “Next.”
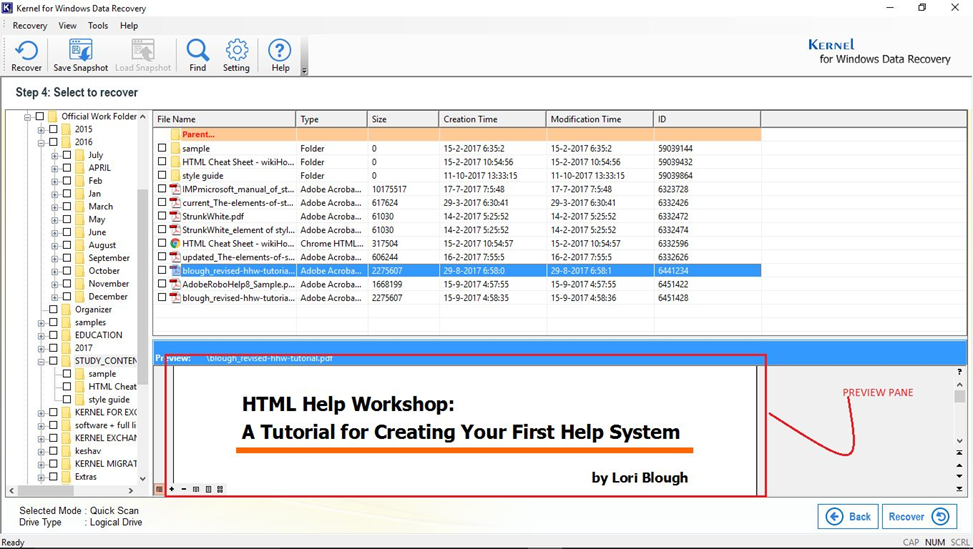
- Next, one can see the original hierarchy of files and folders; and one can click on the files which can also be previewed in the preview pane. Check all the files/folders to save.
Note: One can also find specific files using the “Find Files”.
-
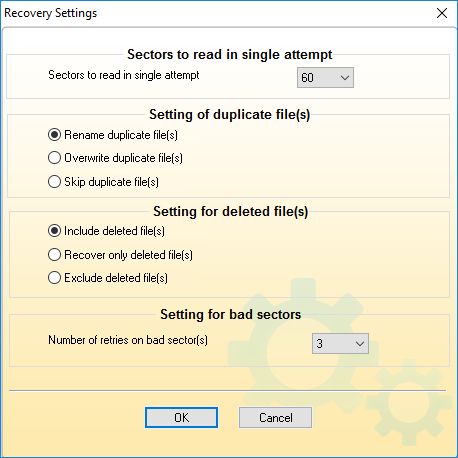
Before saving, one can select from a series of recovery setting options.
-
Browse for the folder to save your file.

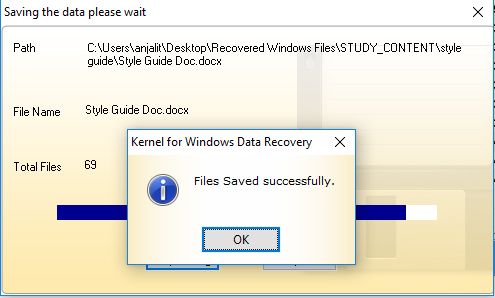
- Next, you will be prompted with a message that your files are saved successfully. Select “Ok” to finish the process.
Conclusion
Memory cards can become corrupt and inaccessible due to numerous reasons. Some of the most common reasons have been discussed in this blog post. Furthermore, we have also discussed some manual methods for data recovery. If you have already tried the manual methods without any success, then an automated method might interest you, which can also recover deleted windows files. Kernel for Windows Data Recovery is an essential tool to have in a crisis. Several useful features of this tool are discussed in detail. One such feature is that it can also recover deleted files free (upto 2GB).