
Read time: 5 min
Email headers might look confusing at first glance due to the technical terms & long strings of text. However, they are crucial as they represent the email’s journey from the sender’s server to your Inbox.
Even if you understand how to analyze email headers for spam, you can easily identify phishing attacks, track email delays, verify senders, or troubleshoot delivery issues to some extent.
To make you aware of email headers, including what, why & how, we have come up with a new write-up. It will help you with the free or built-in options to analyze email headers for forensic investigation across popular email services like Yahoo, Gmail, Outlook, etc. Let’s start the discussion.
Email Headers:
It is a hidden section of the email that contains technical metadata of the message, like
- Who sent the email?
- Which servers handled it?
- When & where was it processed?
- Whether security checks are passed.
Why Do I Analyze Email Headers?
Know the importance of analyzing email headers:
- Verify the real sender of an email.
- To understand the spam filtering decisions.
- Helps in identifying phishing or spoof emails.
- To investigate delayed or undelivered emails.
- Provides easy tracking of emails across servers.
Know the Key Components of the Email Header
Here, we have provided a list of email header components with their core functionality.
|
Components |
Function |
| From | Shows the sender address visible to the recipient. |
| To | Indicates the recipient email address. |
| Subject | Gives information about the subject of the email. |
| Date | Shows the timeline of the email delivery. |
| Received | Each received line shows the:
|
| Message-ID | A unique identifier assigned by a sending mail server. |
| Return-path | Indicates where the bounce messages will be sent. |
| Authentication results | Displays results for security checks, like SPF, DKIM, and DMARC. |
SPF: Sender Policy Framework
DKIM: DomainKeys Identified Mail
DMARC: Domain-based Message Authentication
View & Analyze Email Headers in Popular Email Services
This section will help you view email headers for phishing in Gmail/Yahoo/Apple Mail/Outlook/Hotmail with a step-by-step guide. Make sure to follow the steps as provided.
Analyze Email Headers in Gmail
- Open the desired email whose header details you want to know.
Note: In case you want to view Gmail archived data, consider Gmail Viewer for smooth results.
- Tap on the three dots in the top-right corner & hit Show Original. Then, analyze Gmail email headers.
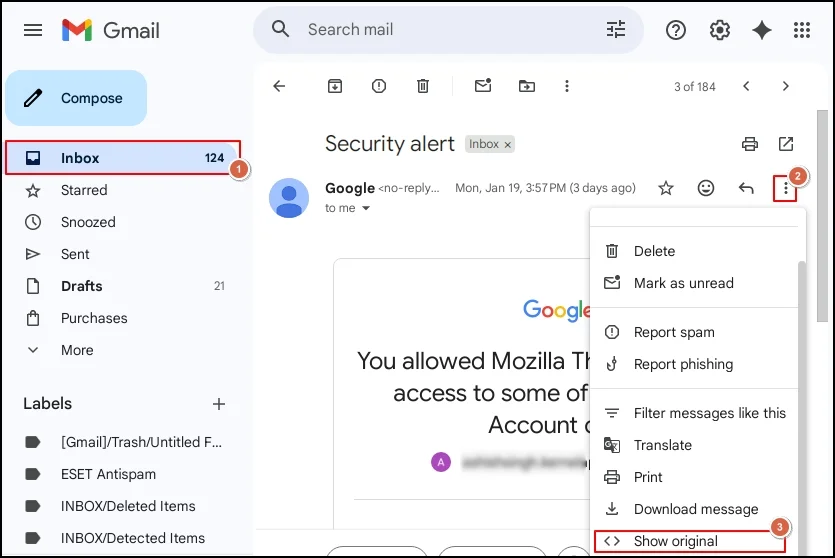
What to analyze: SPF/DKIM/DMARC results, sender IP (in received section), & domain consistency between From & Return-Path.
Analyze Email Headers in Yahoo Mail
- Open the email you want to view email headers in Yahoo.
- Tap on the three dots [More icon] & click on View raw message. Then, analyze Yahoo email headers.
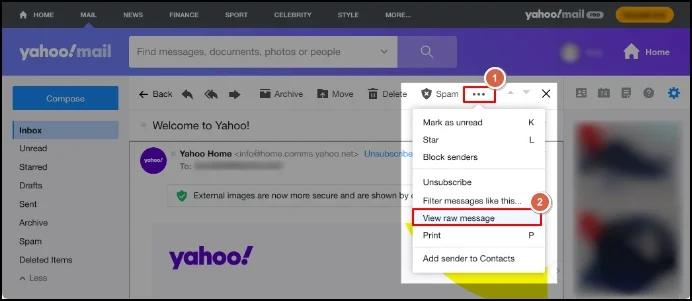
What to Analyze: Received lines, authentication results, & mismatch between sender/receiver domains.
View Email Headers in Microsoft Outlook [Desktop]
- Double-click on the desired email & hit the File
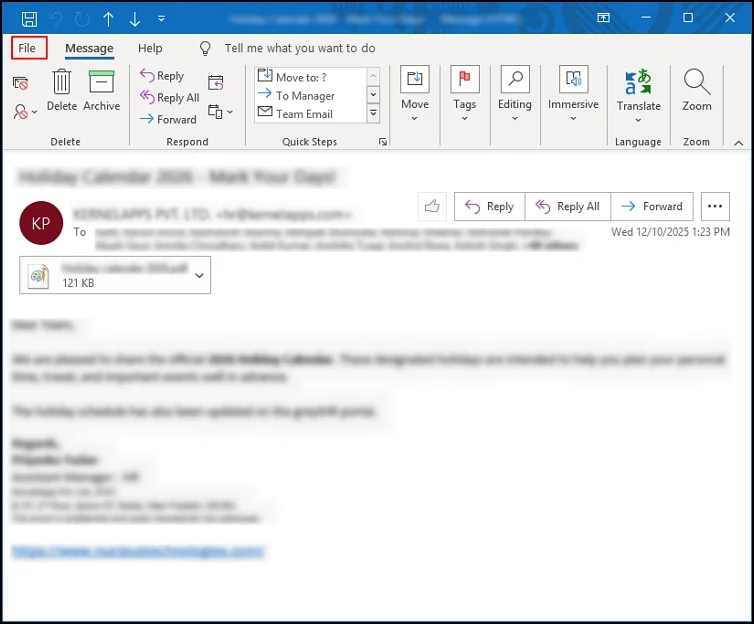
- In the next window, choose the Properties
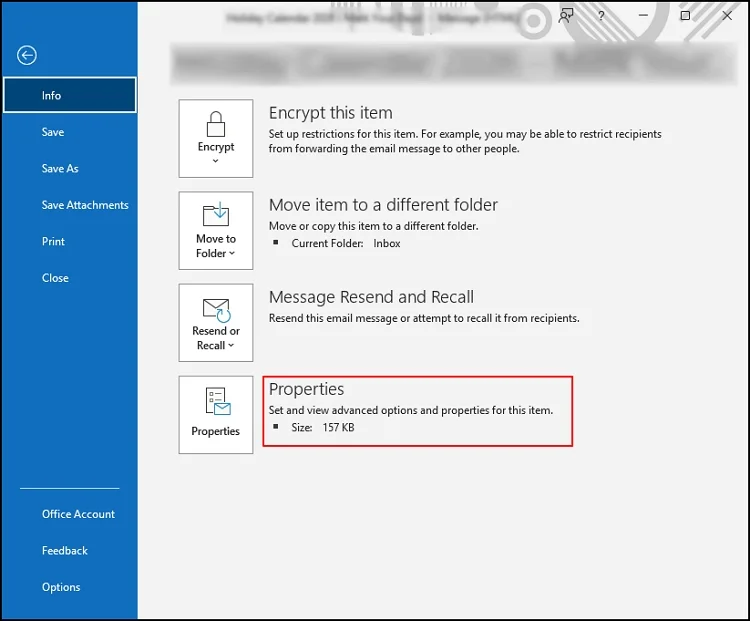
- It will land you on the Properties page, search for Internet headers & then analyze Outlook email headers completely.
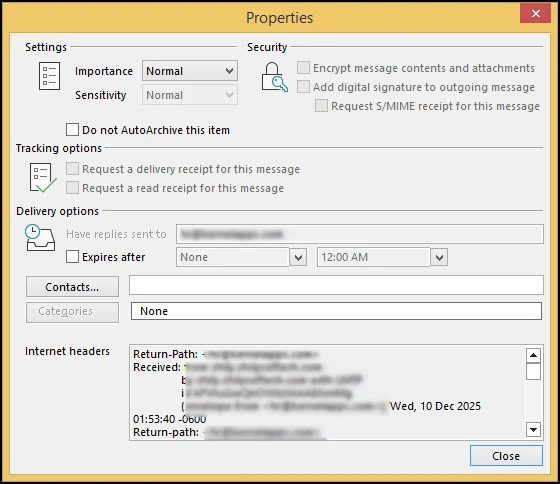
What to analyze: Received entries, timestamps, Return-path, & Message-ID domain.
View Email Headers in Apple Mail
- Open the preferred email in which you want to view the header details.
- Hit the View > Message > All Headers / Raw Source to analyze Apple Mail headers.

What to analyze: Authentication results, sender server details, & consistency across header fields.
Analyze Hotmail Webmail Headers
- Log in to the Webmail [Outlook/ Hotmail] & right-click on the desired email.
- Select the View > View message source option & then analyze Hotmail webmail headers.
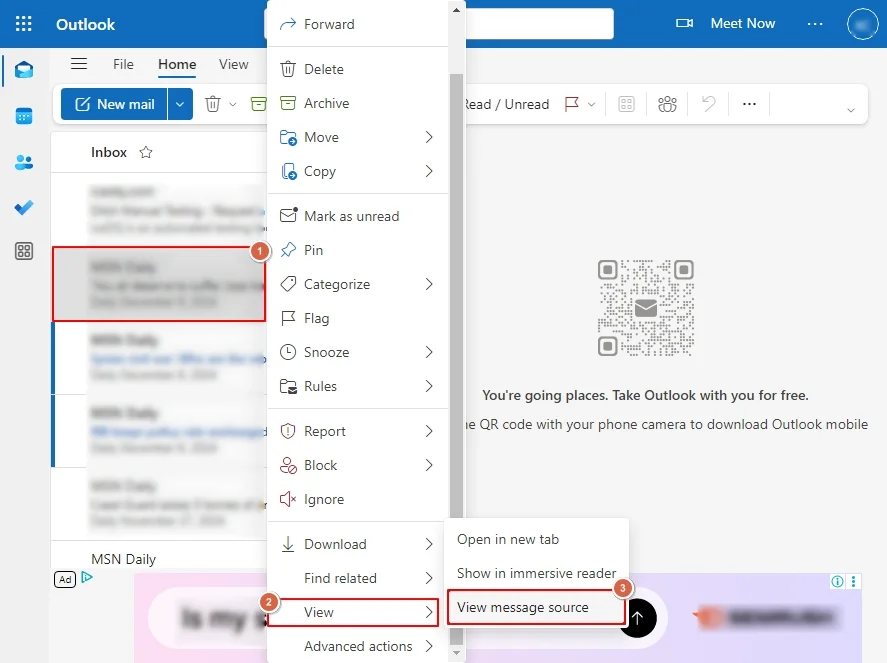
What to analyze: Sending mail server, received path & Message-ID format.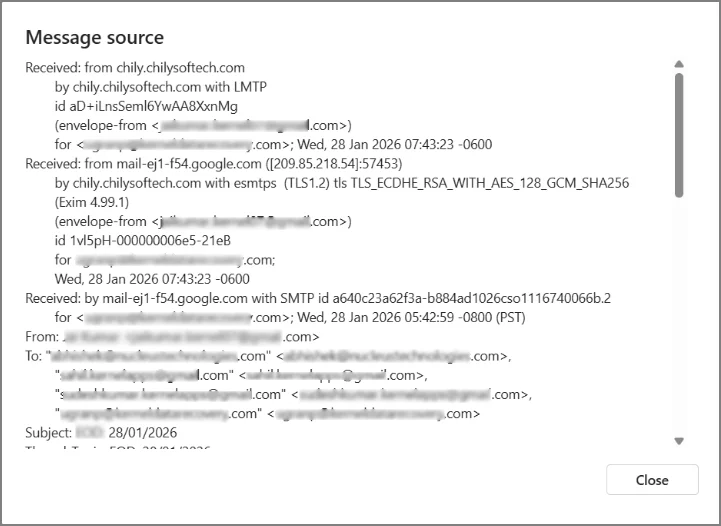
Stepwise Approach to Analyze Email Headers
Here we have summed up the complete email header analysis in some steps that can help in tracking mail authenticity.
Step 1. Check Authentication results
In this section, you need to check whether the SPF, DKIM, & DMARC are showing Pass or not. If not, it may indicate that spoofing or misconfiguration is the cause.
Step 2. Examine the Received Chain
Read the Received fields from bottom to top to identify the original sending server & detect unusual suspicious routing.
Step 3. Compare & Analyse domains
Here, you need to compare the domain to ensure consistency between the From address, Return-Path, & Message-ID Domain. Mismatches are common in phishing emails.
Step 4. Verify IP and server locations
It is considered a beneficial step to trace spam or phishing as it shows the message journey. You need to look for unexpected locations, unknown email servers, and private IPs under this section.
Red Flags Found in Email Headers: Common Ones
By knowing some common red flags, you can take preventive measures on time. Let’s understand them:
- Multiple unknown servers.
- Failed SPF or DKIM checks.
- Inappropriately generated Message-ID.
- Suspicious timestamps or routing loops.
- Mismatch between sender/server domain.
Email Header Analysis: Frequent Challenges
Users can get valuable insights with the analysis of email header, but it has some limits, like:
- It can be complex for beginners or novice users.
- Using multiple servers may create a problem in tracking.
- Some fields are intentionally made hidden from the users.
- Email header analysis works with valid context, not assumptions.
Last Thoughts
When you follow a structured approach, analyzing the email headers can become simple. This practice can help users to verify email authenticity & safeguard themselves against email threats.
With this detailed guide, every needed detail to analyze email headers for phishing has been covered. Hopefully, it has helped you become aware of email headers & its analysis.
Frequently Asked Questions
A. It is possible to manipulate some fields. But core routing & authentication records are difficult to fake.
A. No. Since it is hidden, users need to view it manually.