Overview
Kernel IMAP to Office 365
Migrate to Office 365/Exchange from popular IMAP email clients like Gmail, G Suite, Yahoo, Amazon WorkMail, and more. This tool provides you features like filtering, mapping, and report generation and lets you migrate only the required emails.
- Migrates single/multiple mailboxes from IMAP email servers
- Provision to migrate to mailboxes, archive mailboxes, & public folder
- Easy migration of multiple mailboxes using CSV file
- Support for all IMAP email servers and Office 365/Microsoft 365 plans
System Requirements
Before you start installing Kernel IMAP to Office 365, make sure that your computer meets the following requirements:
Supported Versions
- Outlook PST File - Office 365/ 2019/ 2016/ 2013/ 2010/ 2007/ 2003/ 2002/ 2000/ 98 and 97
Operating System
- Windows OS Platforms - Windows 365/11/10/8.1/8/7/Vista/XP/2000/98/NT and 95 and Windows Server 2016/2012/2008 R2/2008/2003 R2/2003
Processor
- Intel® Pentium Processor compatible (x86, x64) or equivalent
Memory + Hard Disk
- 128 MB Minimum + Minimum 50 MB of disk space
Help Guides
Install Kernel IMAP to Office 365
You have to download the installer file of Kernel IMAP to Office 365 from https://www.nucleustechnologies.com/imap-to-office-365/ Please make sure your computer meets the system requirements and user rights for installing this software
Perform the following steps to install Kernel IMAP to Office 365.
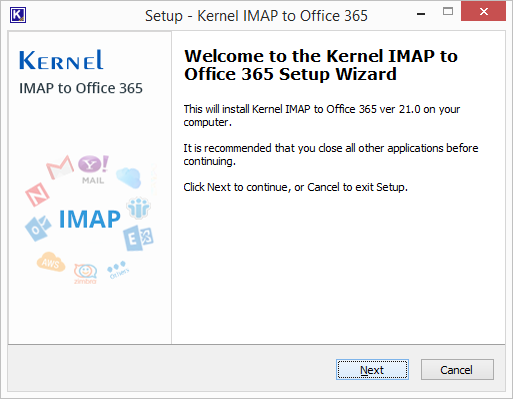
- Double-click the downloaded installer file to start the installation.
- Click Next to proceed to the next step.
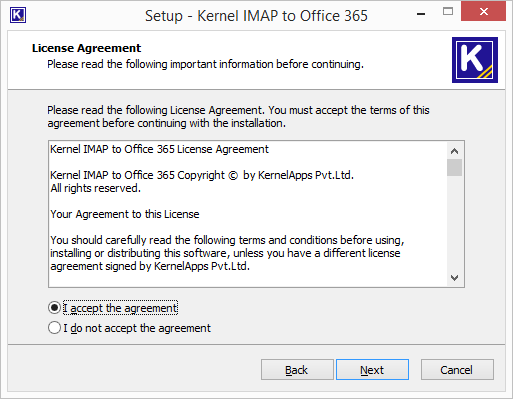
- It is recommended to read the license agreement carefully before installing the software. If you agree to the license agreement and want to continue the installation, then click I accept the agreement and click Next.
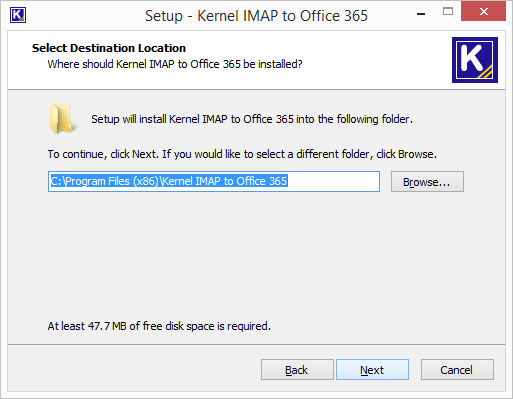
- The following screen appears, which allows you to modify the destination. If you want to modify the installation location, click Browse and select the desired location. Click Next to proceed further.
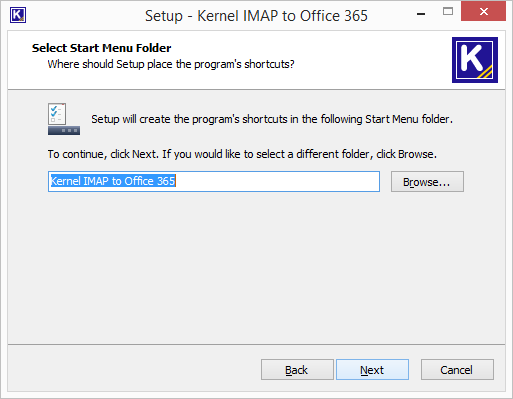
- Here, you can customize the location of the shortcuts folder in the Start Menu. Click Browse and select a different location to modify the location of the shortcuts folder in the Start Menu. Click Next to use the default or customized shortcuts folder
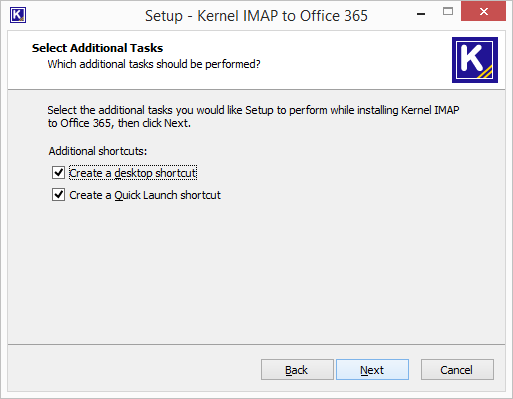
- The next step displays the option to create the additional shortcuts. Check the boxes titled Create a desktop icon and/or Create a Quick Launch icon if you want. Click Next to proceed to the next step.
- Click Install to begin the installation procedure.

- When the installation process is completed successfully, the user receives the following message. Click Finish to complete the process. It will launch the software if you have kept the option Launch Kernel IMAP to Office 365 checked.

Uninstall Kernel IMAP to Office 365
There can be a situation when you need to uninstall Kernel IMAP to Office 365. Please make sure to close the software before uninstalling it. Follow the steps below to uninstall it.
There are two ways to start the uninstallation.
- Go to Start → All Programs → Kernel IMAP to Office 365, click Uninstall Kernel IMAP to Office 365.
- Click Start → Control Panel. Launch Add/Remove Programs or Programs. Select Kernel IMAP to Office 365 and click Remove.
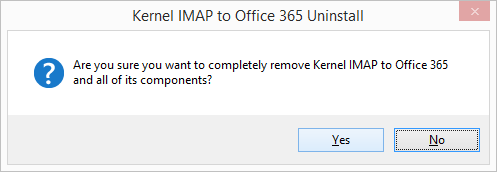
- Following any of the above methods displays a warning message. Click Yes to uninstall the software.
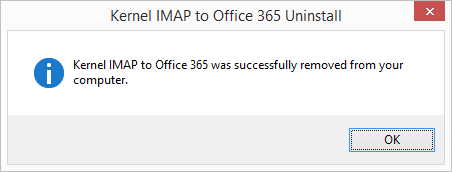
- When the software is removed, the following message box appears onscreen.
Click OK to finish the process.
After following the above steps, Kernel IMAP to Office 365 will be uninstalled successfully from your computer system. By default, the software is configured to retain the license file, behavioral data to handle source and destinations, and other settings in the program installation folder.
To remove the remaining elements, delete its program installation folder manually and then empty the Recycle Bin as well. Kindly do not remove this folder if you want to retain the license file and/or have to reinstall the same/upgraded version of the software. The default path of the program installation folder is %ProgramFiles%\ Kernel IMAP to Office 365– for both 32-bit and 64-bit OS.
Video
Kernel IMAP to Office 365
Release History
IMAP to Office 365 are more secure and easier now with the release of Kernel IMAP to Office 365 (V.21.3). It utilizes modern authentication, also known as 2-factor/multifactor authentication, to ensure that Office 365 logins are always secure and safe. For error-free IMAP/Office 365 logins, the software has implemented special measures in its algorithms. And you can use this tool irrespective of the Office 365 plan or the Outlook version you have. Simply, you have a more efficient version of the tool after the updates. KernelApps aspires to meet the growing IMAP to Office 365 requirements of all types of Office 365 users.
Migrating from the IMAP platform to the cloud platform of Office 365 has become simpler with new Kernel IMAP to Office 365 20.9. The new version of the software will connect easily with any IMAP server account and migrate its content to Office 365 mailboxes. The enhanced performance of the software will ensure a faster and more secure migration.
KernelApps launches the latest version of Kernel IMAP to Office 365 with many updates (version 20.5). This version offers better IMAP server connectivity facilitating faster mailbox folder expansion. Moreover, some minor issues related to the earlier version of the application have been fixed completely. The tool now offers a smooth migration of IMAP mailboxes to Microsoft 365 with complete accuracy.
To help the IMAP users to migrate emails to Office 365 faster, Kernel launches the updated version of Kernel IMAP to Office 365 19.11 which supports all IMAP email clients. It migrates the entire IMAP data or specific data efficiently and precisely to Office 365. The new version offers better features and improved performance.
The latest version of Kernel IMAP to Office 365 19.8 has empowered the IMAP mail users to adopt to Office 365. Due to the changes in the software, the performance is improved, and now it is able in handling any migration of any size for IMAP mails.
KernelApps has released the latest update for Kernel IMAP to Office 365 software. With this update (version 19.8), the tool is much faster and reliable in migrating IMAP mailboxes to Office 365. This improved version can help you migrate IMAP mailboxes to Office 365 quickly and precisely.
The latest version of Kernel IMAP to Office 365 has been released by Kernel Data Recovery. This newest release is introduced as version 19.4 after some bug fixes, and performance enhancements - the connection to IMAP email servers has been improved, and minor problems related to IMAP folder hierarchy migration has been fixed. With the latest updates, it is now much easier to migrate IMAP mailboxes to Office 365.
Kernel has recently launched the updated version of Kernel IMAP to Office 365 19.3. Now, if you want to migrate messages from any IMAP platform, then you can conduct it more accurately. The update has increased the speed of migration; and the performance also has improved significantly.
Kernel releases a specialized migration tool for IMAP Server to Office/Exchange migration. The tool migrates IMAP mailbox data to hosted/on-premises Exchange and Office 365. It incorporates many smart features for instant and clean migration. Its efficient filters like Date Range and Item type extract specific data for Exchange/Office migration. Also, the tool allows migration to public folder and archive mailboxes. Additionally, the tool supports all IMAP email servers including Gmail, Yahoo, and Outlook.com for migration.
Download Trial Version
Get the free version and perform a trial IMAP to Office 365 migration. It helps you migrate data from major IMAP email clients to Office 365 on a trial basis. Also, it lets you learn more about the features and working of the tool.
- Migrate IMAP email data to Office 365
- Migrate 10 items per folder for free
- Can be installed on any Windows PC
Purchase Software
Perform a complete IMAP to Office 365 migration with the full version of the tool. It migrates emails, contacts, calendar, etc., to Office 365 with all the metadata and properties. It is a simple migration tool too.
- Migrates email and other IMAP items to Office 365
- Migrates G Mail, AOL, Outlook.com, Yahoo Mail, etc.
- Migrates to all Exchange versions and Office 365 plans
Online Support
Customer support is not a service, it’s an attitude.
Our dedicated team is available 24x7 to provide fast responses to all of your queries. For any technical support you can register or submit a ticket here.
- Register
Register a new account to submit tickets. click here. - Submit a ticket
Submit a new ticket for your query. Our support team will contact you. click here. - Knowledgebase
Search support helpful articles and find answers to frequently asked questions. click here.
Kernel IMAP to Office 365 - Migrate from QMAIL to Microsoft 365 Account
Ways to Migrate from QMAIL to Microsoft 365 Account
There are not many methods to migrate Qmail mailboxes to Microsoft 365, but some general procedures can be followed to import IMAP mailboxes to Microsoft 365. So, let’s have a look.
1. Migrate with IMAP Configuration
2. Use MS Outlook to Migrate Qmail to Microsoft 365
Method #1: Migrate with IMAP Configuration
If we go by the books, then the first method to migrate Qmail mailboxes is to use the IMAP configuration method. And for that, keep some of these basic rules and guidelines in mind, such as:
- Create your users in Microsoft 365 mailboxes before migrating Qmail mailboxes from the source email environment
- Add the domain name to Microsoft 365 account before creating users in the account
You can add users individually or in bulk. Keeping these ground rules in mind before starting the migration process. And after that, you can follow the below steps to migrate Qmail mailboxes to Microsoft 365.
- Collect your source email server name with Outlook on the web
- Generate a list of the mailboxes that need to migrate to Microsoft 365
- Connect Microsoft 365 to your email system before migration
- Make a migration batch and migrate the mailboxes
- At last, verify whether the task worked or not
To know these steps in detail, you can check the official Microsoft documentation.
Read moreKernel IMAP to Office 365 - How to Migrate IMAP to Office 365 Shared Mailbox?
Migrate IMAP to Office 365 Shared Mailbox
Now, once you have converted the regular mailbox to the shared mailbox, you can start with the migration. There are manual methods available for the IMAP to Office 365 shared mailbox migration, but the complexity and technicality with manual methods are way too high to risk your data for it.
Here, without wasting any more time and risking our data, we are going for the automated solution with a third-party tool that is Kernel IMAP to Office 365. A migration tool that is not only a quick but reliable solution to perform the action. The tool has a very user-friendly interface which lets no trouble come to your migrating experience; let’s check out how the tool works:
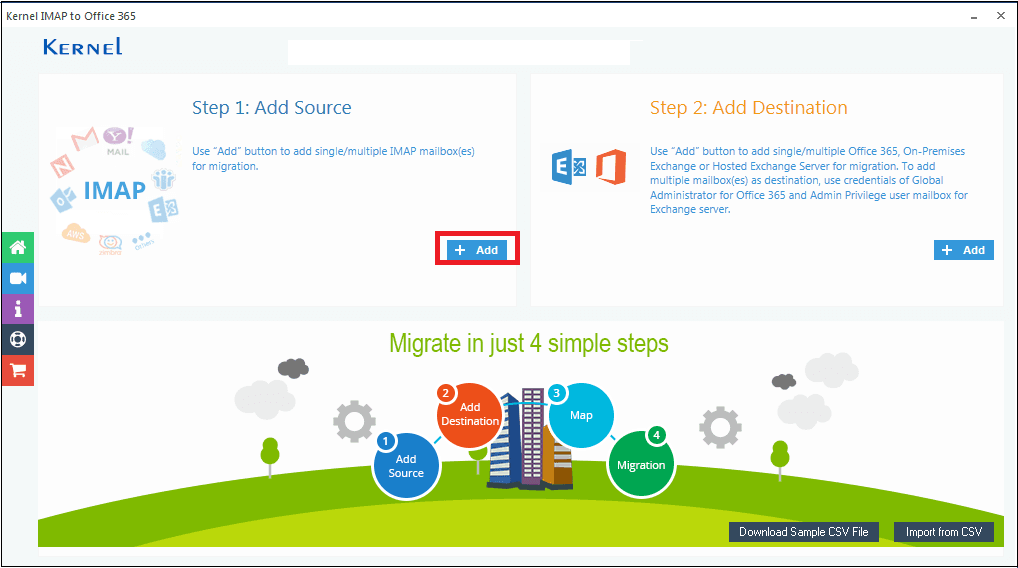
- Start the tool and click on the Add button, under the Add Source title to add the IMAP account.
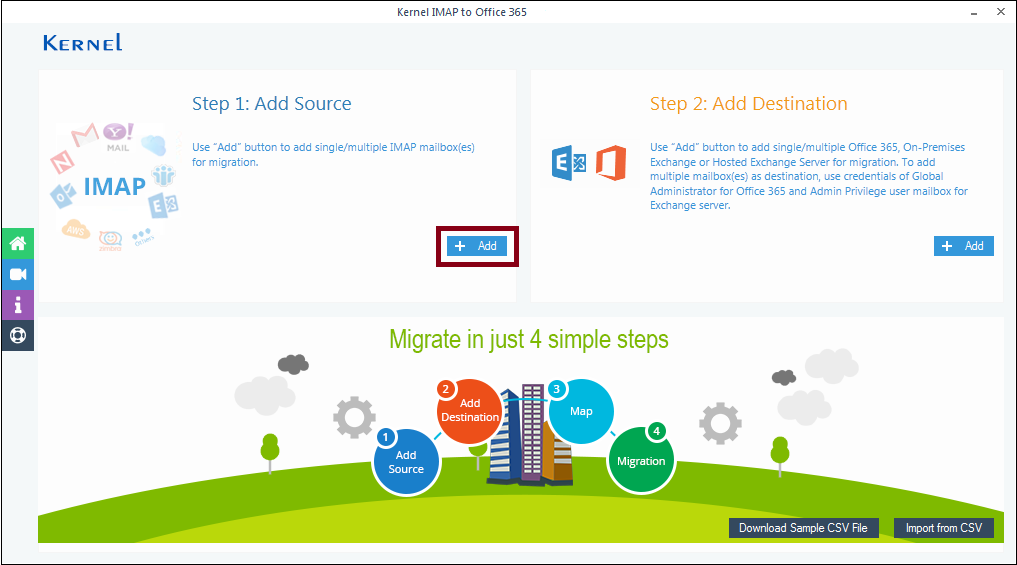
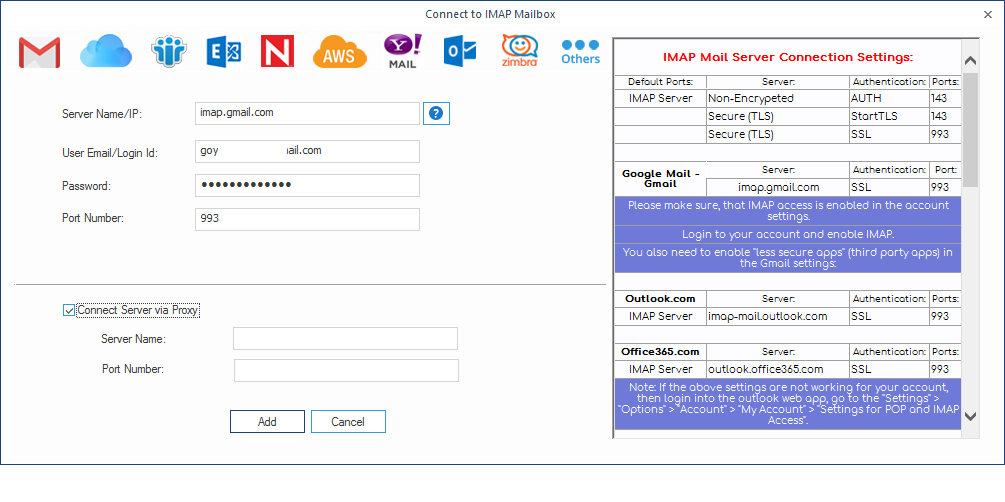
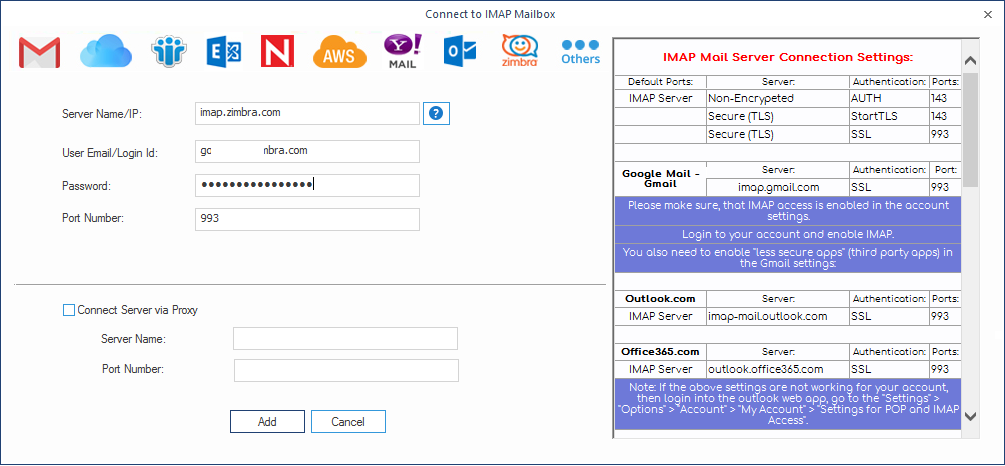
- At this page, you will see that on the right there is a chart that has all the details of the IMAP servers and their Port numbers. Look for your Email client and enter the IMAP account details and credentials of that particular account. Finally, when you are done with all the details, click on the Add button to add the particular.
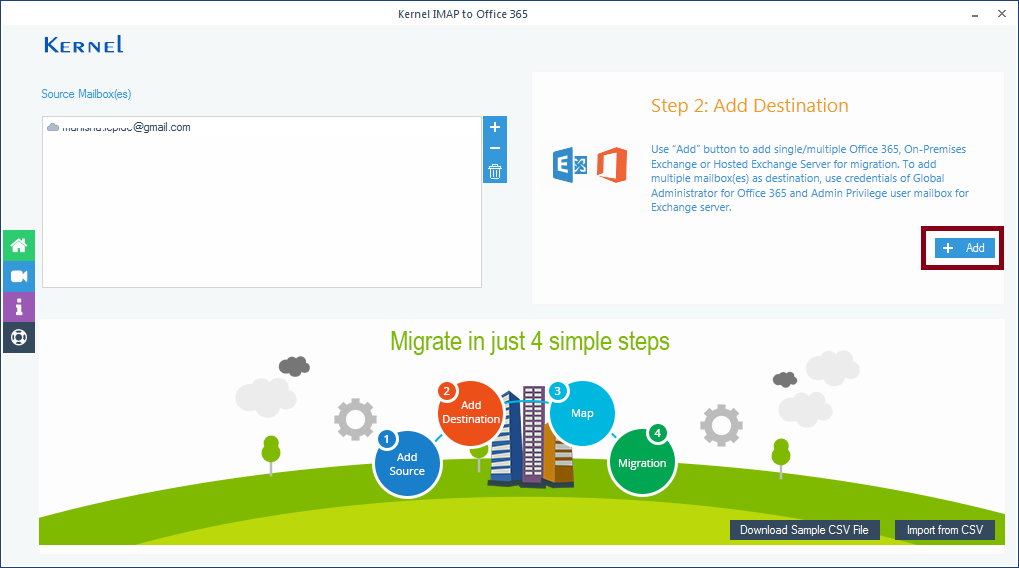
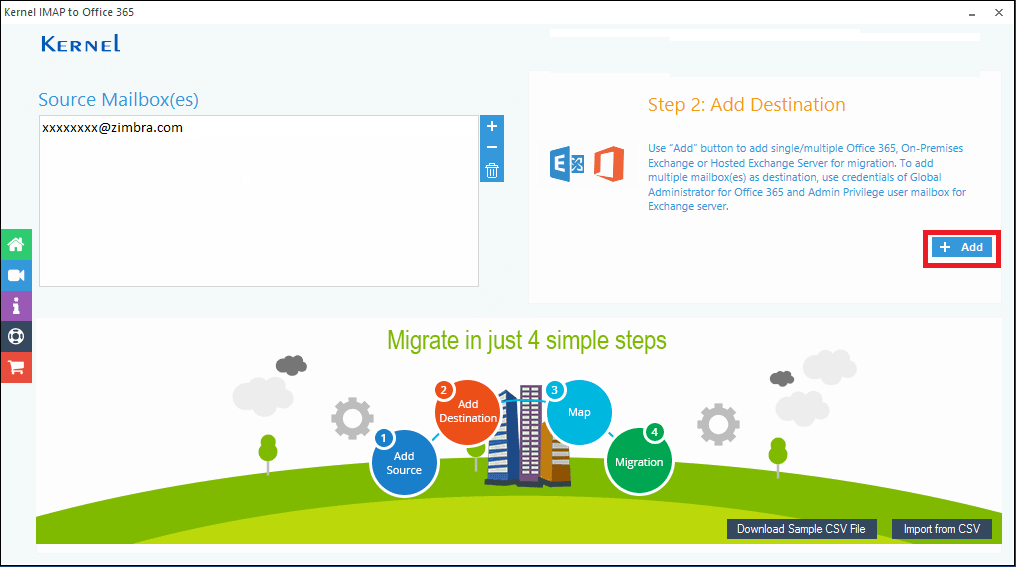
- Now, click on the Add button under the Add Destination section.
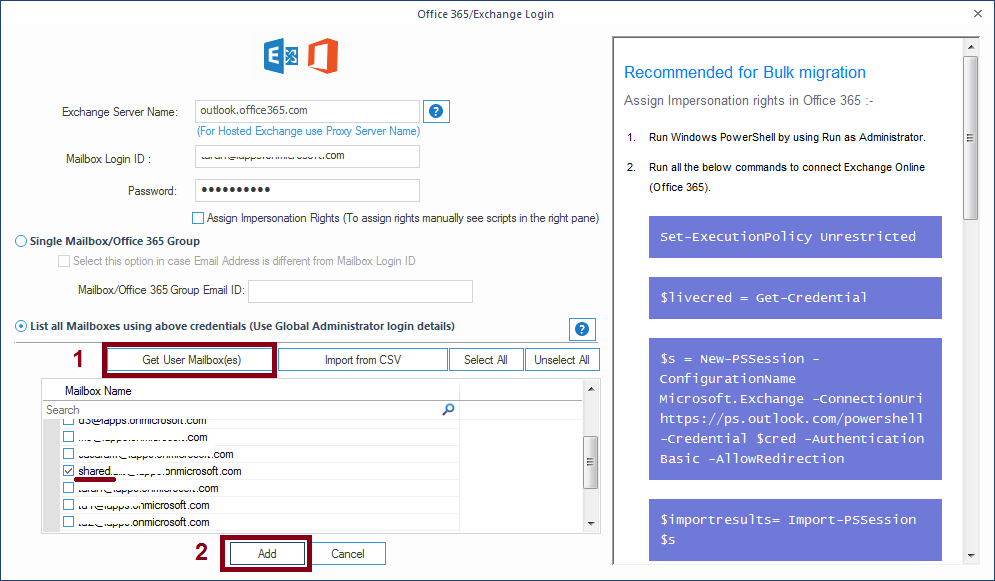
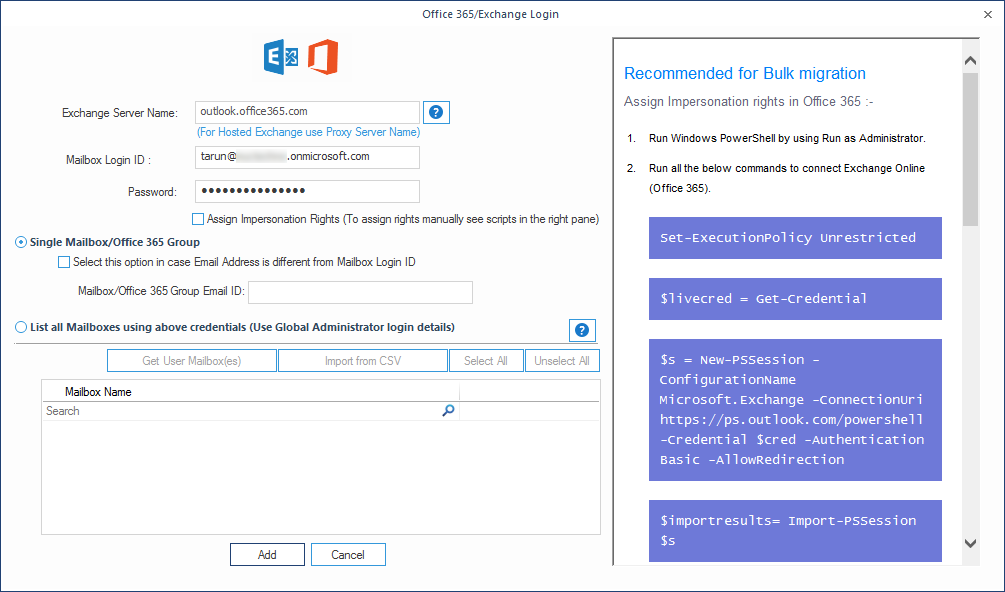
- Again, add the Office 365 account details with credentials, choose List all Mailboxes using…. option and select the shared mailbox from the retrieved list of Office 365 mailboxes. Then, click on the Add button.
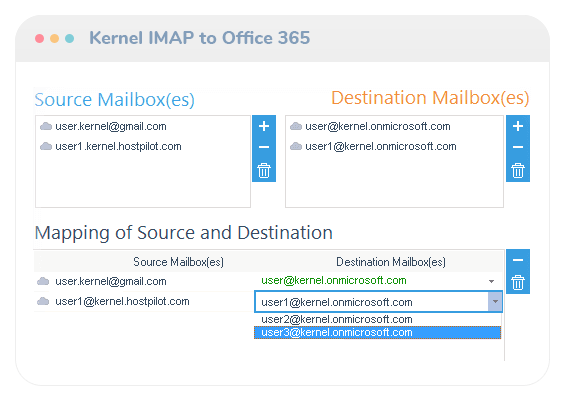
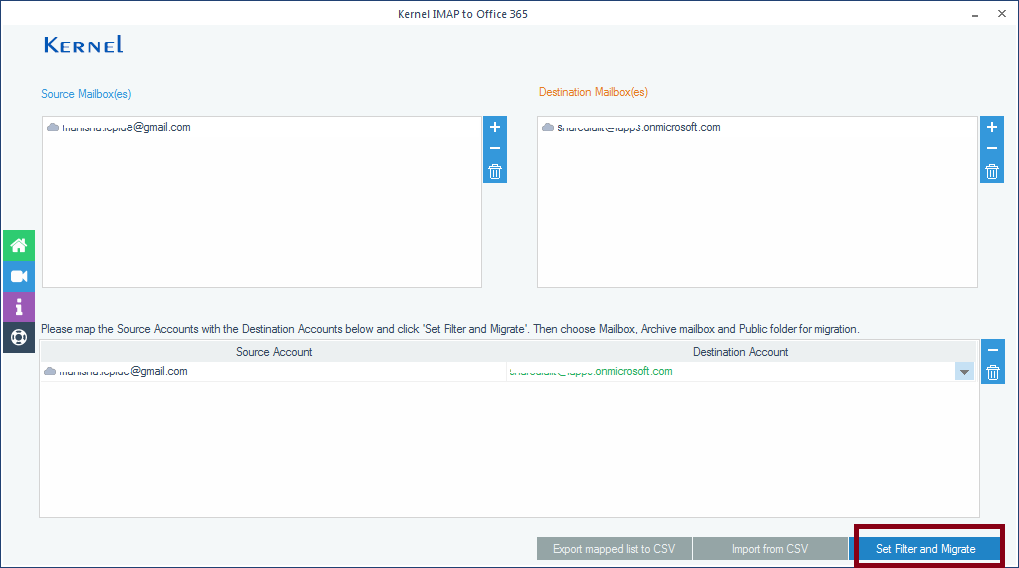
- In this step, under the Destination mailbox section, you will see a little drop-box icon, click there and select the destination shared mailbox. Once you have selected the destination mailbox, click on Set Filter and Migrate.
Kernel IMAP to Office 365 - How to Migrate IMAP Emails to Office 365?
Steps for Migrating IMAP to Office 365
There are six steps involved in migrating other IMAP email accounts to Office 365, and performing each of these steps is crucial for flawless migration of mailboxes. The steps include:
- Identifying the full name of your current email server
- Creating a list of mailboxes to migrate
- Connecting Office 365 to your email system
- Creating a migration batch and migrating mailboxes
- Routing emails directly to Office 365
- Discontinuing email synchronization
Following these steps, you’ll be able to migrate your IMAP data to Office 365 account.
Step 1: Identifying the Full Name of Your Current Email Server
This is the method in which user backup IMAP mailboxes using Outlook application. Follow the process – In Outlook, there is an Import and Export feature (File → Open & Export → Import/Export) using which you can export IMAP mailbox data to Outlook PST file with the Export to a file option. You need to choose Outlook Data File (.pst) as the saving format. But the limitation is that you can move only one mailbox at a time to PST file.
2. Change IMAP Settings to POP3
Office 365 requires the same source email server name for migration, so you’ll have to identify the full name of your current IMAP email server.
- Open your mailbox with Outlook on the web.
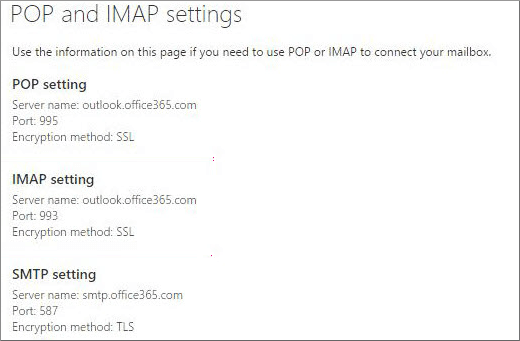
- Go to Settings in the toolbar, and then type pop in the Search all settings box.
- From the result displayed, select POP and IMAP.
- The IMAP server name will be listed in the IMAP setting section.
Step 2: Creating a List of Mailboxes to Migrate
Before migrating the mailboxes to Office 365, you need access to your IMAP user mailboxes. For this, create a list of mailboxes when you know the password of user mailboxes. This information can be collected from your source email system. If you don’t know the user passwords, you can reset the passwords to new passwords.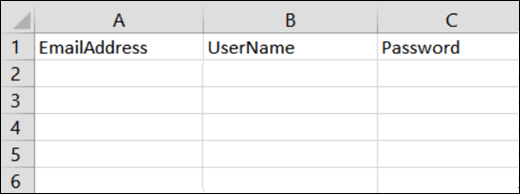
Kernel IMAP to Office 365 - Migrate GoDaddy IMAP Mailboxes to Office 365
Plan the Migration
Step 1) Gather the Office 365 Administrator credentials, GoDaddy Administrator credentials, and all the user passwords.
Step 2) Go to GoDaddy website and login with Administrator credentials –
- Go to Workspace Email and click the option Manage All.
- It will present the list of your emails. Click the Export option.
- At the Export wizard, select Email from the Export drop-down, check the option Select All to select all the properties of Email. At last, choose the option CSV as the File Format. Click Export.
- After saving the CSV file, open it and create a new row at the top for following details –
- User Name
- Email Address
- Password
Start the Migration from GoDaddy to Office 365
- Login to Office 365 Admin center, the go-to Admin Center, and click Exchange.
- Follow recipients → migration.
- Click Add (+) and select Migrate to Exchange Online.
- Select the last option of IMAP migration (supported by Exchange and another email system).
- Click Choose File and browse the CSV file you created for the GoDaddy email.
- At the IMAP migration configuration page, fill the details for the IMAP server (imap.secureserver.net), Authentication (Basic), Encryption (SSL), Port (993). Then click Next.
- Provide a name to the batch migration, select the Bad Item limit, Large Item limit, and exclude folder. Click Next.
- Use the Browse button and select the user(s) who will get the notification at various migration stages. Then choose the option to start the migration.
Kernel IMAP to Office 365 - Migrate IMAP Mailboxes to Exchange Online & On-Premises
Kernel IMAP to Office 365 – Migrate IMAP mailboxes to Exchange On-premises or Exchange Online (Office 365)
To avoid the hassles of migrating IMAP mailboxes to Exchange on-premises with manual methods, use Kernel IMAP to Office 365 tool. Also, it is one of the best tools to migrate IMAP mailboxes to Office 365 (Exchange Online). It is enhanced with some powerful features that include:
- Migration of single/multiple mailboxes from IMAP email servers
- Options to migrate archive mailboxes and public folders
- Quick migration of multiple mailboxes using CSV file
- Successful migration to Office 365, and different versions of Exchange
- Incremental migration of IMAP mailboxes
- Saves the entire migration report in CSV format.
To make it easier to understand, here we will brief the working process of the software, which can be performed by even non-technical users.
First, install the software on your system and then follow the below steps:
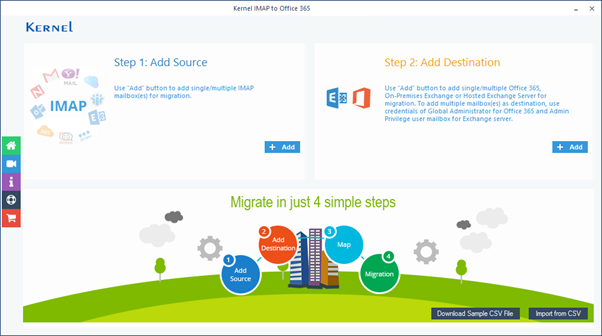
- On launching the tool, select Add in the Add Source section.
Kernel IMAP to Office 365 - How to Migrate Zimbra to Office 365?
Kernel IMAP to Office 365 – Zimbra to Office 365 Migration with Kernel IMAP to Office 365
Kernel IMAP to Office 365 is a perfect tool to perform Zimbra to Office 365 migration. Here are the steps you need to follow to perform the successful migration. Install and run the software and start from step
- On the first page, you need to click Add button to add IMAP files for migration.
- In the next step, select your email client and enter the credentials like Server Name, Email id, Password, and Port Number. Check the box Use SSL Connection, and on the right-hand side, you will get the details of your account. Finally, click on Add to proceed.
- Now, for the second step, you need to click on Add button under Step 2 to add Office 365 mailboxes.
- Now add your mail details like email Id and Password, select Single/Archive Mailbox for single mailbox and List all Mailboxes using above credentials (Use Global Administrator login details) for multiple mailboxes from Office 365. Here we have opted for Single/Archive Mailbox.
Kernel IMAP to Office 365 - Manual Methods for Migrating AOL Emails to Microsoft 365
Kernel IMAP to Office 365 – Manual Methods to Forward AOL Emails to Office 365
AOL is a web-based application, so users need Outlook Web Access to move their AOL emails to Office 365. Follow the below steps to move your AOL emails to Office 365.
- Login to your Office 365 account and open Outlook Web Access (OWA).
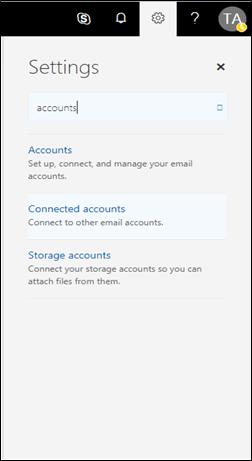
- Now, hit the “Setting” icon in the upper right corner of the tool and type “accounts” in the search dialog box. Select the “Connected accounts” option from there.
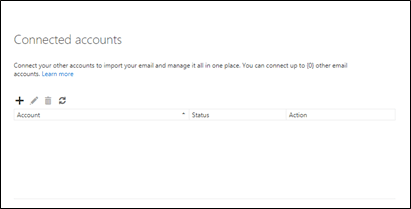
- You’ll be redirected to a new page, click the “+” icon to add a POP3/IMAP account to your Outlook mail.
- A new window will appear on the screen, enter the email address and password for the AOL account, and click Ok.
- A notification will appear on the screen displaying “Connect your email account,” click Ok to complete the process.
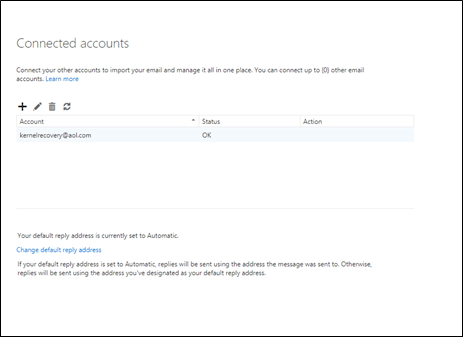
- You can see the AOL account added to the list of Connected accounts.
Kernel IMAP to Office 365 - How to Migrate Yahoo Mail to Office 365 with Ease?
Kernel IMAP to Office 365 – Connect Yahoo to Office 365 Manually
If we talk about the manual methods, then due to the unavailability of a direct method for the migration of Yahoo emails to Office 365 account, we need to convert Yahoo data into PST format in order to transfer to O365. Subsequently, we need to upload this PST file to Office 365 user mailbox. So, let us go through the following steps:
A. Migrate Yahoo Mail to Outlook PST format
In order to export Yahoo Mail to PST, you need to have the adequate knowledge of Yahoo Mail features, or you can follow the below steps:
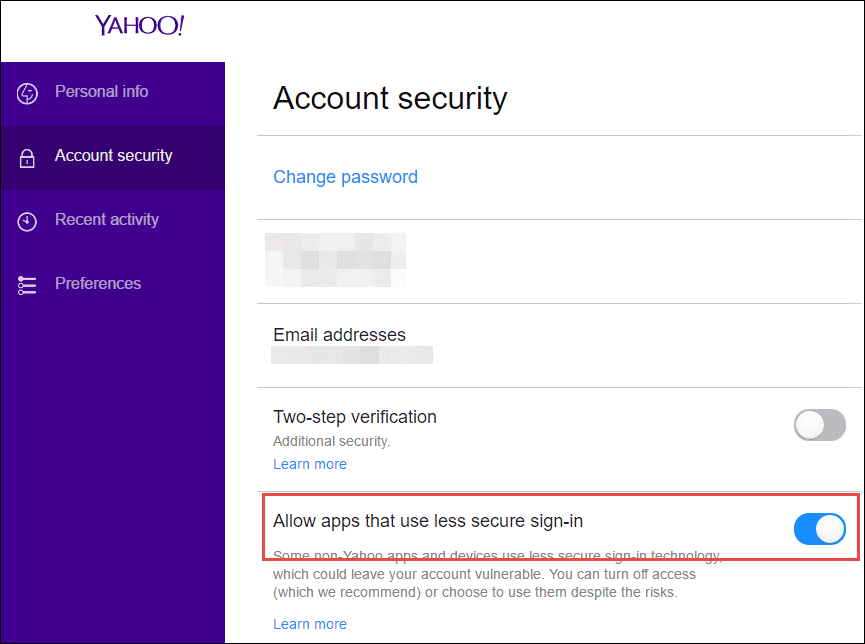
- Change the Account Security of the Yahoo Email. Click on Allow apps that use less secure sign-in option in it.
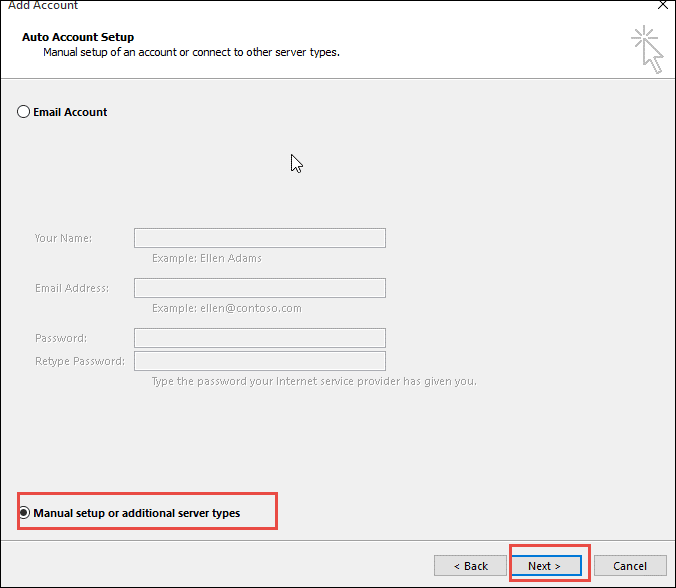
- Step-2. Open Microsoft Outlook → File → Info → Add Account option → Manually Configure Server Settings → Next to proceed further.
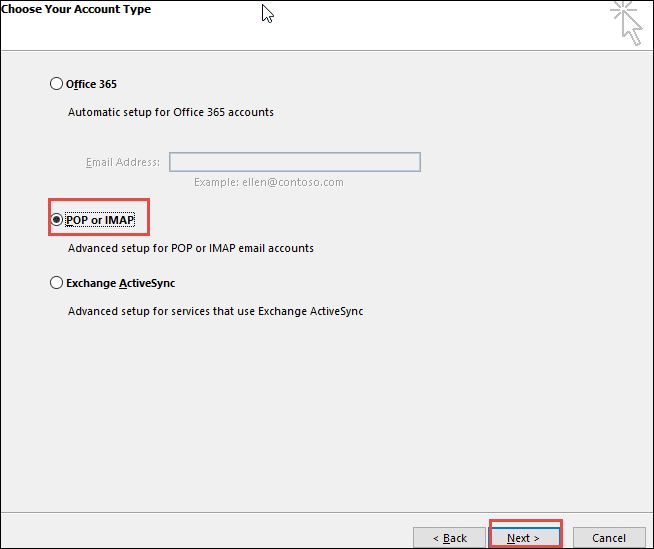
- Step-3. Go to Add New Account → select POP3 or IMAP → Next. Type necessary login details - Yahoo email and password.
- Step-4. Enter pop.mail.yahoo.com in the incoming mail server field and smtp.mail.yahoo.com in the outgoing mail server field.
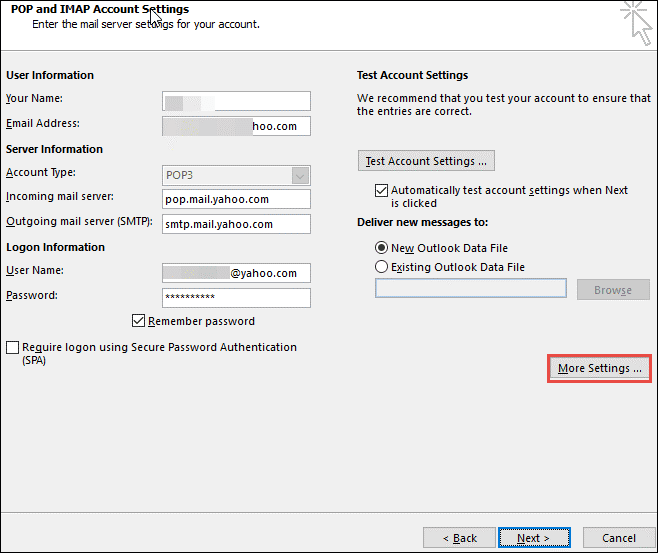
- Step-5. Select More Settings → POP and IMAP Account Settings → Assign an Account Name.
- Step-6. Select the Outgoing Server tab → click on Use Same Settings as My Incoming Mail Server and My SMTP Requires Authentication.
- Step-7. In the Advanced tab → POP3 server: 995 and for SMTP server: 465. Choose SSL as the encryption type. Subsequently, click on 'This Server Requires an Encrypted Connection.'