Read time 8 minutes
Recycle Bin data recovery is a concerned issue for every computer user. Whenever you delete a file from your computer, it temporarily gets stored in the Recycle Bin. This becomes an opportunity to recover accidentally deleted files from the Recycle Bin and bring back to your computer.
Emptied Recycle Bin could lead to panicking situations if you suddenly need a file that you had permanently deleted from the Recycle Bin. File recovery from Recycle Bin seemed impossible until the data recovery software to undelete files was developed and introduced to users. Inbuilt system recovery options proved useful, but to some extent, something unique was required which could make the recovery process easier and more reliable.
The storage size of the Recycle Bin plays an essential part in data storage. The Recycle Bin is emptied to manage and increase the disk space, which gets occupied with the file and folders, temp files, downloaded files, desktop items, program application, scratch files stored in Windows temp, and many other files. At this point, your operating system starts responding slowly, gets frozen, demands restart, disables saving of heavy files, denies copying of large databases and applications and many more events that stop the work continuity.
For Windows XP Users:
- Right-click the Recycle Bin icon and then click Properties.
- Click the Global tab. Drag the bar to the maximum percentage and click Apply.
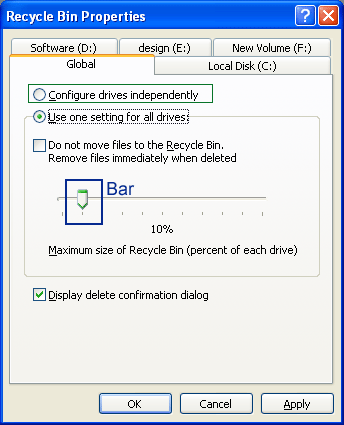
- Click OK to confirm the settings.
These settings can be applied for all drives or to independent drives. Select the Configure drives independently radio button. This will activate the bar in another drive tab as per your computer system.
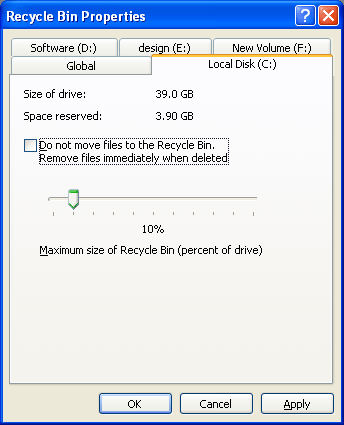
Now maximize the storage space for independent drives.
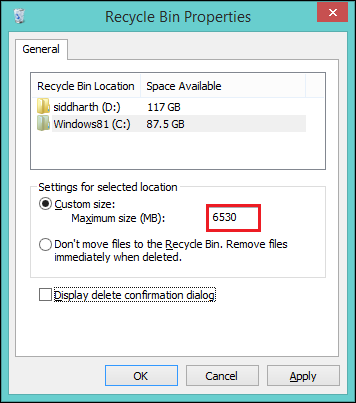
For Windows Vista Users:
- Right-click the Recycle Bin icon and then click Properties.
- Click the General tab. Drag the bar to the maximum percentage and click Apply.
- Enter a number in the Maximum size box, which sets the Recycle Bin’s maximum size (measured in MB) under Recycle Bin Location.
- Click OK to confirm the settings.
For Windows 7/8/8.1 Users:
- Right-click on the Recycle Bin icon and select Properties.
- Click on the storage location and edit the maximum size of the recycle bin on that drive/ location.
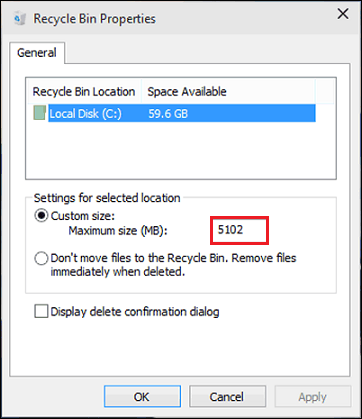
For Windows 10 Users:
- Right-click on the Recycle Bin icon and select Properties.
- Click on the storage location and edit the maximum size of the recycle bin on that drive/ location.
Ways to recover permanently deleted files
What if you have accidentally emptied the recycle bin? There are not many inbuilt ways to recover permanently deleted files from the recycle bin, but restoring from file history might work, which is described below in detail.
Method 1: Restore from file history
If there is any easier method to recover permanently deleted files, then this one takes the cake. The steps to restore your data from file history are listed below:
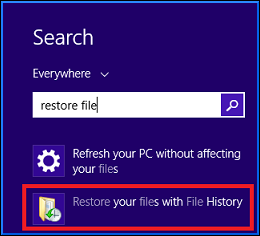
- In the Taskbar search for Restore File.
- Now Select Restore your files with file history.
- In the File History window, look for the file that you want to recover.
- Do check the file versions before recovery
- After finding the suitable version, select Restore. This operation restores the files to their usual place.
- Just in case you wish to restore it to a different place, right-click on Restore > Restore to should do the job.
Many a time, the backup feature can be a lifesaver but there is just one problem- one has to turn this feature on. Follow these two easy steps to Turn on File History.
- Search for backup.
- Click on Add a drive.
- One can select an external drive or a network location for backup.
Method 2: Kernel for Windows Data Recovery
Data recovery tools come in handy when you have accidentally deleted the files (permanently) or formatted the drive. It is possible to restore the files from the file history backup, but in case the backup is turned off, then this method is of no use. In a scenario like this one needs a reliable and efficient third-party data recovery tool.
Kernel for Windows Data Recovery is a very efficient tool for Windows data recovery. This tool can quickly recover your lost, missing, or deleted files and folders, including media files, corrupt Windows partitions, MS Office items, and data from removable drives such as USB, MicroSD, SD card, external hard drives and more.
Let us now explore the rich features of this tool in detail. The step-by-step tool process outlined as follows:
-
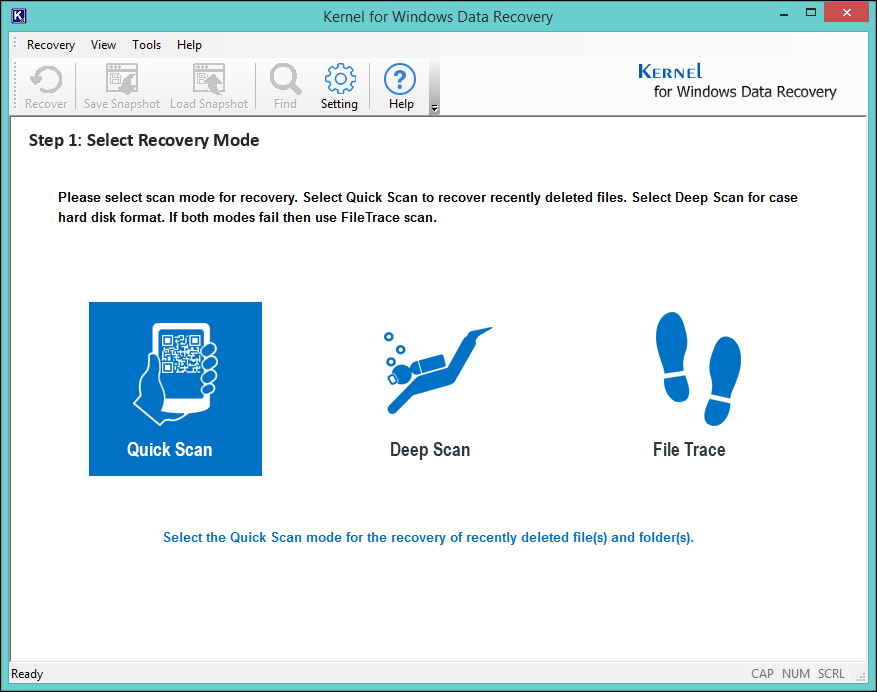
- Launch the tool. After launching, you will be prompted to select from the three modes- Quick Scan, Deep Scan, and File Trace. The selection of a scan mode depends on the severity of corruption. Quick Scan is usually employed in cases when you have recently lost your data, as this mode coarsely scans for the lost data. Another mode option is Deep Scan mode; it conducts scanning of the entire drive to perform precise recovery but always better than the Quick Scan mode. Lastly, File Trace mode is a bit advanced than the other two modes as it conducts a detail scanning operation of the disk drives (sector-by-sector). FYI, File Trace mode takes the longest time to run for obvious reasons.
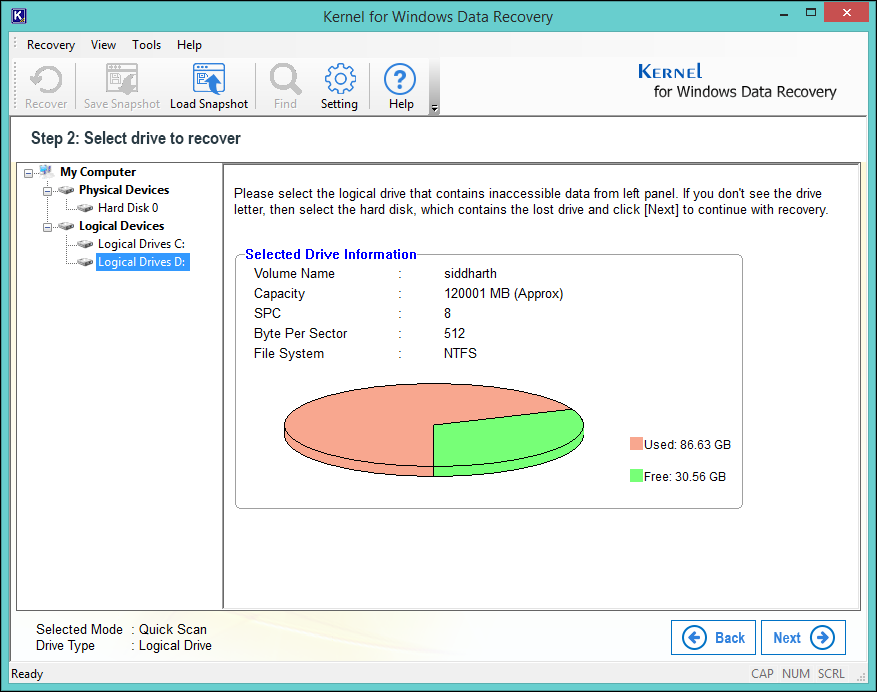
- Next, select the drive that you would like to scan from the left pane. Click Next to proceed.
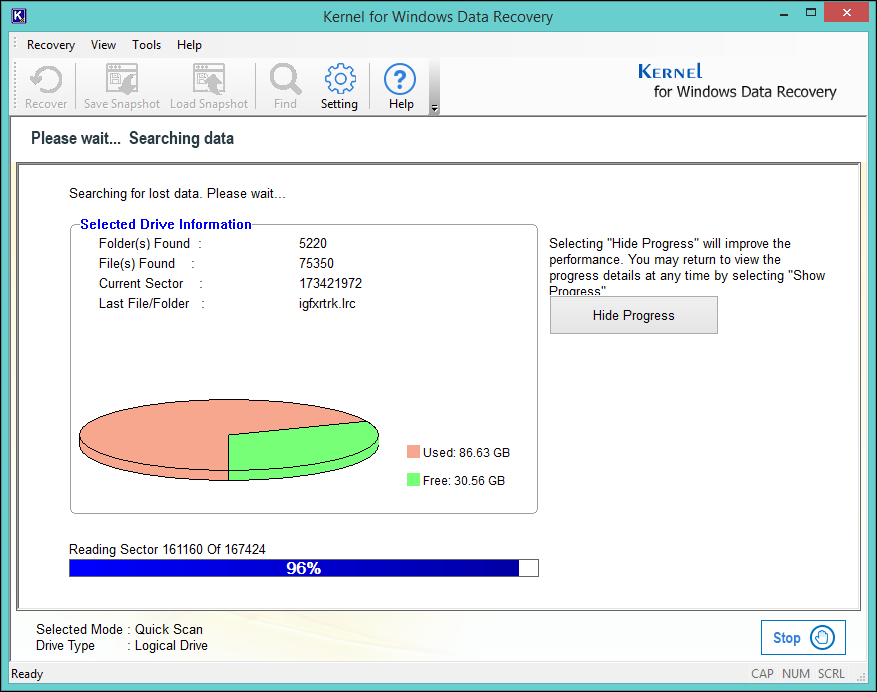
- Be patient as the tool searches for the missing data in the selected drive. You can halt the process by clicking on the Stop button anytime during the scan.
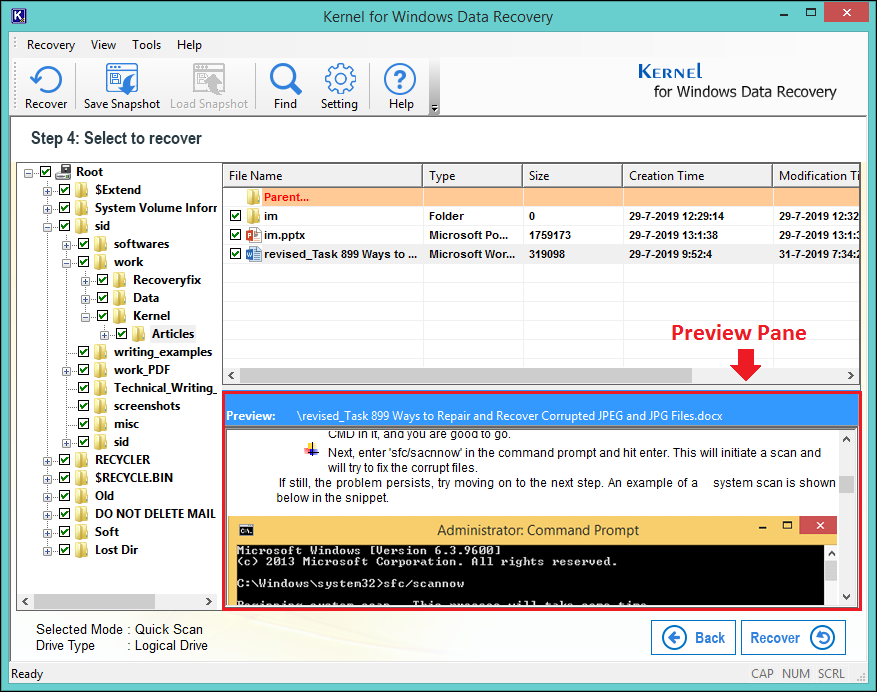
- After the tool is done searching, then recovered files will be displayed in the Preview Pane. Check the boxes in front of all those files/folders that you would like to recover and hit Recover.
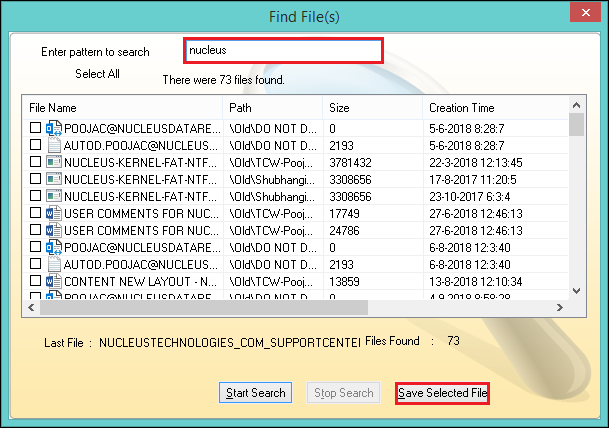
- One can also try the Find Files feature. Using this feature, one can search for specified files and file extensions.
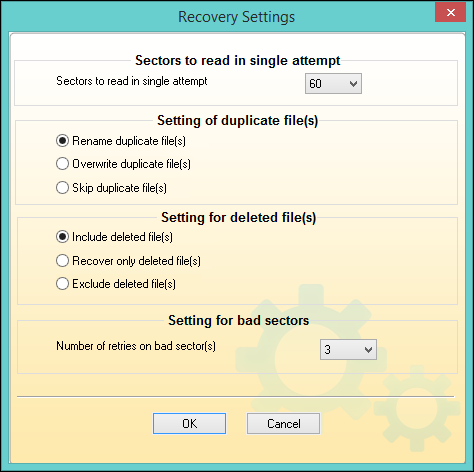
- One can also tweak into the recovery settings. For example, you can specify the number of sectors to read in a single attempt or rename/overwrite/ skip duplicate files on recovery.
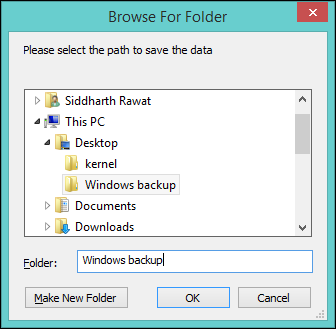
- Provide a file path for saving the retrieved files and click OK.
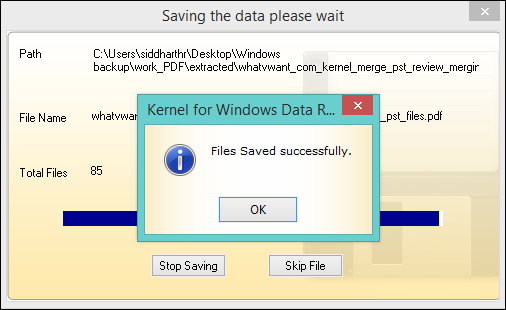
- The Save process will take time, depending upon the size of recovered data. The progress bar displays the status of the save process. Click OK to exit the process.
Conclusion
In an event, you have emptied your Recycle Bin and want to perform data recovery from the recycle bin recovery then you should download Kernel for Windows Data Recovery tool. It is a result-oriented file recovery software to restore and recover permanently deleted files and folders of Recycle Bin.
Try the free evaluation software to analyze the working features and functions of the software, which will enable the preview of recovered items but will not enable you to save them. To save you need to purchase a Full version of Deleted File Recovery Software. Also, try our Windows data recovery software