Read time 6 minutes
Are you a Windows 10 user? If yes, you should consider yourself lucky, as Windows 10 gives you many amazing options that simply life. And one such feature is AutoRun. This feature is incorporated in Windows 10 to automatically start specific programs, open removable drives, or play media files automatically when CDs, DVDs, or media cards are inserted. AutoRun has a sub-feature., i.e., AutoPlay, which allows programs to play or run as soon as the media devices get attached to the computer (this feature is turned on by default in Windows 10).
AutoPlay could be annoying when media files like movies or music play automatically when inserting CDs, DVDs, USBs, etc. Therefore, if AutoRun or AutoPlay is annoying you while doing your crucial work, we have a solution to disable and control AutoPlay features.
Methods to turn Off AutoRun in Windows 10
If you want to disable AutoRun or AutoPlay in Windows 10, use the following methods.
Method 1: Disable AutoRun using Registry editor
You need to execute several Windows 10 Registry Editor actions to disable AutoRun. Perform the given steps to turn off AutoRun in Windows 10.
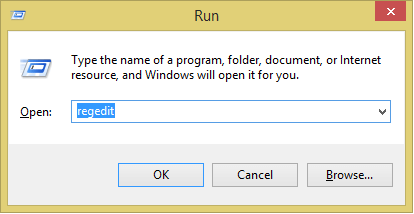
Step 1: Press Windows key + R from your keyboard, type regedit in the Run window, and click OK to open Registry Editor.
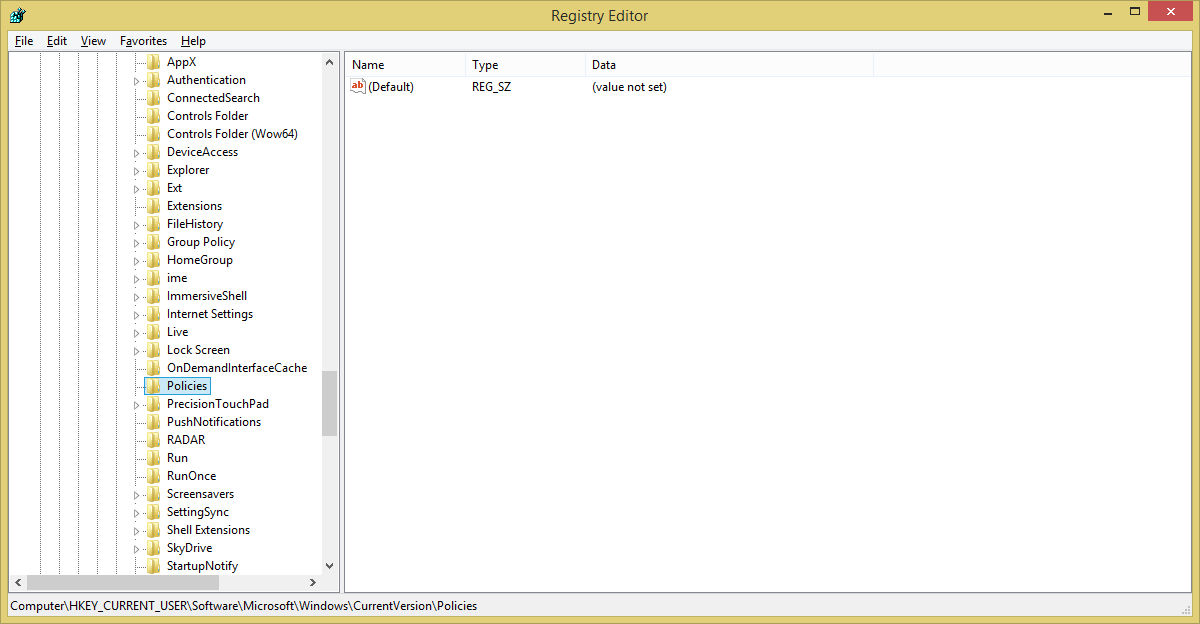
Step 2: Click HKEY_CURRENT_USER and follow the path to reach the Policies folder:
HKEY_CURRENT_USER\Software\Microsoft\Windows\CurrentVersion\Policies
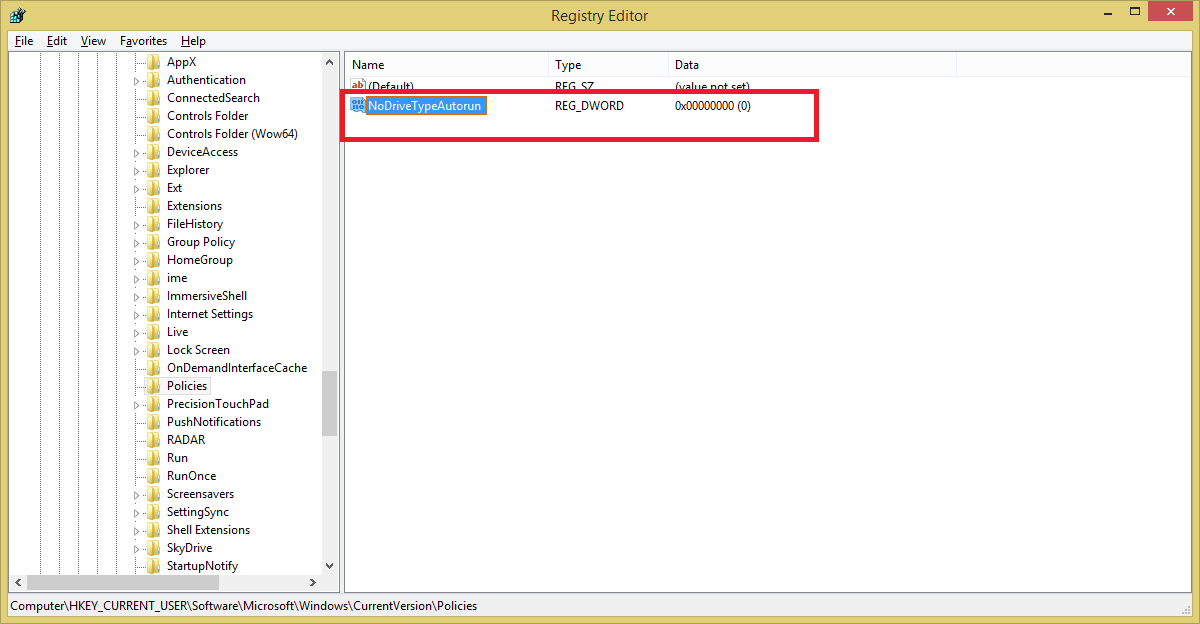
Step 3:Right-click in the right pane of the Registry Editor, create a new DWORD type value, and name it “NoDriveTypeAutorun.”
Set the DWORD value to one of the following to disable different programs:
- FF: To disable AutoRun on all drives
- 20: To disable AutoRun on CD-ROM drives
- 4: To disable AutoRun on removable drives
- 8: To disable AutoRun on fixed drives
- 10: To disable AutoRun on network drives
- 40: To disable AutoRun on RAM disks
- 1: To disable AutoRun on unknown drives
Method 2. Disable AutoPlay in Windows 10
Another way to disable AutoPlay in Windows 10 operating systems is by doing it through Windows Settings. Follow the below-mentioned steps to turn off the AutoPlay in Windows 10:
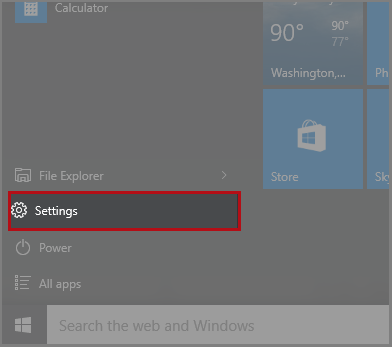
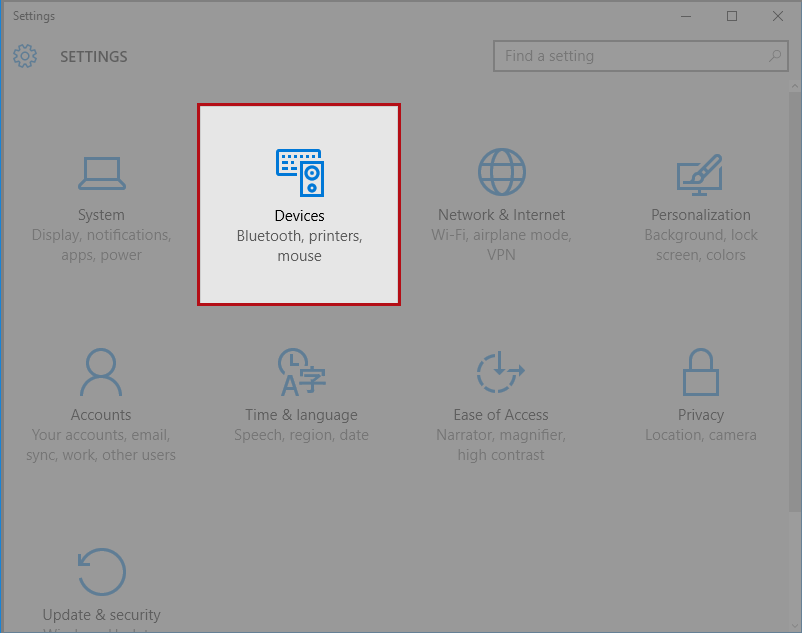
Step 1: Click Windows icon, in your system.

Step 2: Now, from the menu that pops up, select Settings option
Step 3:Select Devices (Bluetooth, printers, mouse) options from the Settings menu.
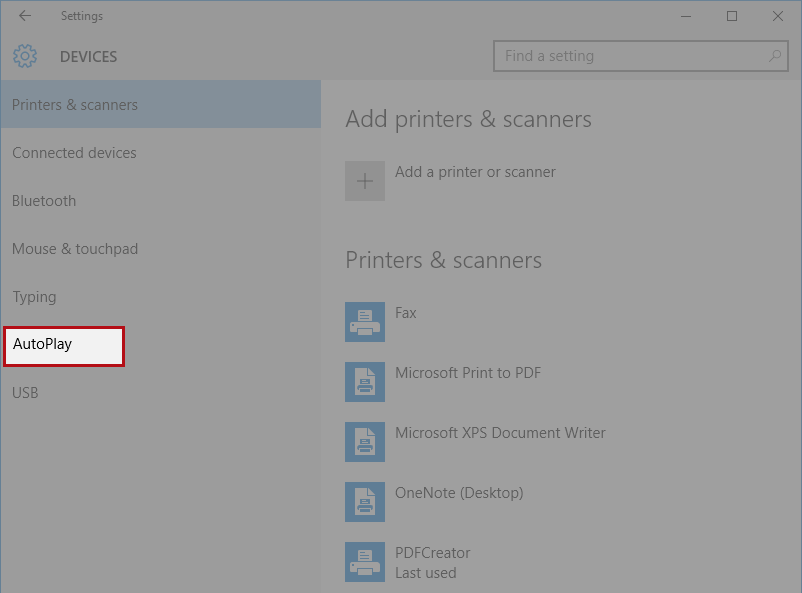
Step 4: Select AutoPlay from the left side pane.
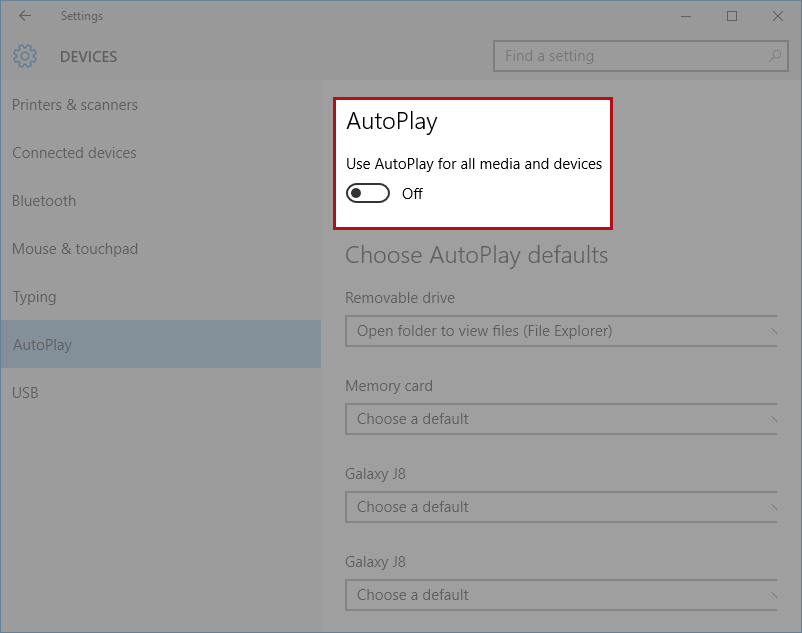
Step 5: Now, turn off the AutoPlay (Use AutoPlay for all media and devices) switch by clicking with your mouse.
Method 3: Disable AutoRun and AutoPlay at Group policy level
If you want to control AutoRun and AutoPlay settings, you can do it with Group Policy editor. Before executing the step-by-step guide, ensure you have logged in to the Windows 10 system as an Administrator for accessing Group Policy editor.
Step 1: Open Windows Start menu and type gpedit to open Local Group Policy Editor.
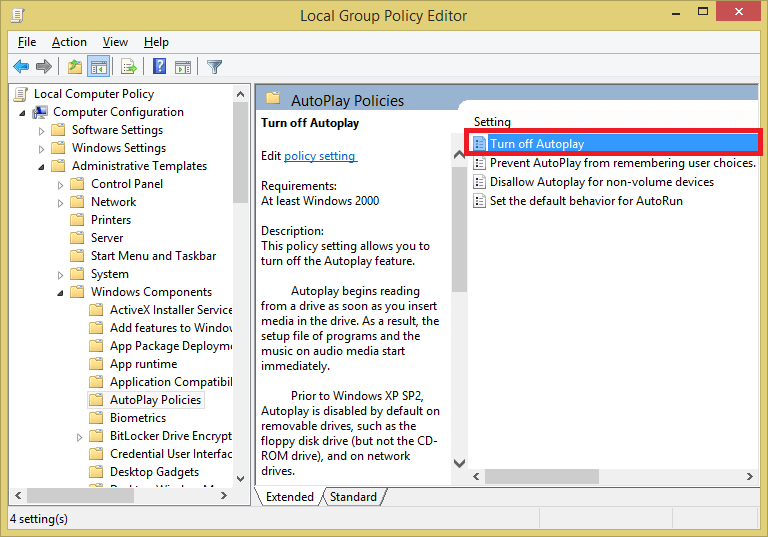
Step 2: Under Computer Configuration, click Administrative Templates >> Windows Components >> AutoPlay Policies.
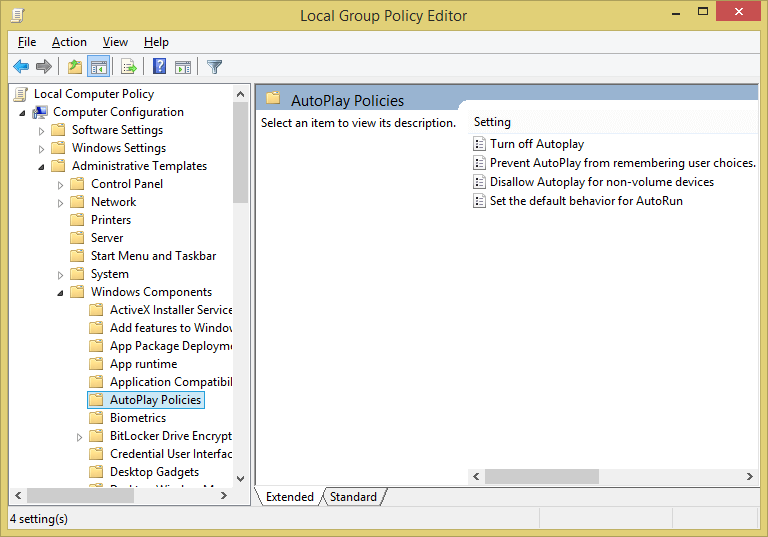
Step 3: Double-click on Turn off AutoPlay under the Settings tab.
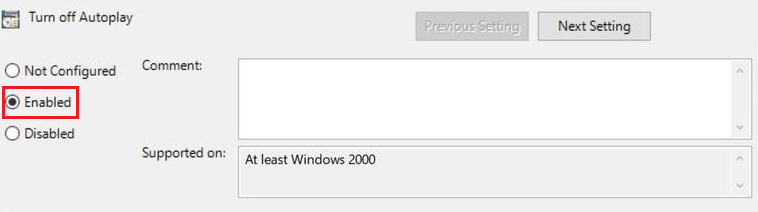
Step 4: Select the “Enabled” option under Turn Off AutoPlay.
Now, the annoying AutoPlay will no more disturb you when you attach an external device to your computer.
Recover damaged or corrupted Windows data using an automated solution
When AutoRun is enabled, malware or malicious programs can be installed automatically on your system, causing severe damage to your Windows system. In such cases, the above-mentioned methods will not resolve your problem. But, they can help prevent disasters from happening. Suppose you are already facing Windows data loss problems. In that case, we highly recommend using a third-party tool, and the best one suggested by IT professionals is Kernel for Windows Data Recovery.
Concluding Words
Windows 10 systems enabled with AutoPlay or AutoRun feature are vulnerable to malware attacks that cause data losses and corruption if a USB drive containing a malicious program is inserted into your computer (even if it is locked). So, always turn off the default Windows AutoPlay settings to keep your computer and crucial data safe and secure.