Summary: Are you also searching for legitimate ways to export your offline Global Address List from OPutlook? Then, this article will help you to export your GAL in its original hierarchy. We have covered all the essential methods to export your GAL files. You can also opt for Kernel Exchange Backup and Restore tool to migrate your data with ease
It is easy for Outlook users to export their contacts to Outlook PST files or CSV files. But what about Global Address List? This also can be exported, but with a slightly different procedure.
Global Address contains an offline address book of Active Directory services. Office 365 users need to migrate their Global address for a backup of their Active Directory services files. But exporting Global Address list is a challenging task. In this article, we will cover all the essential methods to migrate your GAL from Outlook.
Exchange Global Address List can be exported to CSV file format as a backup, for offline use, and for sharing with others, but the process is not as direct as using the Import/Export feature to export Outlook 2016 contacts to CSV file. Exchange administrators require a different approach, including using Contact Group or creating new Contacts folders to move GAL contacts to the default Contacts folder and then exporting them using the Import/Export feature. In this blog, we will go through both processes one by one.
Exporting Offline Global Address List (GAL) from Outlook
Two ways are using which you can export your Exchange Server offline Global Address List (GAL) from Outlook to CSV file format, which we are going to discuss in detail with the sequential process.
Open the People (Contacts) section in your Outlook application.
Click on the Home menu, then select Contact Group from the drop-down list of the New Contact section.
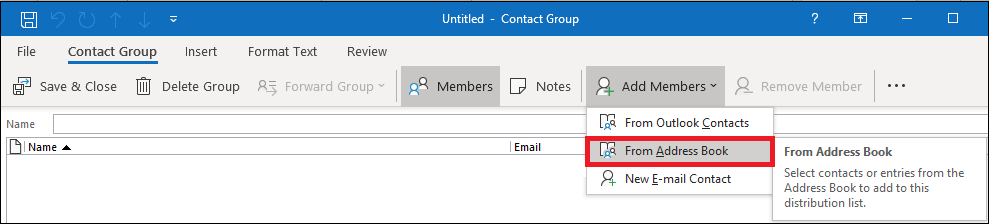
A new window with the Contact Group name will open. Here, click on the Add Members section and then select From Address Book.
In the next window, select the desired Global Address List from the drop-down of the Address Book section to list the contacts within it. Use Shift, Ctrl, and arrow keys to select desired contacts in the list. Click the Members option at the bottom, check the selected contacts and then click OK.
Next, follow File > Save as in the Contact Group window.
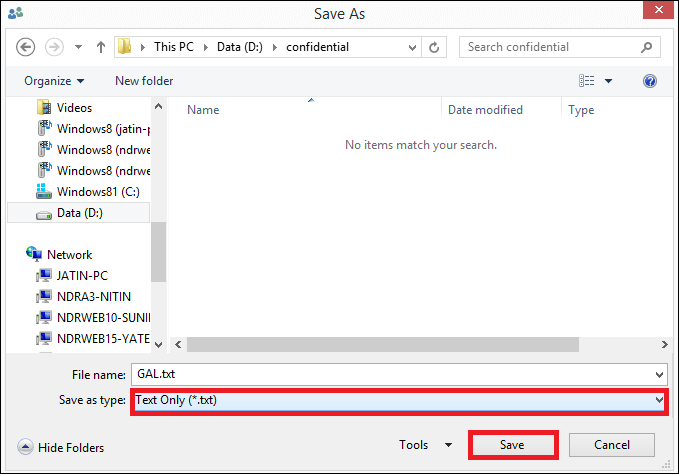
Browse and select the destination folder, add a file name, and select Text only (.txt) from the Save as type section and click on the Save option.
A Text file will be created. Open the file, copy, and paste its content to the Excel workbook.
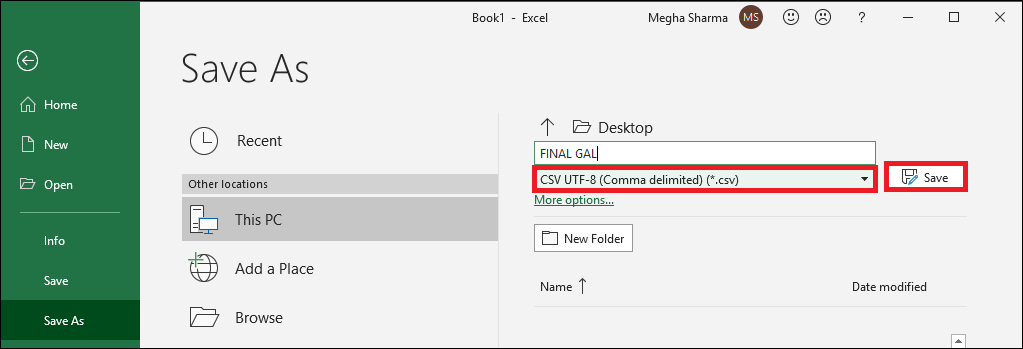
Now, follow File > Save as in the Excel workbook, browse a new saving location along with a new file name and select the Save as type for the file as CSV (Comma delimited) (*.csv). Finally, click Save.
The Global Address List from Outlook is successfully exported to the CSV file format.
Use the Import/Export Feature in Outlook
Open the Outlook application and navigate to the People (Contacts) view.
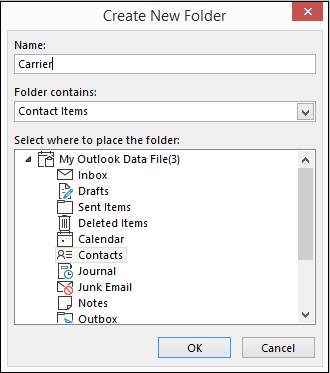
Right-click on the default Contacts folder from the left panel, and follow New Folder > Add a name to the folder (say Carrier), and click OK. Similarly, create another Contacts folder (say GAL) for GAL.
Now, select all the contacts (with Ctrl + A) from the default folder, and drag them all to the new folder created in the first place.
Now, from the Home menu, click the Address Book option from the right corner, and in the newly opened window, select the desired GAL under the Address Book section to list out its contacts.
Select all the listed contacts, right-click and then select Add to Contacts option. The contacts from the selected GAL are now added to the default Contacts folder.
Next, you need to select all the contacts from the default Contacts folder and move them to the second folder created for GAL using the drag-drop action.
Now, we can export this GAL folder to the CSV file format using the Import/Export feature in Outlook easily.
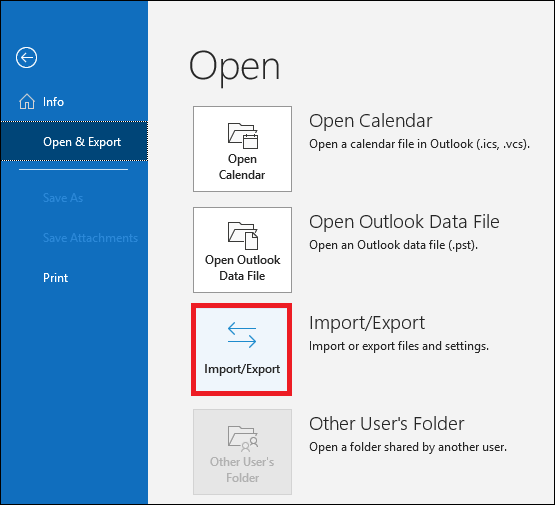
In the Outlook application, go to File > Open & Export > Import/Export.
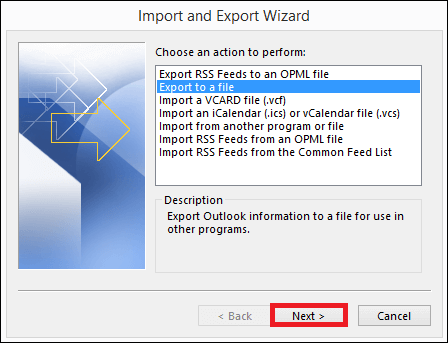
In the Import and Export wizard, select Export to a file and click Next.
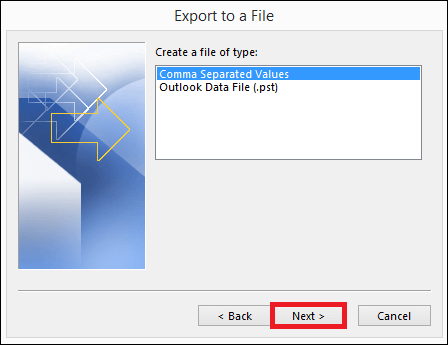
In the Export to a file wizard, select Comma Separated Values and click Next.
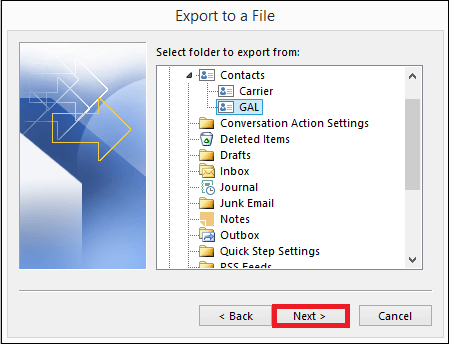
Next, under the Contacts section, select the GAL folder and click Next.
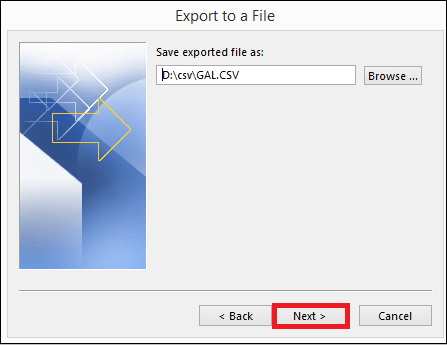
Click the Browse option to provide the destination and name for the file to be exported. Click Next to continue.
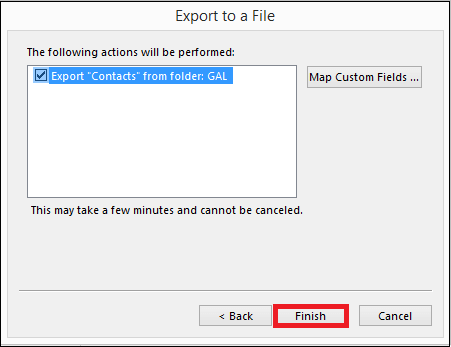
Click Finish in the next wizard.
Now, the GAL contacts along with the default contacts, are exported to the CSV file format successfully.
Now, you can move contacts saved in the 3rd or step C to their original location (default Contacts folder) using the drag/drop action and then delete the created one (Carrier).
Conclusion
Exporting an offline Global Address List is a crucial task, and users are not able to do this. But with this step-by-step guide, you can do it with ease. However, for quick and secure backup of Exchange Server Global Address Lists, you can try the professional solution known as Kernel Exchange Backup & Restore, standalone software for the backup of complete Exchange data to PST files and also restore of PST files to Exchange. The tool is easy to use and delivers outstanding performance. Get your hands on the tool with the trial version.