Read time: 4 minutes

SharePoint Server 2013 version’s mainstream support ended on April 10, 2018, and now it is running on extended support. It means the businesses need to pay for technical help, security, and maintenance of their SharePoint data that was available without any extra payment. Considering these factors, most organizations are looking to migrate from SharePoint 2013 to newer versions.

SharePoint 2016 to SharePoint 2019 Migration

The extended support will end on April 11, 2023, and after that, Microsoft will no longer provide any free assistance to you. The easiest option will be to upgrade to newer versions like 2016 and 2019. Most businesses would like to migrate directly to 2019, but it is not possible. This is because there is no direct method (in-place upgrade) available to upgrade SharePoint 2013 to 2019.

As there is no option for double hop migration in SharePoint, you may migrate to 2019 via SharePoint Server 2016. This method is known as the database attachment method. First, you migrate from SharePoint 2013 to 2016 and then upgrade from 2016 to SharePoint 2019. Note that the SharePoint database should be 2016 RTM or the higher versions. Any database with a lower RTM version will not migrate. SharePoint will lock it and decline to upgrade.
So, the SharePoint Migration will complete in three steps-

Steps in SharePoint Server 2013
  1. The Web applications present in SharePoint 2013 will have Windows authentication turned on. You need to change the mode to claims authentication. Actually, the SharePoint Server 2016 and 2019 only support claim authentication, so you must change it here in SharePoint 2013.
  2. Upgrade the entire site collections from 14 modes to 15. Then run the following cmdlet-
  3. Upgrade-SPSite https://site-name/sites/user-site-name

    The cmdlet will activate the upgrade process for the selected site collection. You can upgrade all the site collections you want to take to SharePoint 2016.

  4. When you have upgraded all the site collections, then you require to take the backup of sites and service application databases. Later, when you have installed SharePoint 2016, you can restore the data from the SharePoint 2013 backup to the new SharePoint farm.
Steps in SharePoint Server 2016
  1. Create a temporary farm with service applications and start a new web application in a temporary database. SharePoint 2016 will be a temporary bridge between SharePoint 2013 and 2019. Here, you should create a new farm and include the service applications by restoring the backup file from SharePoint 2013. After restoring data into a web application and installing the full trust solutions InfoPath forms, you can dismount the temporary database and start the upgrade process.
  2. To upgrade to SharePoint Server 2016, run the following cmdlet-
  3. Mount-SPContentDatabase “DatabaseName” -DatabaseServer “SharePointServerName” -WebApplication https://sitename
Steps in SharePoint Server 2019

The upgrade from SharePoint Server 2016 to SharePoint 2019 is like the upgrade from SharePoint Server 2013 to SharePoint 2016. But here, you do not require to switch the web applications to claims authentication mode.

  1. You must create a backup of data and service application databases from SharePoint Server 2016 and restore the data to a new farm in SharePoint 2019.
  2. After establishing SharePoint Server 2019, you can create a new farm web application in a temporary database.
  3. Install the InfoPath forms, full trust solutions, and other necessary parts of SharePoint.
  4. Dismount the temporary database and run the Mount-SPContentDatabase cmdlet to upgrade to SharePoint Server 2019.
  5. After upgrading to SharePoint Server 2019, you can discontinue SharePoint Server 2013.

Limitations of the Database Attachment Method

The database attachment method described here has many limitations, though it is a Microsoft-recommended method.

  1. Cleansing of data
    There is a constant requirement for cleaning the data from two sources (SharePoint 2013 and SharePoint 2016). Also, it asks to create temporary databases and web applications. It increases the chances of accidental deletion or faulty migration. It cannot move the selected data too. So, if you want to import excel to SharePoint list, then it will be tough to use the manual upgrade process.
  2. Outdated features
    Many outdated features in SharePoint 2013 are no longer required in SharePoint 2019. So, you should check for settings related to them before running the upgrade process.
  3. Migration costs
    The administrator should weigh the migration cost before upgrading SharePoint 2013 to 2019, as the business should purchase the license of SharePoint Server 2019 too. If you are taking help from experts or consultants, you will have to pay them.

Conclusion

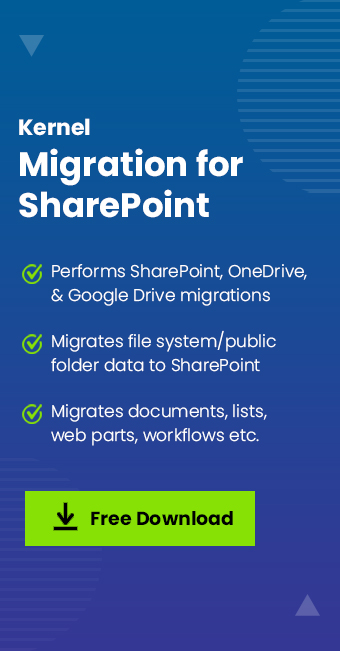
The steps mentioned above to upgrade SharePoint 2013 to 2019 are not easy for a business as they will be expensive and time-consuming. It may take many days to complete, and each step is susceptible to data deletion or unwanted changes. Also, it cannot move subsites to another site in SharePoint. So, its only an upgrade in versions of SharePoint. You should use Kernel Migration for SharePoint software and run an automated migration. This is the only way for direct SharePoint 2013 to SharePoint 2016 migration.

The software supports all versions of SharePoint, and there are no chances of data loss. It can migrate from SharePoint 2013 to 2019 directly, and it will be a simple procedure. You can select the entire site collection, large lists & libraries, and specific documents for the migration.

Kernel Migrator for SharePoint