Read time 9 minutes
Virtual Machine is popular among businesses today due to benefits like easy maintenance, facility for multiple operating systems, independency from the physical systems, and more. It stores its Virtual Machine data in the Virtual Hard Disk files safely. However, this data is also vulnerable to risks of corruption and data loss. Sometimes, it is the fault of the user, while sometimes it is undesirable activities that lead to the loss of data from the Virtual Machine. Most of the time, corruption creates difficulty in loading the Virtual Machine database file.
In all these situations, the data needs to be recovered if it is crucial for the business. We would be discussing the useful ways to recover lost data from Virtual Machines. Before that, let us know the potential reasons for the data loss from the Virtual Machine.
We can consider the following reasons as responsible for the loss of data from Virtual Machine.
The most popular file formats of Virtual Machines – VHD and VMDK files – are prone to corruption and other issues, which leads to data loss eventually. VHD file stands for Virtual Hard Disk file that clones the data of a physical hard drive like files and folders inside disk volume partitions. A VMDK file stands for Virtual Machine Disk file. It is the container of Virtual Hard Disk drives used by virtual machines like VMware Workstation and VirtualBox.
Manually, you can restore the lost data from the Virtual Machine easily via its web console if you have a valid updated backup along with you, but if there is no backup, you need to go for the other recovery solutions.
Whenever a file is deleted from the Virtual Machine, it is no longer available for use but available for recovery unless its sectors are not overwritten with the new information. You can adopt the following manual process to recover lost data from the Virtual Machine.
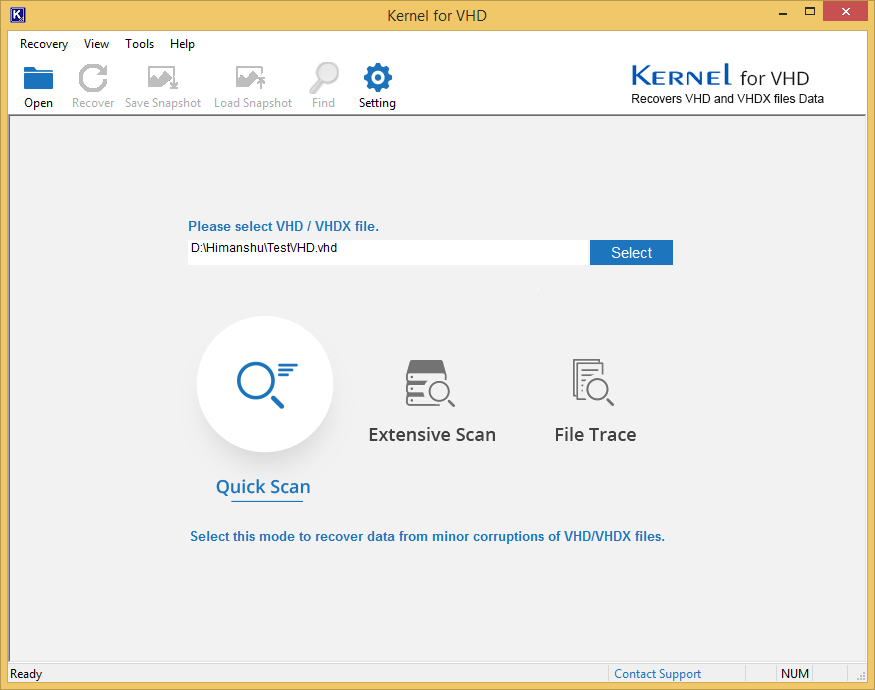
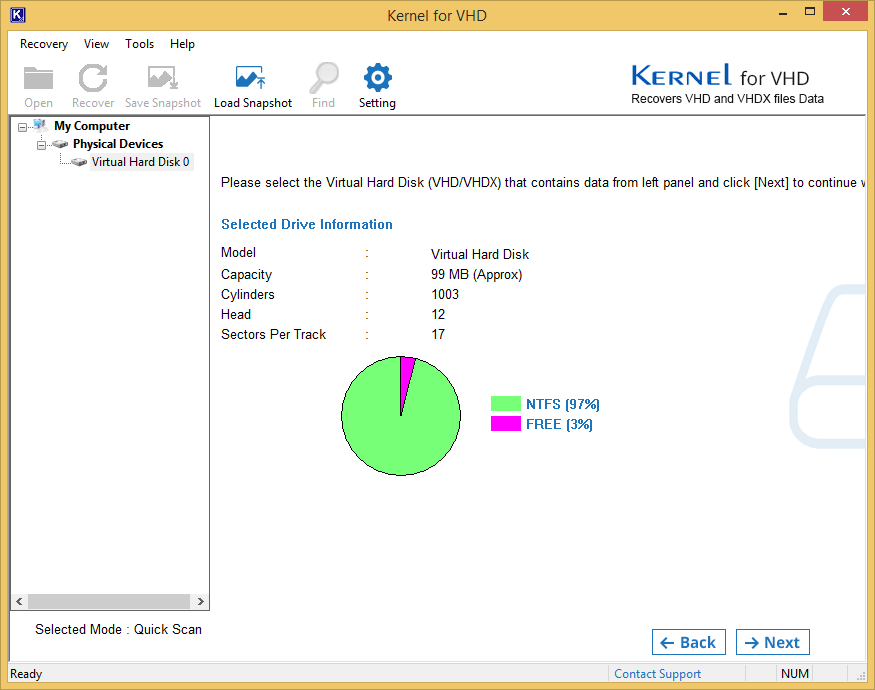
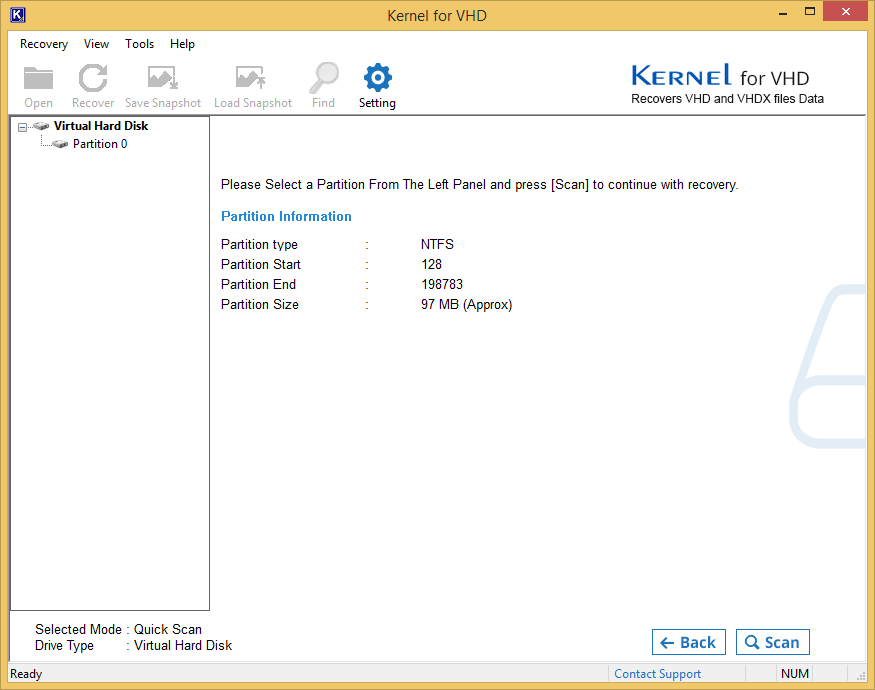
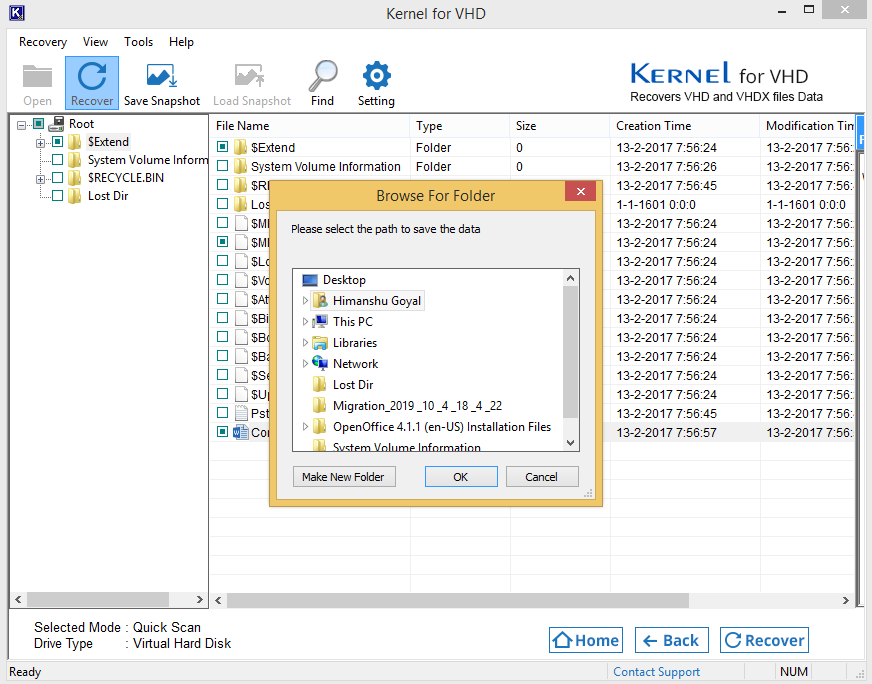
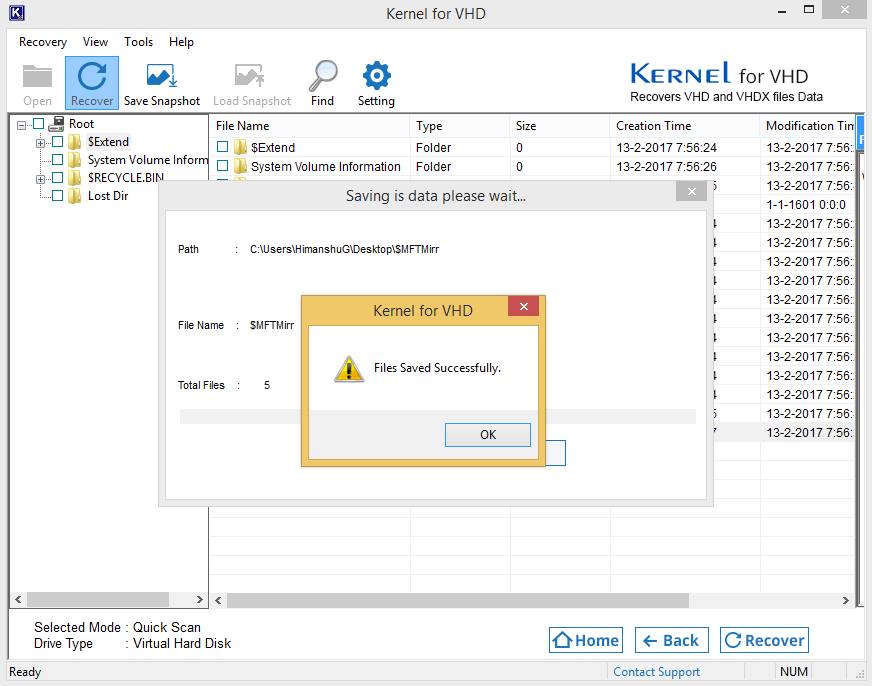
The above manual method to recover lost data from the Virtual Machine is feasible but unreliable. There is no confirmation that the lost data would be retrieved. So, you can give it a try if you have time; otherwise, you can go for an easy and reliable solution for the recovery of lost data from your Virtual Machine. For recovering data from VHD files, you can try Kernel for VHD Recovery. The tool recovers complete data from the corrupted VHD/VHDX file partitions and saves it to the desired system drive location. Let us understand it better with its working steps. You need to download and install the Kernel for VHD Recovery tool on your system first and then run the following procedure stepwise.
Also, we describe a professional solution to recover data from VMDK files.
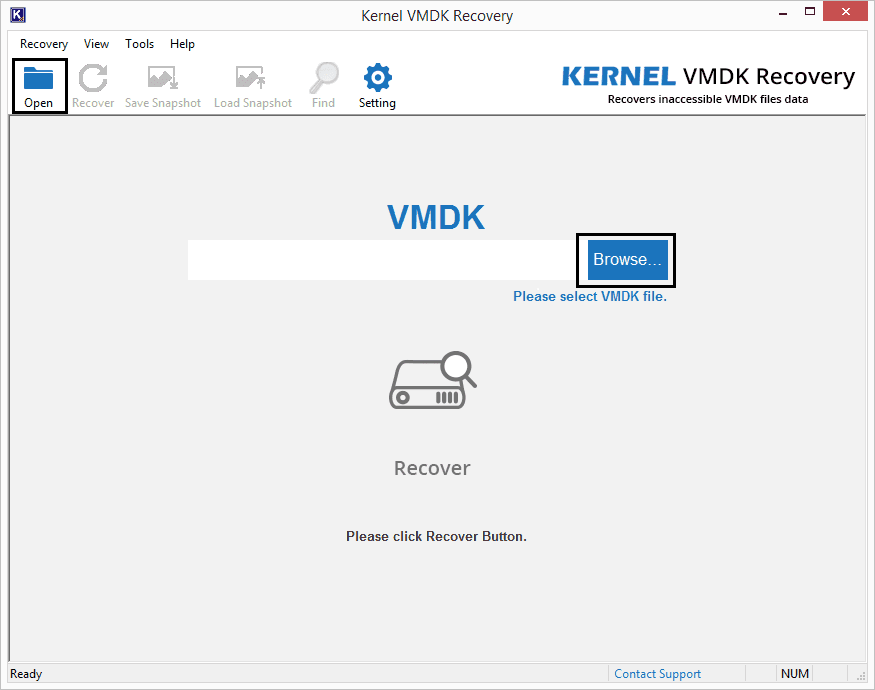
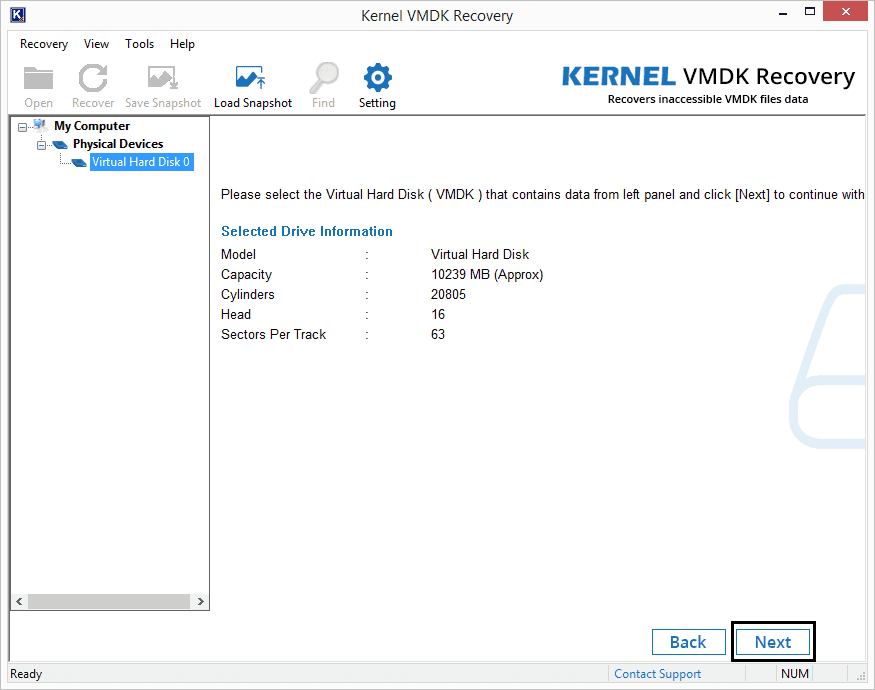
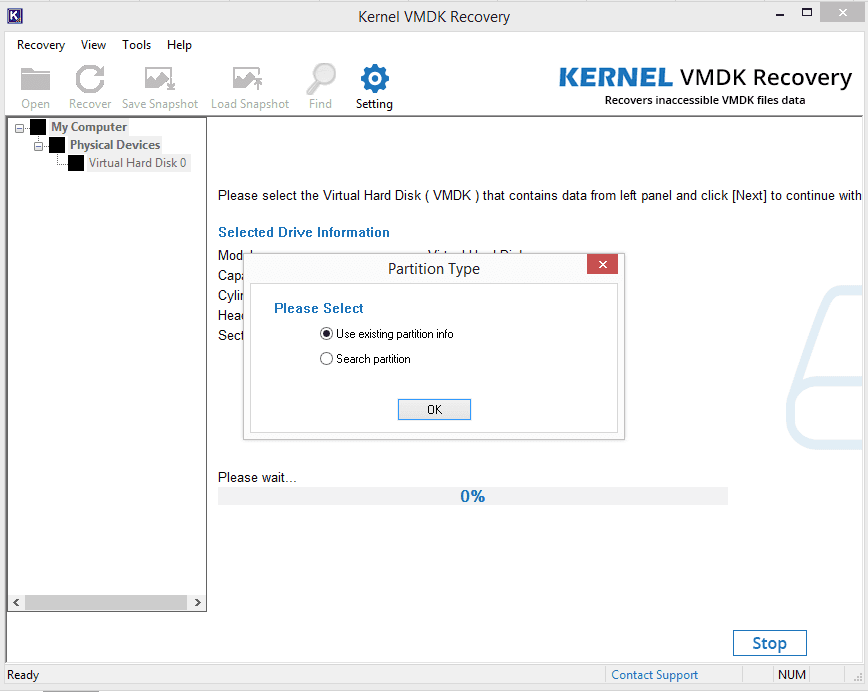
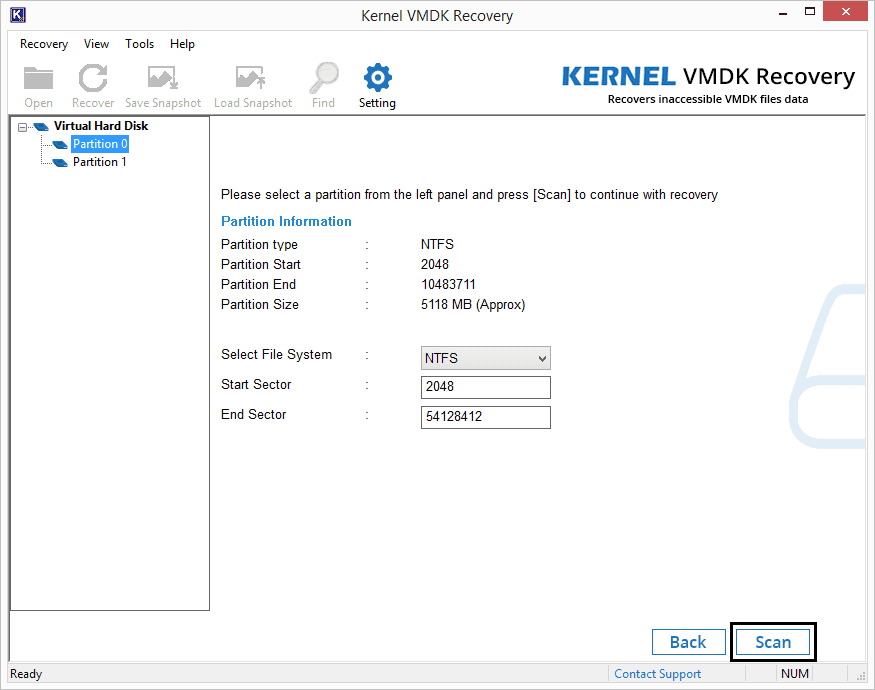
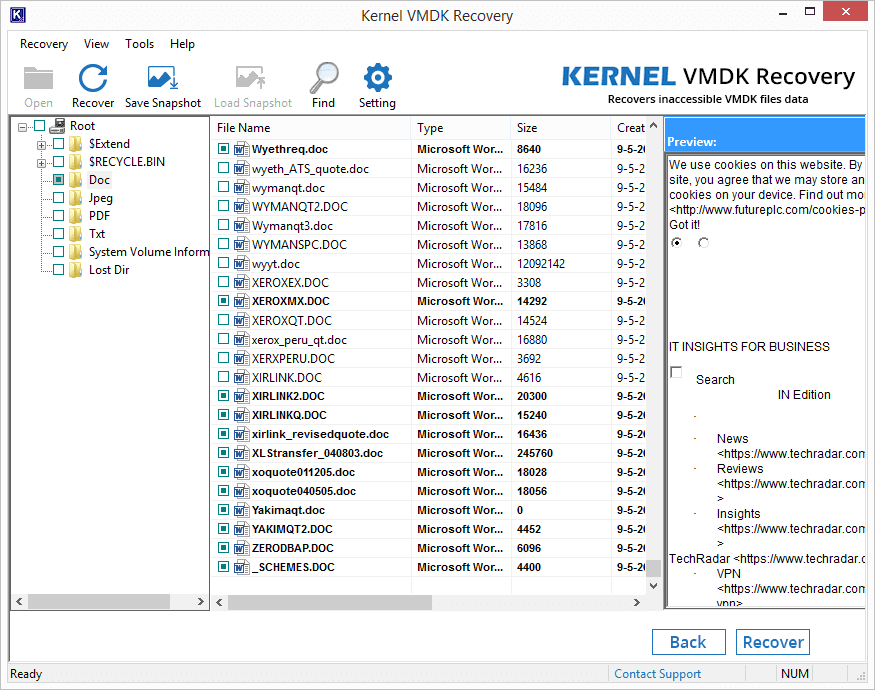
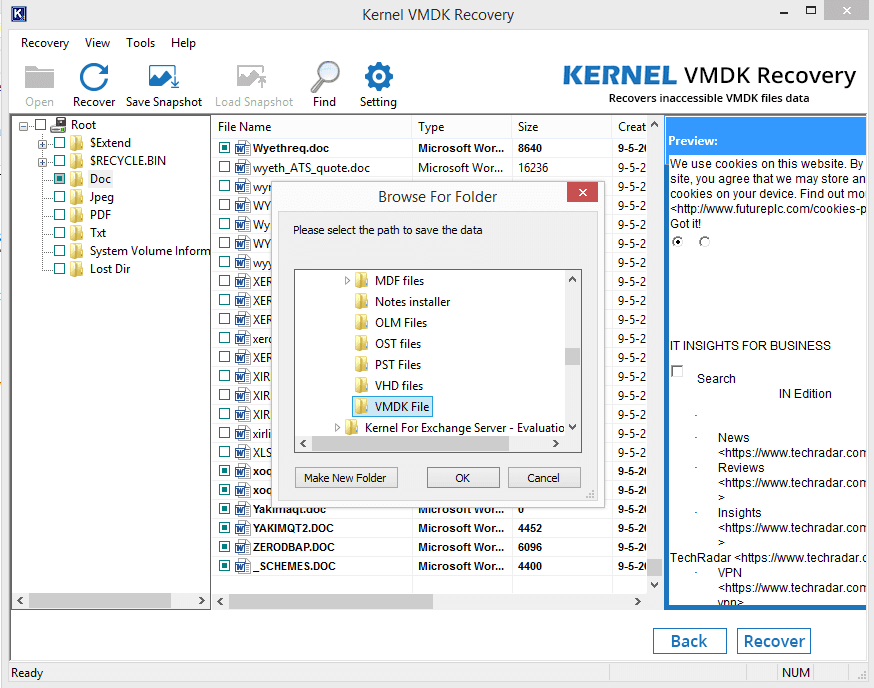
Kernel VMDK Recovery tool is a helpful utility to recover all types of lost data from VMDK files easily. It thoroughly scans the VMDK file partitions and retrieves data. Here is the complete explanation of the software functioning with the working steps.
First, visit the official website of the Kernel VMDK Recovery tool and then download the free version of the tool. Install it on your system, get ready with your VMDK file, and then follow the given instructions.
Now, we can list the features of the Kernel VMDK Recovery tool.
Partitions Recovery: Recovers lost from corrupted VMDK file partitions.
Information about the drive: Displays complete details about the Virtual Hard Disk drive and partition.
Exclusive Preview: Detailed preview of the retrieved VMDK file items.
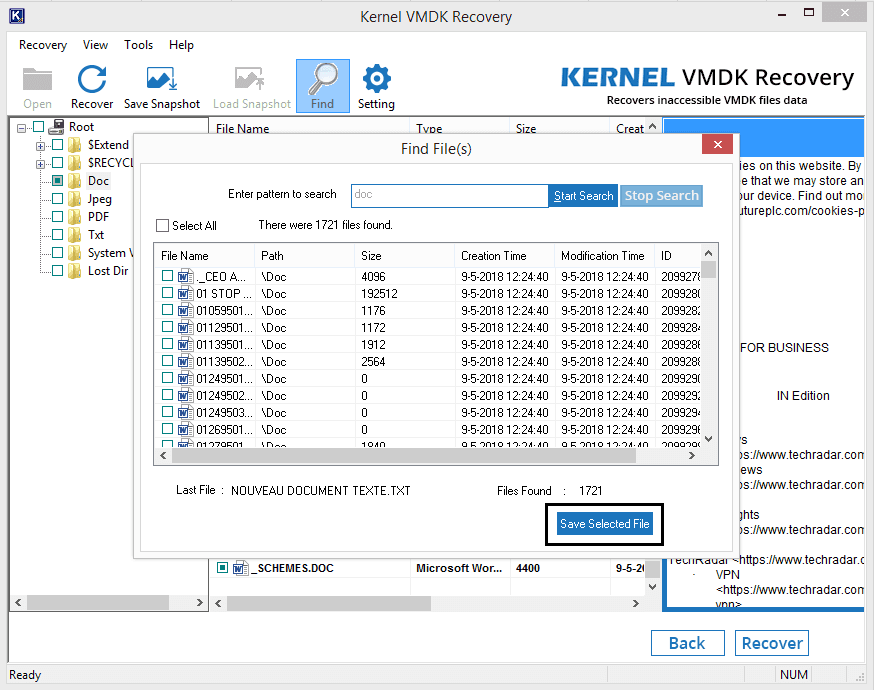
Find Filter: A filter option to search for files.
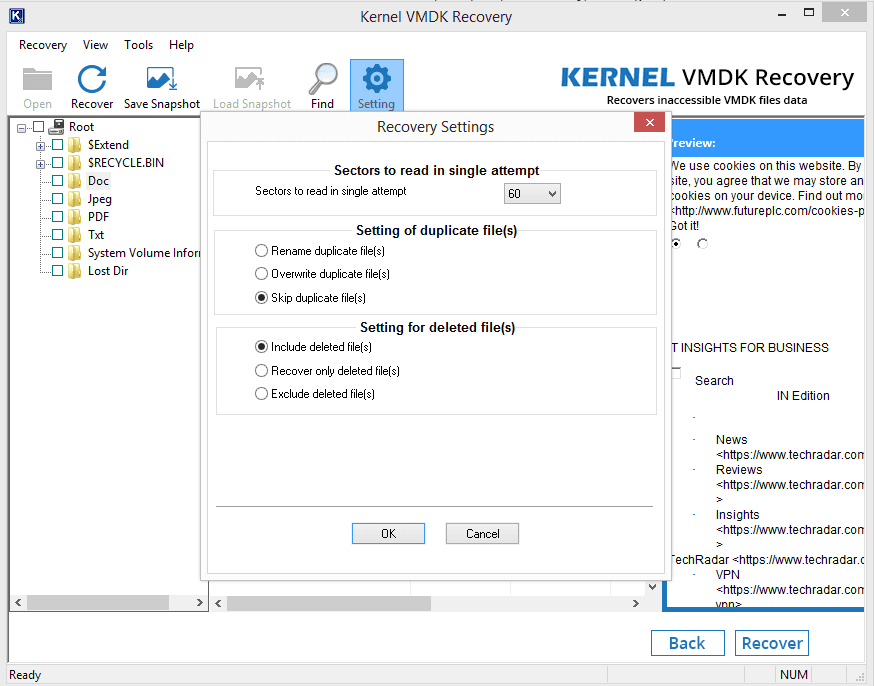
Recovery Settings: Multiple recovery settings – Sectors to read and desired actions on duplicate and deleted file items.
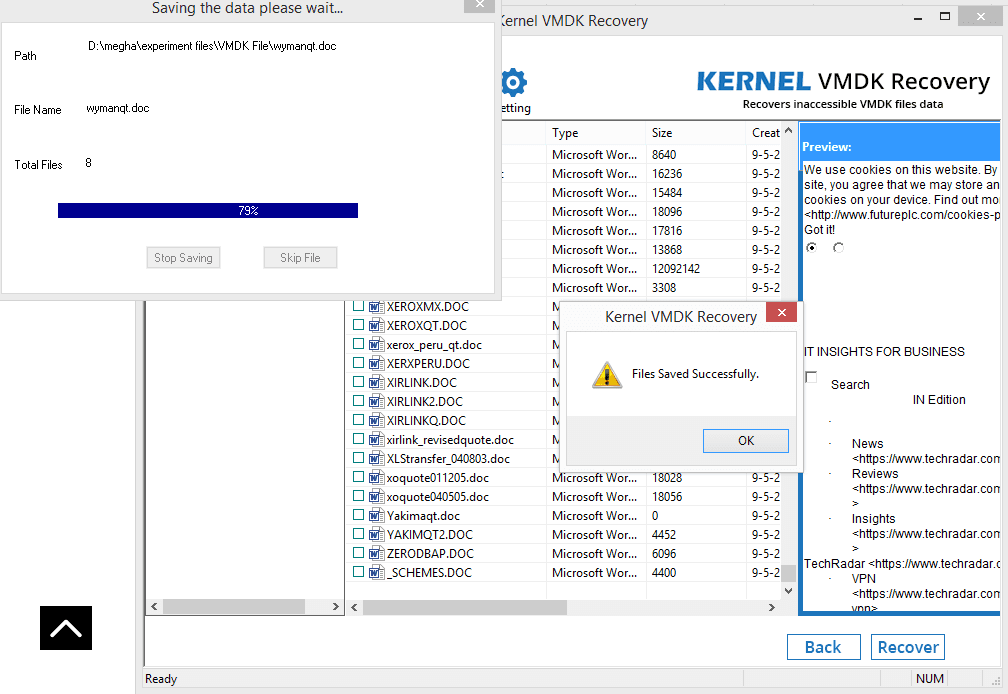
Saving Convenience: Easy saving of selected files to the desired location and an added option to create a new folder for saving.
Get the tool quickly if you want to recover lost data from your Virtual Machine without any extra effort.
Keep your Virtual Machine data secure with regular backups and avoid any tension in the future. For already affected users, there are two solutions – free methods to repair corrupt and damaged VMDK file and automated recovery solutions like the Kernel VMDK Recovery.


Kernel VMDK Recovery tool really helped me to recover lost data from corrupted VHD.