Read time: 7 minutes
Summary: Whitelisting a domain in Office 365 allows users to enable emails from trusted domains to bypass junk filters of Microsoft Outlook. This can be done using Mail Flow rules from Exchange Admin Center, anti-spam policies in Microsoft Defender, or by setting up the Safe Sender list.
Due to the advanced spam filtering feature of Office 365, even legitimate emails get sent to the junk folder. This can cause serious problems, especially when emails carry important information. Hence, whether you’re working with the Business Premium of Microsoft or using a free version, you must know how to Whitelist a domain in Office 365. Use the efficient ways as explained ahead like Mail Flow rule and Defender Allow List to Whitelist domain in Office 365.
What Does Whitelisting a Domain in Office 365 Mean?
Whitelist is an allowed list of email addresses, IP addresses, domain names, or applications using a cybersecurity strategy. It safeguards our system from harmful threats that can disrupt local networks or the internet. It is created using a strict policy set and access permission by the IT admin.
Often, emails from an important client or partner get landed in the spam folder because, due to some applied filters or unintentional mistakes, they get blacklisted, which mark some domain emails as spam. Another reason emails get spam is that they can be sent from unknown sources, that leads to neglecting the SPF or DMARC check. Therefore, to avoid such a mistake, you need to add a specific domain and all email addresses based on it to the whitelist.
Exchange Online’s Whitelist Is An Exception To The Security Configuration That Was Put In Place And Was Defeated By The Program’s Anti-Spam Mechanisms.
What’s the Need to Whitelist a Domain in Office 365?
There are instances in Office 365 where you might want to whitelist emails:
- Whitelist the whole domain in Exchange Online to bypass spam filtering for your customer or partner. By mistake, blacklists or filters classify emails from this domain as spam (false-positive). In this situation, you can add a certain domain and any associated email addresses to the whitelisted exceptions.
- Multiple online services that send emails on your behalf, such as Mailchimp, ConverKit, GetResponse, ActiveCampaign, and others, should be whitelisted in Exchange Online. These services send emails to your readers or clients using your email account. Due to the fact that these services are utilizing your email address while sending you emails, they can be identified as a potential danger. To ensure that emails from Mailchimp and other email providers do not end up in your Junk folder, you must add them to your whitelist.
Whitelist vs Safe Sender List: Difference Between the Two
| Features | Whitelisting a domain | Safe Sender list |
|---|---|---|
| Control provided | Admin-managed process | User-managed process |
| Scope of protection | Organization wide protection | Individual user level protection |
| What is it used for | Used for trusted business domains | Used for personal contacts |
| Implementation | Implemented on client, server, gateway rules | Implemented on email client settings like Outlook, Gmail, etc. |
How to Whitelist a Domain using Mail Flow Rules in Microsoft 365
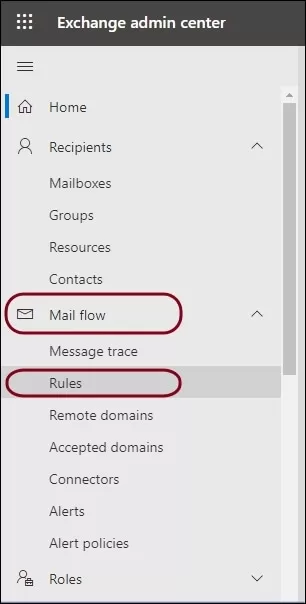
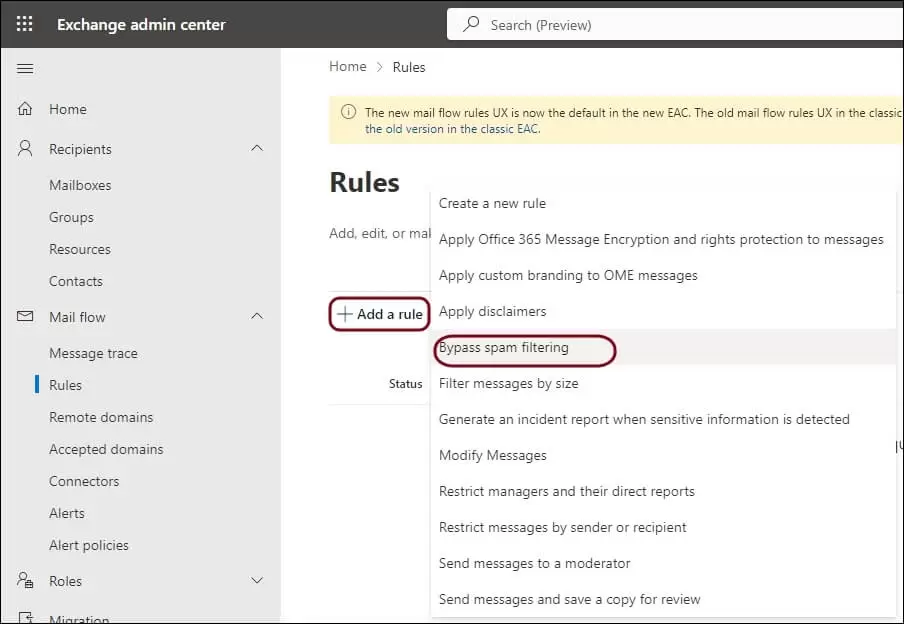
- Go to the Exchange Admin Center and expand Mail Flow.
- Now select Rules and click on the plus icon
- Here, choose Bypass Spam Filtering.
- Now enter the name for the rule, and Under Apply this rule if select Sender, and in the next column, choose Domain is from the drop-down list.
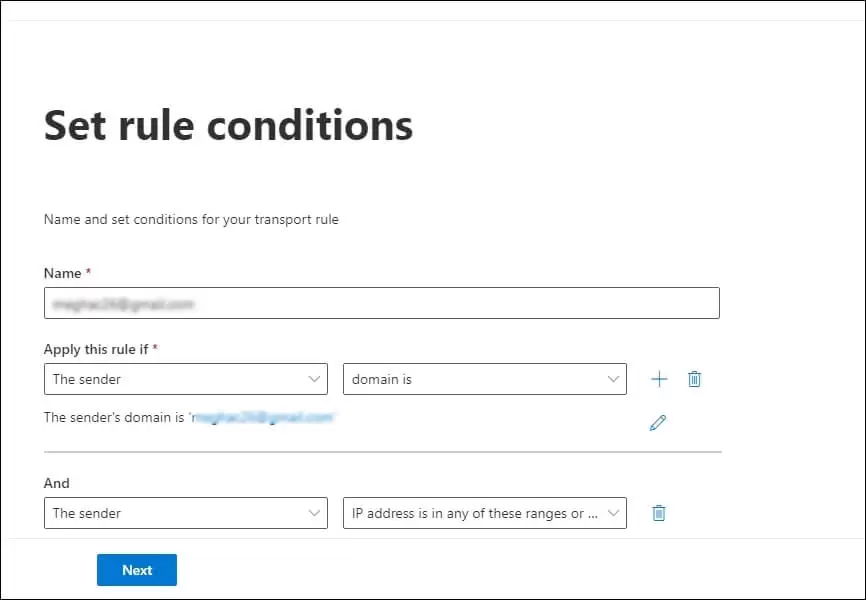
- Here user can also opt for some additional conditions-
If the user wants to filter the emails based on Words in the Subject, they can go for this-
The Subject or Body and next Subject include any of these words
If a user wants to prevent spoofing of an allowed domain, they can go for this
A Message header and next includes any of these words.
Now under “Enter text” and dmarc=pass under “Enter words….” Add Authentication-Results
- Now go to the Add Action and select Set a message header
Here put the header to X-ETR and the value to Bypass spam filtering for the Domain.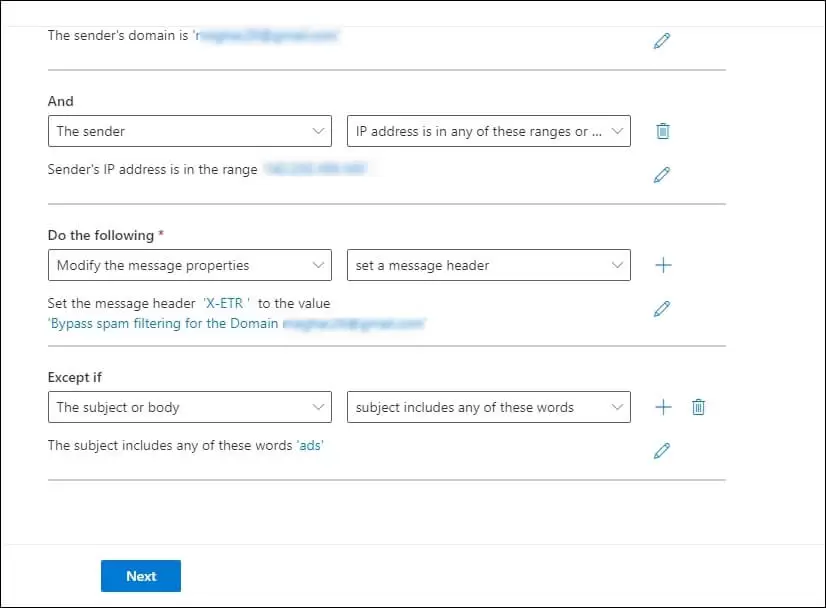
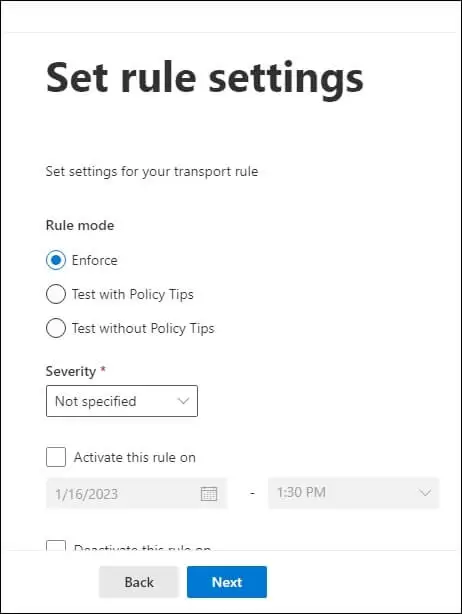
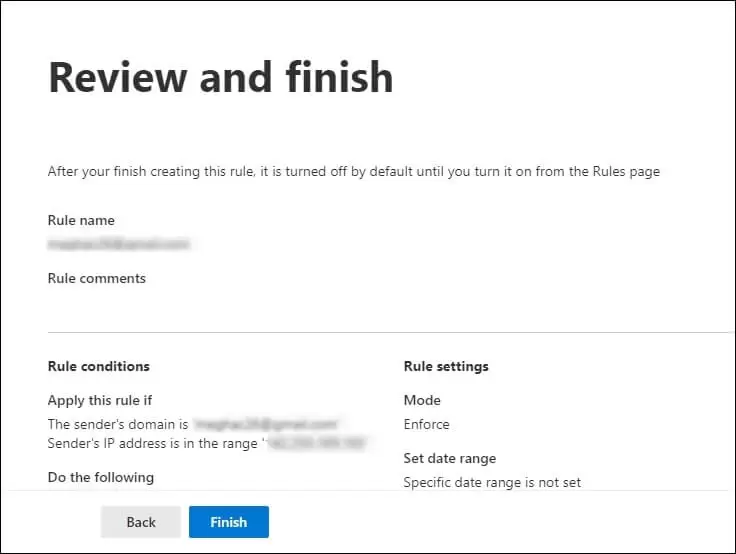
- Set the Rule Setting and click on the Next button
- Finally, Review and Finish.
Whitelist Domain Using Microsoft 365 Defender
Here we will use the Microsoft 365 Defender, where Domain will bypass spam protection and sender authentication to whitelist a domain-
- In Microsoft 365 Defender, go to the Policies & Rules
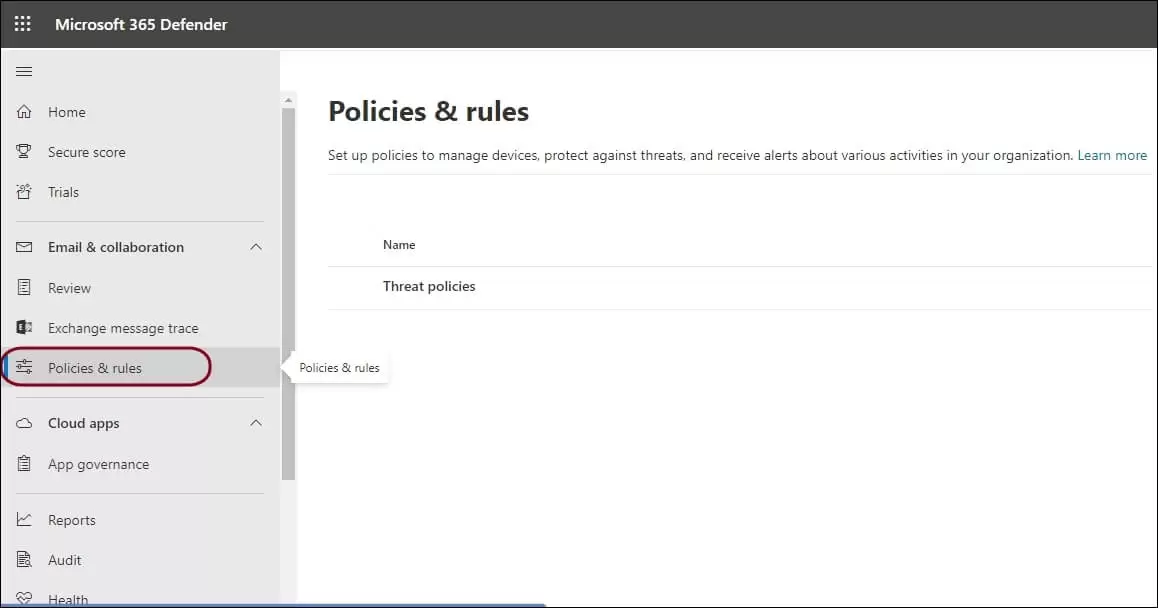
- Now select Threat Policies and Open the Anti-Spam Policies

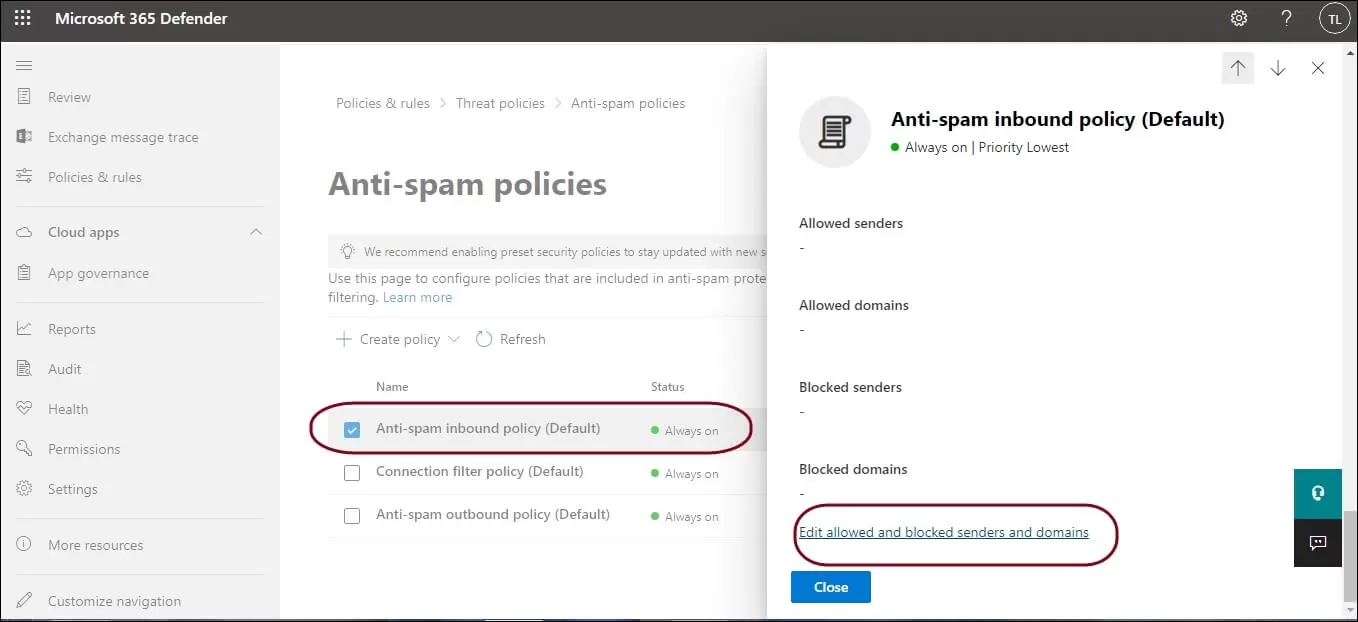
- Select the Anti-spam inbound policy
- Now, scroll down and click on Edit allowed and blocked senders and domains
- Now click on Allow domains and add the domains
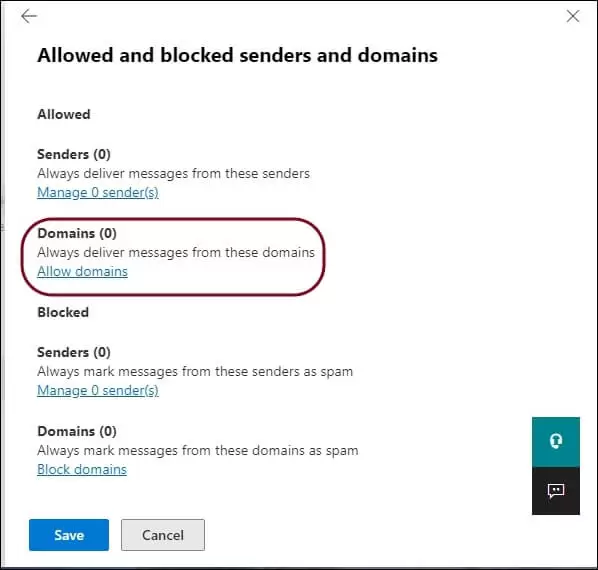
- Click on the Save button to save the changes.
Whitelisting a domain is a good idea to avoid your important messages getting spammed. But sometimes, even after using this, the messages used get spam, and we don’t get aware of this, so the best way to keep your important data intact with yourself by having a backup copy of those files.
To backup your email messages and attachment, we recommend going for a professional Office 365 Backup tool, i.e., Kernel Office 365 Backup & Restore. It’s used backup an entire mailbox; one can use the free trial version to understand its usage.
Summing Up
It’s essential to whitelist a domain in Office 365 so that you don’t miss the important emails that might have moved to the junk folder. The easiest way to do so is by setting up Mail Flow rules in Exchange Admin Center that define which email should go in which folder. Another way is by applying the Anti-spam and Threat policies in Microsoft Defender for Office 365. Make sure to take a backup of your data before proceeding using a reliable backup tool to keep your data protected.
People Also Ask
A. Whitelisting is the process of enabling emails to avoid spam filters so that emails can be sent to Inbox instead of Spam folder.
A. Typically, the changes take effect in a few minutes and can be tested by users; however, due to some policies it may take longer for the changes to reflect.
A. Only whitelist the domains that you’re completely sure they’re from a known sender and are completely safe. Mail Flow rules and Safe Sender list are the safest options to do this.