Read time 7 minutes
The MBOX file format enjoys widespread popularity and finds utility in numerous desktop email clients such as Mozilla Thunderbird, Eudora, Seamonkey, PocoMail, Apple Mail, and various others. These versatile MBOX files are compatible with major operating systems, including Windows, Mac, and UNIX, highlighting their extensive usability. MBOX comes in various variants, including mboxo, mboxcl, mboxcl2, and more, each tailored to specific email client needs within the diverse landscape of MBOX files. Nevertheless, the .mbox extension remains the most prevalent variant in contemporary usage.
In contrast, Microsoft’s Office 365 is a cloud-based storage solution offering a suite of robust online applications, accessible anytime and from anywhere. Its versatile features encompass email storage, contact management, task lists, and journaling capabilities. Additionally, Office 365 ensures data security by safeguarding against potential malware threats, protecting your valuable information.
Moving MBOX files to Office 365? Why?
A user of Outlook is typically aware that direct opening of an MBOX file is not possible. Furthermore, users are familiar with the common errors that may arise when attempting to access these files. Here are some examples:
- “The MBOX file is either non-existent or has been relocated.”
- Large MBOX Files
- Emails could not be loaded.
Because of these obstacles, users often become perplexed, leading to the need for converting these files into a more reliable service. This underscores the importance of transferring or importing MBOX Files to Office 365.
With this in mind, it’s important to acknowledge that there are essentially two approaches for importing MBOX files into Office 365: manual and automated.
Manual Method to Move MBOX Files to Office 365
- Launch the Thunderbird application and set up your Gmail account.
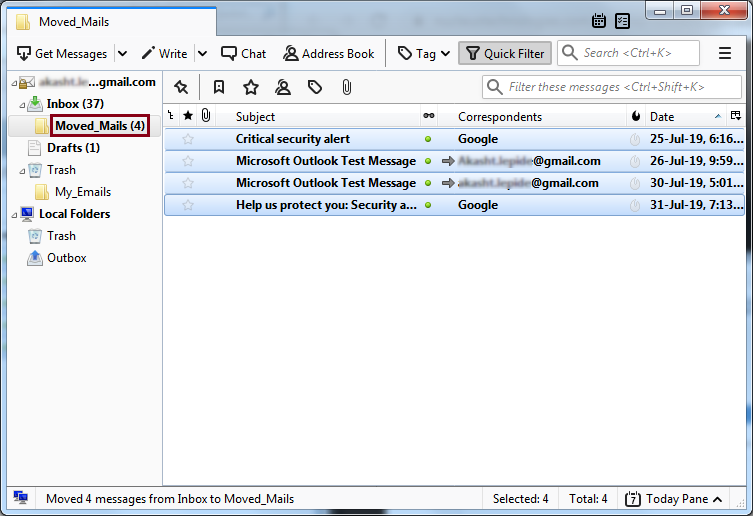
- Establish a fresh folder within Thunderbird to conveniently organize the emails you intend to access through Outlook.
- Choose the emails you’d like to access within your Outlook and transfer them to the newly created folder. (Please note: You can easily accomplish this by either dragging and dropping the emails into the new folder or utilizing the “Move to” feature.)
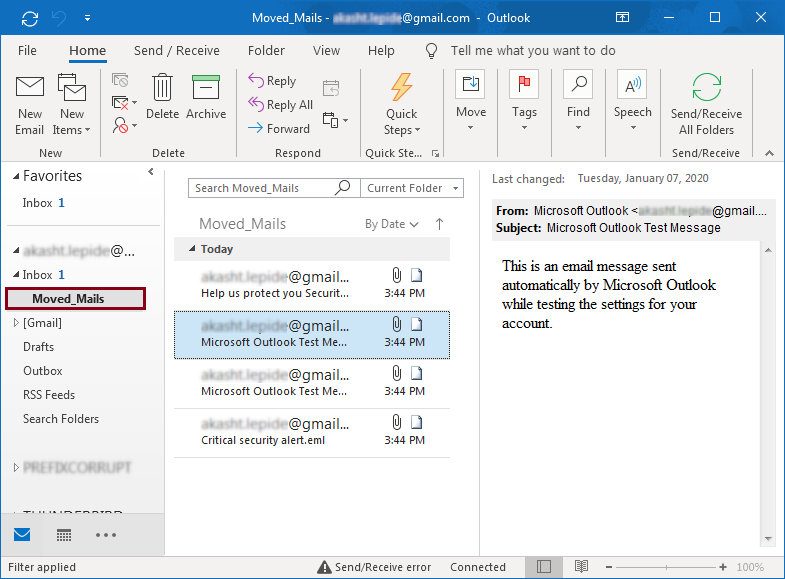
- Please launch Outlook and choose the emails you’d like to include in your Outlook.
- Drag the file into a fresh Outlook folder to enable viewing within that folder.

To utilize the manual method, please adhere to the steps outlined above. It’s important to note that this approach could be rather time-intensive. Hence, we recommend opting for the automated alternative, utilizing Kernel for MBOX to Office 365.
Using tool to convert MBOX to Office 365
We’ve explored the manual approach for converting MBOX files to Office 365, which can be effective for small-scale tasks. However, for handling substantial amounts of data involving numerous mailboxes, the manual drag-and-drop method becomes impractical. In such cases, a more automated solution is required, and Kernel offers a robust option with its Kernel for MBOX to Office 365 tool.
There are several compelling reasons why Kernel for MBOX to Office 365 becomes essential for you as a user. These reasons are outlined in the following details:
- The software possesses the ability to extract mailbox data from MBOX, MBS, and MBX files originating from 20 popular email clients such as Thunderbird, AppleMail, PocoMail, and more.
- Moreover, when utilizing this tool, you have the capability to seamlessly transfer both your emails and associated metadata to Office 365 while preserving their integrity. Furthermore, the software offers a filtering feature that allows you to organize your items before initiating the migration process. This enables you to refine your mailbox data based on specific criteria such as date ranges and sender information, among others.
- Once more, the Tool provides you with the capability to preview your entire mailbox data before exporting it to Office 365. Additionally, it assists in verifying the integrity of migrated items and facilitates selective migration.
With these features in consideration, it is imperative to grasp the operational mechanics of this tool. Consequently, the forthcoming section elucidates the procedures for utilizing Kernel for MBOX to Office 365:
Step -1: Install & Run Kernel for MBOX to Office 365 software
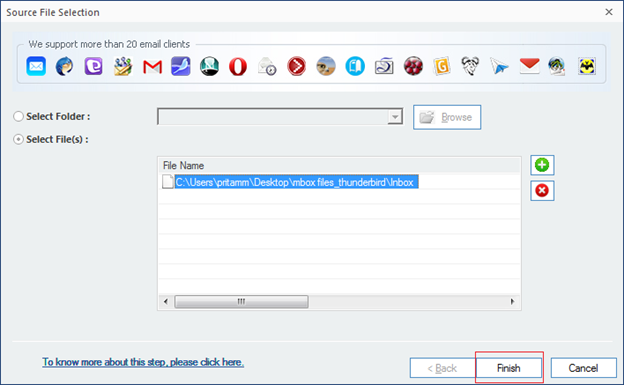
Step – 2: In the window for selecting the source file, choose one of the following options: ‘Select Folder’ or ‘Select File.’ Then, click the ‘Browse’ button.
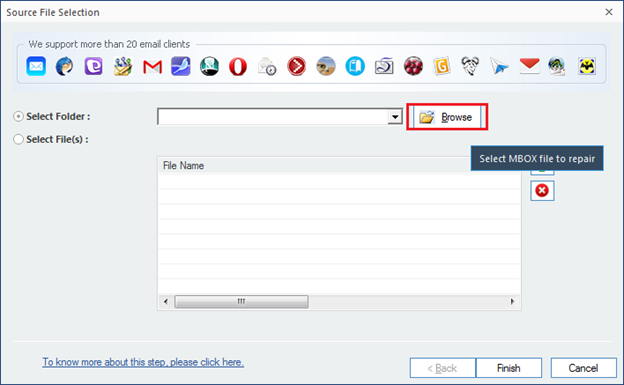
Step -3: Choose the MBOX folder and then click on “Open.”
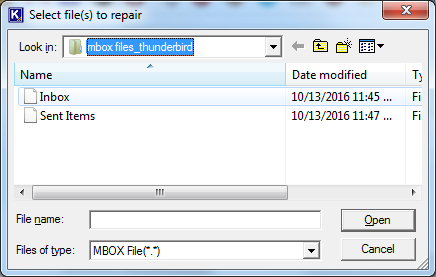
Please select “Finish” to proceed.
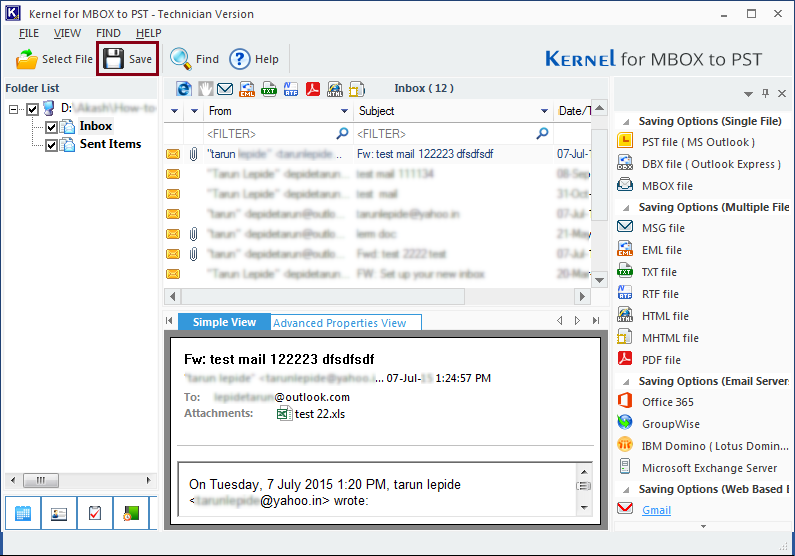
Step – 4: Choose either a single folder or multiple folders, then proceed to click “Save.”
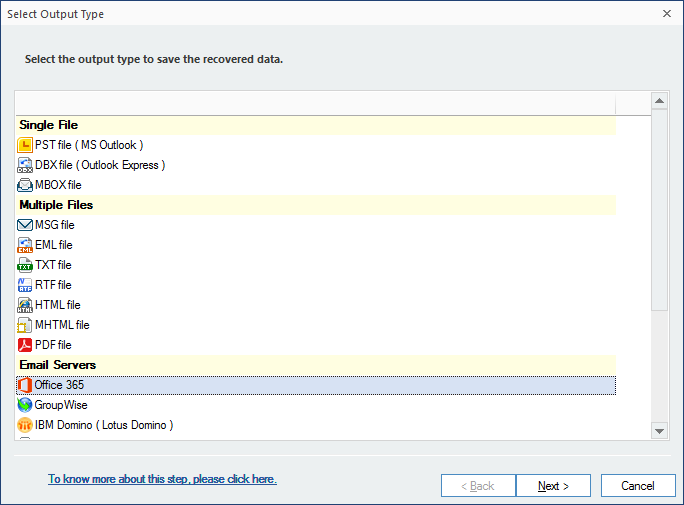
Step – 5: In the window labeled ‘Choose the output format for saving the restored data,’ opt for the Office 365 alternative. Then, proceed by clicking the ‘Next’ button.
Step – 6: A new window labeled “Select Filters” appears, allowing you to conveniently add multiple filters such as Item Type, Date Range, Folder Name, Subject, Recipient, Sender, and more. Once you’ve applied the desired filters, proceed by clicking “Next.”
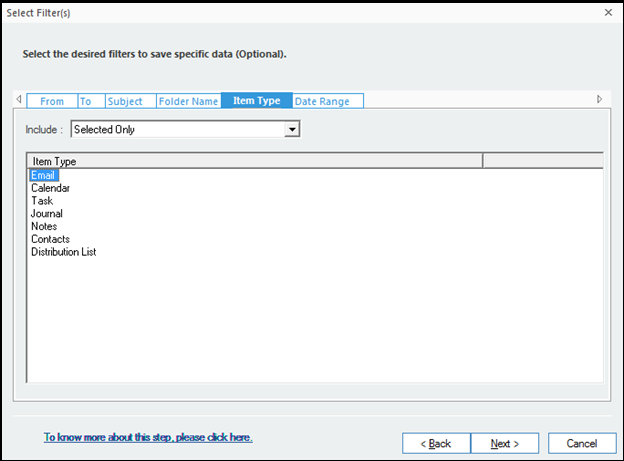
(Note: If you choose ‘Selected only’ from the Include drop-down menu, you have the freedom to pick from either of the available options.
Hold down the Shift key while selecting multiple items, or just a single item, then proceed by clicking “Next.”
Step – 7: Enter your Office 365 login information and then proceed by clicking on the “Finish” button.
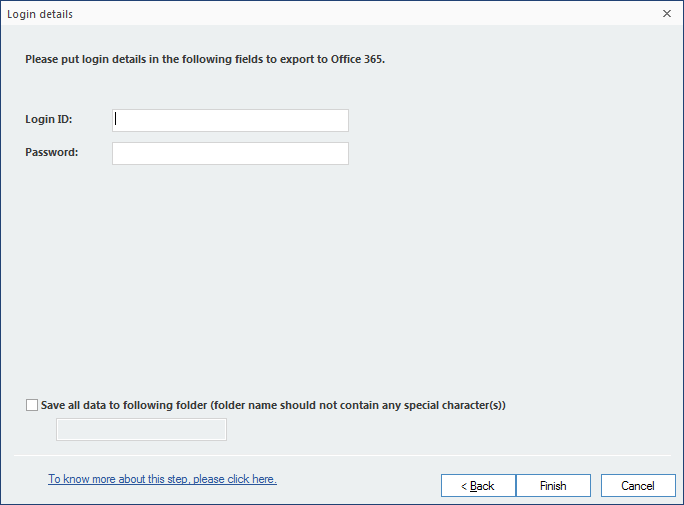
And your File is saved.
Conclusion
If you’re encountering errors when using an MBOX-based email client and are looking to switch to a more robust platform, consider utilizing the Kernel MBOX to PST Converter software. This tool not only scans your MBOX files for potential corruption but also seamlessly migrates the intact data to Office 365 for a smoother email experience. You can also choose the software to migrate MBOX emails to another email servers like Exchange, IBM Domino, Novell GroupWise, etc.