Read time: 9 minutes
Your mailbox is running out of space, but you want to retain important emails. This is where Outlook Online Archive becomes useful. It provides a separate mailbox for storing older emails while keeping them accessible in Outlook.
However, many users aren’t sure how to enable it, find archived messages, or move emails automatically. Here, we will explain how to access, enable, and manage Outlook Online Archive in Office.
What’s the Difference Between Outlook Archive Folder, Online Archive, & AutoArchive?
Microsoft provides different Archive options depending on the Outlook version, which serve different purposes. So checking out the table below helps you gain clarity.
| Feature | Archive Folder | Online Archive/ In-Place Archive | AutoArchive |
|---|---|---|---|
|
Main Purpose |
A regular folder within the primary mailbox |
A separate archive mailbox |
A classic Outlook client-side archiving feature |
|
Storage Location |
Primary mailbox |
Separate Exchange archive storage |
Stores a local PST file. |
|
Reduce Primary Usage |
No |
Yes, when items are moved into it |
Depends on configuration. |
|
Requires Administrator |
Generally no |
Yes |
Depends on client & organizational settings. |
|
Applicable for |
Organize less-used messages |
Retain older mailbox content separately |
Move or manage older Outlook items locally. |
How to Access Outlook Online Archive In Office 365?
The name and position of the Archive Mailbox depend on the Outlook version. For Outlook for Mac & Classic Outlook, it shows Online Archive, while Outlook on the Web (OWA) or New Outlook displays In-Place Archive. Here are the steps to access the Archive folder in different Outlook versions.
For New Outlook
Step 1. Open the New Outlook application.
Step 2. Locate the In-Place Archive in the folder list.
Step 3. Expand the archive mailbox to view its folders.
Step 4. Select the required folder to access archived messages.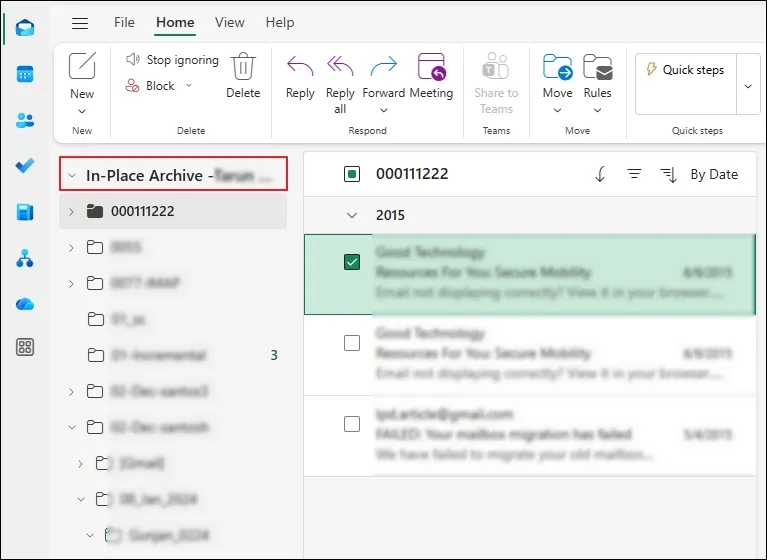
For Outlook on the Web
Step 1. Sign in to Outlook on the web using your Microsoft 365 account.
Step 2. Access the email folder list.
Step 3. Navigate to In-Place Archive to access its content.
Step 4. Open it to manage the archived emails as needed.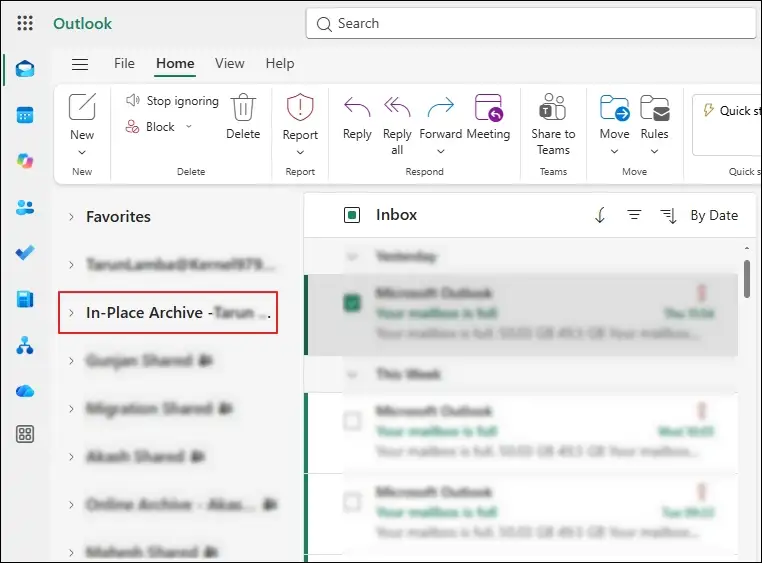
For Classic Outlook
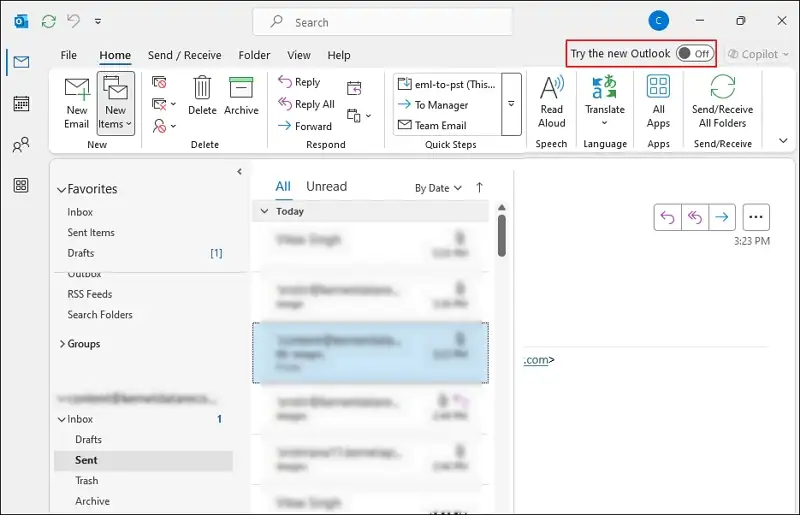
Step 1. Launch Classic Outlook.
Step 2. Find the separate mailbox labeled Online Archive.
Step 3. Expand it to display its available folders.
Step 4. Select the required folder to access emails.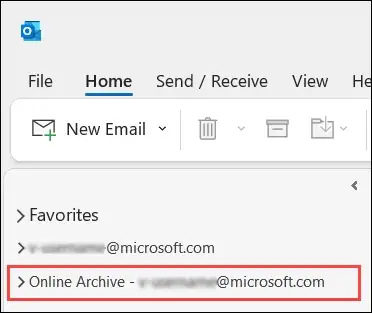
For Outlook for Mac
Step 1. Open the Outlook for Mac application.
Step 2. Go to the folder navigation pane.
Step 3. Locate the Online Archive folder.
Step 4. Expand it to view the available archive folders.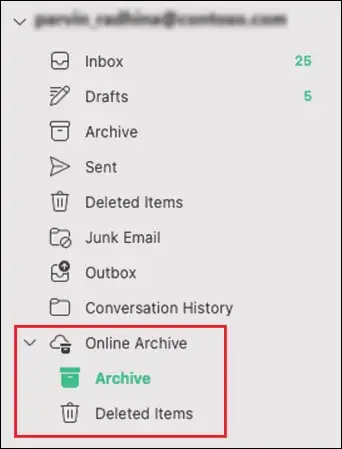
Enable Online Archive In Office 365: Steps for EAC & PowerShell
To enable Online Archive, you must have an active Microsoft 365 subscription plan that includes this feature. Also, log in with an administrative role (Exchange/Global Administrator or Organization Management) along with Mail Recipients. Here are the steps for two official methods:
Way 1. Enable Online Archive Using Exchange Admin Center (EAC)
Here are the steps to enable Online Archive in Office 365 with EAC.
Step 1. Go to the Exchange admin center.
Step 2. Expand Recipients and click on Mailboxes.
Step 3. Select the required mailboxes to proceed.
Step 4. Navigate to Others tab to Manage mailbox archive.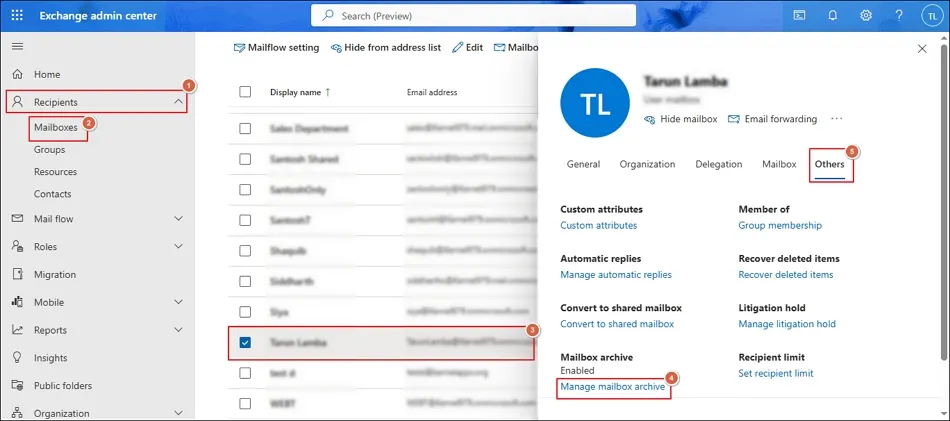
Step 5. Enable the Mailbox archive status toggle.
Step 6. Provide the Name and click Save.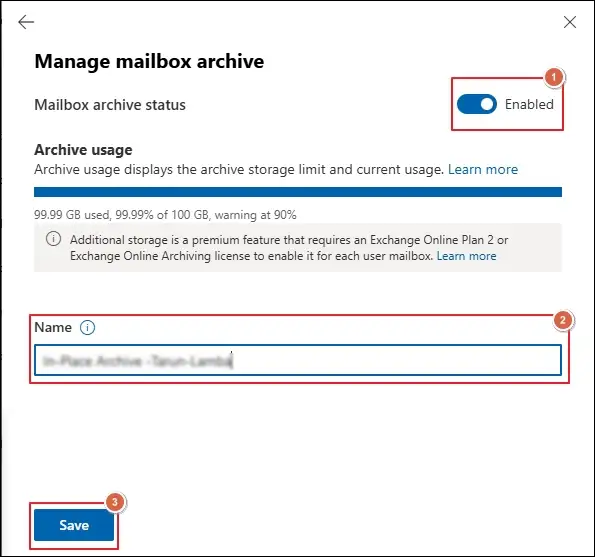
Way 2. Use PowerShell Commands to Enable Online Archive
Follow the given steps to enable Online Archive using PowerShell commands.
Step 1. Install the Exchange Online PowerShell module.
Step 2. Then, import the module with this command.
Step 3. Execute the following command to connect to Exchange Online.
Step 4. Enable the user’s archive mailbox.
Step 5. Verify the archive configuration by executing the command below.
Format-List DisplayName,ArchiveStatus,ArchiveGuid
Step 6. After provisioning, check the archive usage with this command.
Format-List DisplayName,TotalItemSize,ItemCount
Step 7. Disconnect from Exchange Online once done.
Note: You can also disable the Online Archive in Microsoft 365 with this command (Disable-Mailbox -Identity user@contoso.com -Archive).
How to Move Emails to the Outlook Online Archive Folder?
After getting the location of the Outlook Online Archive or In-Place Archive in Outlook, you can move the emails to the same folder using these steps:
Step 1. Open Outlook and access the primary inbox folder.
Step 2. Select the required emails to proceed.
Step 3. Click on Move > Select a different folder.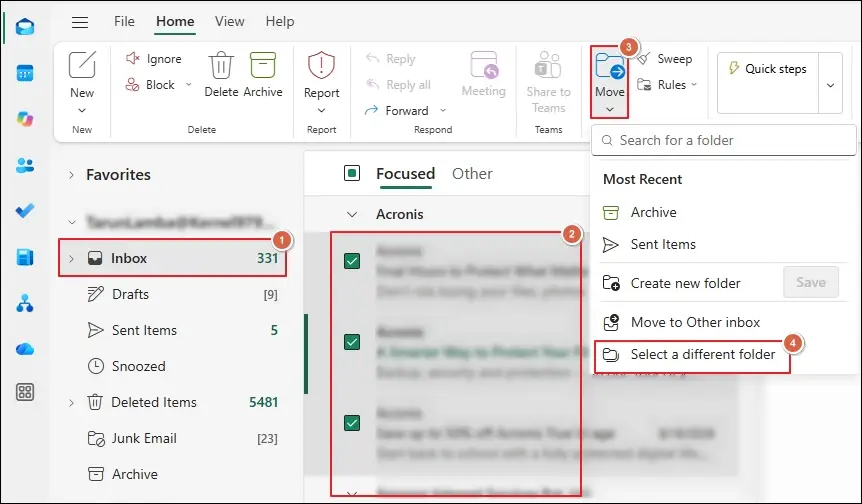
Step 4. Choose the In-Place Archive folder and proceed to Move.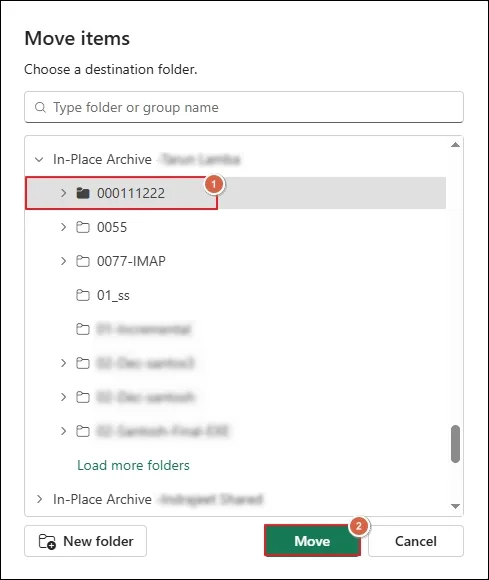
Step 5. It will move the emails to the Online Archive folder.
Outlook Online Archive Mailbox Folder: Know Its Storage Limits
The Online Archive facility is included in most Microsoft 365 plans . However, the archiving space depends on the subscription plan. Please note that Microsoft is increasing the maximum auto-expanding archive capacity from 1.5 TB to 3 TB for specified eligible licenses.
The rollout began in mid-October 2026 and is expected to complete by late October 2026. Eligibility includes certain Office 365 E5, Microsoft 365 E5, A5/G5, and qualifying Microsoft Purview subscriptions. For other licenses, the 1.5 TB maximum limit remains unchanged.
Steps to Check Online Archive Mailbox Usage
You can check the Office 365 Outlook Online Archive mailbox size and usage with Exchange Admin Center (EAC) and PowerShell. Here are the complete steps.
Method 1. Check Storage Usage in Exchange Admin Center
Step 1. Go to Exchange Admin Center.
Step 2. Navigate to Recipients > Mailboxes.
Step 3. Access the required mailboxes to continue.
Step 4. Locate the Others tab to Manage mailbox archive.
Step 5. View the Archive usage to check the consumed space.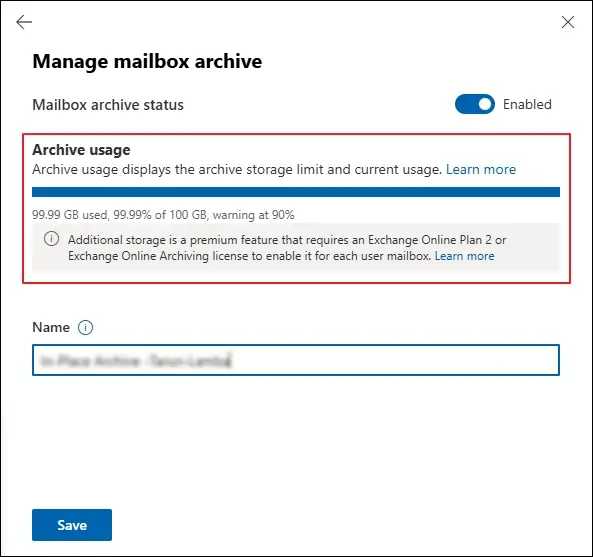
Check Storage Usage with PowerShell Commands
Step 1. Connect to PowerShell with Exchange Online. Then, execute the command below to check archive statistics.
Format-List DisplayName,TotalItemSize,ItemCount
Step 2. Run the following command to inspect archive folders in more detail.
Select-Object Name,FolderPath,FolderSize,ItemsInFolder |
Format-Table -AutoSize
Final Thoughts
Here, we have covered a detailed guide on Outlook Online Archive in Office 365. You can use the provided information to get the necessary information to do the following yourself:
- Access Outlook Online Archive easily.
- Enable or disable the Online Archive.
- Move emails to Online Archive folders.
- Check the Online Archive storage usage.
But archiving mailbox items is not the same as backup. If you want to back up your mailbox items, then consider our Kernel Office 365 Backup tool. The software helps you back up Microsoft 365 mailbox data in PST and other formats with ease.
FAQs: Quick Answer Section
A. First, locate the Online Archive (or In-Place Archive) folder in your folder list, find the message, and drag it to your primary mailbox, or select Move and choose the destination folder.
A. Disabling it disconnects the archive mailbox. As per Microsoft, you can reconnect it within 30 days to restore its original contents. After that period, the contents are permanently deleted. Enabling it again will create a new archive mailbox.
A. Yes, if a retention policy applies. Microsoft’s default archive policy moves items to the archive mailbox after they are delivered or created. Administrators can adjust the rule with retention policies to move emails manually.
A. It appears only if an administrator has enabled the archive mailbox and your license includes archiving features.
A. No. Online Archive gives you extra storage for older email in a separate mailbox within Microsoft 365, but it isn’t an independent backup. For a separate copy of your mailbox data, use a backup tool or export your mailbox.