Read time: 7 minutes
Entourage is a Mac-based email client application launched in 2000, used for sending and receiving emails and sharing information with others. It uses MBOX file format for storing its data. However, due to lack of compatibility, Entourage was discontinued in 2008 and is no longer available for use now. To increase productivity and compatibility, users are shifting from Entourage to Outlook.
Outlook is a widely used and accepted email client application by users and provides various advanced and intelligent features to increase its capability. However, it is not easy to migrate data between these two email clients, as they both use different file formats to save their data.
Why to switch from Entourage to Outlook?
There are various reasons behind users switching from Entourage to Outlook. Let’s have a look at some of them:
- Compatibility: When compared to Entourage, Outlook is a more compatible email client application.
- More advanced features: Outlook is an advanced email client, which offers unique and updated features to enhance its functionality.
- Enhanced security: As Entourage is a discontinued application, it lacks security features. Whereas Outlook provides a strong and secure network for your email’s safety.
Methods to import mailbox from Entourage to Outlook
There is no direct method to import emails from Entourage to Outlook. Hence, you need to perform this procedure in three parts. Below we have mentioned all three parts in detail:
Part 1. Extract MBOX files from Entourage
If you want to migrate Entourage mailbox to Outlook, you first need to start by making a copy of the data or extracting the files that you want to export. Follow the steps mentioned below carefully:
- Start Entourage on your system; click on the File option on the top.
- Now, from the File menu, select Export option.
- Now, select all the data you want to import. Select ‘ Export Items to an Entourage archive’ and check all the boxes. Click on the Next icon.
- As the tool asks you if you want to delete the Archived items or not. You need to select, ‘No keep the items in Entourage after they are archived.’
- In the next step, you need to select a location on your system to save the archive file. Click on the Save button to proceed.
In this manner, a copy of Entourage emails has been saved on your system.
Part 2. Convert extracted MBOX files into PST format
Once you have extracted MBOX files from Entourage, now you need to convert them into PST format. This can only be done with a professional tool. We recommend using Kernel for MBOX to PST tool to convert Entourage MBOX files to Outlook PST file format easily. Besides the easy and quick migration, this tool has a lot more features for users to explore. Let’s have a look at the conversion procedure by using this tool:
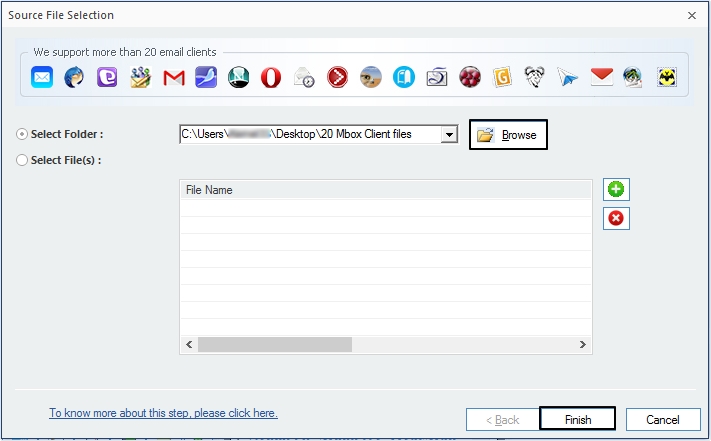
- Launch the tool on your system and click the Select File option located at top left side.
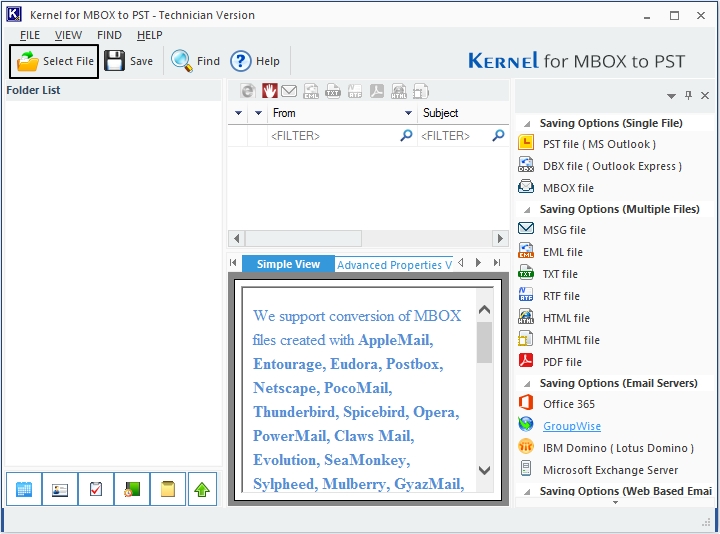
- Click on Browse to add the MBOX file, once added, then click Finish.
- The software will enlist all the files and lets you check the content also. Then click Save option.
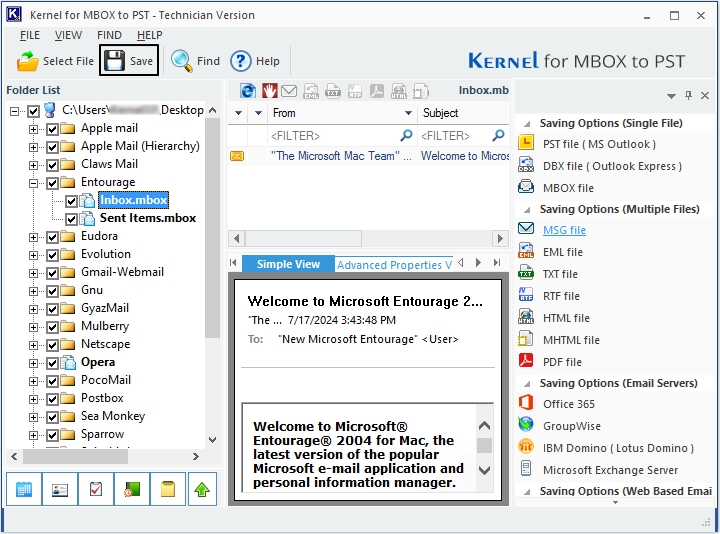
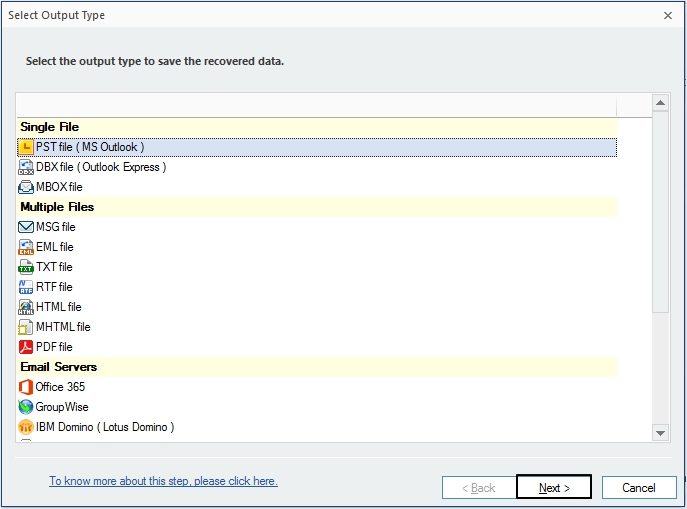
- Choose PST file (MS Outlook) and click Next.
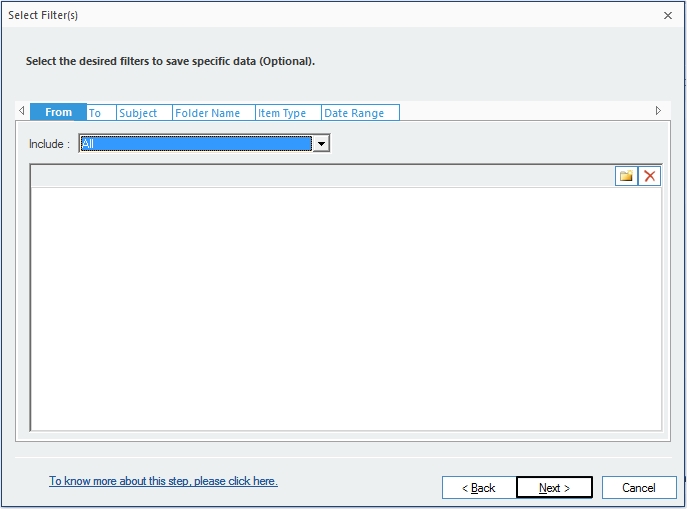
- Apply the available filters if needed on MBOX file content and click Next.
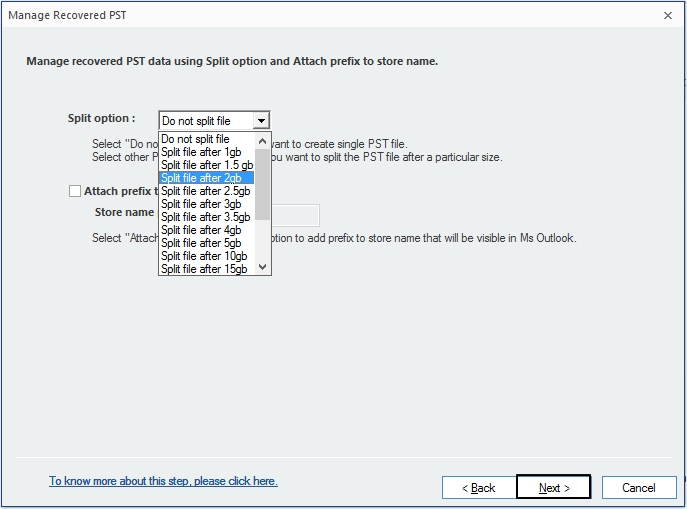
- Split the large-sized file into several smaller sized PST files according to your requirements. Click Next.
- Click on Browse to provide the saving location for the content and click Finish.
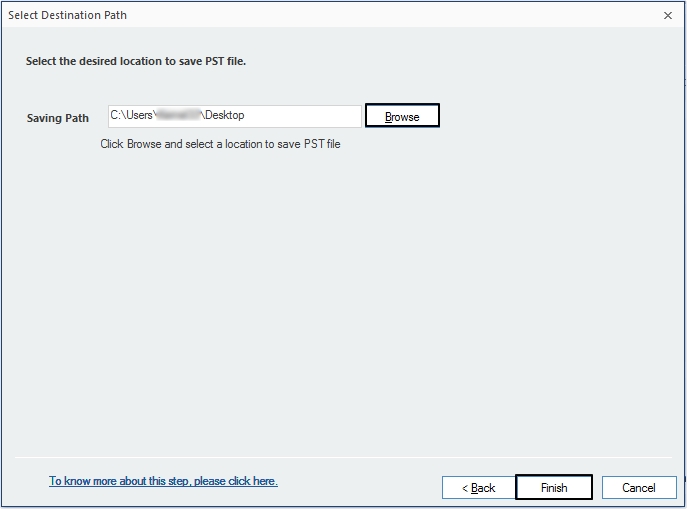
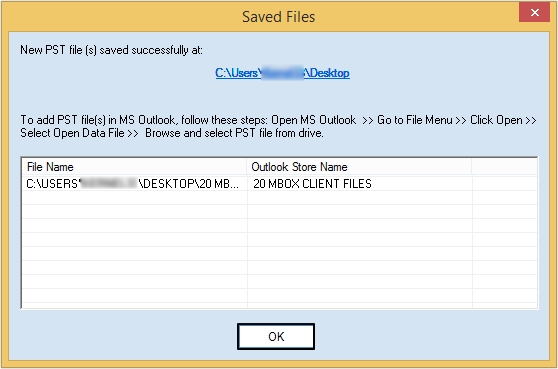
- The PST file is saved successfully, and the software will show the location of the PST file after saving it. Click OK to end the process.
Note: You will get two options Select Folder and Select File(s), you can choose any according to your requirements.
Part 3. Import PST file into Outlook
After converting the MBOX files into PST format, now you need to import them into Outlook. Follow the steps outlined below for the same:
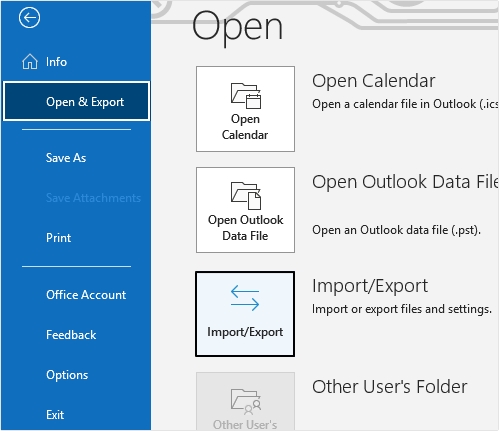
- Launch Outlook on your system and tap on File option.
- Click on Open & Export option then Import/Export option.
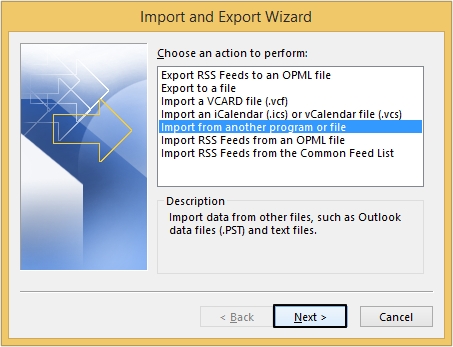
- Now, select Import from another program or file option and click Next.
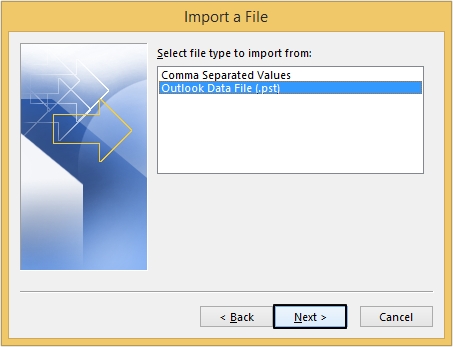
- Moving ahead, select Outlook Data File (.pst) and click Next.
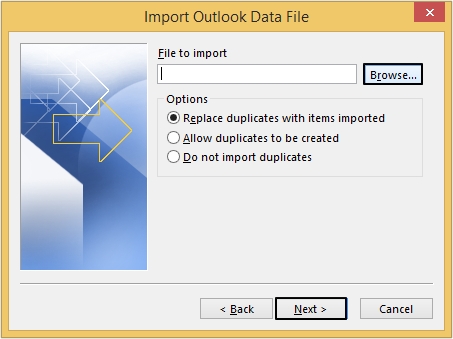
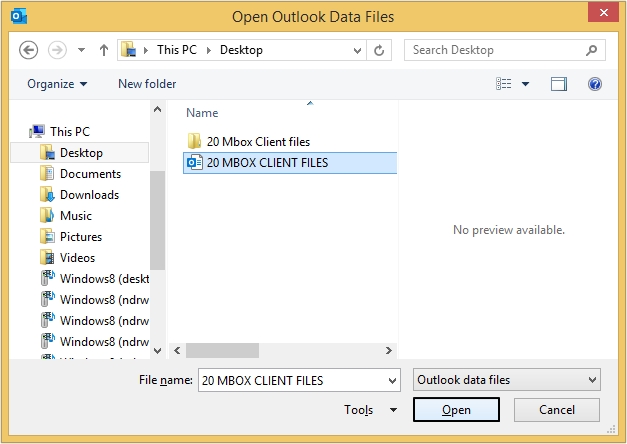
- Click Browse to select the file you wish to import.
- Select the file and click Open to add the file.
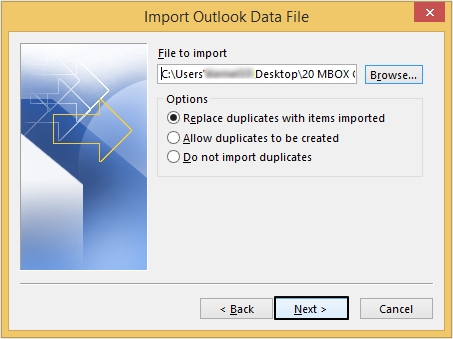
- Now, click Next and in the next window click Finish.
Conclusion
The process of importing Entourage emails into Outlook is not direct, thus it can be done in three parts. This article has effectively given all the necessary methods and steps to import Entourage emails into latest versions of Outlook like 2016 and 2019. Moreover, converting files of MBOX format to PST can only be done with a professional tool like Kernel for MBOX to PST.