Read time 9 minutes
Dealing with thousands of Outlook emails is not an easy task, especially when you receive a lot of email messages daily. This has become the case usually with people who are using Microsoft Outlook for fulfilling their different business purposes.
There are times when you need to open an email you received days or possibly months back, but due to the huge stack of email messages existing on top of the one you need, scrolling through is not the option you would want to consider.
To access an email fast in Outlook, using the search option is the smartest way. However, some technical issues can prevent the user from getting the desired search result. Outlook 2016 search not working can be frustrating, especially when you need an old important email to view some attachments.
Improper or broken search in Microsoft Outlook 2016 can be fixed via multiple approaches, but it is important to make use of the right ones. In this article, we’ll guide you through how you can have a resolution for the above-mentioned hurdle.
However, before we jump to the methods for fixing the “Outlook 2016 search not working” problem, let’s first try troubleshooting to verify if Outlook has indexed every item or not. In case Outlook is not done indexing all the items then there is a high chance you will not get appropriate search results.
Check Indexing Status in Outlook 2016
Check the indexing status in Outlook, before we jump to the methods for fixing the Outlook search problem. Make sure of whether a specific Outlook file type is left from indexing or not. For checking the Indexing Status in Outlook application, follow below steps:
- Launch Outlook 2016.
- Click on the Search tab in the menu bar, click Search Tools, and select Indexing Status.

- If the Outlook file type left from indexing, it will show up as below: 0 items remaining to be indexed is displayed; click Ok.

Search tab is missing
If the Search tab is missing from the menu bar of your Outlook application, you can add it yourself as below:
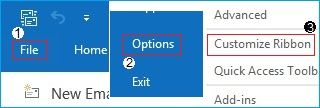
- Click on the File tab, click on Options, and select Customize Ribbon.
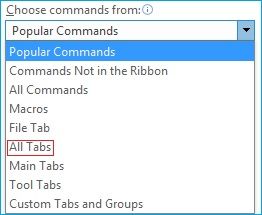
- Inside the Customize Ribbon Settings area, click on Choose commands from the drop-down, and select All Tabs.
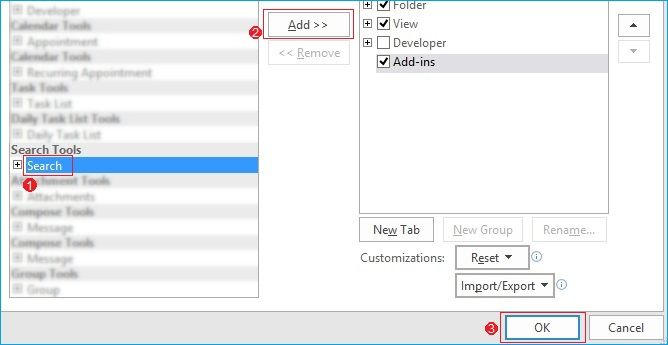
- From the list of tab selections, select Search, click on Add button, and click Ok..
Methods for resolving the issue “Outlook 2016 search not working”
If the above troubleshooting shows no items left for indexing, then you have to execute certain manual methods to get appropriate search results. Each method targets specific sections, which could have been the reason for the “Outlook 2016 search not working” issue.
Method 1. Rebuild Outlook index
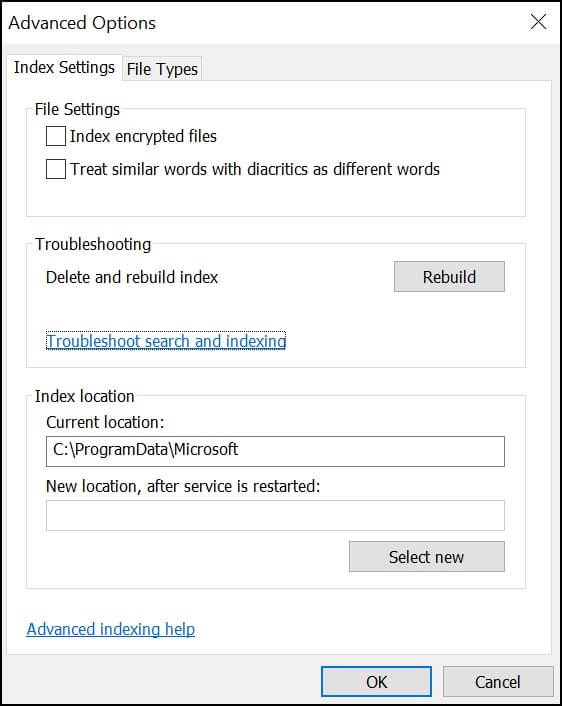
Now that you have checked indexing status from within the Outlook, let’s move forward to the fixing method. In case, if the Outlook file type is left to be indexed or still the search is not throwing the expected result, then rebuild the index using Advanced Indexing Options.
Perform the following steps for doing so:
- Launch Outlook.
- Click on File > Options and select Search.

- In the Search Options area, click on Indexing Options (under Sources section), and click on Advanced in the Indexing Options dialog box.

- Click Yes in the UAC – User Account Control prompt.
- Click on Rebuild under the troubleshooting section; click Ok.
Note: The index rebuild procedure would take some time, restarting the PC afterward.
Method 2. Check if indexing for Outlook 2016 is enabled
You’ve confirmed the indexing status and have rebuilt the index from scratch, but still, the search is not producing the appropriate results. In this condition check whether Outlook 2016 application is listed in the Indexing Options or not. Follow the steps below:
- Open Outlook.
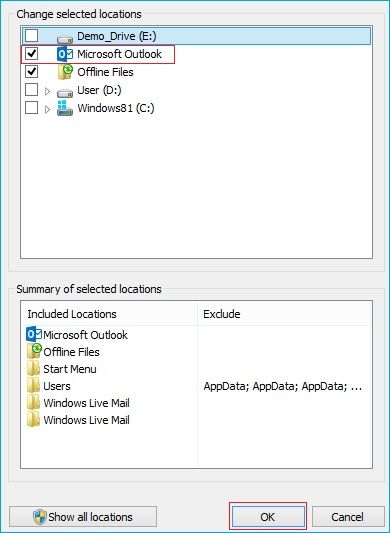
- Click on File > Options and select Search.
- Click on Modify.
- Check whether there is a checkmark aside by Microsoft Outlook; in case the checkbox is empty, select it, click Ok, and restart PC.
Method 3. Repair Outlook data file
If rebuilding or indexing the Outlook application does not prove to be any help, then it might be possible that the issue is with the Outlook Data file – PST and repairing it might solve the issue.
For doing so, you can make use of the native Outlook inbox repair tool provided by Microsoft called Inbox Repair tool (ScanPST). The ScanPST tool can fix minor issues related to PST files.
However, the Inbox Repair tool has certain limitations such as deleting the damaged data leading to permanent data loss. Also, ScanPST cannot repair a PST file with major corruption and with a file size of more than 2GB.
Method 4. Troubleshoot search and indexing
If Outlook search is still not working after trying these methods, you can try troubleshooting search and indexing.
- To do this, close Outlook and go to Start > Control Panel > Indexing Options. Click the “Advanced” button and then click on Troubleshoot search and indexing.
- After that, you need to check mark your problem as Can’t start a search or see results. Tap on Next.
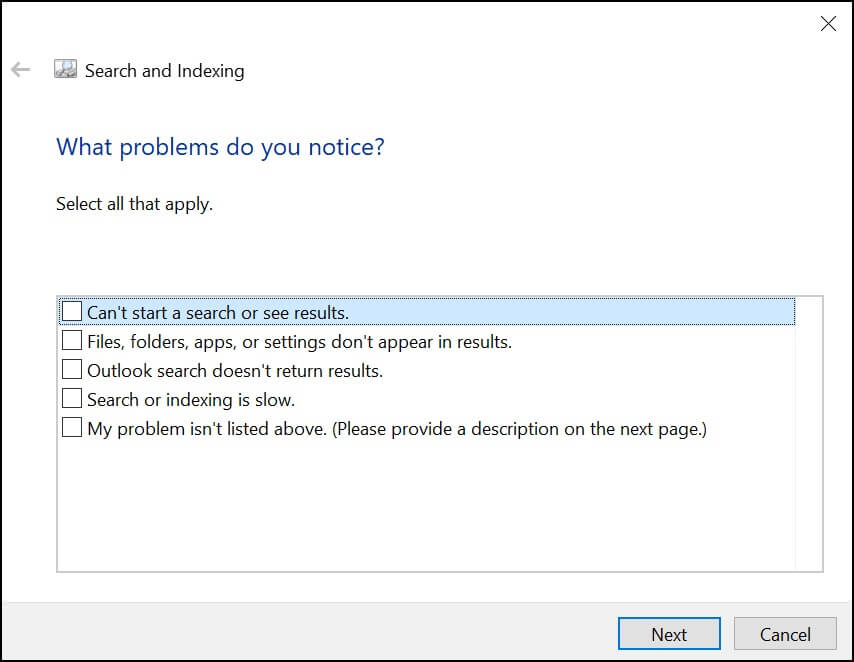
- It will start detecting the problem and self-troubleshoot it in a few seconds.
Restart Outlook and check if the issue still persists. In case the problem still persists, your corrupted Outlook PST files can be a reason. To get an easy fix for the PST files, give Outlook PST Repair a try.
Repair PST using a professional tool
Using a professional Outlook repair tool would be worthy in case the built-in utility SCANPST did not solve the problem with the PST files. Kernel for Outlook PST Repair is a tool which is specifically made for the objective of addressing all the issues of Outlook PST files.
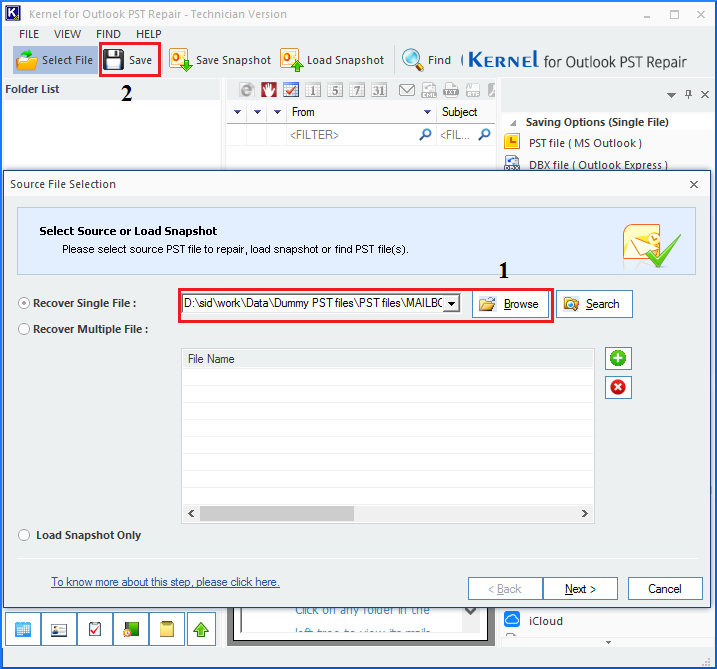
This tool can recover all items from the corrupt PST file, including emails, contacts, attachments, tasks, notes, journals, etc. It also recovers deleted items from the corrupt PST file. Also, this advanced utility is compatible with all versions of Microsoft Outlook.
PST Repair tool is a mix of top-class features that deliver best results with full efficiency. Here are a few of its advanced features:
- Export PST to Microsoft 365 & Email Servers.
- Repairs encrypted and password-protected PST files.
- Option to search PST file.
- Smart Filtering Options.
- Retains Meta Properties.
- Repairs archive PST files of any size.
Conclusion
Outlook search is a very convenient utility for finding specific emails in the Outlook email client. The absence of such a robust search mechanism can prove to be a major drawback in user productivity and workflow. If your Outlook search does not provide appropriate output, then use the above-discussed methods to fix the “Outlook 2016 search not working” problem. Outlook will have a hard time indexing a corrupted PST file. Therefore, we recommend utilizing the Kernel for Outlook PST Repair tool for a quick and complete recovery of your PST file.