Yes. You can migrate user permissions and document versions using the Kernel migration tool. If you need, you can migrate all the versions or the latest ‘n’ versions as per your choice. Also, there is an option to migrate specific versions (both major and minor).
Yes. Using this software, you can migrate document libraries along with permissions.
Our tool provides complete support to the migration of Office 365 Groups data including that of Teams.
Yes, you can. To enumerate the Site Collections, provide the URL of the Site collection using the 'Find Site Collection' option. After logging with the admin credentials, simply select the desired web app and this is how you can enumerate all site collections. Then select the specified sites of the selected site to add in the destination pane of SharePoint server for the migration.
No, the local file systems are automatically added as the default source by SharePoint migration tool.
Yes, you can. To add a remote file system as source, simply provide the IP address of the machine that you want to add in the “Add New File System” option. Select the disk drive that you want to take remotely and then validate the connection. After establishing the connection with remote machine, it will add files/folders in the source pane.
Yes, our software supports migration from long paths while migrating from file servers to SharePoint. The software handles them internally and migrates the whole data.
Yes, our software handles special characters perfectly. If the source file server directory/files having a special character, our software replaces it with _ by default. You can change the character to another character using the global settings of the software.
You can move Office 365 public folders with your Office 365 account configured in your Outlook application.
The solution allows to export and import various SharePoint modules such as document library, templates, content types, web pages, site collections, structure reports and many more.
Yes, you can. Your system drives will automatically get added on the software. You can select any documents, images, etc. from the drive folder and double-click on it to view.
The free demo or trial version has the following limitations:
- Migrate only 5 items per folder
- Do not migrate subsites
- Migrate only 5 lists or libraries
Once you have added your SharePoint site, you can select the list, sites, subsites folder and use the filter option on the top pane. It filters the data on the basis of:
- Date filter (file access, file creation, and file modification)
- File filter (file name, file extension and file size)
The tool includes an option to generate CSV file for File System, Public Folder and SharePoint Server and move the added files to SharePoint (2010,2013,2016,2019, SharePoint Online (O365)), OneDrive and Google Drive destinations.
Follow these steps to generate the CSV file for File System.
- On the welcome page of the tool, select File System from the CSV Generation option at the top
- Then click on Add option to add local or remote files/folders
- Select the retrieved data to be added; you can also view group or user permissions with the given option
- Then select a destination on the system to save this CSV file
- Your CSV file is generated which you can use anytime for bulk migration
When you migrate OneDrive data using the trial version of the KMS, it will migrate 5 items per folder (with file size below 20 MB).
Yes, the scheduling will work for the OneDrive migration also. You can set the time, and the migration will start automatically.
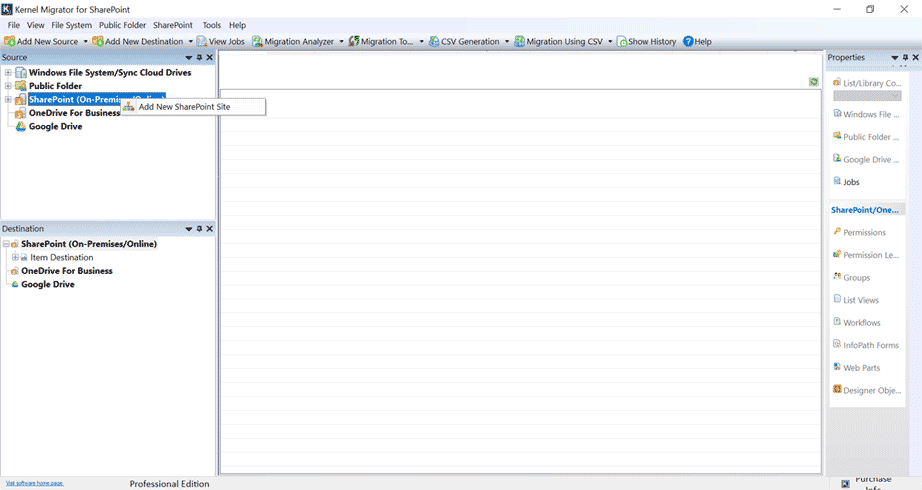
- Step 1: Run Kernel Migrator for SharePoint.
- Step 2: In the Source pane, right-click on the “SharePoint (On-Premise/Online“ option.
- Step 3: Click Add new SharePoint site.
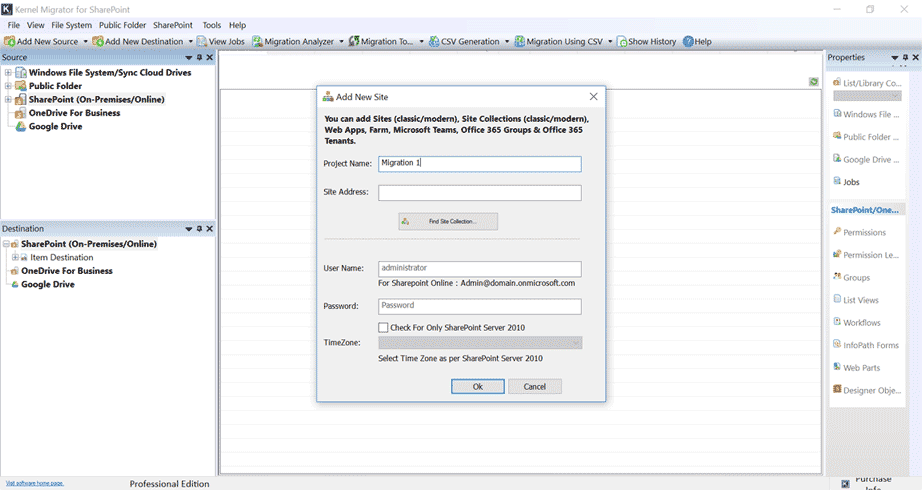
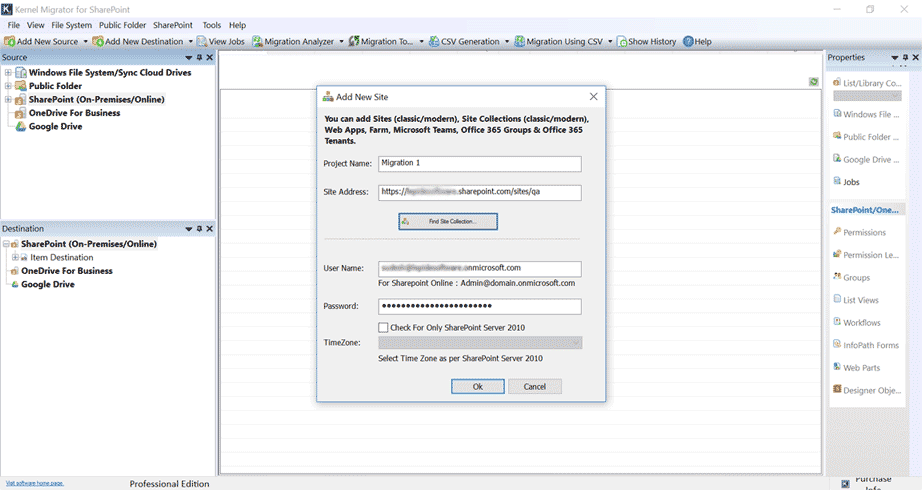
- Step 4: On the New site dialogue box, Enter the project name, and click “Find Site Collections.”
- Step 5: On the site collection dialogue box, enter the central admin URL (https//yourdomain-admin.sharepoint .com ) and enter central admin credentials. Click next. Now it will show all the admin center sites.
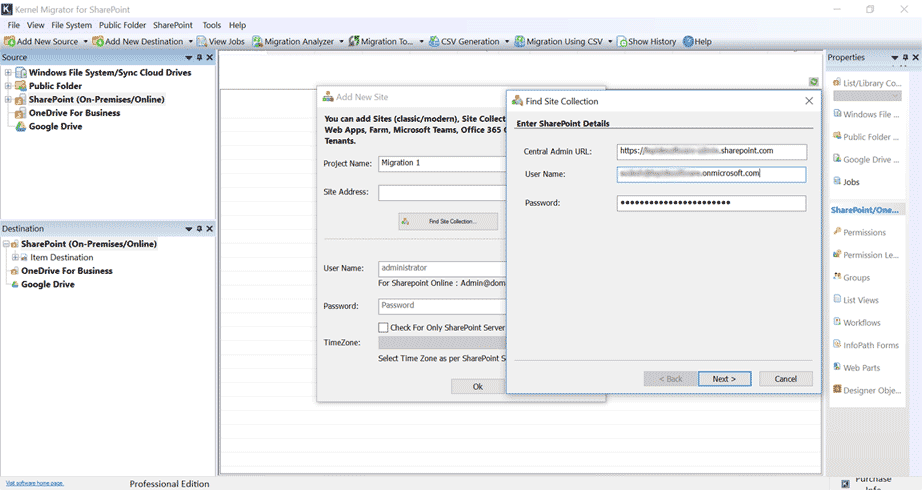
- Step 6: From the list, select the specific site; click Finish.
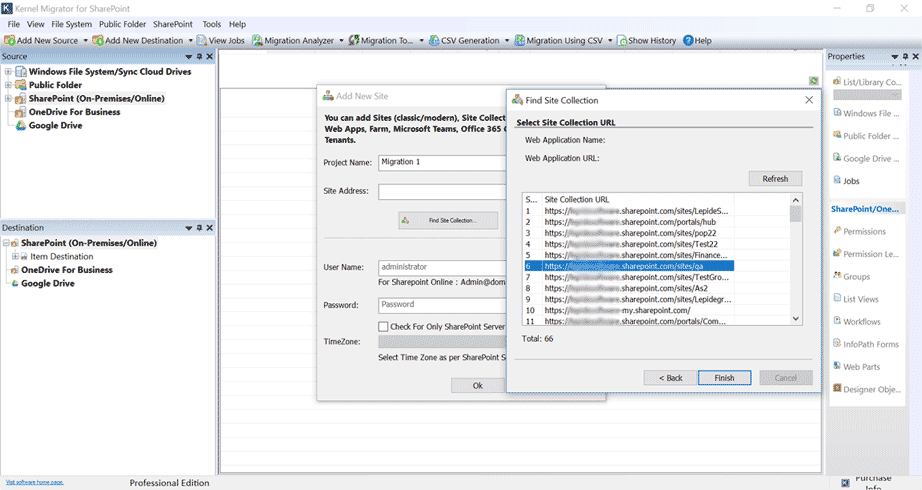
- Step 7: Click OK.
Advantage of this process:
- If you don’t know the url of a particular site you want to migrate, then you can use this method to pick the site from the list easily.
- All the sites are visible in a single place.
- You can create the same site at the same level in the destination tenant.
To add an Office 365 SharePoint site as the destination, simply use the following procedure:
- Right-click the root SharePoint Server and select Add New SharePoint Site.
- Enter the project name and site address.
- Click 'Find Site Collection' to enumerate the complete site collections.
- Now provide the Office 365 SharePoint site in the 'Central Admin URL' and provide admin login credentials.
Note: It will enlist all the web application URLs present on the selected server. - When not using 'Find Site Collection' option, then simply add project name and provide the URL of Office 365 site in the Site Address textbox.
This is how you can add Office 365 SharePoint site in the destination pane.
This error message is displayed when you've entered wrong login credentials – either provided a wrong username or password. Please try again with an authentic username and password to resolve this issue.
This type of error message is displayed in the following scenario:
- Missing connection between the SharePoint server and its linked SQL Server
- Either the linked SQL Server is turned off or its services are not functioning anymore.
To resolve this issue, try to build a reliable connection between SharePoint server and SQL Server. Also, verify that the SQL Server linked to the SharePoint server is running well along with its services.
This issue occurs because you don’t have the same template in the destination as in the source. So, you need to contact the site administrator to publish or activate it. For more details, see: https://www.nucleustechnologies.com/sharepoint-migration/documentation/work-flow-template-not-present-in-destination.pdf