XPS (XML Paper Specification) files are often used to preserve document layout but sharing them can be challenging due to compatibility issues.
JPG/JPEG is a widely supported image format that offers greater flexibility to users, allowing easy sharing of high-quality images that are accessible on most devices.
Through this write-up, we will show you how to convert XPS to JPG images, ensuring final files are clear and acceptable by various applications.
Best Way to Convert XPS File to JPG (Automated Solution)
There is no manual process to convert from XPS to JPG. In such a scenario, using a reliable XPS Converter Tool is the only solution. Kernel XPS Converter is the most renowned and trusted software to convert XPS to JPG. Moreover, it offers a detailed preview of added files in the preview pane.
![]()
![]()
Features of best XPS Converter tool:
- Allows adding multiple XPS and OXPS files simultaneously.
- Supports large XPS file conversion without any restrictions.
- Multiple saving formats, including JPG, JPEG, HTML, DOC, Excel, PPT etc.
- Provides a detailed preview of the source file in the original form.
- Preserves the hierarchy and formatting the same as the source file.
- Seamlessly convert XPS to PDF without an internet connection.
- Compatible with all Windows operating systems.
How to Convert XPS to JPG? Step-by-Step Guide
Here is the detailed stepwise guide to convert XPS files using the best XPS to JPG converter.
Step 1. Launch Kernel XPS Converter and click on File >Add File.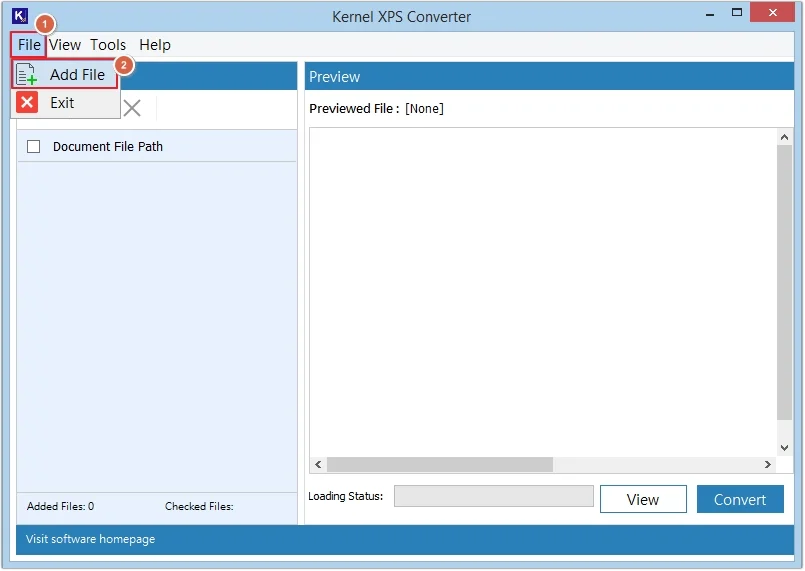
Step 2. Select source file type as XPS and OXPS. Click Browse to choose files from drive, select all the files you want to convert, and click Add Files.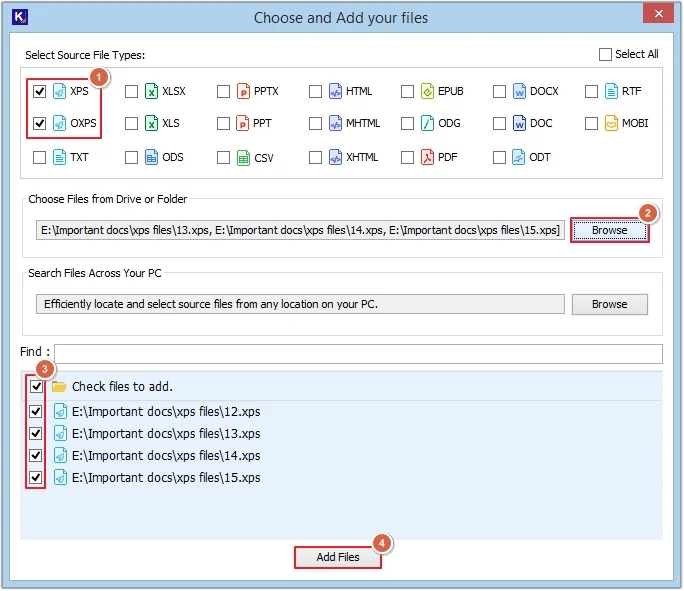
Step 3. Click on any file to get a detailed preview, then click Convert.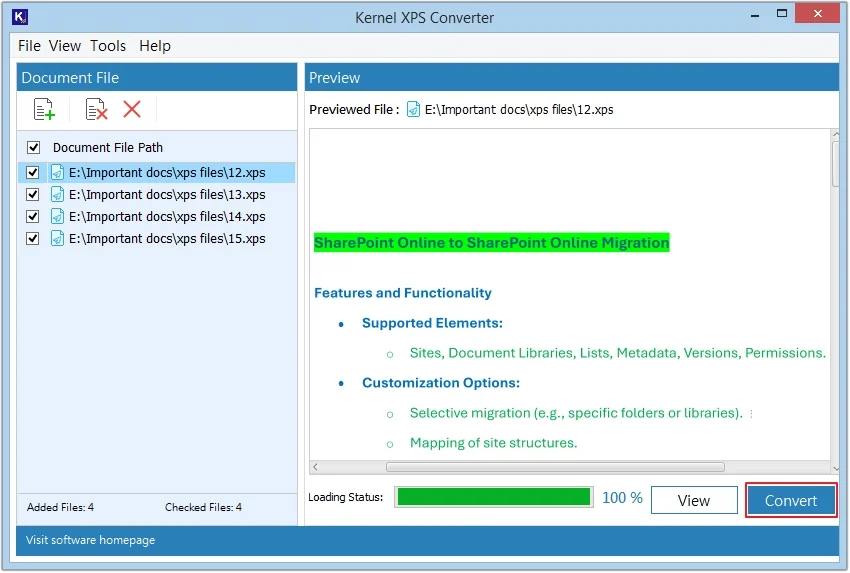
Step 4. Click on the Browse button to provide the saving location, then select JPEG as the conversion file format and click Convert.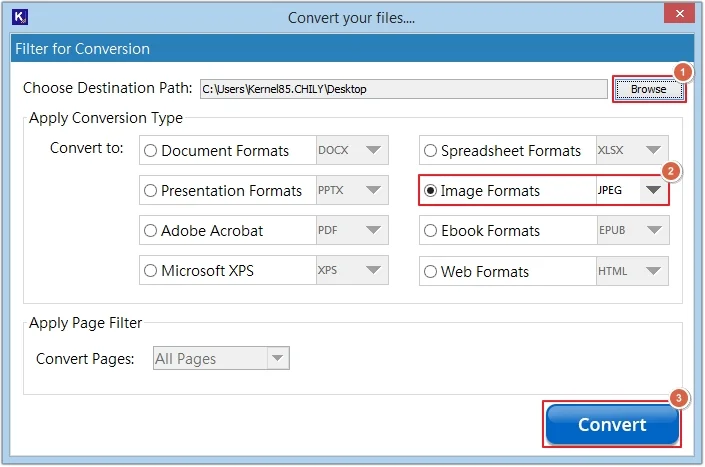
Step 5. The software will begin to save XPS as JPEG.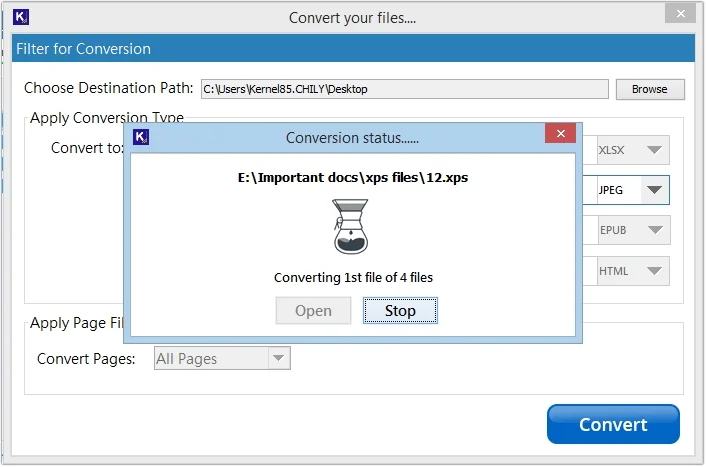
Step 6. Once the process is completed, click Open to view the saved files.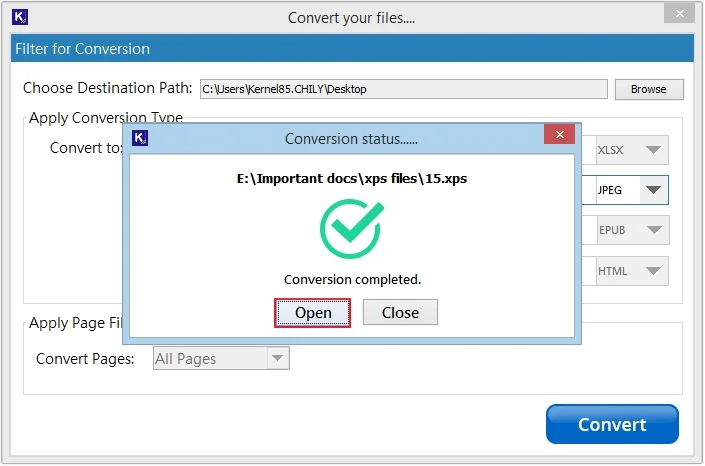
Reasons to Convert XPS to JPG Files
There are numerous reasons to convert from XPS to JPG or JPEG. Some of them are mentioned below:
- JPG files are widely supported by everyone.
- Smaller image size, even at high quality.
- Ideal for archiving large volumes of photos.
- Easy integration with websites, improves user experience.
- JPEG files can easily be edited using popular image editors.
- These files are easy to share via email, messaging, apps, etc.
- JPG can be used on both Windows and Mac operating systems.
- Easily accessible and suitable for long-term archiving.
Conclusion
Converting XPS files to JPEG or JPG brings various advantages to users. However, due to a lack of direct methods, it becomes difficult to convert XPS file to JPEG images. To ease and automate the conversion process, use the recommended XPS to JPG Converter tool. Follow the mentioned step-by-step guide to make the entire process hassle-free and get error-free results.
Frequently Asked Questions
Q. Which is the best way to save XPS as JPG/JPEG?
A. The best way to save XPS as JPG is by using a professional tool like Kernel XPS Converter.
Q. Does XPS Converter maintain image quality when converting XPS to JPG?
A. The Kernel XPS Converter preserves the images in original quality when converting XPS to JPG, ensuring 100% guaranteed results.
Q. Can I batch convert XPS file to JPEG with this tool?
A. Yes, you can convert XPS file to JPEG in bulk using the XPS Converter software without facing any problems.