In this article, we will discuss the process of importing PST files into Office 365 shared mailboxes, utilizing both manual techniques and a specialized tool known as Kernel Import PST to Office 365. This tool is designed for advanced PST file imports into various Office 365 destinations, including mailboxes, archive mailboxes, public folders, shared mailboxes, and Office 365 groups.
![]()
![]()
An Office 365 shared mailbox is a unique mailbox type designed for collaborative use by multiple users who need access to the same mailbox. These shared mailboxes are ideal for functions such as managing company data, handling support emails, managing a reception desk, and other similar purposes. Additionally, they can serve as a centralized calendar resource, enabling multiple users to effortlessly view and schedule vacation time and work shifts.
In general, Office 365 shared mailboxes are a highly advantageous option for organizations operating within the Office 365 platform, which is why many are opting to transition to these shared mailboxes. In this article, we will delve into the process of importing PST files into Office 365 shared mailboxes, covering both manual methods and the use of professional solutions.
Certainly, the PST file format is undeniably crucial for Outlook users, serving as a primary means to store their email data. However, PST files can often pose challenges for users as they are susceptible to corruption due to unforeseen circumstances like abrupt Outlook shutdowns, sudden power outages, and other similar events.
As a result, numerous individuals and organizations opt to migrate their PST files to Office 365 mailboxes. Office 365 offers various mailbox types, including primary mailboxes and shared mailboxes. In this article, we will specifically focus on shared mailboxes and explore the process of importing PST files into them.
What are Office 365 Shared Mailboxes?
Shared mailboxes represent one of the most valuable features offered by Office 365, enabling multiple users to collaborate within a unified account. They prove to be an excellent solution for organizations that primarily operate within the Office 365 ecosystem.
Hence, it's not surprising that in recent times, the majority of businesses are inclined towards migrating their PST data to Office 365 shared mailboxes. This migration approach not only facilitates widespread data accessibility but also enhances security measures. In the following sections, we will explore the techniques for efficiently importing PST files into Office 365 shared mailboxes.
Approaches to Import PST files to Office 365 Shared Mailboxes
If you’re looking for manual approaches to import Outlook PST emails to Office 365 shared mailboxes, then Microsoft provides three different ways to import PST files to Office 365. Let's get some information about each method.
Method 1 – Import PST Files to Shared Mailbox using Import/Export Wizard
Method 2 – Import PST Files using the Network Upload Method
Method 3 – Import PST Files using Drive Shipping Method>
Limitations with the Manual Methods
- Manual methods are not suitable for large files.
- There is always a risk of data loss and data corruption.
- Requires complex configuration and technical knowledge.
- Lengthy and time-taking process.
As previously mentioned, manual methods for PST file imports can be time-consuming and demand a solid grasp of Office 365 technicalities. Consequently, they may not be the ideal choice for those seeking an immediate PST file migration to Office 365 shared mailboxes. In light of this, we will introduce a third-party tool in this article, which offers an efficient and direct solution for importing PST files into Office 365 shared mailboxes.
An Automated Tool to Quickly Import PST Files to Office 365 Shared Mailboxes
Numerous Microsoft MVPs have acclaimed Kernel Import PST to Office 365 as one of the premier utilities for seamlessly importing PST data into Office 365. This advanced tool empowers users to perform PST file imports into various Office 365 destinations, including mailboxes, archive mailboxes, public folders, shared mailboxes, and Office 365 groups, all while maintaining complete data integrity. It boasts several outstanding features that set it apart, such as the capability to import various types of PST data, PST file mapping, and the option for selective migration of PST file data, among others. To gain a better understanding of this software, let's delve into its operational process. Please follow the steps below to comprehend its workflow.
![]()
Step 1: Download and install the software on your system.
Step 2: On launching the tool, select Add Source to add PST file(s).
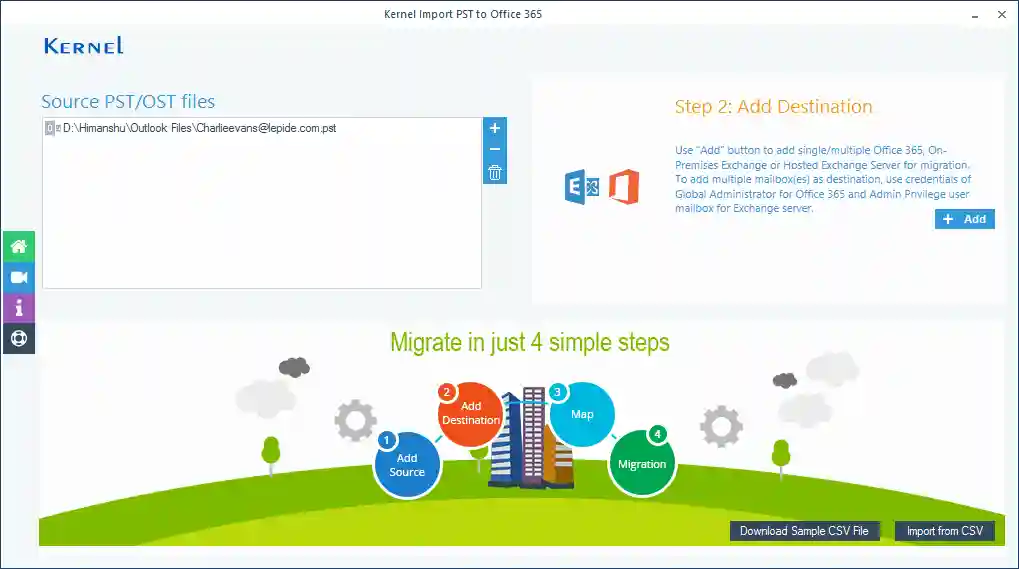
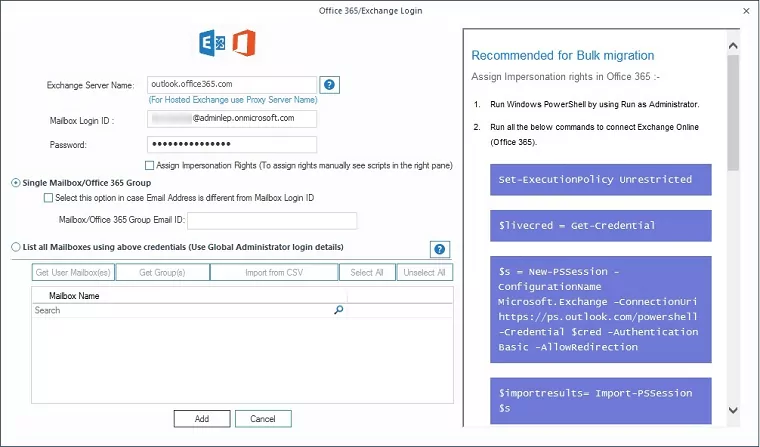
Step 3: In the destination field, add Office 365 account as the destination with the proper credentials.
Step 4: Both the PST file and Office 365 account will be added to the tool.
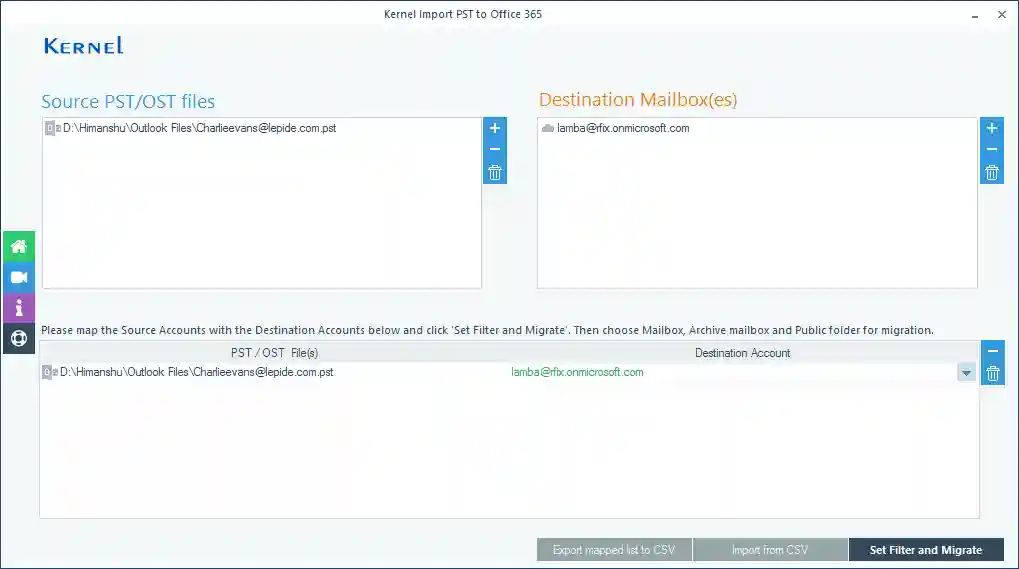
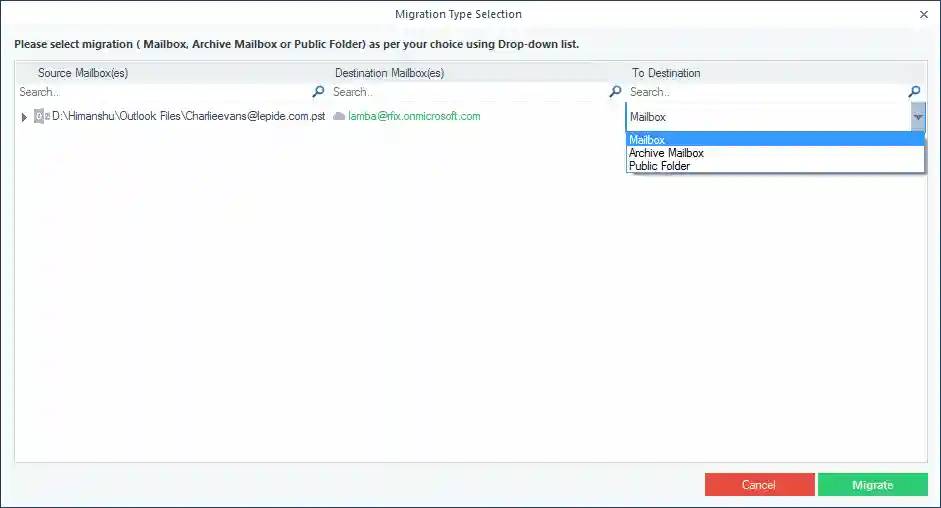
Step 5: Select the destination type where you want to import the PST file and click Migrate.
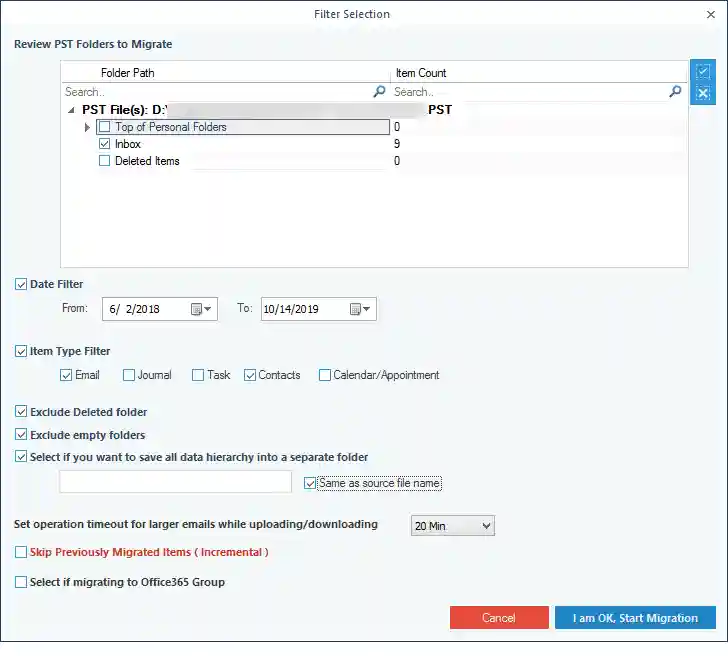
Step 6: Apply specific filters to the PST file based on your requirements and click I am Ok Start Migration.
Step 7: The migration will start. Once it is complete, a notification will appear on your screen the following:
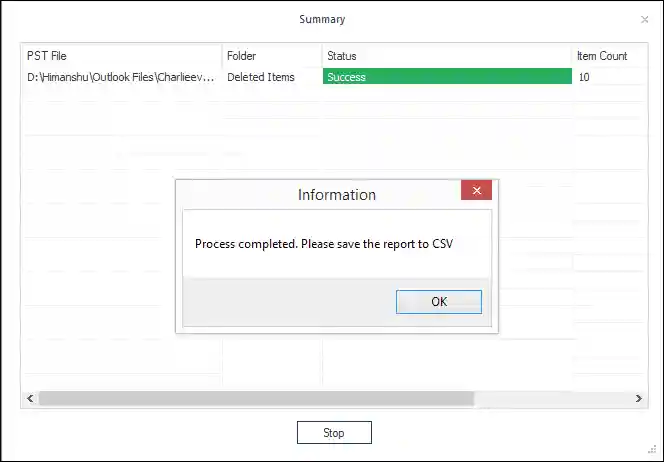
Step 8: Click OK to finish the process and save the report to CSV format by clicking Save report to CSV. This is the simplest way to import PST files to Office 365 shared mailboxes. Using the same tool, you can also migrate PST file to an archive mailbox or public folder.
Safeguarding your crucial emails and documents from malware attacks is paramount to prevent data loss and corruption. Therefore, the decision to import PST files into Office 365 shared mailboxes is a prudent one, as it grants access to advanced and enhanced security features, further fortifying your data against potential threats.
As evident from our earlier discussion, manual methods for PST file imports may not be the most dependable or trustworthy choice. In light of this, we strongly recommend utilizing the Kernel Import PST to Office 365 tool, which offers a seamless and efficient means to swiftly import PST files into Office 365 mailboxes. To gain confidence in the tool's functionality, you can explore its free demo version.
![]()