Every organization needs to keep its Office 365 data secure and for that they must take a regular backup of the data and store it in the cloud. While taking these regular backups, they store multiple duplicate items in their backup. So, to skip duplicate items while backing up/restoring Office 365 data, use the advanced Kernel Office 365 Backup and Restore software to take regular backups of Office 365 data.
This advanced utility facilitates automated backup of Office 365, on-premises/hosted Exchange Server items to PST, and other file formats and restoring Outlook PST files to Office 365 or on-premises/hosted Exchange Server. Let us understand the software features and functions more in the coming section.
Process to skip duplicate items in Office 365 while backing
The incremental migration feature of Kernel Office 365 Backup & Restore lets you skip duplicate items during the migration. Here, we will show you how to skip duplicate items using the incremental backup option.
Before moving to the tool’s process, first download the Office 365 Backup software and install it on your system.
![]()
![]()
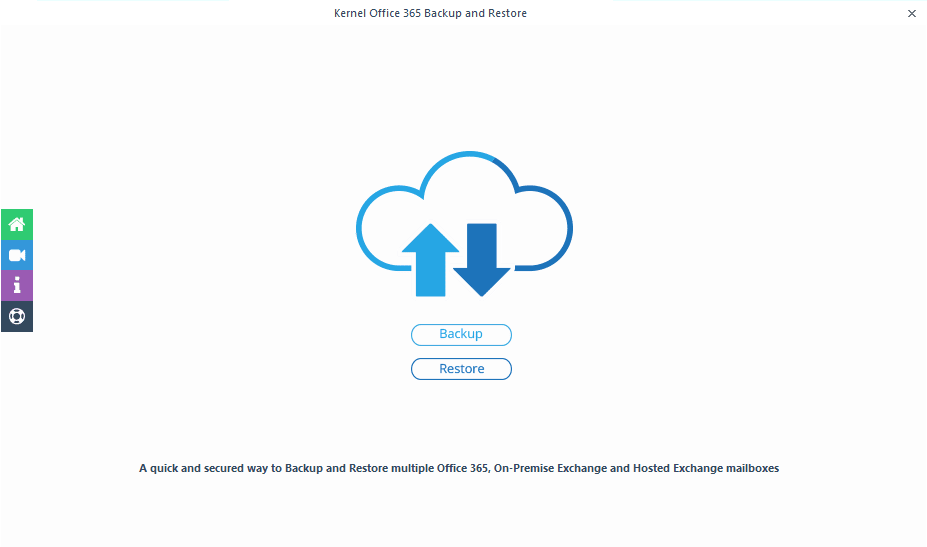
- Launch the software on your system.
- On the home screen, click on the Backup option to initiate the Backup process.
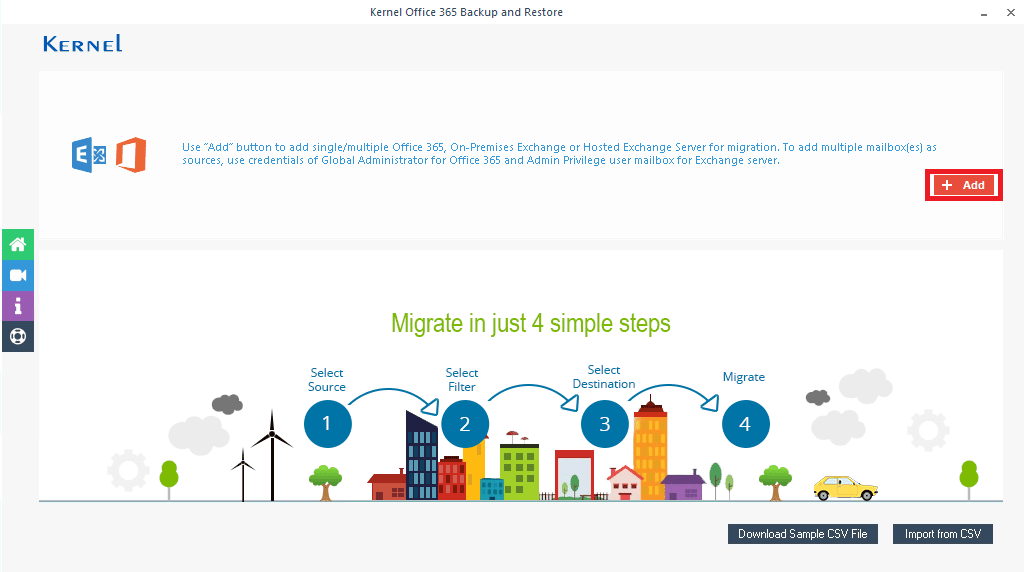
- Click the Add option to add the Office 365 account.
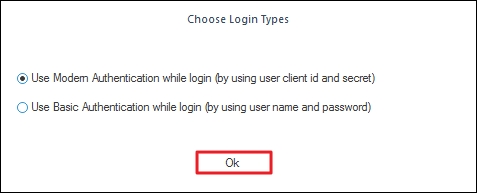
- In Choose Login Types, select login mode accordingly.
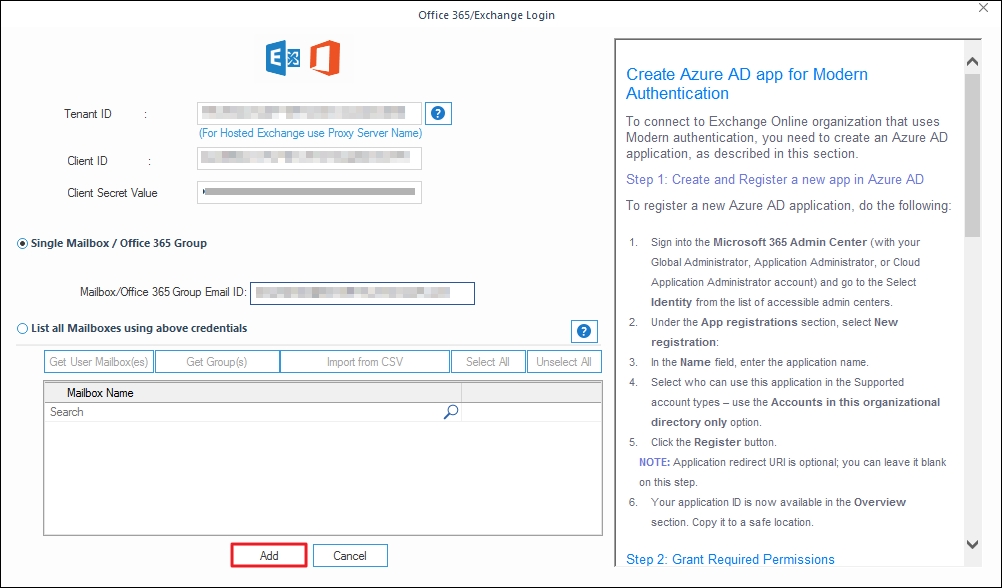
- On the Office 365/Exchange Login wizard, enter the cloud account login credentials like Tenant ID, Client ID, Client Server Value, and Mailbox/Office 365 Group Email ID. After inputting these details, click on Add.
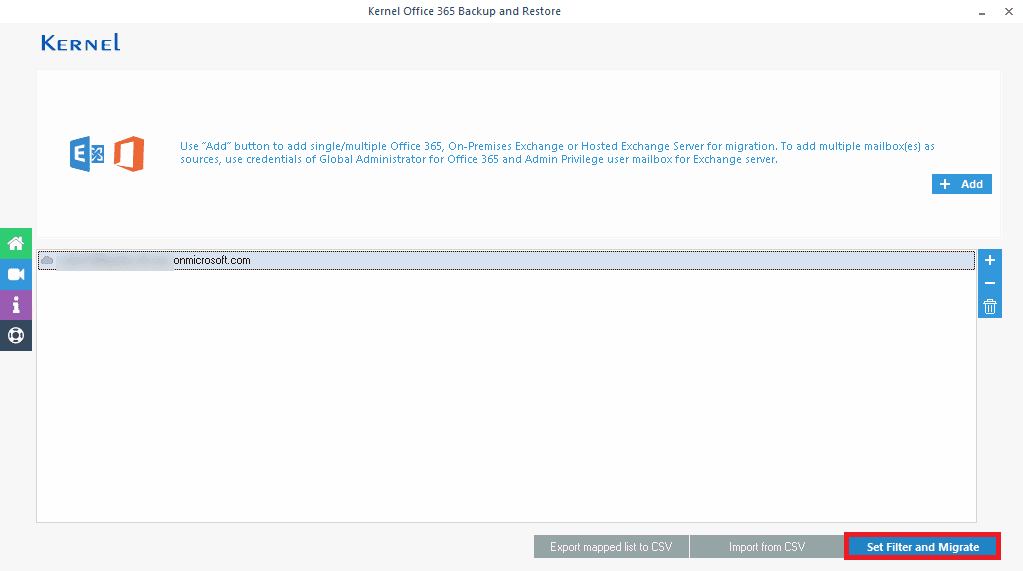
- The Office 365 account is successfully added. Users can add more accounts by clicking on the + icon. Here, click the Set Filter and Migrate.
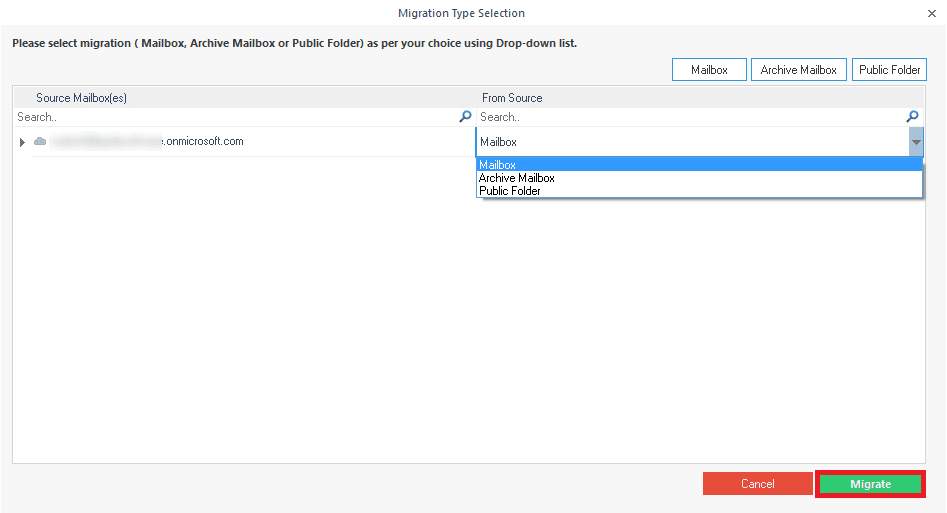
- In Migration Type Selection wizard, select Source Mailbox(ex) and From Source drop-down menu Mailbox, Archive Mailbox, and Public Folder according to your need. Hit the Migrate option.
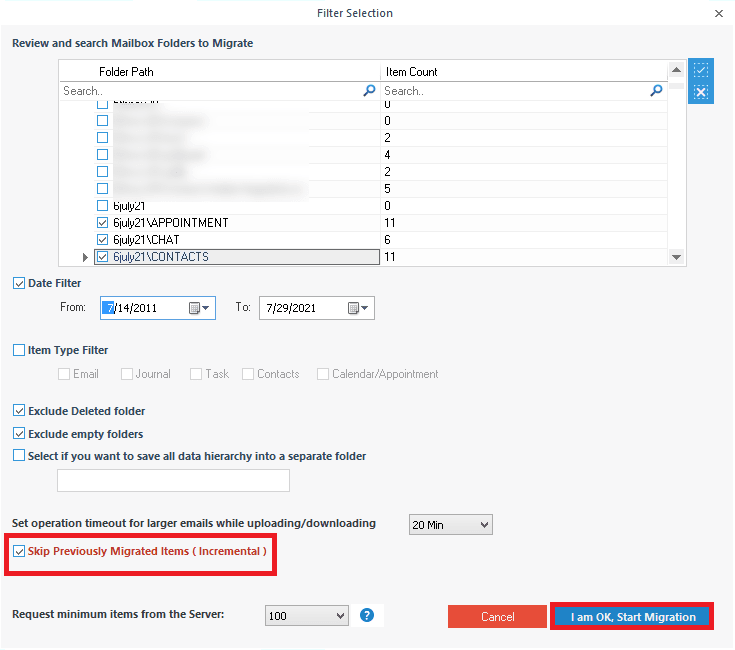
- All the data of Office 365 account will be previewed in the tool console. Apply the necessary filters and tick the Skip Previously Migrated Items (Incremental). To start the migration process, hit I am OK, Start Migration.
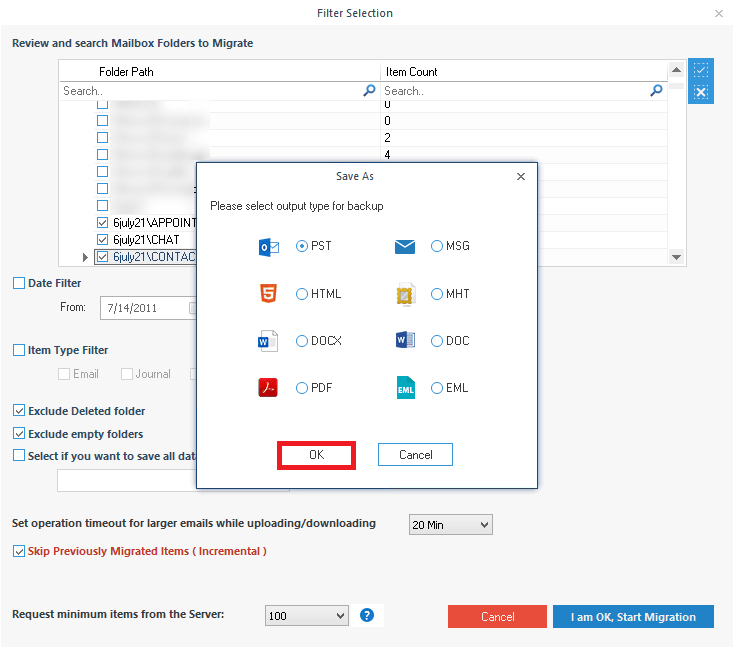
- On the next page, select the output file format, such as PST, and click OK.
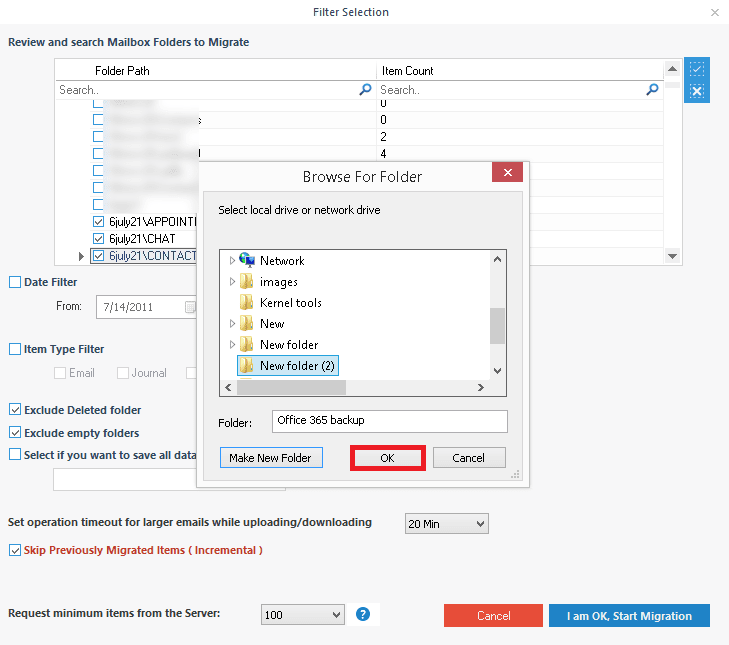
- Now, select the destination folder on the system drive or create a new folder via the Make New Folder option to create a new folder with any name on the specified system drive. Then click OK.
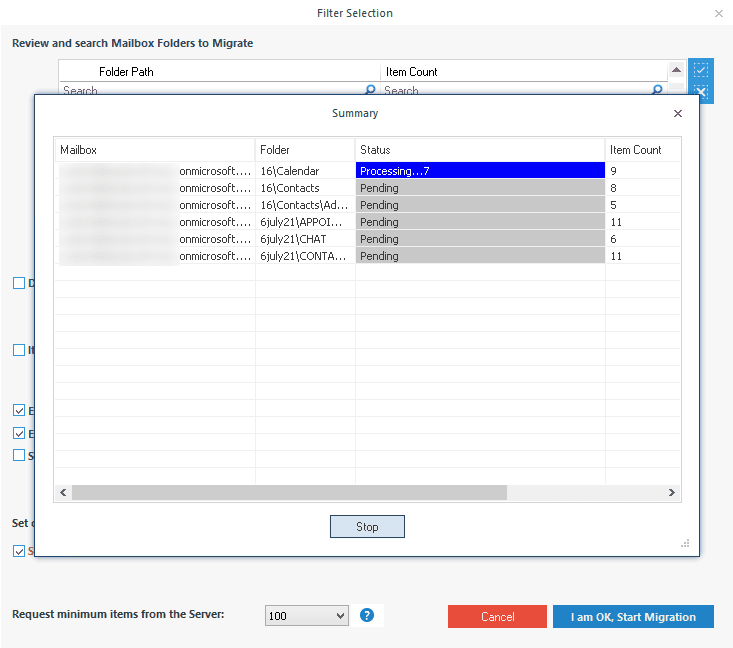
- The selected Office 365/ Microsoft 365 backup without any duplicate items will start and display the live progress.
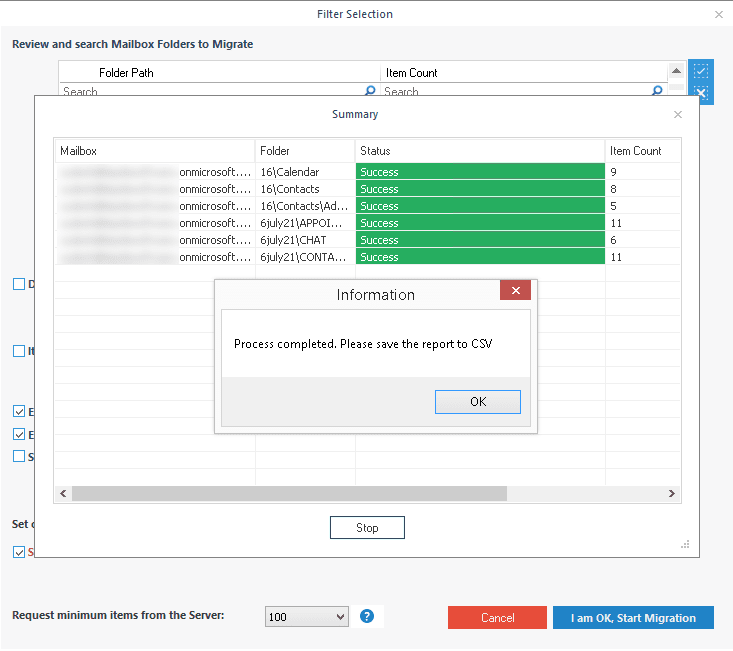
- On the completion of the backup process of Office 365, a confirmation message will appear. Click Ok and save the backup report to CSV file format at the desired system drive with the given option.


Note: The Filter Selection page options, including the Skip Previously Migrated Items (Incremental), are similar while restoring PST files to Office 365 with the Restore feature of the application.
Therefore, you can keep the earlier moved items away from the current backup process. It is an extremely useful option for such accounts that require consistent and timely backup, and it will also reduce the size of resultant PST files smaller and more agile.
Conclusion
Skipping duplicate items while backing up or restoring Office 365 data is crucial and for that we have provided an immense solution to make it easy. While there are a few limited manual methods that are quite time-consuming and risky. That’s why we recommend the Kernel Office 365 Backup and Restore software to easily migrate your Office 365 data according to your needs.