When migrating from one tenant to another, most users are not able to skip already migrated items, which later spam their Office 365 mailboxes with copied emails and messages. Duplicate items take up so much storage space and will create shortage of storage for further migration. To tackle this situation, users look for manual methods. However, manual methods to migrate Office 365 data don’t give users a choice to skip already migrated items. Which eventually creates more difficulties for users to perform the migration.
Steps to Skip Already Migrated Items During Office 365 Mailbox Migration
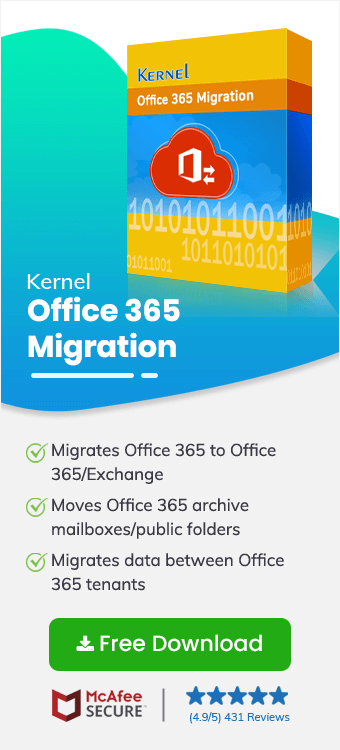
As discussed earlier, manual methods have some limitations. However, you can avoid exporting the already migrated items by using our Advanced Office 365 Migrator, which is specially designed for office 365 migration skipped items. It provides smart filtering options that allow you to migrate data from one tenant to another as per your requirements and preferences. Here, we are going to discuss a step-by-step process of skipping already migrated items while migrating Office 365 mailboxes from one tenant to another.
![]()
![]()
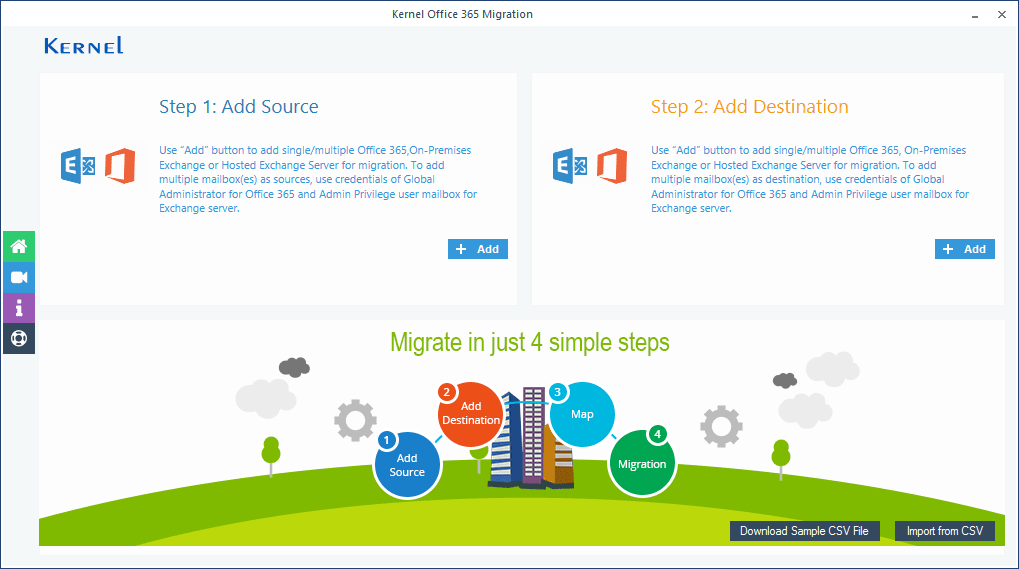
Office 365 Data Migration tool involves a simple and straightforward working process, even non-technical users can easily migrate their Office 365 mailboxes with the help of this software. Also, the smart filtering options allow you to migrate selective data as per your requirements. Now, let’s check out the working process of the software.
First of all, you need to download and configure the software on your system. After installing the tool, follow the below steps:
- Launch the tool and click the Add Source section from the home screen of the tool.
- In the opened wizard, provide the credentials for Office 365 account. Now, select ‘List all Mailboxes using above credentials’ and click Get User Mailboxes. The multiple mailboxes linked with the account will appear in the below section, select the specific mailboxes that you want to export and click Add.
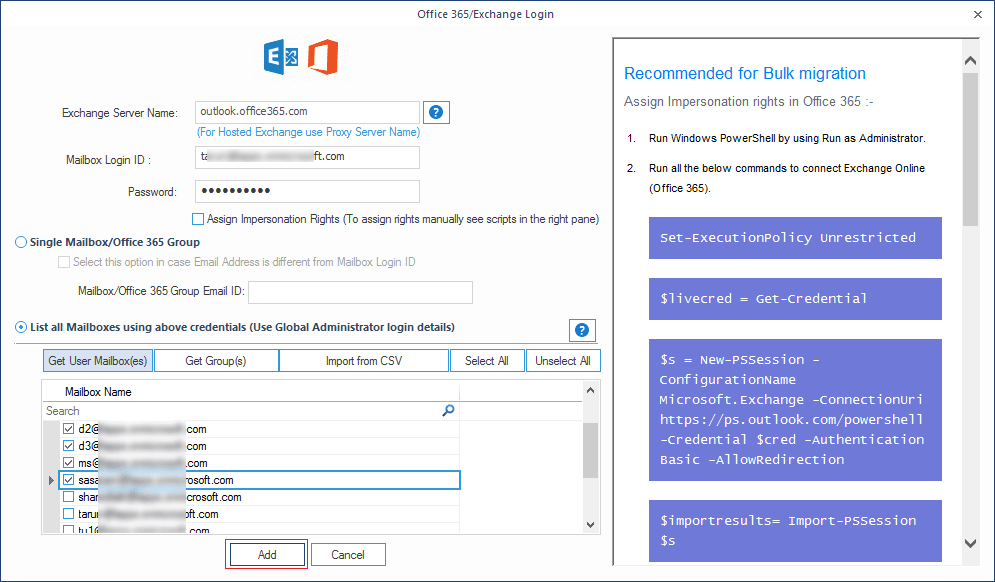
Note: Make sure you are using a global admin account to add multiple mailboxes. - After adding the source mailboxes, you can add the destination mailboxes using the same procedure mentioned above.
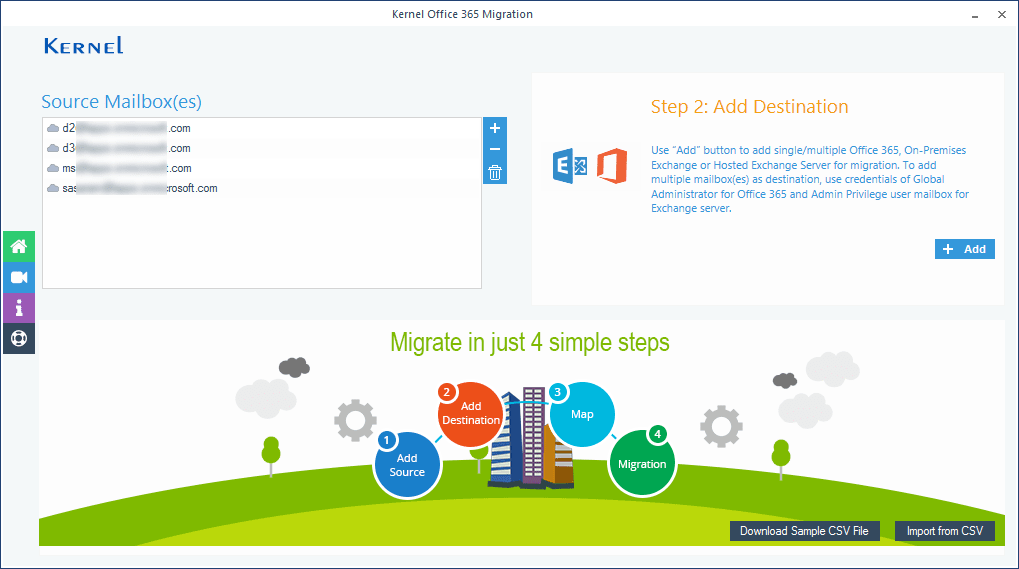
- Once the source and destination mailboxes are added, map source mailboxes to the respective destination mailboxes, and then click Set Filter and Migrate.
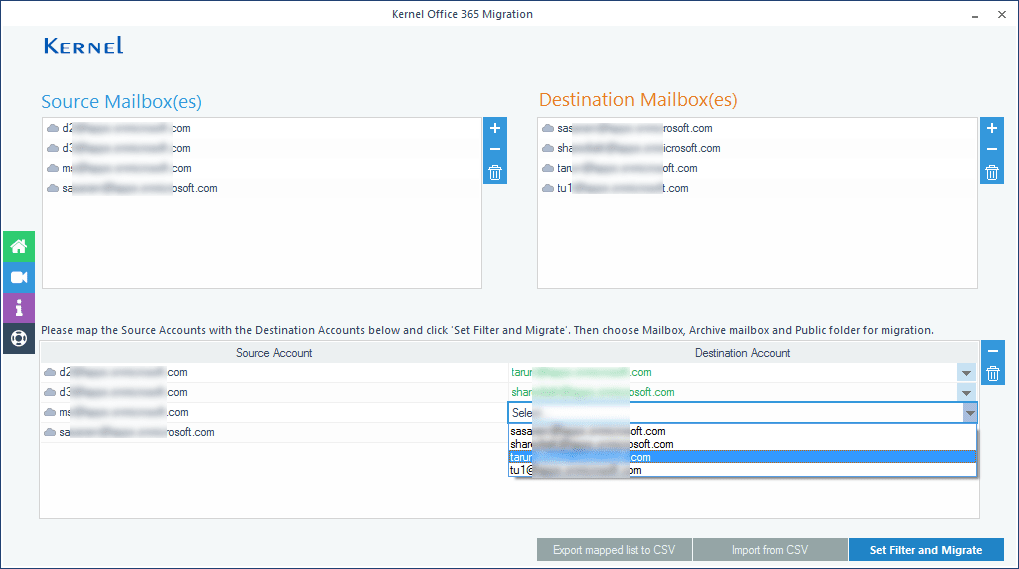
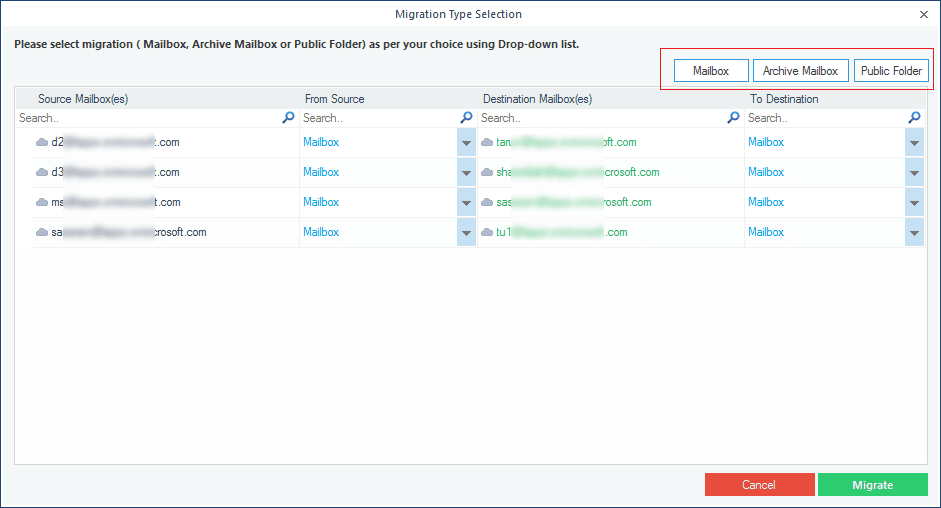
Note: You can also use a CSV file to add both source and destination mailboxes. - In the next step, select the type of mailbox to which you want to migrate source mailboxes, and then click Migrate.
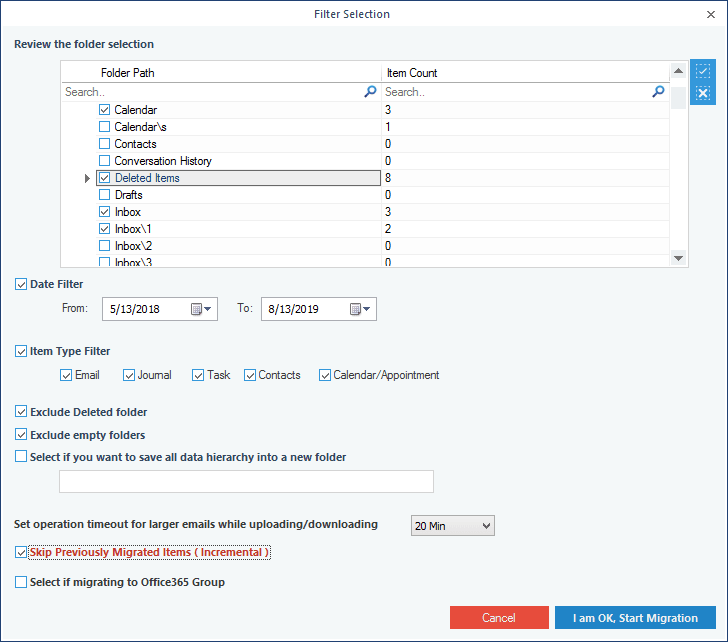
- Here, you can apply specific filters to source mailboxes based on Item type, Date, Folder, and most importantly, you can select the ‘Skip previously migrated items’ option. After making your selection, click I am OK, Start Migration.
- The tool will start migrating Office 365 mailboxes from one tenant to another without copying the already migrated items. Once the process is complete, a message will appear on your screen confirming the process completion, click OK to end the process.
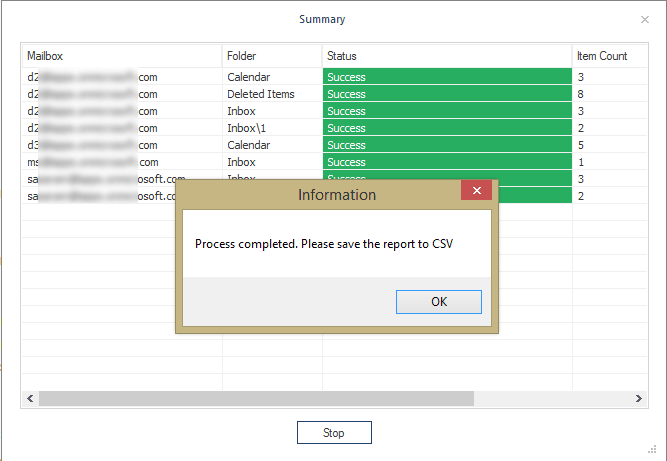
Note: If you want to save this migration report to CSV, then click Save Report to CSV.


That’s how you can easily migrate Office 365 mailboxes while skipping already migrated items and folders with this Migration tool.
Conclusion
In this article, we discussed how you could avoid already migrated data. No user would want to migrate the same data again and again while migrating Office 365 mailboxes from one tenant to another However, the manual methods of migrating Office 365 mailboxes often don’t allow users to skip already migrated items. Thus, users need a utility like Kernel Office 365 Migration tool, that can help them to skip already exported data.
![]()