Office 365 mailbox migration is a process for which organizations continue to conduct deep research to find solutions that offer easy execution. Yet, the priority for businesses for such solutions is to have more advanced email filters for selective Office 365 mailbox migration.
User Query for Selective Migration
I am looking at your Office 365 migration products, do you have something that can be used to move selected folders in the O365 mailbox from one user to another user on the same tenant? It is not the mailbox which I want to migrate from one tenant to another, but an email folder from one user to another on the same tenant. I want to selectively move folders from a mailbox.
Let's simplify this query for you— The user wants an Office 365 migration software that includes advanced features to move specific email folders between users of the same tenant.
The requirement for selective Office 365 mailbox migration filters aims to have a reliable solution that can help with small-level or single email file migration along with complete Office 365 tenant to tenant migration.
To search for software with a specific filter for email seems easy, but that’s not the reality. While checking multiple tools online, you may find some offering one filter and some missing out on the same filter. That’s why as a user you might aim for a complete tool that fulfills your requirement for the same tenant-specific email migration.
Benefits of Selective Office 365 Mailbox Migration
Having a multi-tasking solution to move selected folders on O365 is a blessing for Office 365 businesses. There are several benefits behind this demand, so let’s learn about each advantage below:
- Productive migration: Different filters that allow to remove spam or unwanted emails before migration help to have proper business data. So, you will have all the specific important data at the destination user in the same tenant for better optimization.
- Small migration: On multiple instances when you want a specific email folder but must migrate the entire mailbox, it makes the migration too heavy. So, these filters help choose specific data to minimize the file size and fasten the migration process in the same tenant as well.
- Save time: Sometimes business operations only require moving particular emails and also removing large attachments of no use. It will save a lot of time for your migration and help with a smooth process.
- User advantage: Once you perform the data migration while applying preferred filters, any new or old user in the destination will get a productive environment. All the data in the destination user is relevant and available to utilize in different tasks, which makes the process easy.
Which Office 365 Mailbox Migration Software Offers the Best Filters?
Office 365 mailbox migration is very tedious but the need for selective migration makes it even more troublesome. To perform selective migration, you need to rely on distinctive filters that offer to refine your migration.
There are multiple tools available online to filter your specific email folder migration within the same tenant, but they might not offer useful filters all in one place. Are you also wasting so much time searching for a trusted Office 365 mailbox migration tool?
Try the all-in-one Kernel Office 365 Migration Tool that is designed to provide extensive support for your Office 365 mailbox migration. Easily move selected folders on O365 mailboxes, archive mailboxes, public folders Data, shared Mailboxes Migration, Office 365 Groups, etc.
Utilize the trial version to know about the tool’s filters and selective Office 365 mailbox migration capability.
![]()
![]()
Highlight the Useful Filters Of Kernel Office 365 Migration Tool
The tool works on a simple user interface that enables you with easy execution for Office 365 mailbox migration. It is equipped with high-end filters for your specific email migration that refine the mailbox data on different stages. Checkout the key filters for email migration:
Filter 1. Fetch multiple user mailboxes using Get User Mailbox(es) filter.
By clicking on this filter, you will get a list of Office 365 account mailboxes to proceed with your specific email migration. Select the preferred mailbox and Add it to begin migration.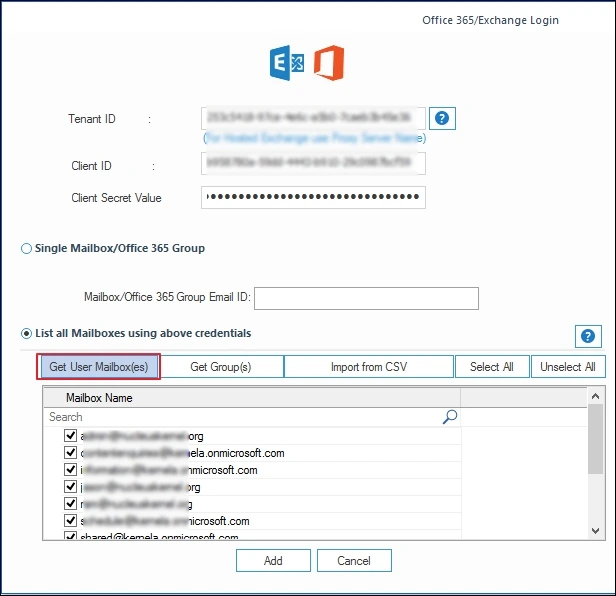
Filter 2. Choose Get Group(s) to specifically include the Groups in your Office 365 account.
Click on the Get Group(s) option and you will see list of groups from that you can select any particular group for migration.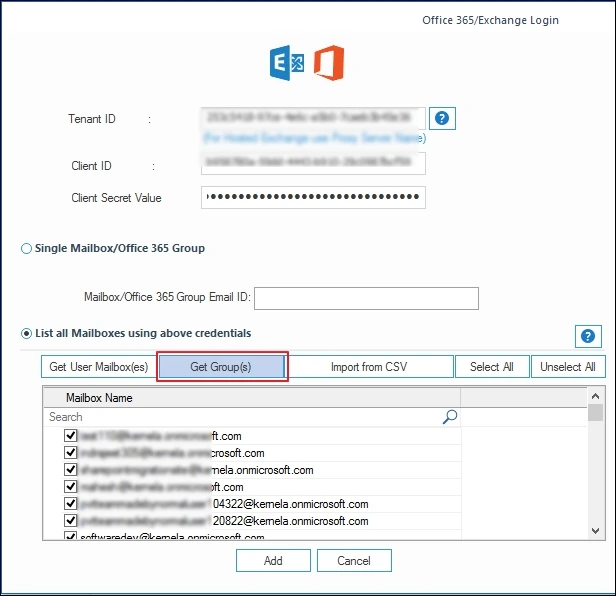
Filter 3. For the destination, utilize the filter to bifurcate Office 365 mailbox migration among Mailbox, Archive Mailbox, and Public Folder.
Easily specify the email folder that you want to migrate to, by selecting the suitable destination to map.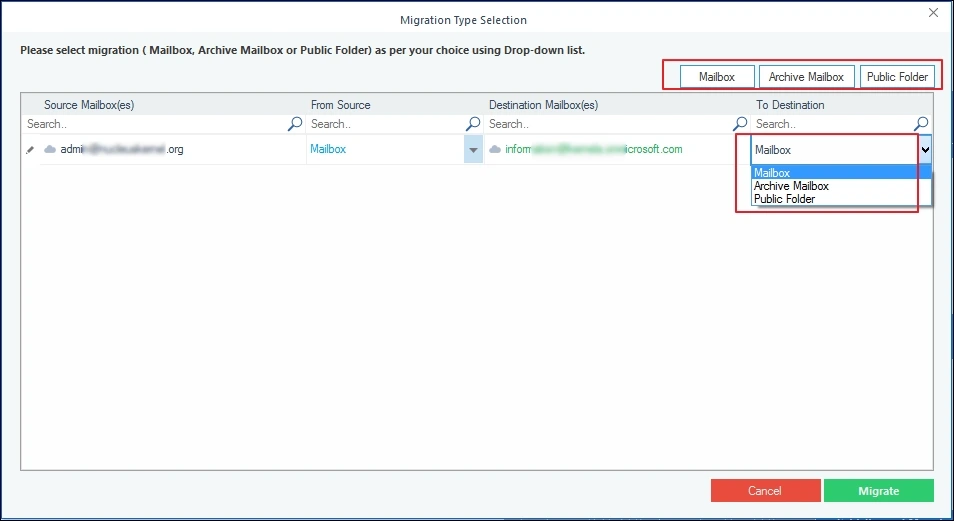
Filter 4. Explore all the content of the selected mailbox and choose a particular email folder.
At the Review the folder selection, you have the option to selectively migrate folders from O365 and proceed for migration.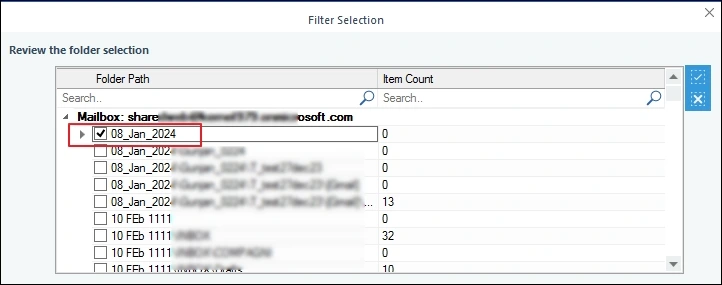
Wrap up
The highlight of the above guide is to provide you with a viable solution for selective Office 365 mailbox migration. We hope that your crucial query is solved above as we have suggested a reliable third-party tool that integrates exceptional filters for specific migration in the same tenant.
However, we would like to suggest that you should have valid Office 365 subscription, else upgrade Microsoft 365 subscription for successful migration.