Upgrading to the latest version of a platform provides an upper hand over the innovative features that a preceding edition won’t. Moving to SharePoint latest version provides a lot of benefits which is why most businesses are considering this shift. It is easy to manually migrate data from one SharePoint server to another, however, this is not the case with SharePoint lists and libraries.
You need to follow a different approach to execute a SharePoint list migration to another site. Some of the ways to migrate a list and library are mentioned below:
- Export the list using Central Administrator or PowerShell.
- Creating a SharePoint Server farm to migrate databases
- Modifying the CMP file (not recommended)
Migrate SharePoint list/library with Kernel Migration for SharePoint
While the above methods can be used to copy a SharePoint list to another site, they can be quite challenging to execute due to their inherent complexities. Furthermore, non-technical users may need experts' help to perform these procedures. This leads us to the question arises: How can a SharePoint list be efficiently moved to another site? The most suitable answer is to seek professional help for SharePoint data migration.
Kernel Migration for SharePoint is a powerful SharePoint migration tool that is used to migrate SharePoint data from one server to another. It is empowered with great features, making it one of the best migrating tools for SharePoint.
![]()
Some of the tool’s efficient features are:
- Fully capable to migrate SharePoint list/library to another site between different versions.
- Pre-migration analysis for an error-free migration.
- Capable of migrating large files & folders.
- Advanced data filters to migrate specific data.
- Bulk migration with the help of CSV file.
- Compatible with all version of SharePoint, including SharePoint 2016.
Process of SharePoint list/library migration
Now, you know what this software is capable of. Let’s have a look at its working process. Here, we are going to perform the migration of lists and libraries from SharePoint 2010 to SharePoint 2013. Follow the steps below to perform the migration.
- Download and install the tool on your system.
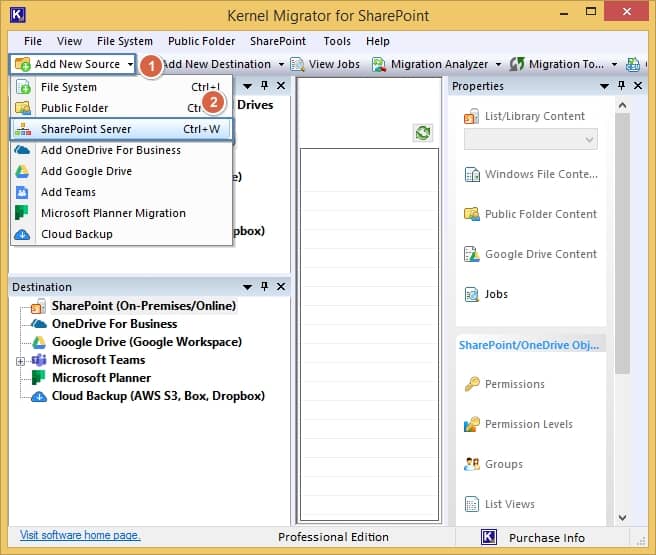
- On launching the tool, the welcome window will appear on the screen. Go to “Add New Source” in the toolbar, select SharePoint Server.
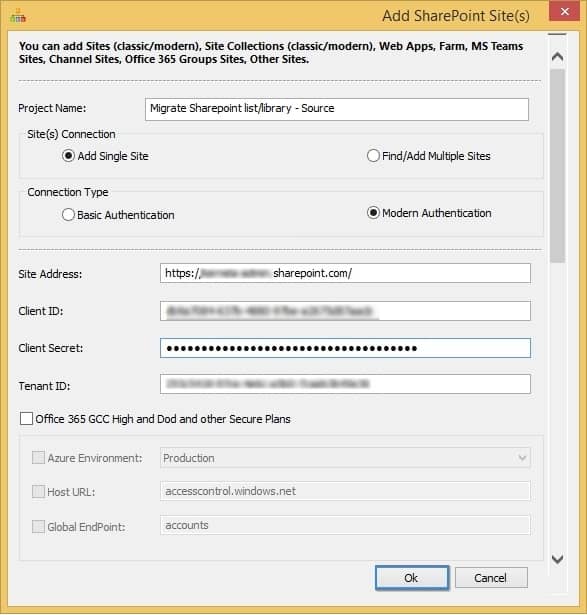
- Enter the asked credentials based on the Connection Type (Basic Authentication or Modern Authentication) and then press OK to connect the SharePoint site with the source.
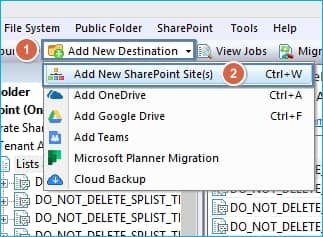
- Go to the Add New Destination in the menu bar and then select Add SharePoint site(s).
- Just like the source, enter the credentials for a destination to connect with the SharePoint site.

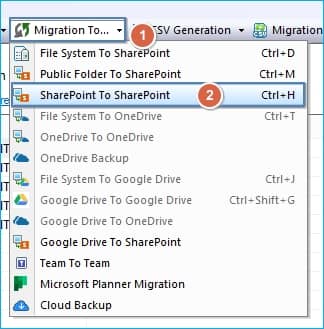
- After adding the source, go to the “Migration to” dropdown in the toolbar and then select “SharePoint to SharePoint.
- It will open a wizard that will allow you to edit the source selection, and you can choose what you want to migrate from the source.
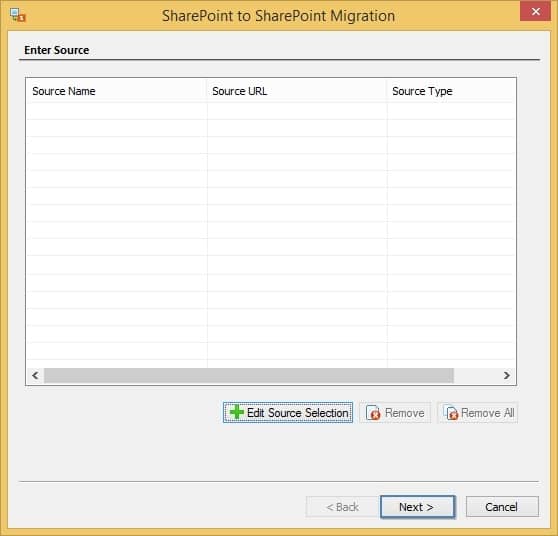
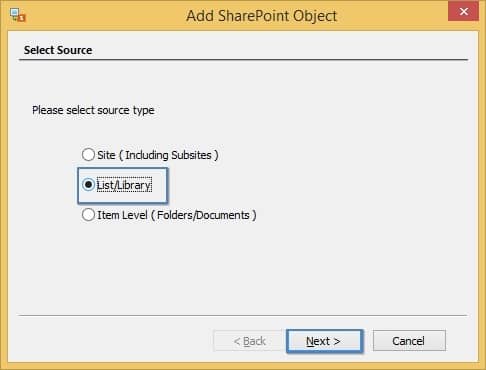
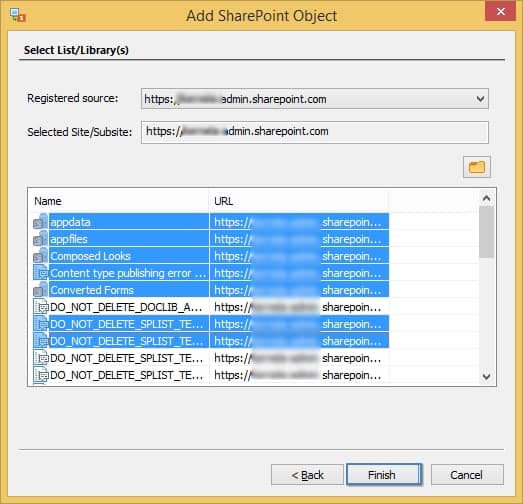
- In the Enter Source wizard, click the “Edit Source Selection” button, select List/Libraries to migrate, and then click “Next”.
- The data retrieving process will start. Once done, the tool will display all the lists in SharePoint.
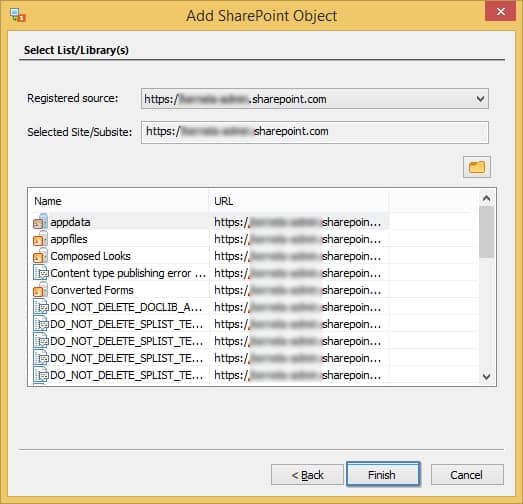
- Select the list/libraries to migrate the SharePoint list from the source SharePoint account. You can select multiple files by “Ctrl+Click.” After selecting the files, click “Finish.”.
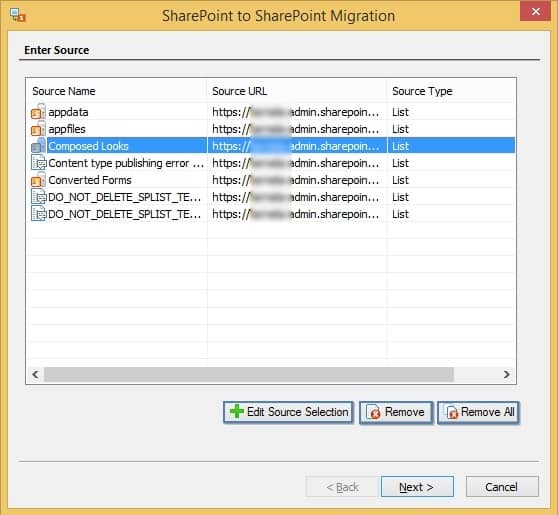
- All the selected lists will appear in the Enter Source pane. Add more files using the Edit Source Selection button, and the Remove All button will remove all files from the selection. The remove button allows you to delete the selected list from the ones you’ve added.
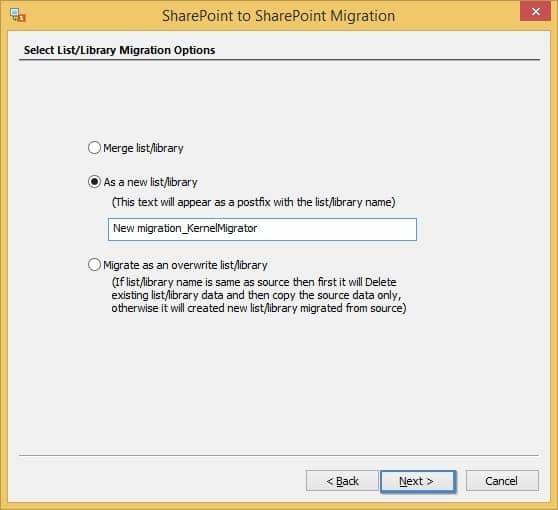
- Now, you’ll see the options to migrate lists and libraries. Select the desired option and click “Next.”
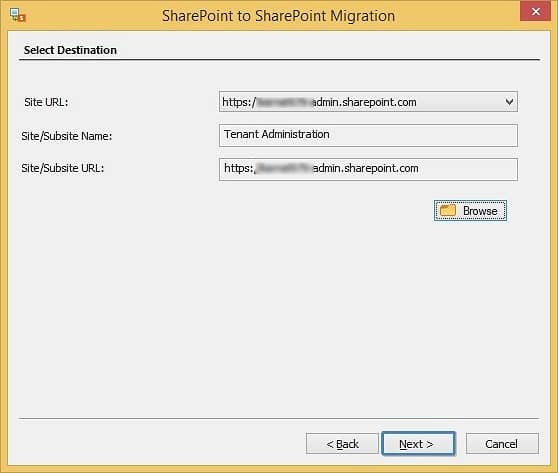
- In the next step, select the destination to migrate these lists. The default SharePoint site will be automatically selected. To add another site, click the drop-down menu and select the site. Click the “Browse” button to select a destination list, library, or folder in the selected SharePoint site.
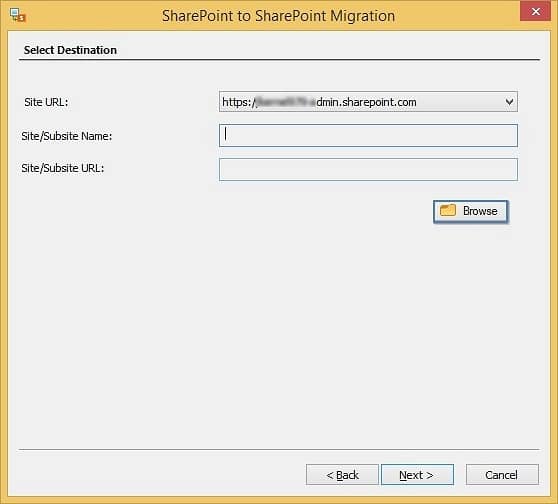
- The following dialog box will appear on the screen. Select the desired location (site or subsite) and click “OK” to confirm.
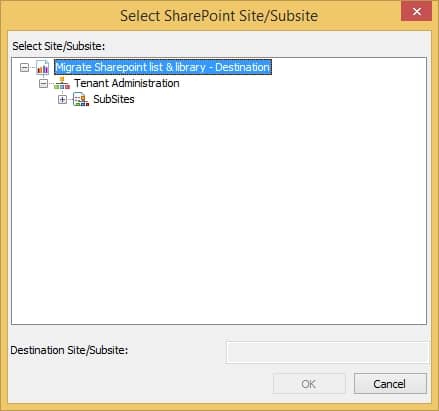
- Once the list/library is selected, you’ll get back to the migration wizard that displays the selected list/library. Now, click “Next” to move to the new step.
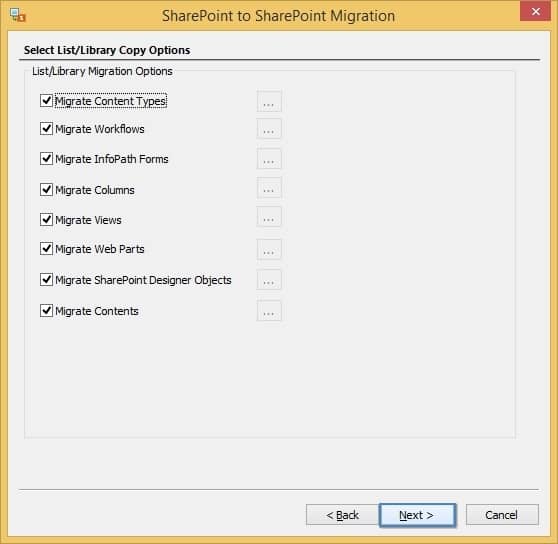
- Select the desired copy options for list/libraries. Click “Next.”
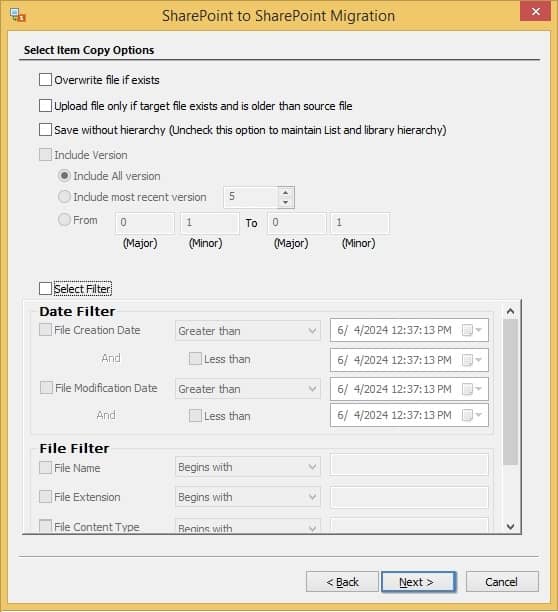
- Apply the filters that you want to use for the migration and click “Next.”
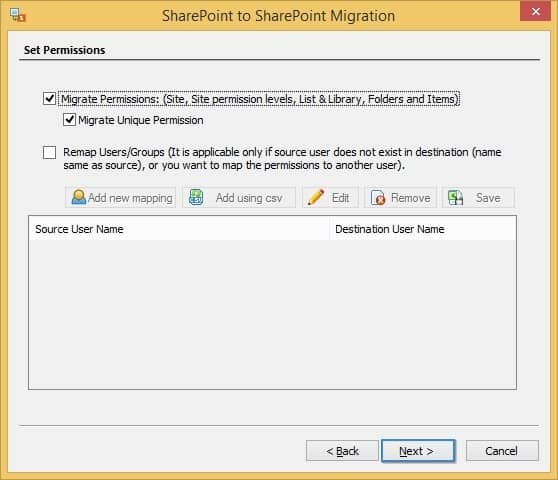
- Now, allow permission to migrate the lists/libraries.
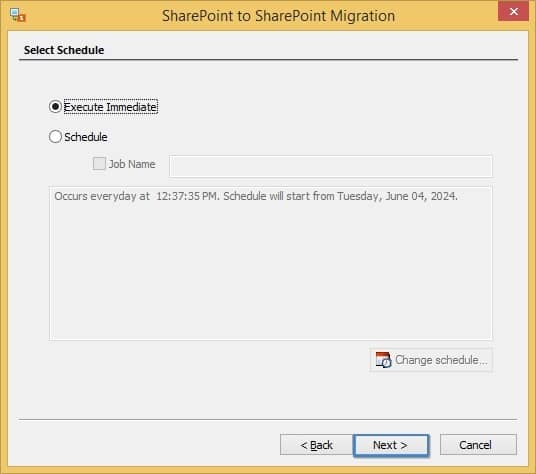
- In the next step, select whether you want to execute the process immediately or schedule it.
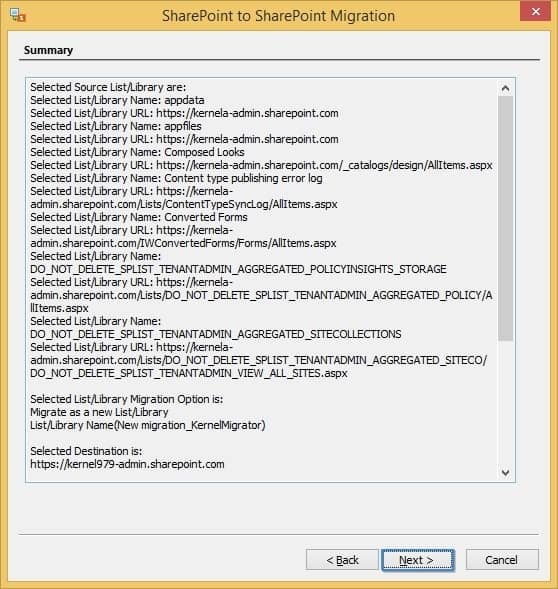
- After executing the process, you’ll see the summary of the migration process. Go through the summary and then click “Next” to start the migration process.
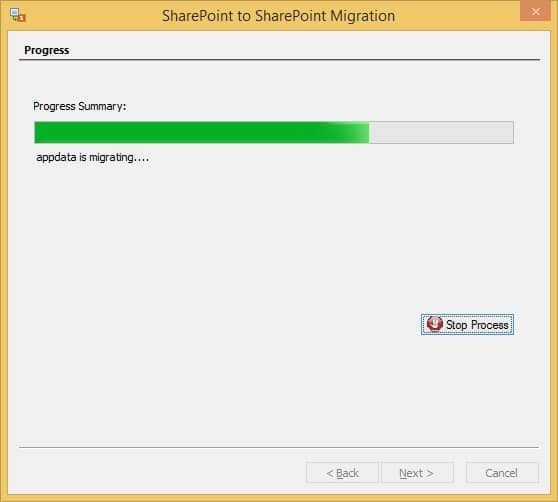
- The migration process will take some time to complete based on the size of lists. You can see the progress of the migration process on the screen.
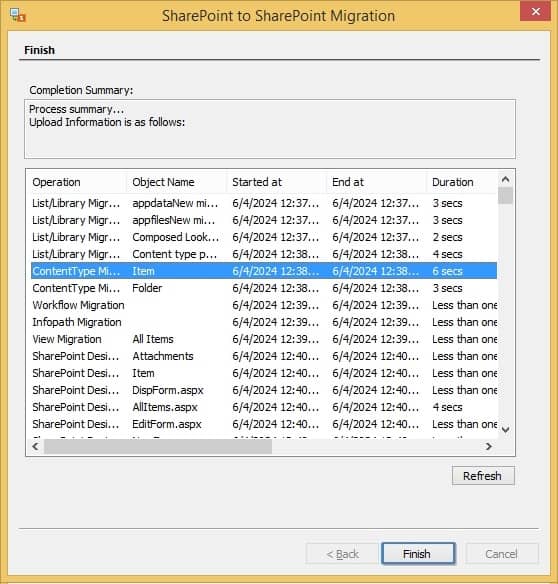
- Once it is done, you’ll see the completion summary on the screen. Click “Finish” to close the wizard.


Using the migration tool, you can easily copy or move the SharePoint list/library to another site. It can also migrate complete SharePoint data to full scale. There is no loss of data or hierarchy when you move a list or library in SharePoint using this migration tool.
Conclusion
When you migrate SharePoint list/library from one site to another, it is important to trace the process; otherwise, the data might get corrupted or lost. Make sure you’ve got the necessary permissions and expertise to use the manual migration methods. You can use them if you possess good technical knowledge. However, if a user faces problems with the manual approaches, the most efficient alternative is Kernel Migration for SharePoint.
![]()