Exchange Server acts as the backbone of IT organizations, especially dealing with customer services. An Exchange Server database EDB file includes inbox, calendar, contacts, deleted items, drafts, journal, notes, outbox, sent items, and tasks. Backup of Exchange EDB file is necessary to avoid data loss or inaccessibility via Server crash down, under maintenance, or file in corruption. Export EDB contacts as a backup to deal with instances where the EDB file is corrupted or inaccessible, the items within the mailbox will be unavailable otherwise. Important business addresses and contacts are stored to secure storage on the local machine in a reliable file format like PST in advance to assure its all-time availability. Here comes the need for a perfect solution to import EDB contacts to Outlook PST file.
There are many direct and indirect methods to import EDB contacts from EDB files to Outlook PST files. One such perfect solution to import EDB contacts is with a professional EDB to PST Converter tool, specially designed for converting corrupted or healthy EDB files data to PST and various other platforms like Live Exchange Server, Office 365, etc.
Import Contacts from EDB to PST using Kernel for EDB to PST
Kernel for EDB to PST Converter is an innovative tool that repairs and converts EDB files to PST (new or existing), Live Exchange, Outlook, and Office 365 without affecting the performance of the server. It allows easy export of primary mailboxes, archive mailboxes, and public folders from EDB mailboxes.
![]()
The process to import EDB contacts from EDB files to Outlook is very simple and straightforward with the help of EDB to PST converter tool. You do not need to be an expert in Exchange Server to use this tool for saving contacts to a PST file.
Follow the simple steps mentioned below one by one to successfully import contacts from EDB file to PST.
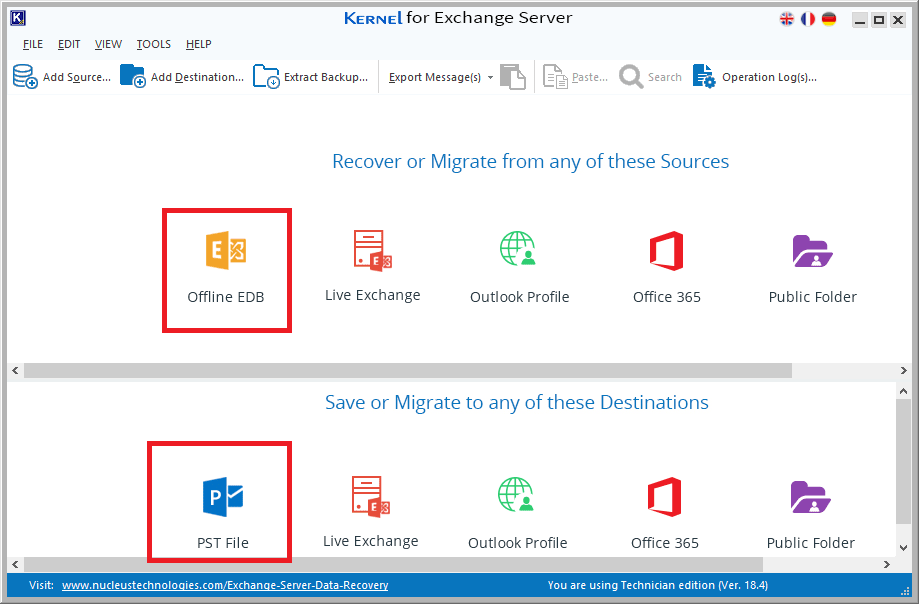
- Launch Kernel for Exchange Server software and select Offline EDB file from the source pane (Recover or Migrate from any of these sources).
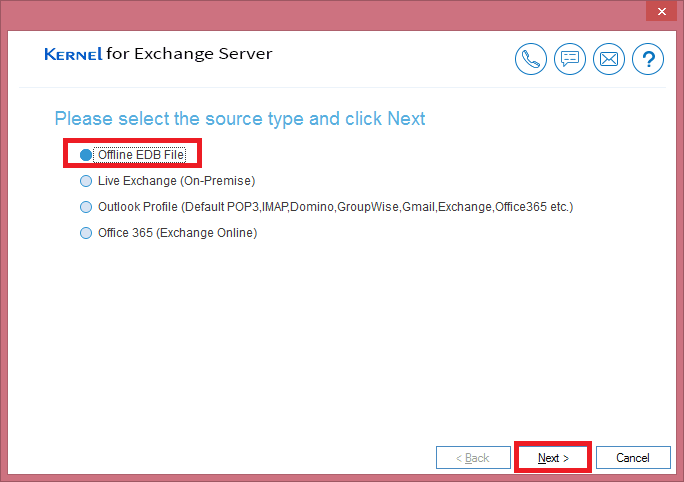
- In the next window, select Offline EDB file from the listed options and click Next.
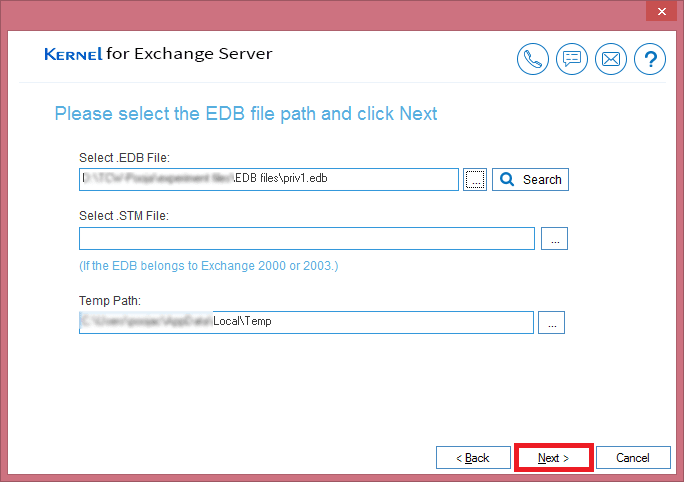
- Click Browse(…) button to select an Offline EDB file saved on your computer and click Next to proceed ahead.
- Choose a scanning mode from the two EDB scanning mode for faster processing, click Next for the next step.
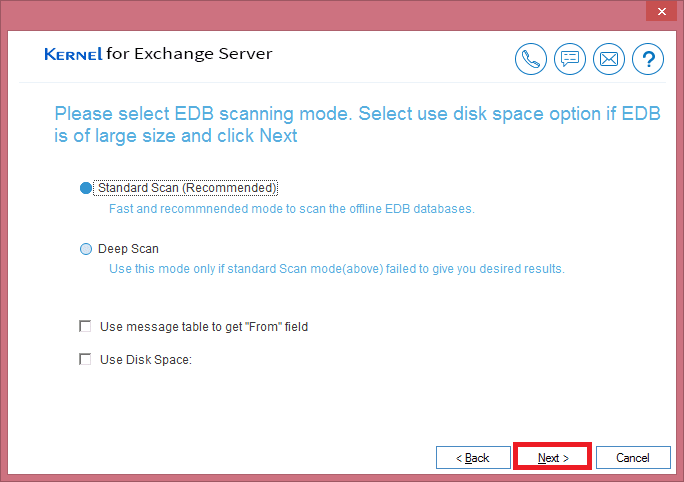
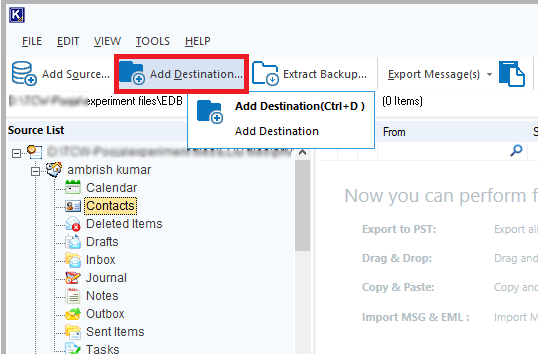
Note: You can checkmark Use Disk Space to select disk space option if EDB is of large size. - Click on Add Destination button from the menu to add a PST file.
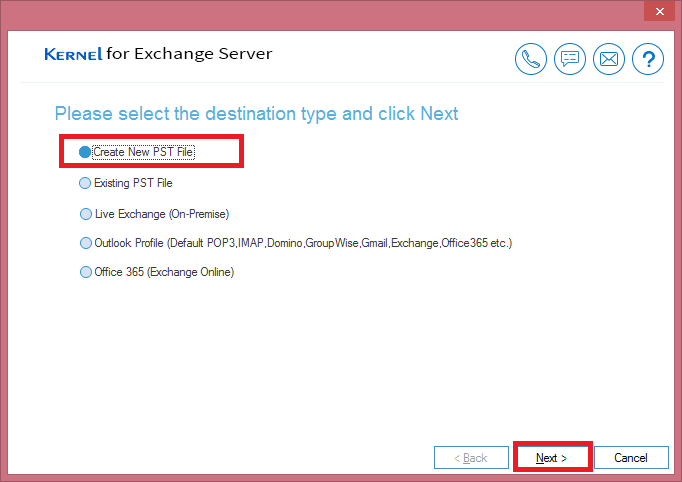
- Choose Create New PST File to import EDB contacts to PST file and click Next.
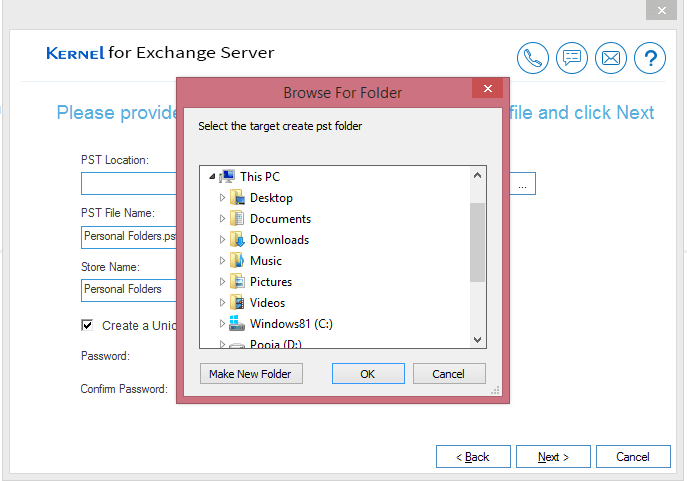
- Select existing or create a new folder on your local machine to save the PST file and click OK and then click Next to proceed further.
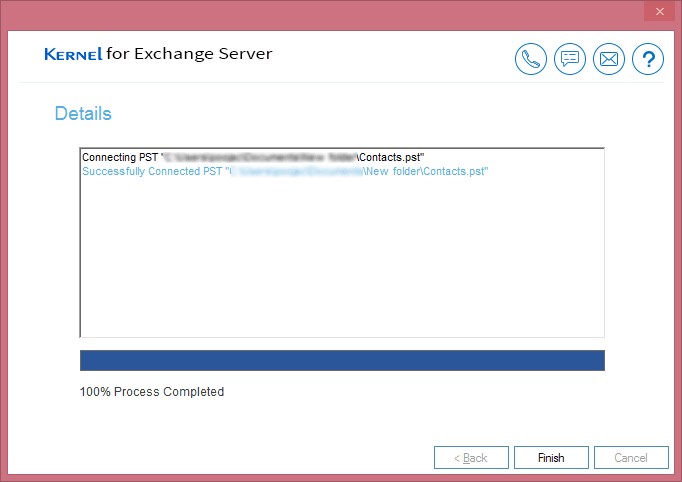
- Once the PST file is successfully created you will have the path details in the Details wizard. To proceed click the Finish button.
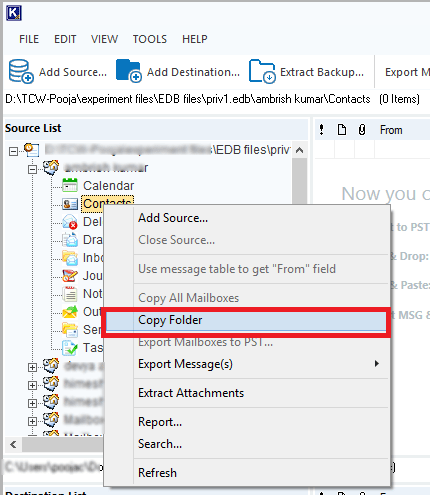
- Now, to import contacts from EDB file, expand the mailbox and look for Contacts folder. Now, right-click over it and select Copy Folder option.
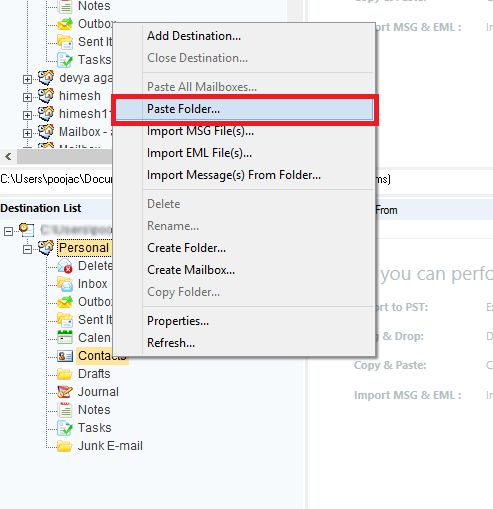
- Move to the destination section right-click on the Contacts folder within the newly created PST file and select Paste Folder.
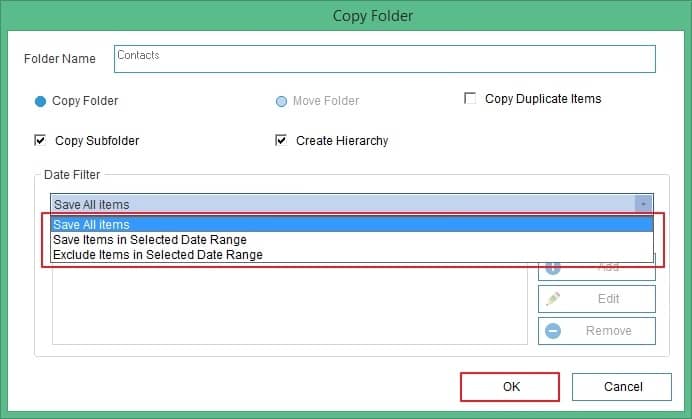
- Now, select the date filter to define if you want to import selective contacts to PST file. Mark the checkbox Create Hierarchy to ensure the hierarchy is maintained. Once done click OK.
- Once you’ve imported contacts from EDB file to PST, the tool will show you logs describing the details of the process executed.
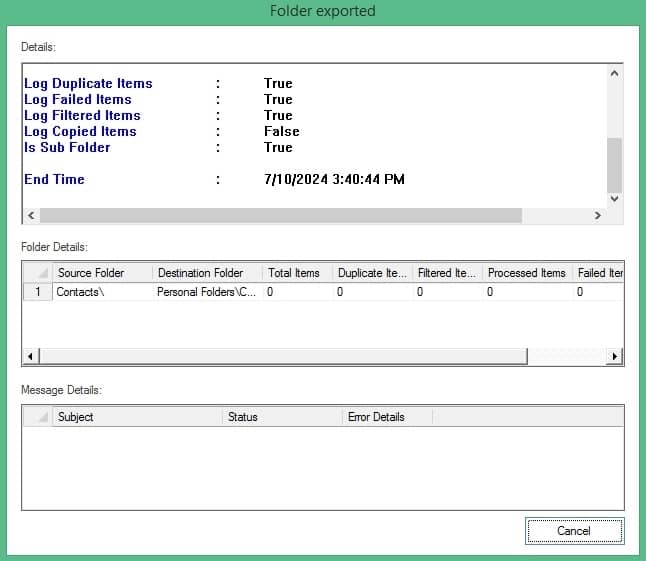


Hence, contacts from your selected mailbox are now saved in the PST file within your local storage. Use it whenever you need by importing the PST file to Outlook and establish communication with the contacts missing from your current mailbox.
Final lines
Your EDB file or mailbox contacts are successfully saved to a PST file. Use this PST file to import EDB contacts to Outlook mailbox application. The software can also recover deleted contacts in Office 365. Other advantages include advanced search, inbuilt backup extractor, export attachments, export messages, and Exchange EDB files to Office 365 migration that can help you in the time of Exchange Server crisis.
![]()