Public folders in Exchange Server act like shared folders. It is a folder where organizations and their members collaborate and share information of common interests. Organizations store and manage emails, contacts, calendars, and other crucial data in them. Sometimes, many organizations want to migrate their data including mailboxes, public folders, etc. from one platform to another or one tenant to another. There is no direct method available for this migration process, which makes it difficult for users to migrate the public folders.
How to Migrate Public Folders Between Office 365 Tenants?
As we already know there is no direct method for this, here we recommend a complete solution for moving to Office 365. Kernel Office 365 tenant migration tool helps to migrate Office 365 user mailboxes, archived mailboxes, and public folders to another Office 365 tenant very easily. Additionally, the tool supports Office 365 GCC High, GCC, DOD and Microsoft 365 business plans and subscriptions to provide seamless process. It facilitates more migrations listed below:
- Office 365/on-premises Exchange/hosted Exchange to Office 365 migration
- Office 365 to Office 365/on-premises Exchange/hosted Exchange migrations
![]()
![]()
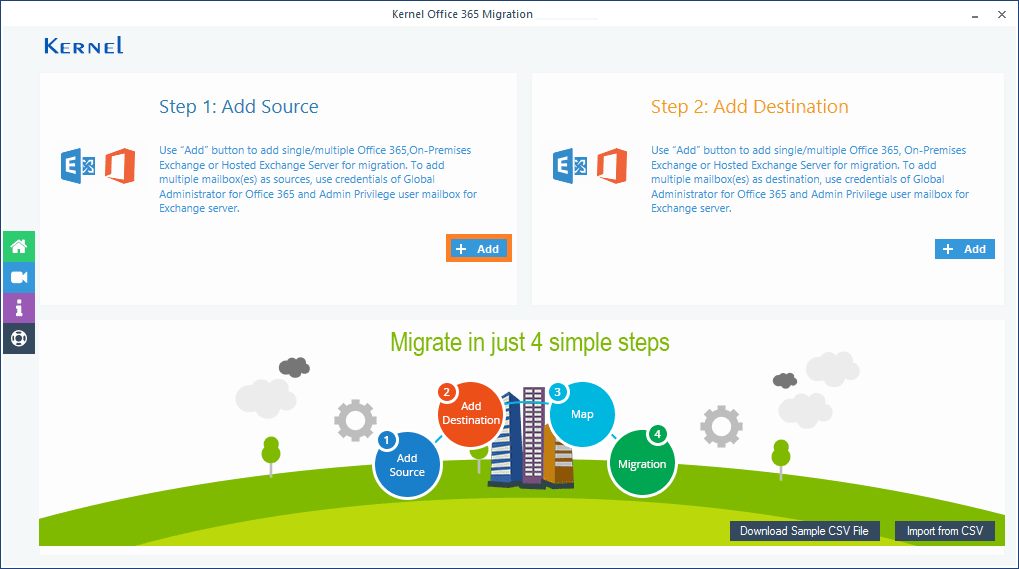
This tool masters in performing Office 365 tenant to tenant migration. However, here our focus is on the public folder data migration between two Office 365 tenants. Get Kernel Office 365 Migration tool on your system and perform these steps.
- Open the application. To add the source Office 365 account, go to Add Source section and click Add.
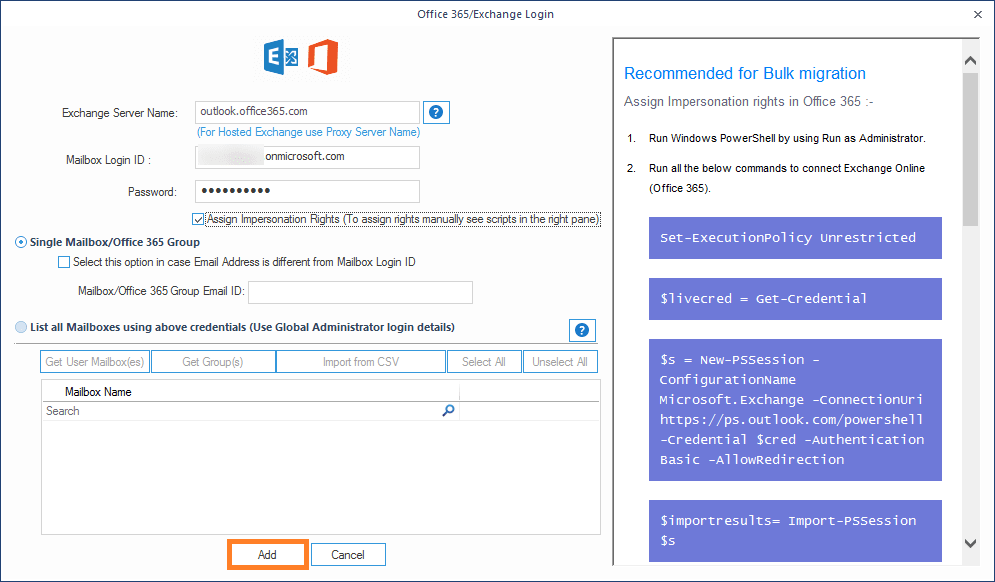
- Enter the Office 365 global administrator credentials, choose the Single mailbox option, Assign Impersonation Rights…, if you want to assign these rights to the user account. Then, click Add.
- Your source Office 365 account will get and added. Now add the destination Office 365 account by clicking on Add option.
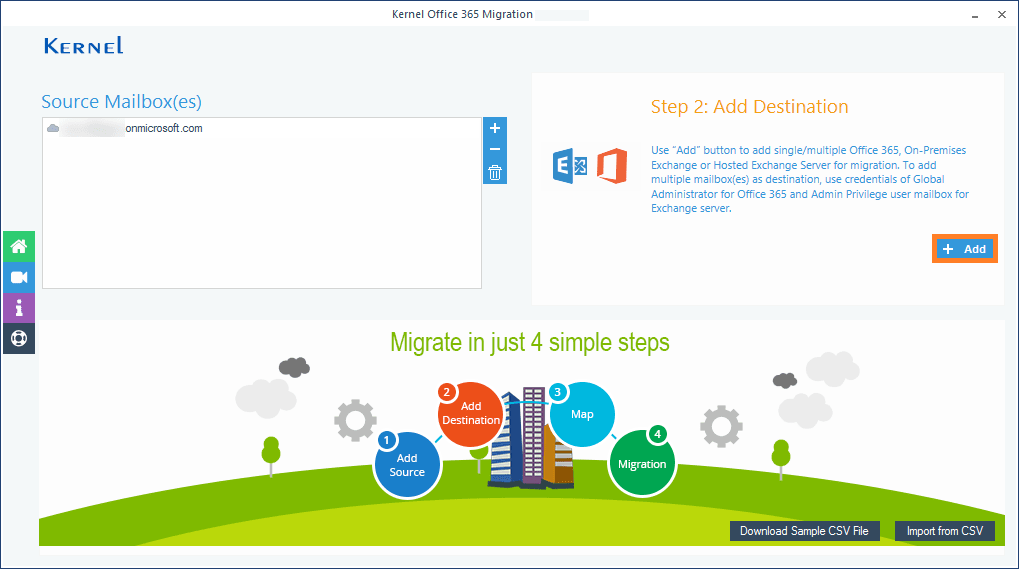
- Just like the source, add the destination account credentials, select the option, and click Add.

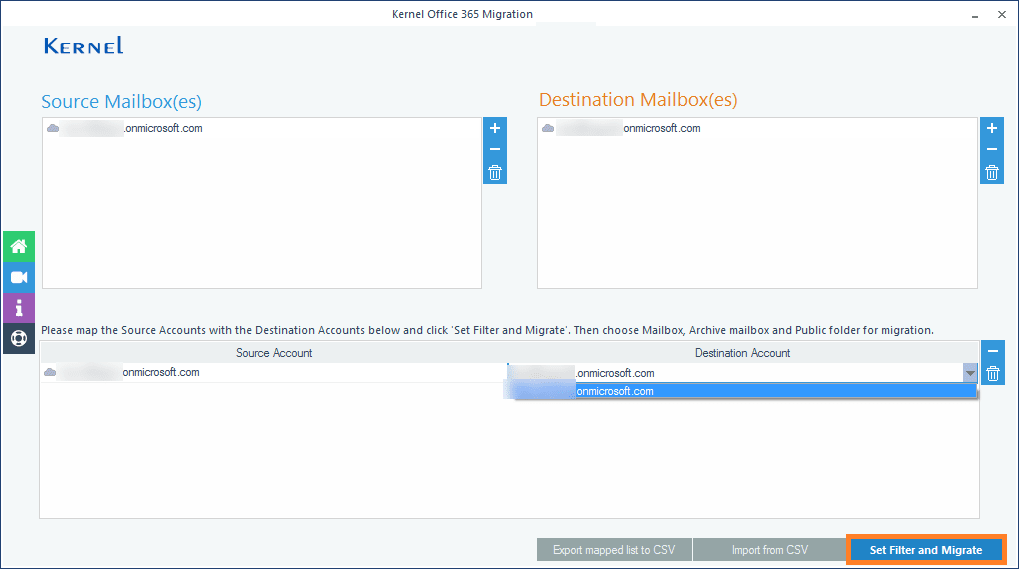
- Now map the added source Office 365 mailbox to the destination Office 365 mailbox and click Set Filter and Migrate tab.
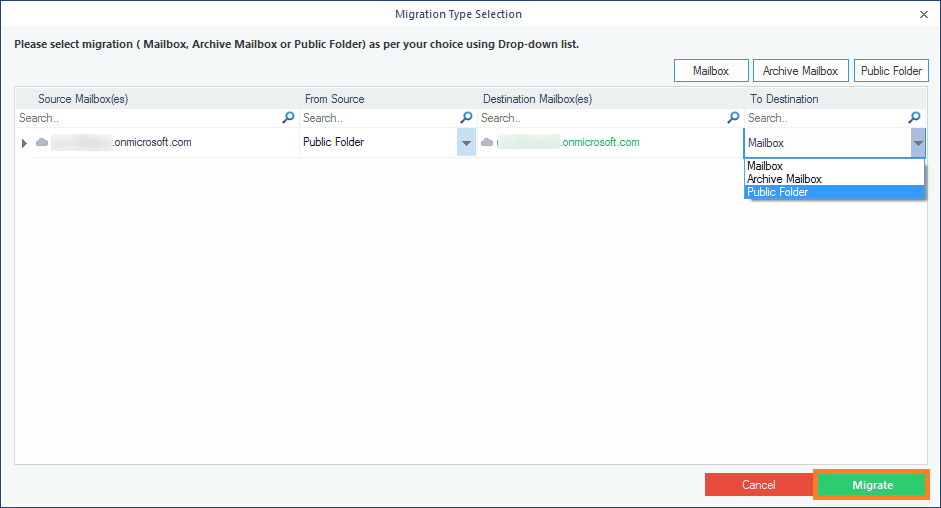
- On the Migrate Type Selection page, select public folder option against the source and destination mailboxes. Then click Migrate option.
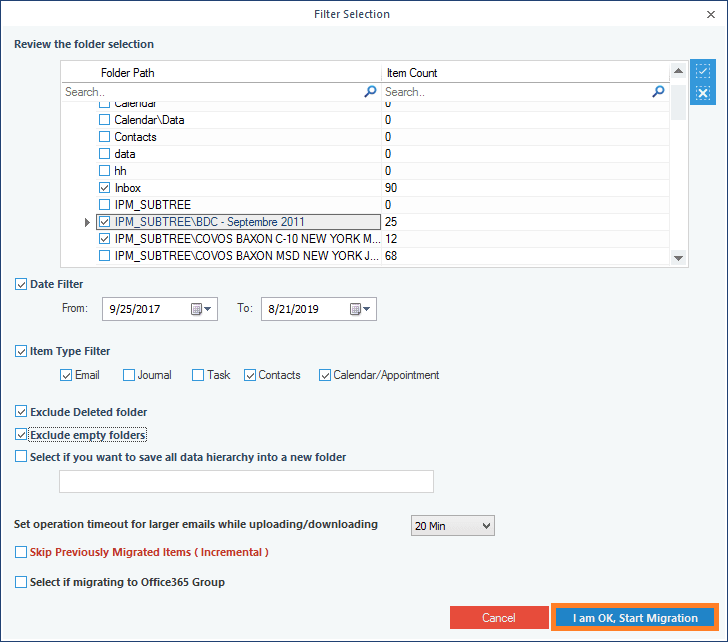
- Add filters as per the requirement. You can include or exclude the folders, apply date range filter, and use other options for selective data migration. Once done, click I am OK, Start Migration.
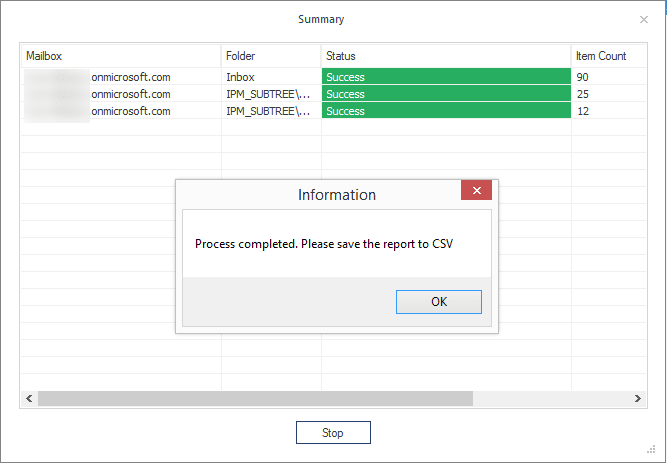
- The migration of data between public folders will get started, and you can view the progress.
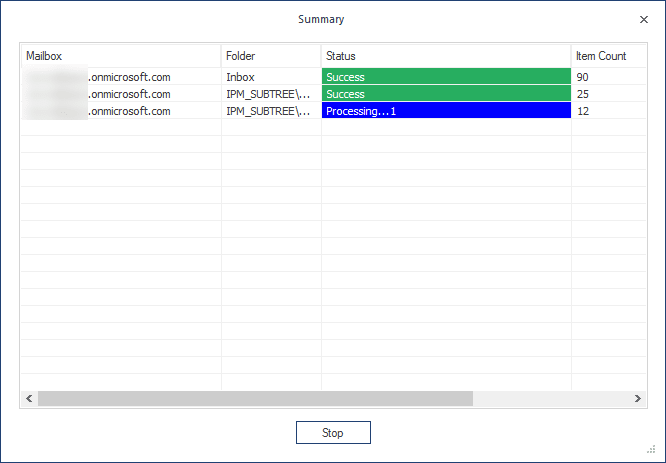
- The migration will take some time and gets completed with a pop-up message. You can save the migration report to CSV file if needed.


Conclusion
Public folder migration between Office 365 tenants is complicated, due to lack of methods to perform it. The best and most reliable solution is utilizing software which is designed for it. Hence, we have talked about Kernel Office 365 Migration tool. You just need to consider Office 365 pre & post migration checklist, and then easily migrate public folders between Office 365 tenants.
>![]()