OneDrive is the ultimate cloud-storage platform in Office 365 environment used by individuals and for businesses to store their crucial data. It offers a great storage limit to the businesses at a cheaper rate, where they can store innumerable files and share them with other users. Online businesses possess a large amount of data, from which few data is very essential to secure, but due to its large size OneDrive Personal is not viable for them. That’s why most users and organizations now look for OneDrive Personal to Business migration.
But it is challenging to migrate a data that runs into multiple gigabytes and how the recipients support it. You should check out the best OneDrive migration tools that can migrate OneDrive Personal to OneDrive for Business accounts in the safest and cleanest manner.
Utilizing an automated third-party tool
Here, in this post, we will discuss how to migrate OneDrive Personal to OneDrive for Business, Google Drive, and SharePoint Online using SharePoint Migration tool.
![]()
It involves two steps:
- Synchronize OneDrive (Personal) to your Windows PC
- Migrate OneDrive (Personal) to OneDrive for Business, Google Drive, & SharePoint Using tool
Kernel Migration for SharePoint tool can perform fast and secure SharePoint Server, OneDrive for Business, Google Drive, and File System migrations. The migration can be customized and easily performed for all versions of the SharePoint Server. Here, our focus is on how to migrate OneDrive Personal to Business, Google Drive and SharePoint Online using it.
Prerequisites:
The prime requirement is to add or connect the OneDrive (Personal) to your PC. You can connect OneDrive (Personal) to your PC using the inbuilt OneDrive application or downloading the OneDrive desktop application. Once the OneDrive (Personal) is installed, you can sign into it with a Microsoft account, and the OneDrive folder will display all its content in the File Explorer.
How to perform OneDrive Personal to Business migration?
Make sure that you have connected to OneDrive (Personal) from your PC. Also, ensure that you have the login credentials of OneDrive for Business, Google Drive, or SharePoint to where you want to migrate the data. Next, run the software on your system and perform the following steps.
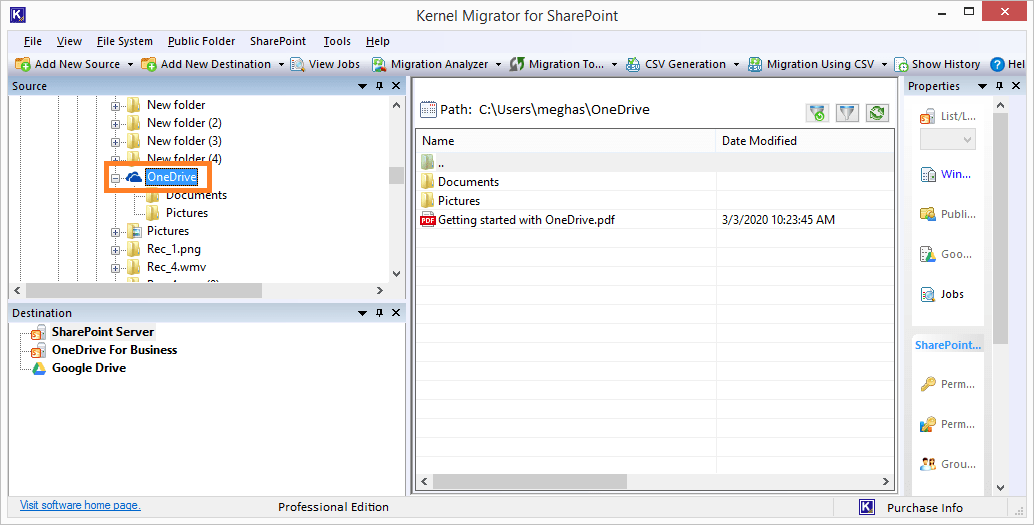
- On the left pane of the Welcome Screen, find the OneDrive application folder.
- Next, under the destination panel, choose the option as per your requirement.
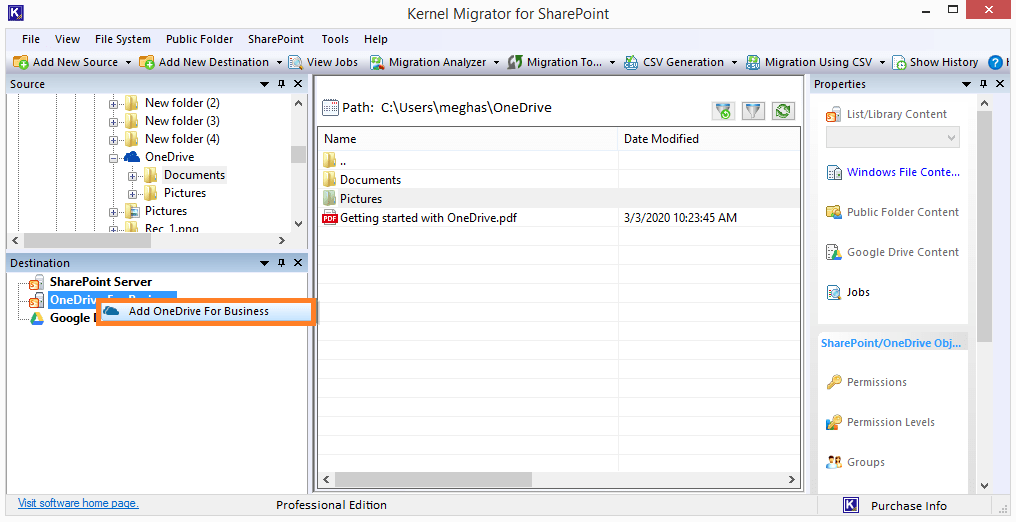
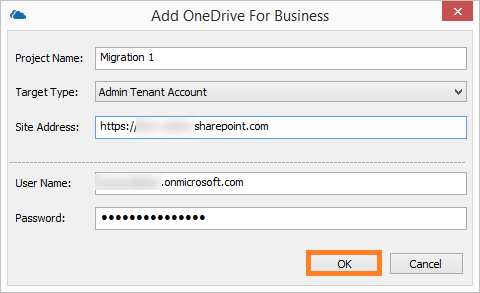
- OneDrive for Business: Right-click on the OneDrive for Business option and choose Add OneDrive for Business.
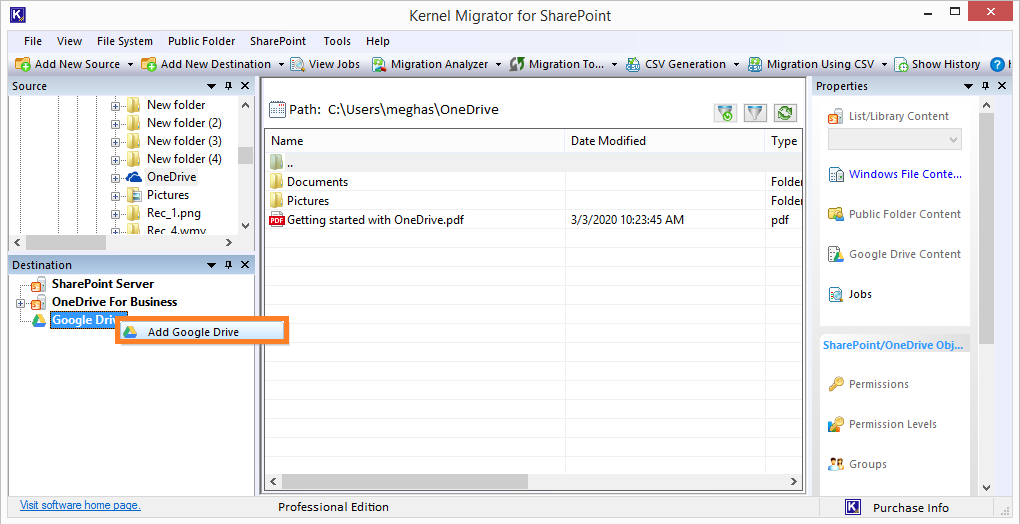
- Google Drive for Business: To add Google Drive as the destination, right-click the Google Drive option and select Add Google Drive.
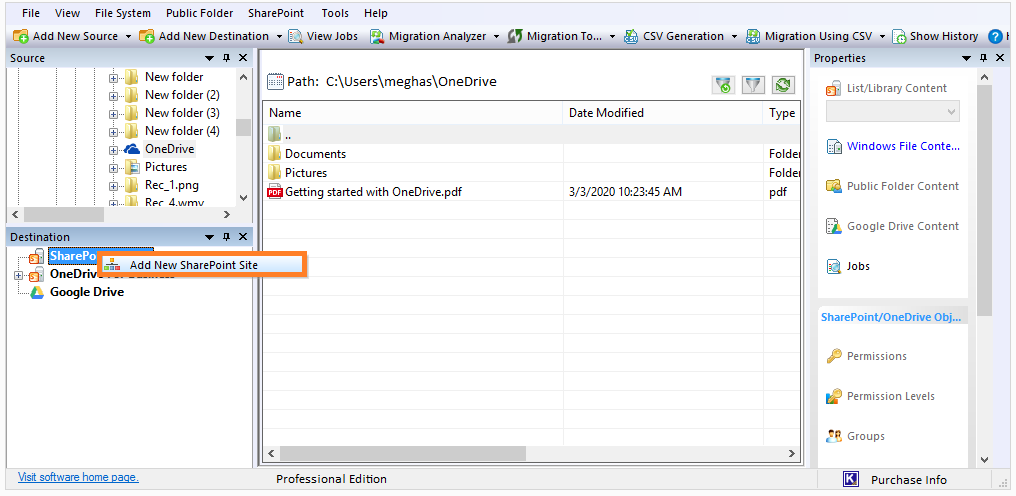
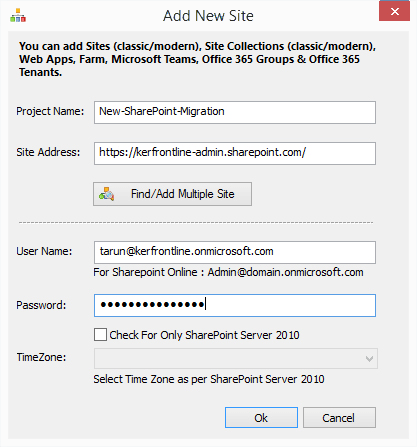
- SharePoint: Add SharePoint (On-premises or Online) as the destination by right-clicking on the SharePoint Server option and then choosing Add New SharePoint Site.
- OneDrive for Business: Right-click on the OneDrive for Business option and choose Add OneDrive for Business.
- Add destination details like Project Name, Site Address, Username, Password, etc. Click OK. It will add the OneDrive for Business account as the destination.
- To add Google Drive as a destination, you need the following details.

- Provide details like Site URL, Username, and Password to add your SharePoint Server as the destination.
- To add Google Drive as a destination, you need the following details.
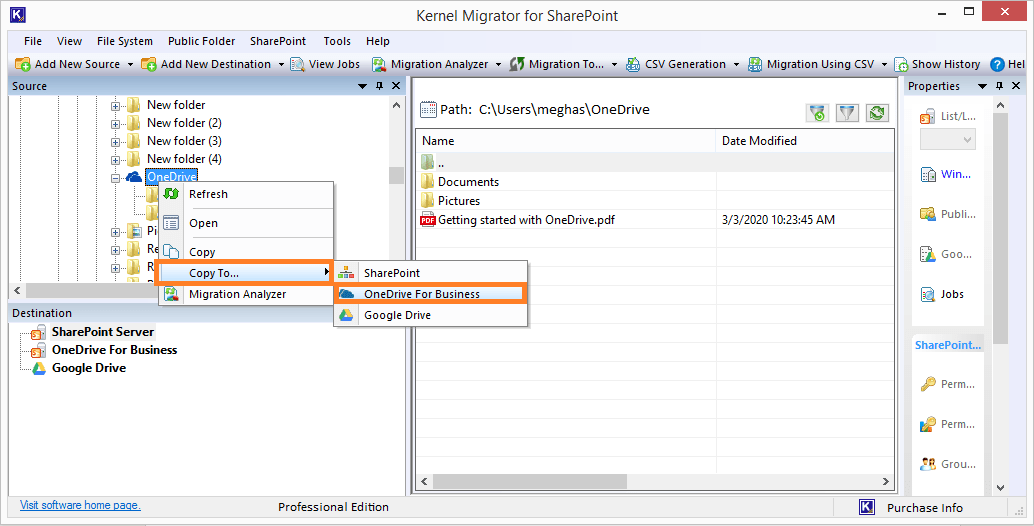
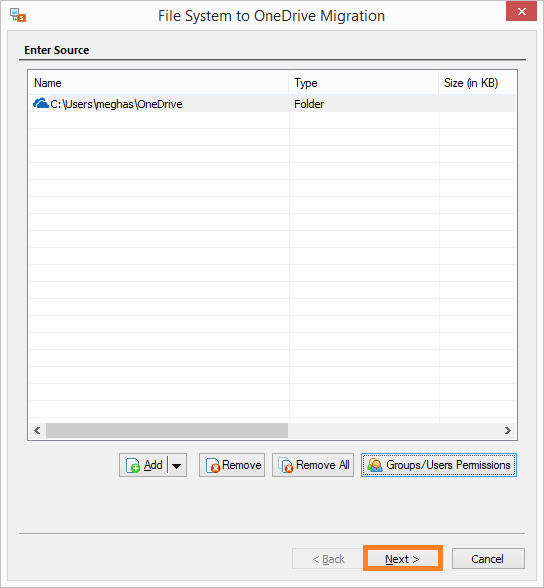
- Go to the Source Panel and right-click on OneDrive (you can either choose the full folder or the sub-folders and right-click on them. Here, we are selecting the full folder). Right-click the OneDrive folder and then click Copy to > OneDrive For Business.
- Select the folder, choose data from the Add option, and provide Groups/User Permissions as per your choice. Click the Next option.
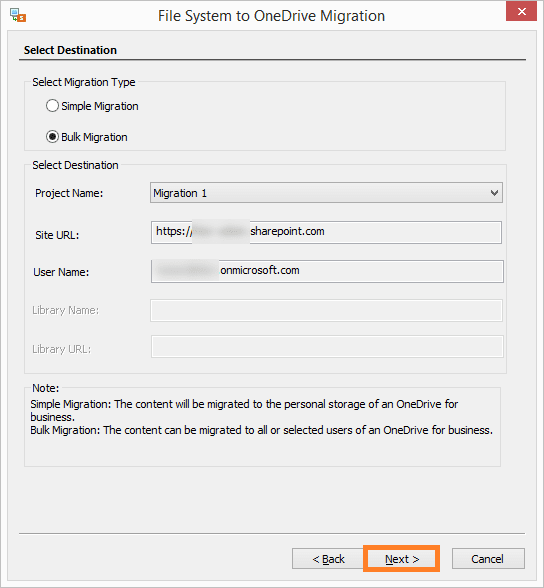
- On the next page, the tool will automatically fetch the added destination OneDrive For Business details from Step 3. You can choose to perform either Simple or Bulk Migration. After that, click Next to continue.
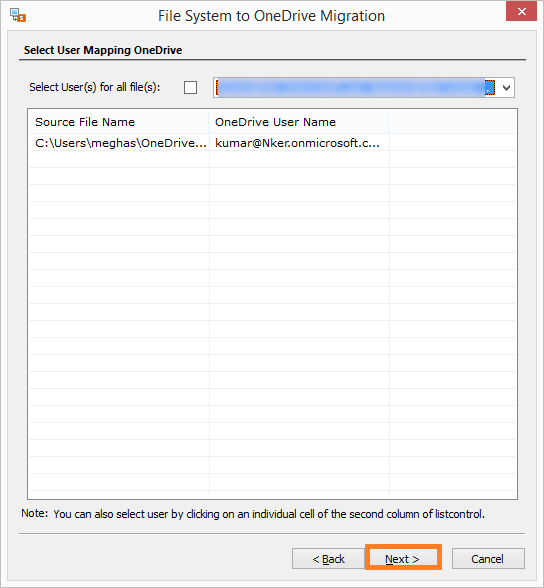
- Select the users in the destination to which you want to move the source data and click Next.
- Select your choice for Copy options, and add Filters (Date Filter, File Filter, or User Filter) if needed. Click Next.

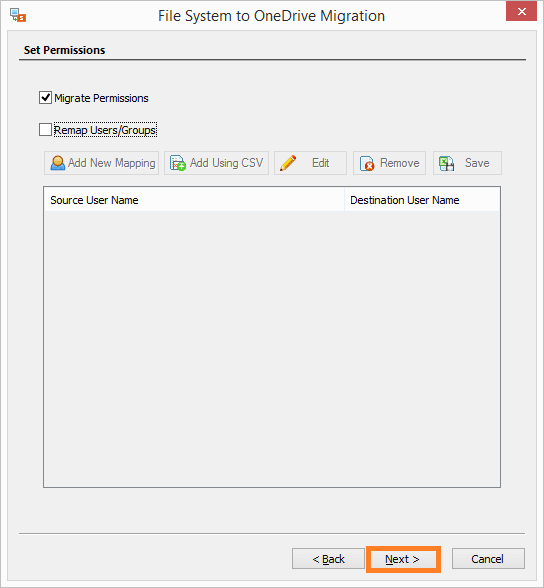
- Here you can set permissions for migration and remap users or groups. Click Next to continue.
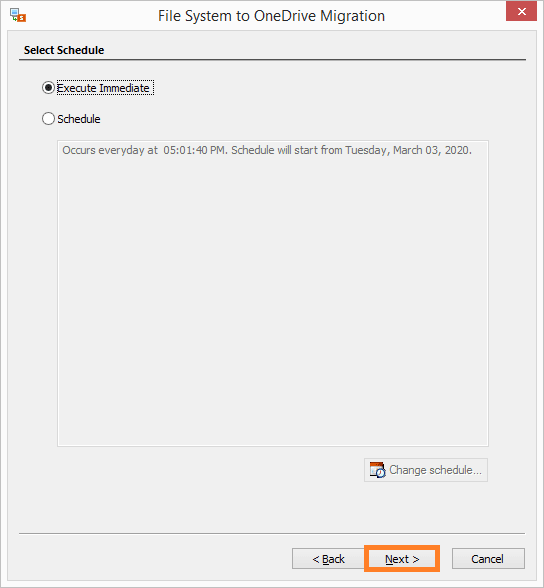
- You can either execute immediately or schedule it on a particular day/time. After the selection, click Next.
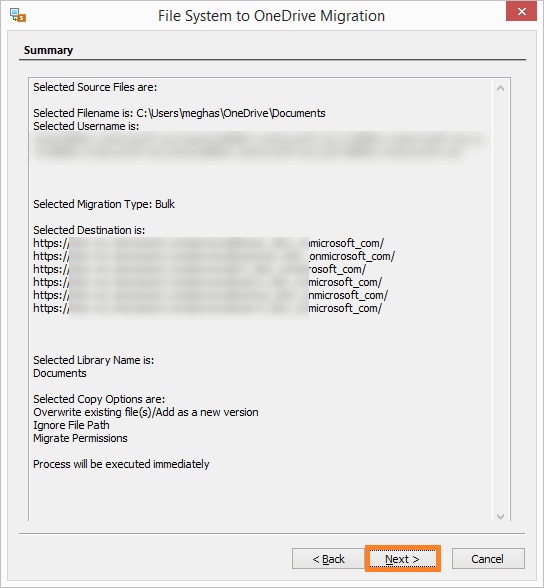
- Check the details of the added Source and Destination. Click Next.
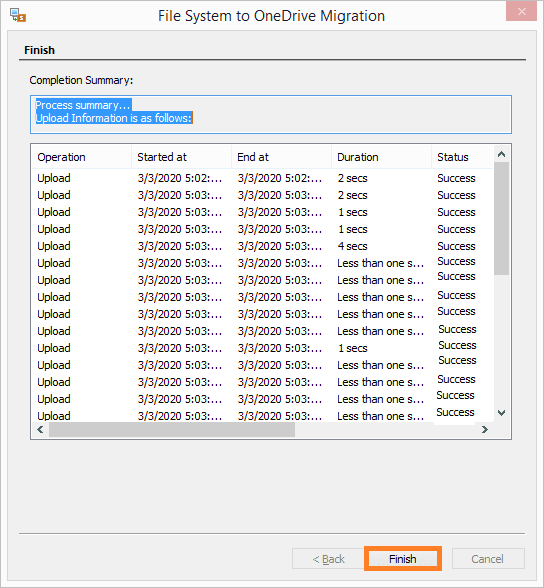
- The data migration from OneDrive (Personal) account to OneDrive for Business will get started. The migration is completed within a very short time and displays the migration status as well. Click Finish finally.


Hence, you have just experienced the simplest way to migrate data from OneDrive Personal to OneDrive for Business, Google Drive, and SharePoint Server destinations.
Conclusion
As you can see, Kernel Migrator for SharePoint can easily help you migrate Personal OneDrive to OneDrive for Business and other destinations. The tool is capable of performing bulk migration, selective migration, and incremental migration with complete data integrity. You can download its free demo version to learn more about the tool’s features.
![]()