

EML files store emails in the most basic format, typically as a text file. It’s a convenient file format that is used by many email clients. Often, due to reasons like company mergers or personal projects, the need arises to import EML to Office 365 platform. However, Microsoft does not offer any direct method to transfer EML files directly to Office 365 server. So, users find it challenging to safely move their emails.
Go through this detailed guide to know more about the reasons to import EML file to Office 365 and the steps to execute the import process. Moreover, we’ll also highlight an efficient tool and its detailed steps to perform an effortless EML files to Office 365 migration.
Why do Users Need to Import EML to Office 365?
There are many reasons to upload EML to Office 365. Below, we have mentioned some of them:
Migration from legacy email clients: Moving old EML files while shifting email clients.
Better accessibility: Since Office 365 is a cloud platform, you can easily access the data from anywhere, at any time.
Easy collaboration: Office 365 allows users to easily integrate with other Microsoft applications like Teams, SharePoint, OneDrive, etc., and collaborate with each other.
Advanced security: Office 365 provides outstanding security features to safeguard the emails.
Centralized email platform: Office 365 allows you to store all your email messages in one place and access them effortlessly.
Is there a Manual Method Available to Import EML to Office 365?
Yes, you can use Outlook. It is not a direct method to transfer EML files to Office 365. It is more of a workaround and is not recommended for importing EML files on a large scale. In this method, you drag and drop EML files directly to a folder in Outlook that is configured with the target Office 365 account. Then, you let the added EML files sync with the Office 365 server.
However, importing EML files in bulk with the manual method will consume a significant amount of your time. If you try to drag and drop multiple EML files together in Outlook to speed up the process, it may freeze Outlook and may even terminate the import process. Moreover, this method does not preserve the original folder structure.
A Smarter Way to Import Bulk EML to Office 365
To import a large number of EML files while retaining the original metadata, attachments, and folder structure, a better approach is to use a professional EML to Office 365 converter. A reliable tool that allows you to move thousands of EML files directly to an Office 365 account is the Kernel Email Migrator tool.
To know more about the tool’s functionalities, explore the below mentioned features:
- Import single or multiple EML to Office 365 in one go.
- Transfer EML files for a specific day, month, or year
- Maintains the original attributes of emails like From, To, Subject, etc.
- User-friendly interface. Even non-tech users will find it easy to import EML files.
- Offers incremental migration to avoid moving an email twice in the Office 365 account.
Steps to Import EML Files to Microsoft 365
Here’s the step-by-step process to import EML file to Microsoft 365 using the software:
This is how you can import EML file to Microsoft 365 with the Kernel Email Migrator tool.
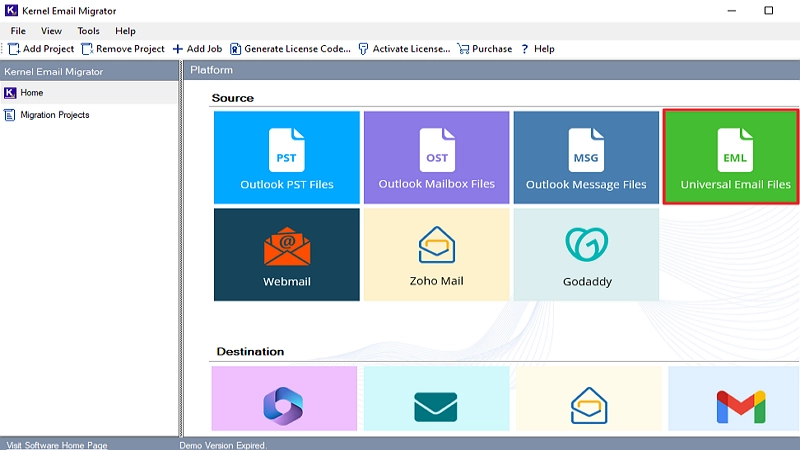
- Open the tool and click on Universal Email Files (EML files).
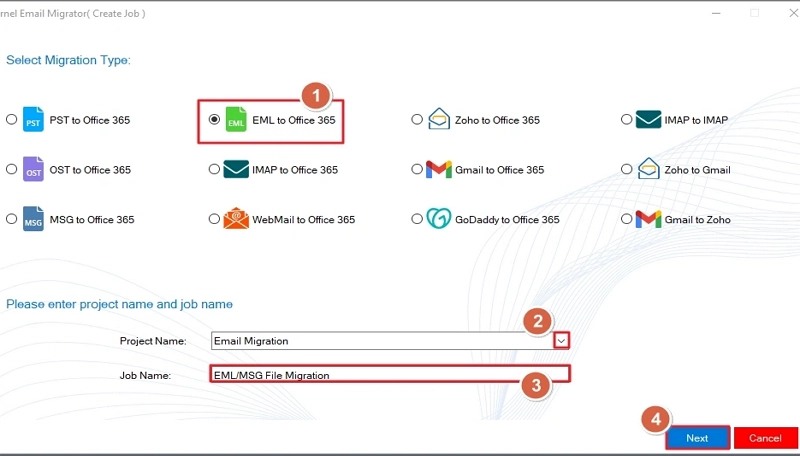
- Select the migration type as EML to Office 365. Then, enter Project Name, Job Name, and click Next.
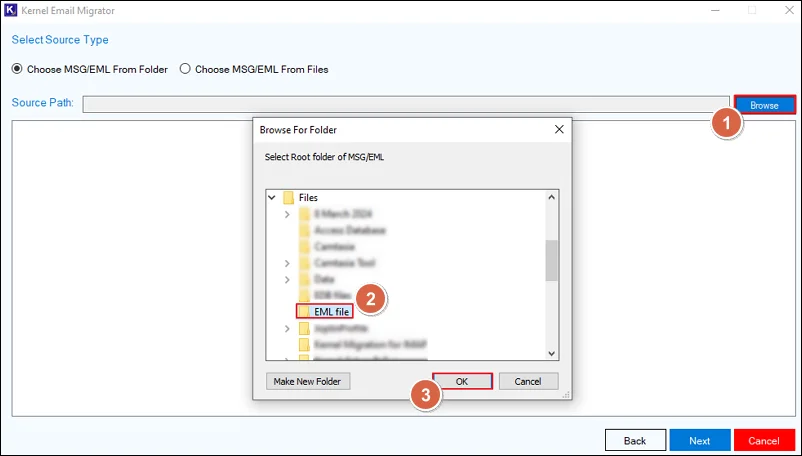
- Click the Browse button and add the folder containing the EML files. After that, click Next.
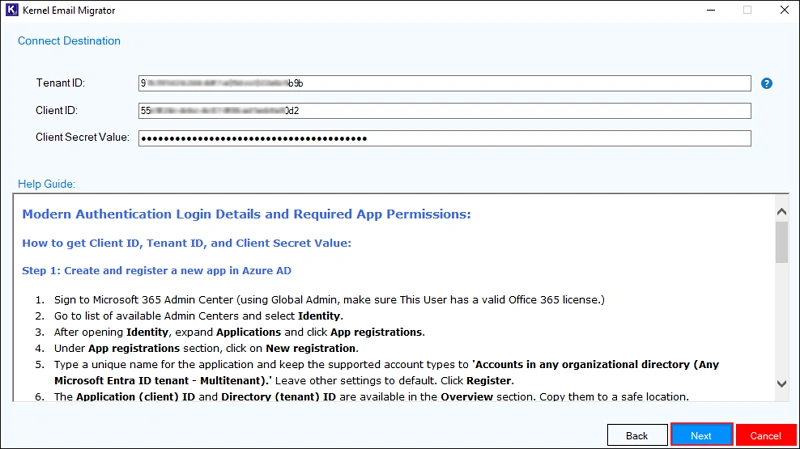
- Enter the Tenant ID, Client ID, and Client Secret Value to connect the destination. Then click Next.
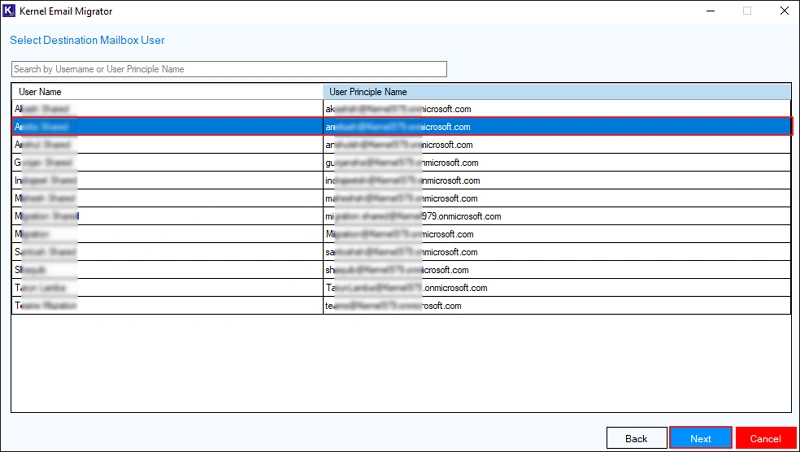
- Select the destination user mailbox to import EML to Microsoft 365 account and click Next.
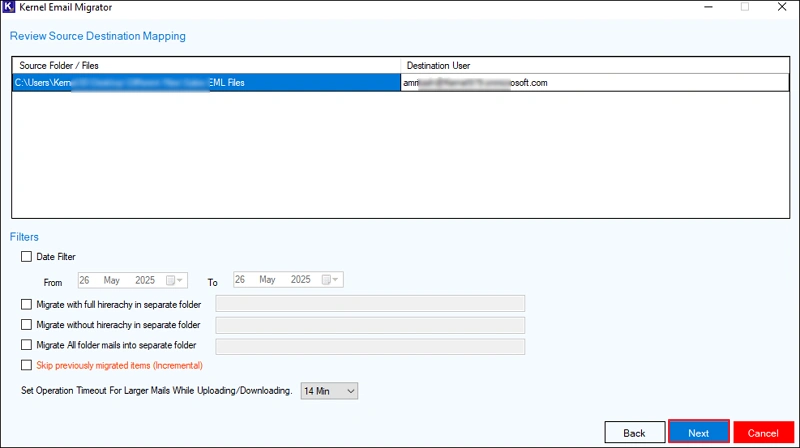
- For a selective conversion, apply filters like date range, option to preserve hierarchy, option to save all mails to a separate folder. After applying the filters, click Next.
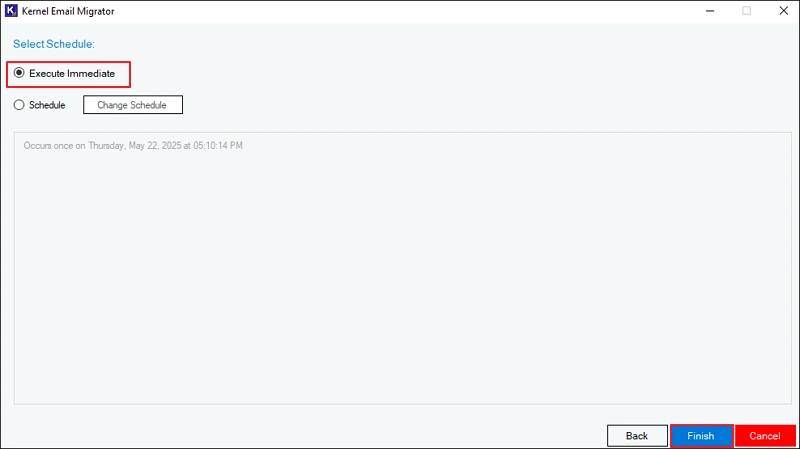
- Either execute the migration immediately or schedule the process for a time that suits you best and click Finish.
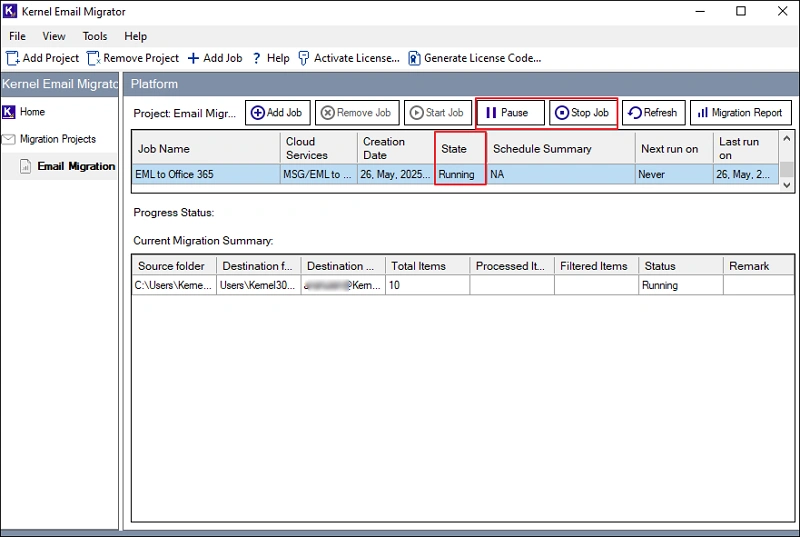
- The tool creates a migration job and starts the EML transfer process. You can Pause or Stop the running migration job if required.
- After a successful migration, the status of the job will display as Ready.
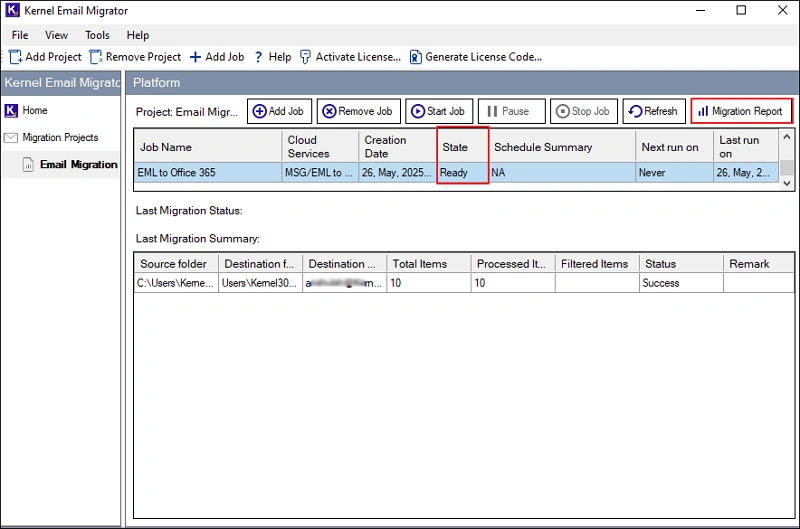
- Click on Migration Report to view the detailed report of migration.
- Choose the report you want to review and click on View Details.
- A detailed summary of the migration process will be displayed on your screen. Click on Save Report to CSV to save the report of the migration process on your local system.
Conclusion
For moving only a few emails, Outlook will be sufficient. But for a large-scale transfer of EML files, use a professional tool to import EML to Office 365. Whether you’re moving to a new email server or want to consolidate distributed EML files into a centralized server, the Kernel Email Migrator will save you time.
Frequently Asked Questions
How to import EML to Microsoft 365 for free using Outlook?
You can use Outlook to move EML files to Office 365 like this:
- Install Outlook and configure it with the target Office 365 account.
- On your system, go to the location where the EML files are located.
- Select the emails you want to import, drag them to an Outlook folder, and drop them.
- The emails will be added to that folder and later will be synced with the Office 365 account.
Which version of Outlook supports EML files?
All versions of Outlook, including the New Outlook, support EML files.
Does Outlook also support importing EMLX files into Office 365?
No, EMLX files are not supported by Outlook. If you want to import them, you can use an EMLX converter tool to convert all the EMLX files to PST and later import the PST to Office 365.