For the migration of offline files from the user’s computer to a Team in Microsoft Teams, Kernel Microsoft Teams Migration provides the safest process. The Microsoft Teams Migration tool lets you to move all the folders along with all their files, and each file will be moved with its proper metadata, features, properties, and permissions.
![]()
![]()
Process to save File Server data to Microsoft Teams
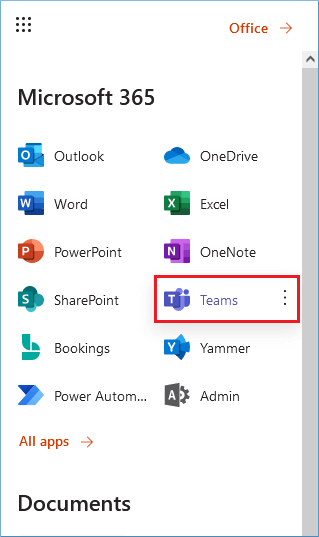
- In the first step, you must connect the Team as a destination in the tool. For this, you must have the SharePoint Site URL of the Team. Go to Office 365 portal and choose Teams.
- Go to the Files category of the Team and click Copy link.
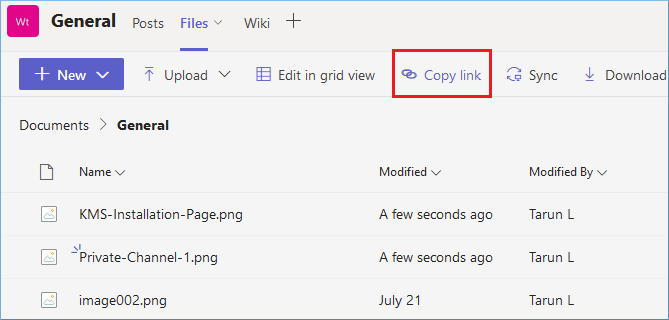
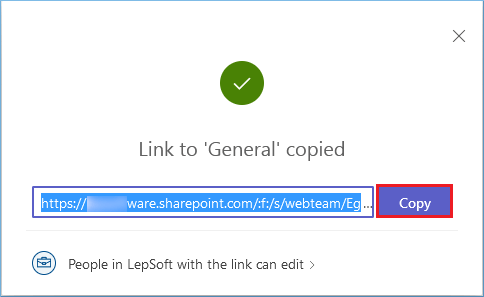
- Copy the new link and open it in the web browser. There, save the URL to the Team name. For example - https://domain.sharepoint.com/site/team. Copy the URL.
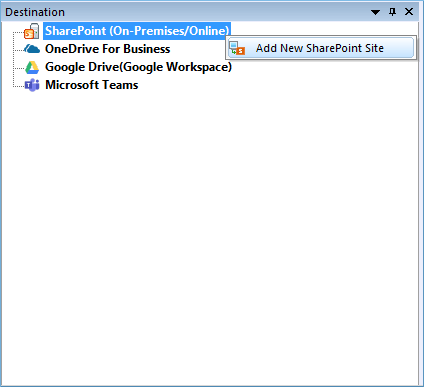
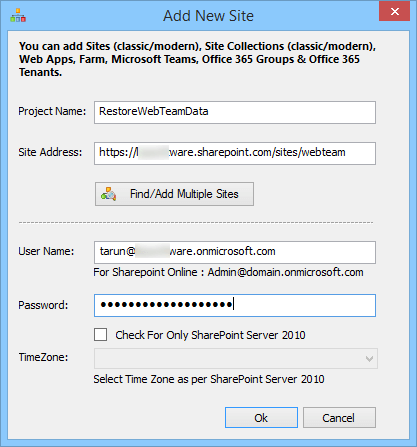
- Start Kernel Microsoft Teams Migration from the Applications menu and go to its Destination section. Right-click SharePoint (On-premises/Online) and select Add New SharePoint Site.
- Input a new project name, the site address you took in the previous step, the username (Site or Team admin), and password. Click OK.
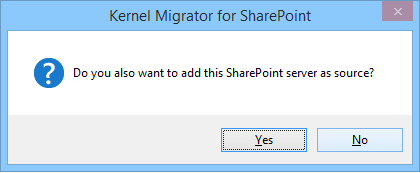
- When the source asks you to connect the SharePoint as the source, click No.
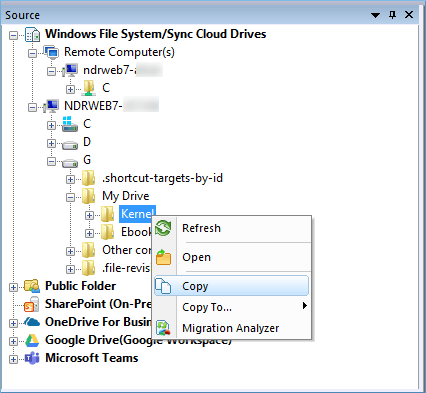
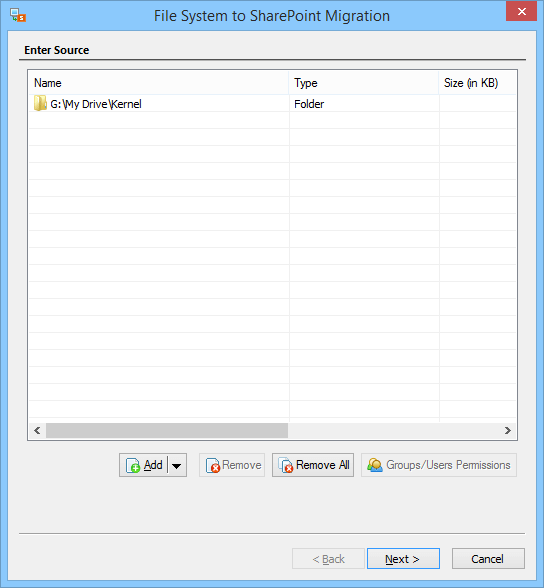
- Expand the Windows File System pane and choose such folders you want to save to MS Teams. Right-click and select Copy.
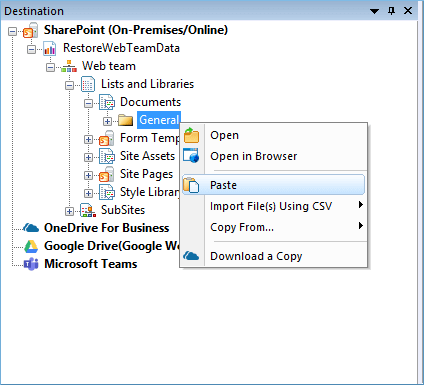
- Go to the destination, expand the MS Teams, and select a folder that will work as the destination. Right-click and choose Paste.
- The wizard shows the selected items and their destinations. Click Next.
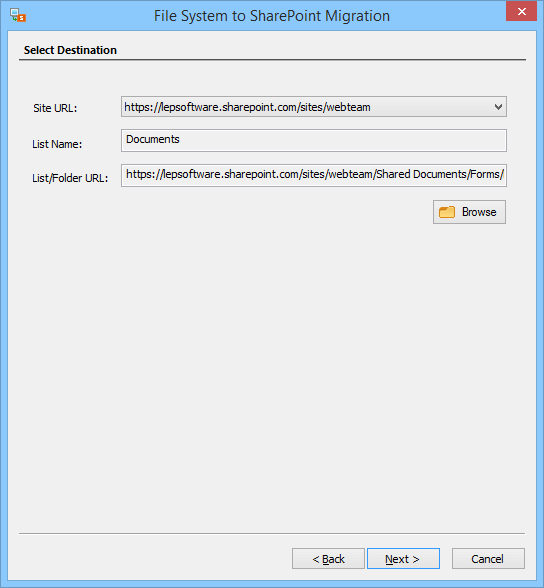
- Click Next.
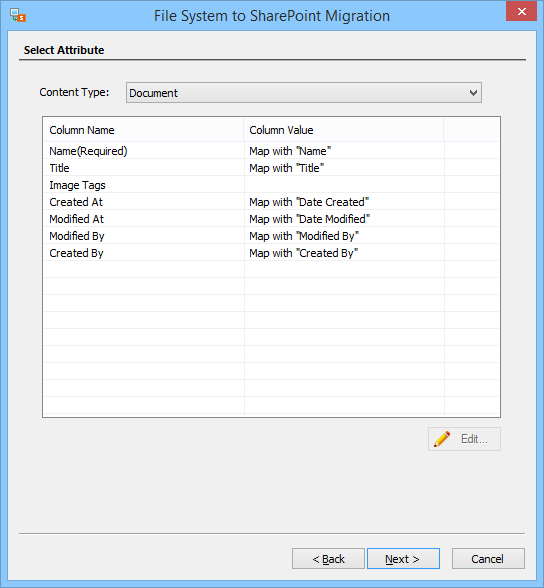
- Select the attributes to restore in Teams. Click Next.
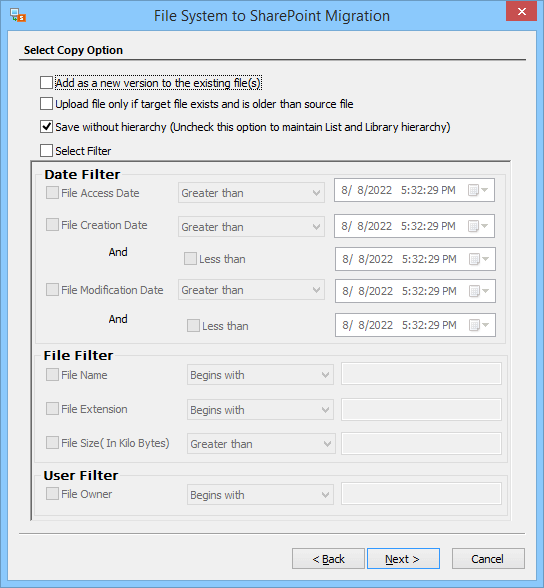
- Apply the required filters. Click Next.
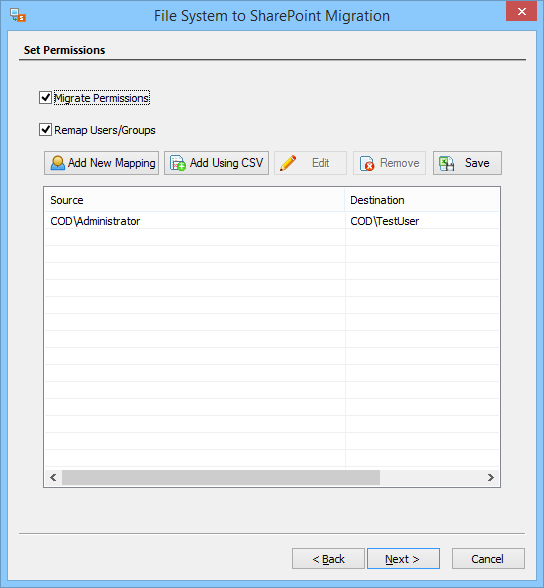
- Set the permissions to migrate from the local system to MS Teams. Click Next.
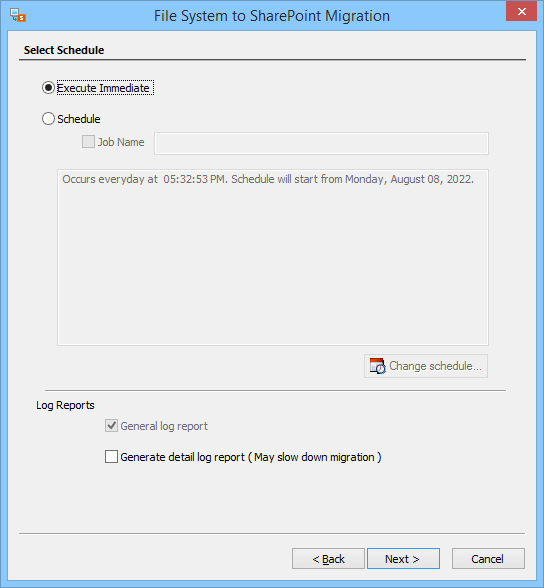
- Check if you require to schedule the data migration later. Click Next.
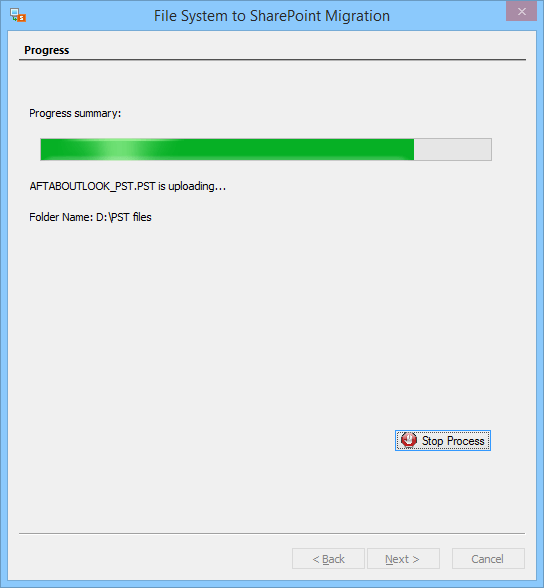
- The data gets moved to MS Teams. You can check the progress.
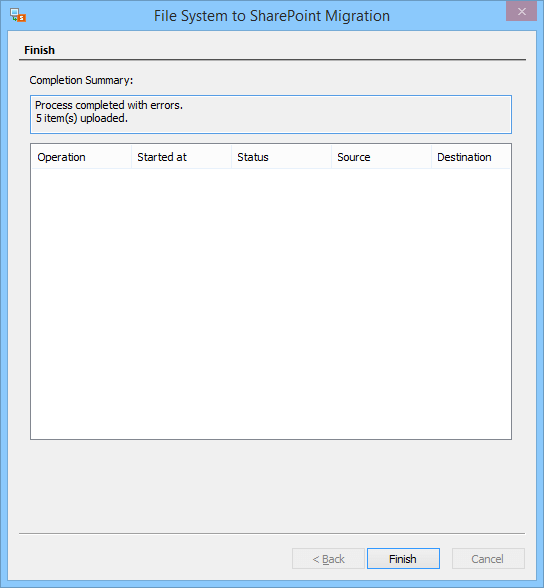
- The data from the local computer gets saved to MS Teams, and a successful message appears in the end. Click Finish.


Read Also: An Easy Method to Migrate Data Between Microsoft Teams