
Read time 10 minutes
Are you encountering error 0xc00d3e8c while attempting to play videos on your Windows 10 system? If so, you may be wondering why this is happening. This issue arises due to various factors, such as your media player lacking support for the file format you’re trying to play. In this article, we will delve into this error and provide practical solutions to resolve it easily.
What is the Error 0xc00d3e8c, and Why you May Face It?
Prior to delving into potential resolutions, let’s begin by understanding the error. What does encountering this error signify? Essentially, it pertains to a prevalent issue in Windows 10 that could impede playback of MKV video files. The absence of appropriate codecs is a probable cause for this occurrence. MKV stands as a widespread video file format encompassing video, audio, subtitles, and various other elements. Modifications in the Windows operating system, such as reinstallations, may trigger this error.
The occurrence of this error can be attributed to any automatic updates that have been recently applied. Following such updates, individuals may encounter not only this specific error but a variety of others as well. These can manifest as a black screen, white screen, or issues with videos and audio.
Let’s tackle error code 0xc00d3e8c by presenting various distinct solutions. Users can choose based on their specific requirements. If the exact cause of the error remains uncertain, it’s recommended to try these solutions step by step to pinpoint the one that fixes the issue.
- Try Another Media Player
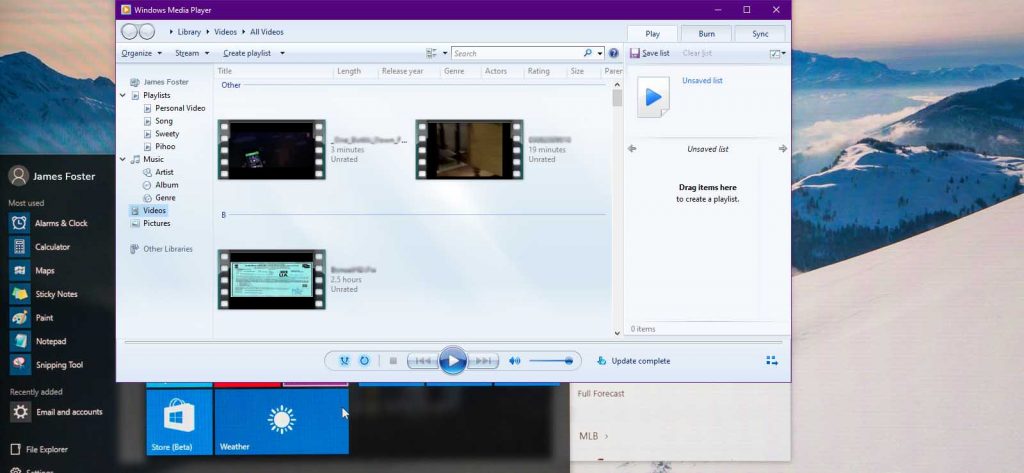
If encountering the 0xc00d3e8c error when attempting to play a video file using a specific media player, consider trying an alternative one. It’s been observed that numerous players struggle to handle various video file formats appropriately. This occurs when the essential codecs needed to play a video file are not present in your current media player.
While Windows 10 offers excellent features, it may lack certain essential video codecs required to play MKV files optimally. If you find that Windows Media Player lacks the necessary video codecs for smooth video playback, consider exploring alternative media players.
Numerous media players, both online and offline, come with suitable video codecs to playback your files. Experiment with different options to troubleshoot the error. We suggest using VLC media player for playing MKV files, given its widespread popularity and extensive support for various video formats, including MKV. Test it out and confirm its functionality. If the error persists across different media players, consider trying an alternative.
- Try Updating Video Driver
Updating video drivers can resolve issues in numerous instances. As previously mentioned, encountering an error may stem from the absence of essential video codecs. Video drivers that haven’t been updated could be deficient in crucial codecs. This situation could also arise following a recent reinstallation of Windows 10. In such cases, updating the video drivers is imperative to ensure the installation of vital and up-to-date codecs.
Updating your video drivers offers an additional advantage by enhancing your computer’s overall performance. Therefore, aside from resolving errors, this action improves your system’s functionality. Refer to the outlined steps below to update your video drivers.
- Press the Win and R key altogether to open a Run Window on your system.
- Now, in the box of the Run window, type, devmgmt.msc. Click on OK or hit Enter to proceed.
- As you hit enter, a Device Manager window will open. There you need to look for the Device Adapter option.
- Expand the Device Adapter category by clicking on the arrow next to it and make a right-click on the Graphics card.
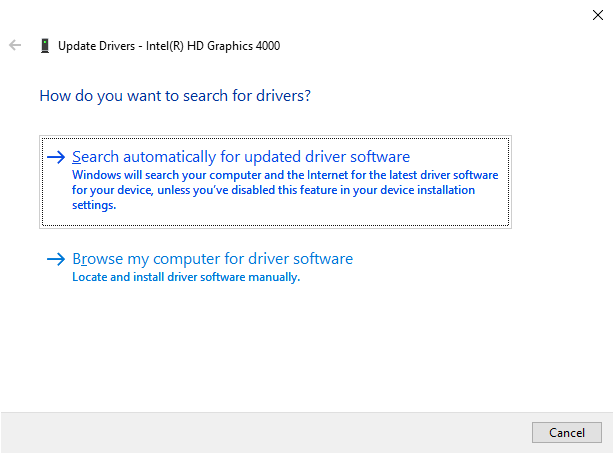
- From the menu, select Update Driver.
- You will see a new window on your screen; there click on the Search automatically for updated driver software. After this, Windows will search for the missing and latest drivers. Once searched, all the required drivers will be installed.


So, this is how you update video drivers. Repeat the same process for the other graphics drivers, if you have any. This solution should fix your problem; if not, then try the next method.
- Try Resetting your Apps
If encountering the 0xc00d3e8c error while using a movie or TV app to play your video, consider performing a reset. The presence of this error suggests a technical issue with the app’s functionality during video playback. Even after converting the video file formats to the supported formats of your movie or TV apps and still encountering the error, it might be necessary to verify or reset the settings.
Prior to initiating the reset procedure, it’s advisable to remove temporary files from your system. Utilize the Win+R shortcut, input Temp into the Run box, and hit enter. This action will display all temporary files present on your system. Proceed to delete these files to troubleshoot the issue. If the problem persists, verify critical settings such as date, time, region, language, and other fundamental details. Ensure their accuracy by accessing the Settings on your system and navigating to the Time & Languages section. Confirm the correctness of the entries. If necessary, make manual adjustments or reset them accordingly. Following this process should resolve error 0xc00d3e8c. If not, proceed to the next troubleshooting method.
- Try Converting MKV file format to WMA
If the error persists, consider resorting to converting the MKV file to WMA as a final solution. This approach is effective because Windows Media players support and utilize the WMA file extension. WMA, functioning as both an audio codec and format, allows for successful conversion of the video file.
There are multiple options accessible, both online and offline, for selecting conversion tools. The conversion of videos can be intricate, potentially compromising the video’s quality if not executed accurately. Furthermore, video conversion can be time-consuming, especially for larger file sizes, necessitating a significant amount of time.
One of the reliable ways to convert a video file is by using a VLC media player. You can convert video files with VLC without any trouble.
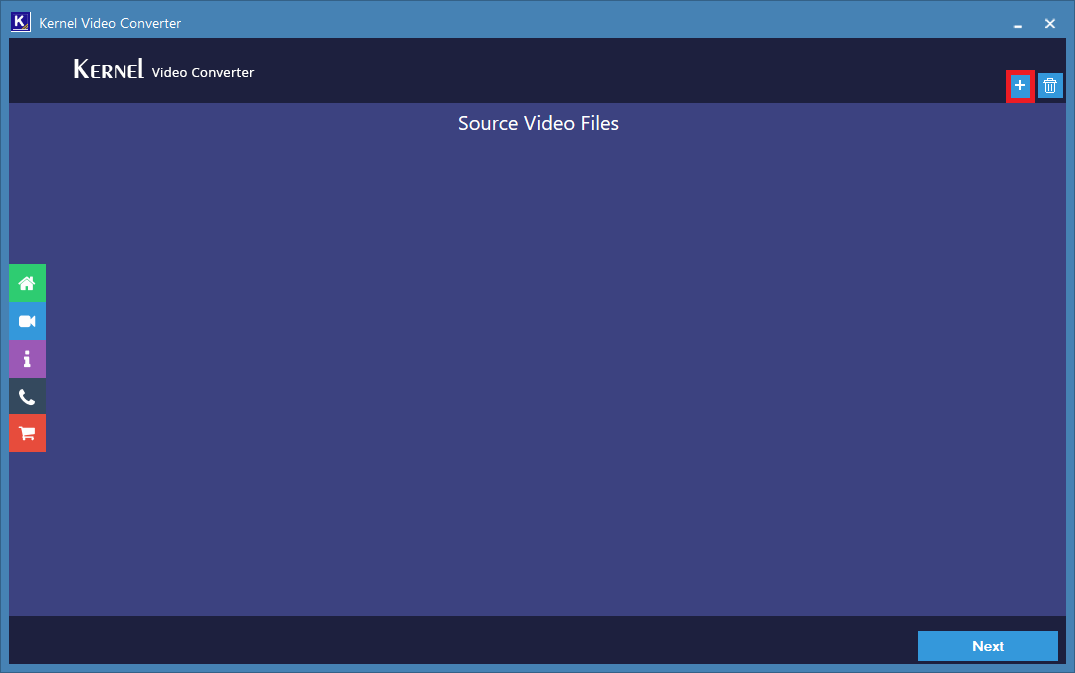
If you seek a swift, effortless, and seamless conversion process, consider giving Kernel Video Converter Tool a try. This tool specializes in video conversion, boasting a user-friendly interface that’s remarkably easy and fast, even for novices. The intuitive GUI and consistent high quality make it a top pick for users. Take it for a spin to elevate your video conversion satisfaction to the next level. Check out the tool’s homepage for a sneak peek.

In dealing with this error, this scenario is among the potential outcomes. While the error may not manifest immediately, the file’s functionality might remain compromised or unable to open properly. It’s important to note that the persistence or elimination of the error is unrelated to this situation. Following the aforementioned procedures will resolve the error, although an associated risk is potential file corruption, particularly with video files.
Rest assured, rectifying a corrupted video file isn’t overly complex—it’s quite manageable. Numerous online and offline solutions are available to address video file corruption, offering flexibility to choose one that aligns with your specific needs. For instance, VLC media player is a viable option. While the process of fixing a corrupt video file with VLC media player may seem straightforward, its capabilities are somewhat constrained. VLC, primarily a media player with a diverse range of features, including the ability to remedy minor corruption issues in video files, does have limitations. When faced with extensive corruption in your video, VLC may prove inadequate in resolving the problem.
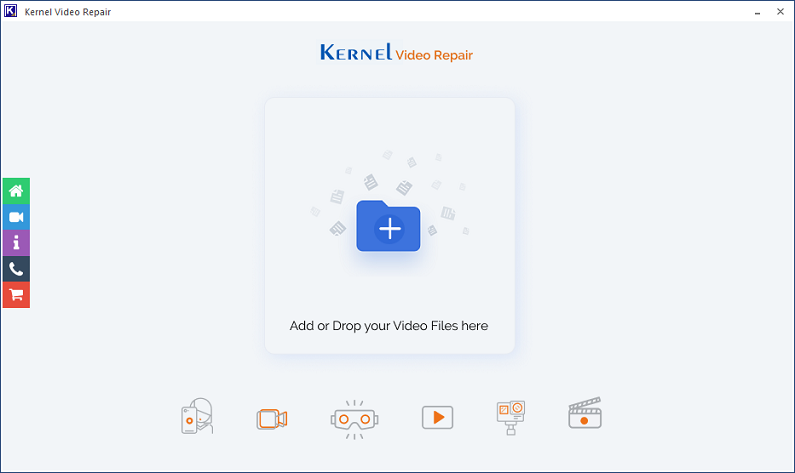
If you’re new to this or hesitant to experiment with uncertain solutions, consider using a third-party automated tool specifically designed to repair corrupted video files. One reliable option is the Video Repair Software , capable of fixing a wide array of video file formats, whether popular or less known. The tool features an intuitive and uncomplicated graphical user interface, making corruption repairs a straightforward process. Simply follow the tool’s self-explanatory steps displayed on your screen to complete the repair. The tool is efficient and preserves the file’s integrity, ensuring the quality of the repaired file matches its original state. For more information, visit the tool’s homepage.

I’m confident that utilizing this best video repair tool will leave you entirely satisfied. Give the tool’s complimentary trial a go to dispel any uncertainties. During the trial period, you’ll have the ability to restore an entire video and retain a 30-second sample of the initial video.
Conclusion:
In this blog post, we delved into the error code 0xc00d3e8c, providing an understanding of its nature and potential manifestations on your screen. We proceeded by presenting effective solutions to rectify this error. Our recommendations included various manual approaches tailored to address the Video Not Playing issue, contingent upon the root cause of the error. Within these methods, we advocated for converting the video file to WMA format. Emphasizing the efficiency and simplicity of the process, we highlighted Kernel Video Converter as the optimal tool for seamless video file conversion. Furthermore, we explored a possible aftermath of encountering error 0xc00d3e8c—corrupted video files. Managing corrupt video files can be challenging and even jeopardize the permanence of your videos. To mitigate this, we suggested utilizing Kernel Video Repair software, a trusted utility known for its proficiency in addressing corruption across a spectrum of video file formats. We trust this blog post has proven valuable in assisting you in resolving the error. Feel free to share any inquiries or concerns in the comment section below.