

Read time 6 minutes
On-premises Exchange Server is an effective email server that has all the security features provided by Microsoft. But if the Exchange data becomes inaccessible due to physical/logical errors, you can quickly repair corrupt Exchange database. The majority of the time, the Server does not provide any warning before showing the errors. Although the administrator can minimize corruption in a database, it cannot be reduced to zero. Therefore, the administrator keeps a backup of the Exchange database to restore its data during a catastrophe. Administrators can use the backup feature of Windows Server to backup and restore Exchange data. We will discuss the whole Windows Server Backup process in two parts –
- Backup Exchange data using Windows Server Backup (Part I)
- Recover Exchange data from Windows Server backup (Part II)


Try an automated solution for backing up and restoring your Exchange data – Kernel for Exchange Backup & Restore.
Before starting the backup, a process using the WSB, you need to know about the features and options associated with it.
- The backups can be taken only at the volume level. So, to do the application-level backup and restoration, you will need to select the entire volume. For the backup of the database, you will need to choose the total volume with the database. It is impossible to take the backup (even of the folders) without selecting the complete volume.
- You cannot take remote backup. The backup should run locally on the server that is being backed up.
- Only the full backups should run. You can alter the folder after the completion of the WSB job.
- The restoration process is more straightforward when you want to restore the database and the log streams to their actual location. The WSB manager and plug-in will take care of the complete restoration by copying the database data and replaying the transaction logs.
- WSB does not support the restoration of Exchange database. you will have to manually copy data and replay transaction logs at a different location.
Benefits of using Windows Server Backup
- Windows Server Backup is a free utility and you do not require to pay extra for taking a backup of using it.
- The user can customize backup operations by selecting the entire server or a handful of volumes.
- The backup data will be updated automatically.
- The backup process includes all OS data and app data for making it available for quick restoration.
Backup Exchange Data Using Windows Server Backup
Windows Server Backup provides Administrators the facility to back up a complete server, selected volumes, or selected folders. Steps to back up the Exchange data using Windows Server Backup are:
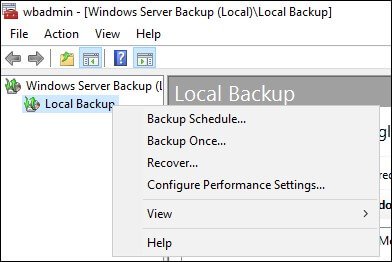
- Start Windows Server Backup and select Local Backup. Click Backup Once from the Action pane.
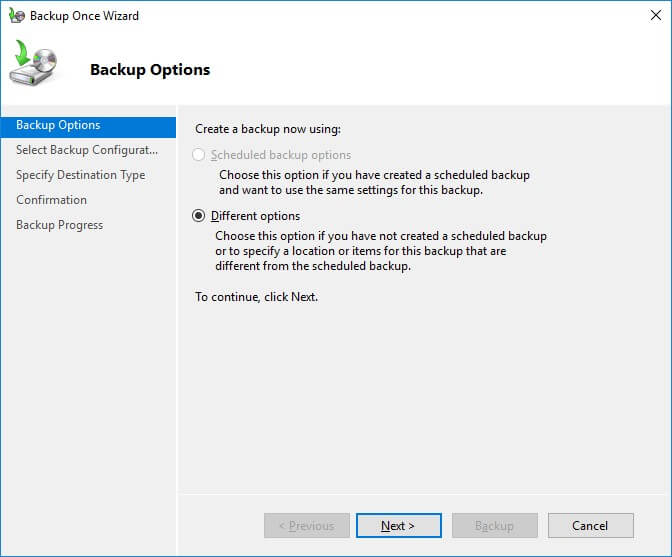
- Select Different Options on the Backup Options page, and click Next.
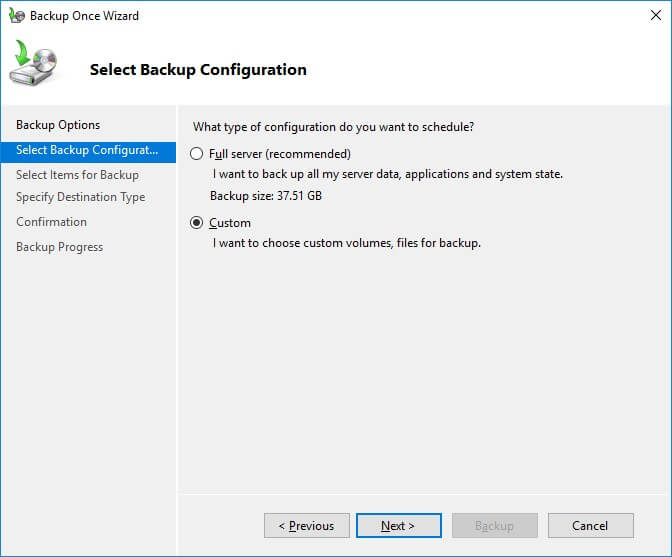
- Now, select Custom on the Select Backup Configuration page and click Next.
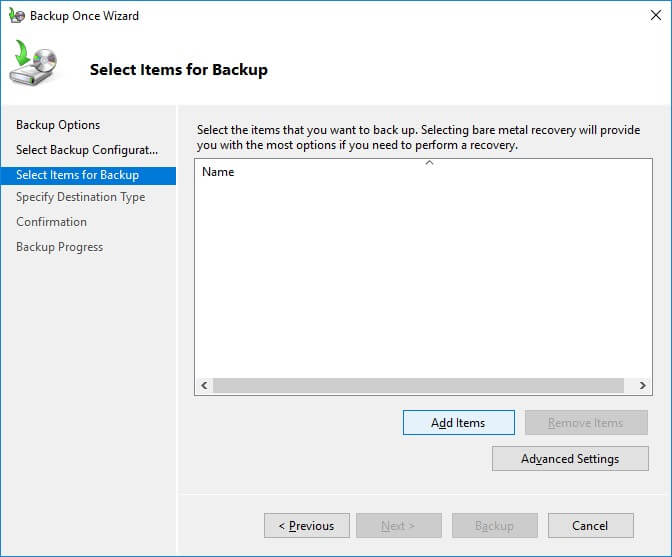
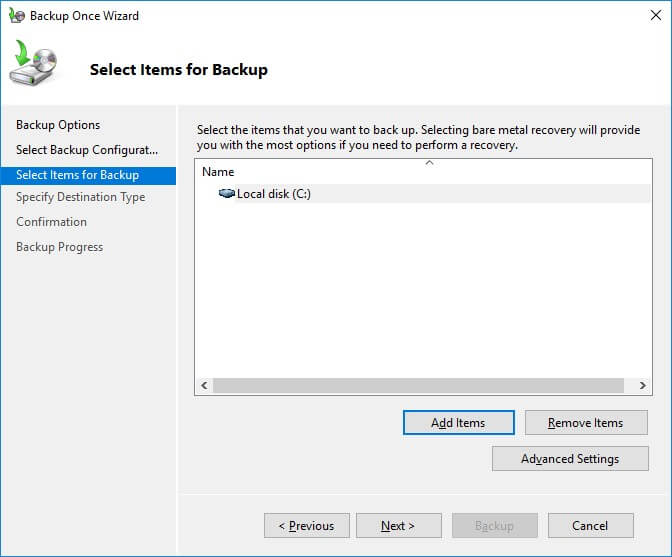
- On the Select Items for Backup page, click Add Items.
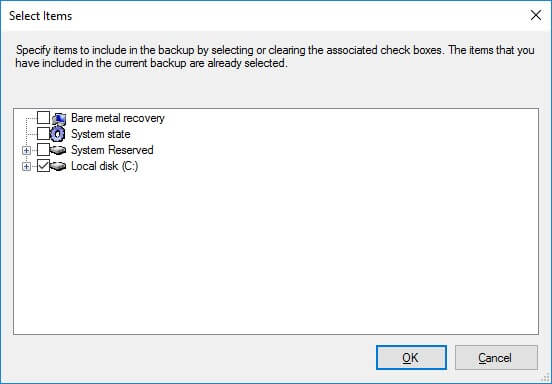
- Select the volume(s) to be backed up and click OK.
- The selected volume gets added. Click on Advanced Settings.
- Now go to VSS Settings tab, select VSS full backup and click OK and then click Next.
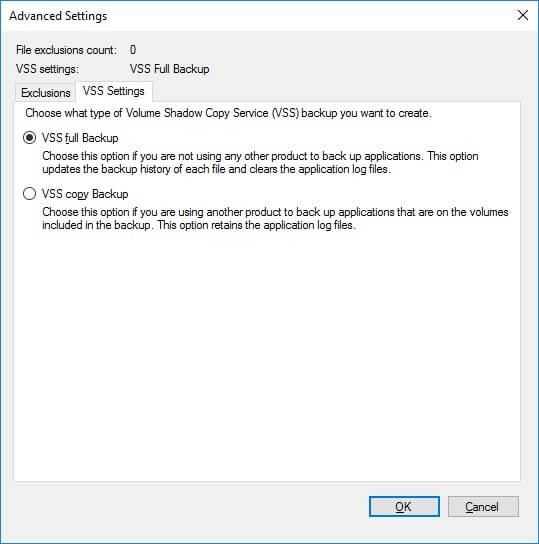
Note: To exclude file/folder from backup, go to the Exclusions tab; click Add Exclusion, and select the files or folders that are to be excluded from backup. - Enter the location for storing the backup, on the Specify Destination Type page. Click Next.
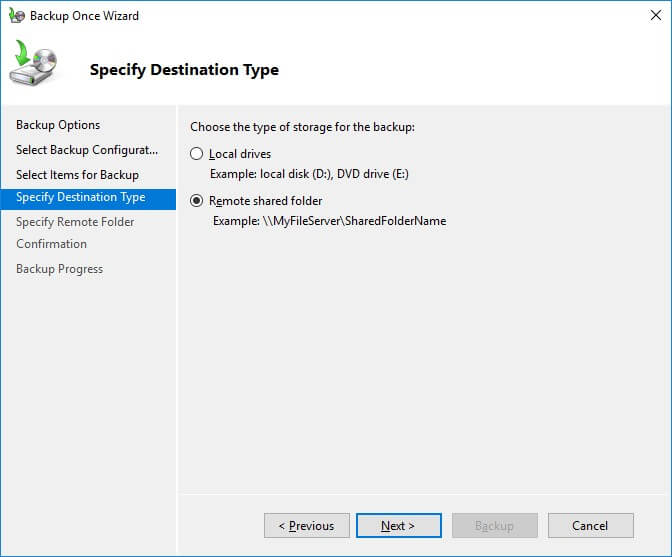
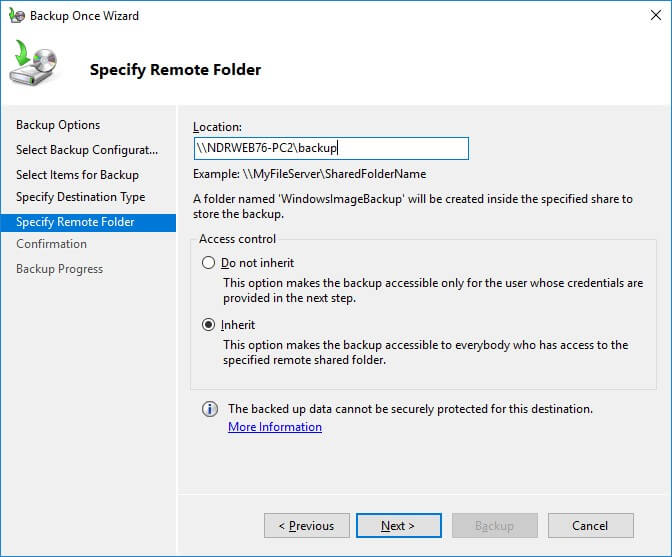
- If you select Remote Shared Folder, the Specify Remote Folder page appears. Provide the necessary details and click Next.
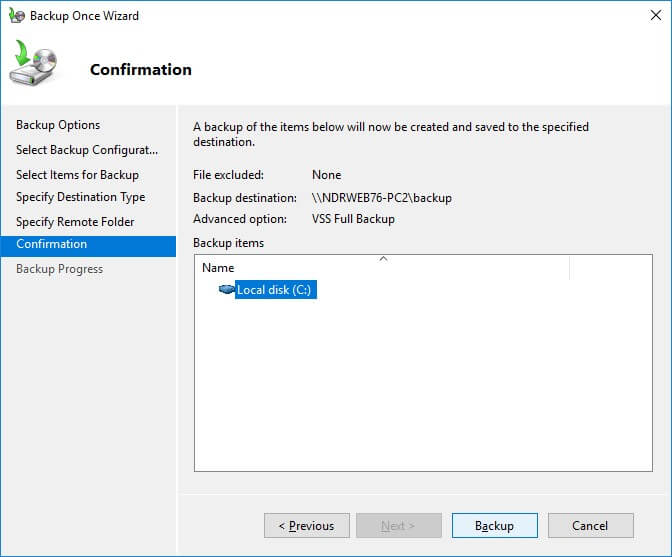
Note: If you select Local Drives, the Select Backup Destination page appears, select one from the options available in Backup Destination dropdown and click Next. - On the Confirmation page, verify the backup settings and click Backup.
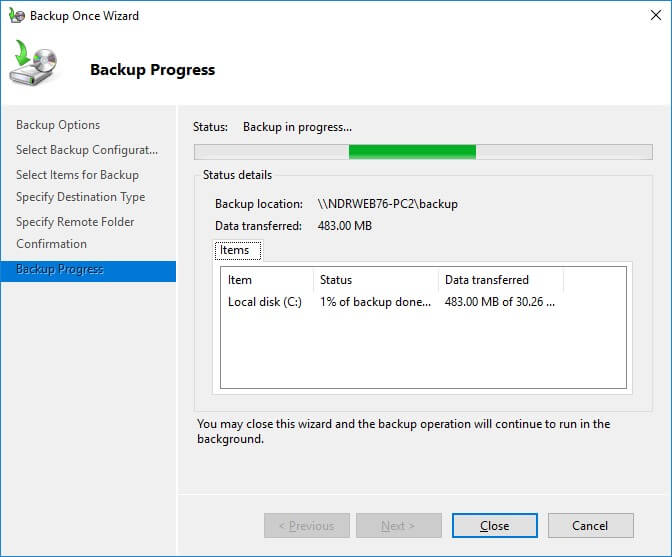
- Now the backup process gets started. One can see its status on the Backup Progress page.
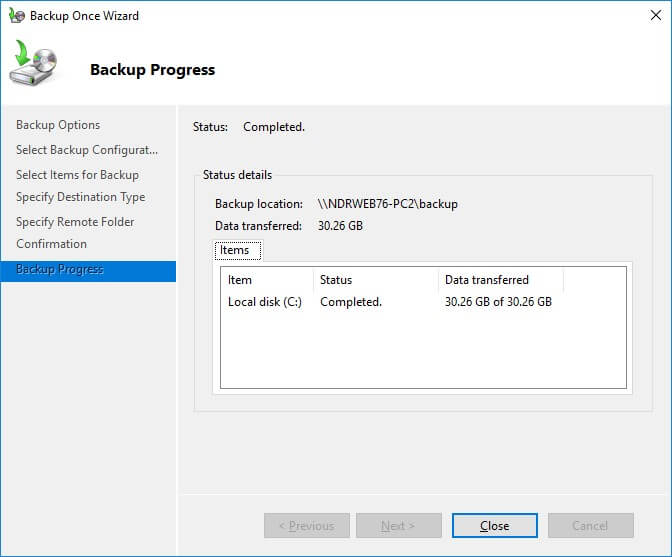
- After the successful completion, the details of the backup are displayed.


The Exchange data can be backed up securely after using the Windows Server Backup application. You can use this to increase the security level of Exchange data.
In the first part of the series of articles, we showed you that how you can use Windows Server Backup and take the backup of your Exchange Server accounts. It is a secure process that checks all the features, metadata, and properties of exchange and maintains the right hierarchy of data. The next part of the series will tell you how to restore the backup file to Exchange Server.