

Read time 9 minutes
When it comes to Lotus Notes to Outlook migration, converting NSF files to PST is essential since these database formats are compatible only with their respective email clients. Organizations often prefer Outlook for its versatility, features, cost-efficiency, and seamless integration with MS Office suite. To import NSF files into various Outlook versions like 2019, 2016, or 2013, there are two main approaches: using the free manual solution to move NSF to PST or opting for a professional third-party solution. This article provides an in-depth exploration of both methods for importing HCL Notes data into Outlook.
Methods to Import HCL Notes to Outlook 2019/2016/2013
A manual solution is available to transfer data from HCL Notes NSF files to Outlook. This two-stage process involves exporting HCL Notes data to a CSV file in the first stage, and then importing the saved CSV file into the Outlook application in the second stage.
Note: It is advised to have a backup copy of the NSF file before exporting as there are chances of data loss during the export/import process.
Exporting NSF File Data to CSV File
Follow the below-given instructions to export the HCL Notes data to a CSV file.
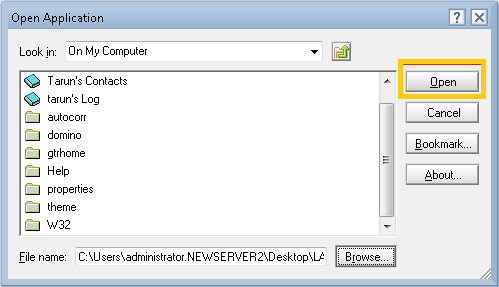
- Start your HCL Notes application. Then navigate to File > Open > HCL Notes Application.
- A new window named Open Application will get open. Here, click Browse option to add your HCL Notes NSF file and click Open to open that file.
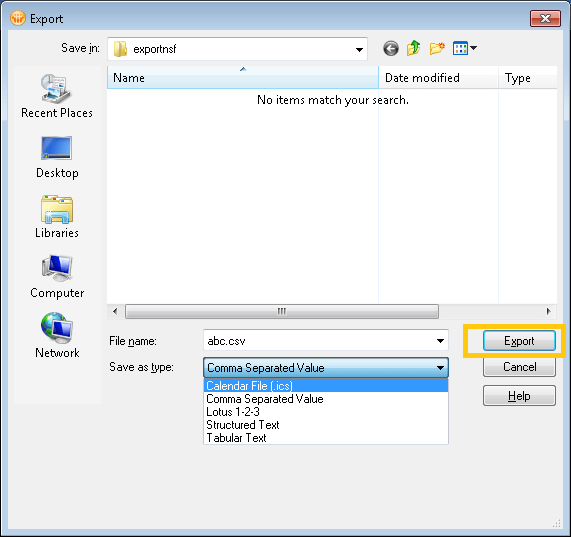
- Once the desired NSF file gets opened, go to File option and then click Export.
- Now, in the Export window, add the destination path, file name, and file type (Comma Separated Value). After this, click Export.
- In the next CSV Export window, choose the options from How Much to Export, Export Character Set and Detail to Incorporate. Click OK.
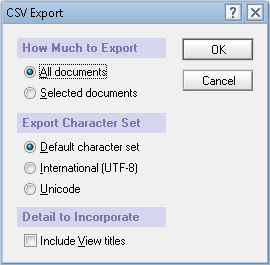
- This will save the NSF file data to the CSV file at the specified location.


Importing CSV File to Outlook 2019/2016/2013
The next step is importing the CSV file created in the first step to your Outlook (2019, 2016 or 2013). Just follow the given instructions to perform this procedure.
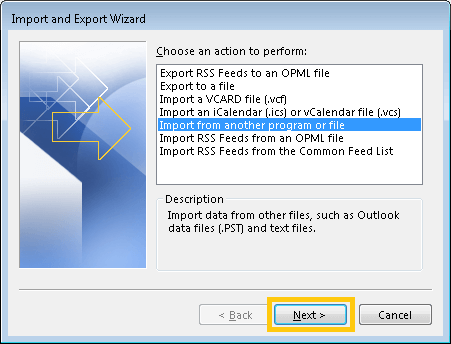
- Run your Microsoft Outlook application. Go to File > Open & Export > Import/Export.
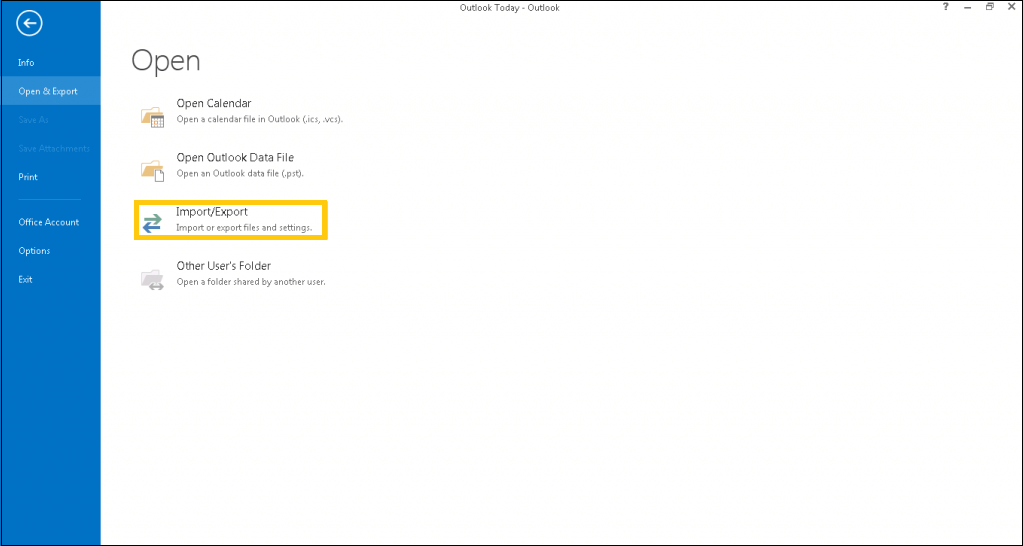
Note: For Outlook 2010, follow File > Open > Import. - After choosing Import from another program or file, click Next.
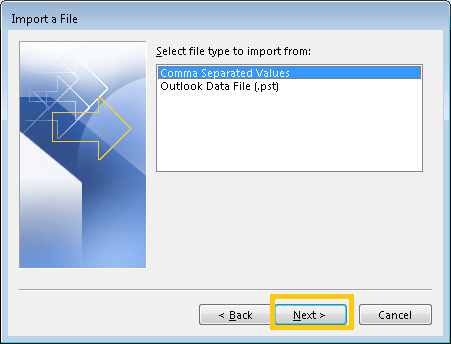
- In the Import a File window, select Comma Separated Values option and click Next.
- Click Browse to add the CSV file for import. Select options for duplicate items and click Next.

- Select the destination folder to save the NSF data from the CSV file. Then click Next.

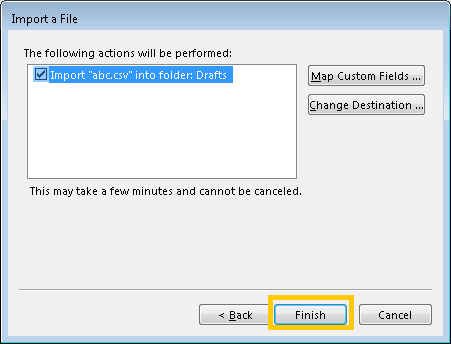
- Click Finish to complete the import process.


While the manual method is an option, it has limitations such as importing only one NSF file at a time and offering no guarantee of complete data transfer. Additionally, it imports data into a single PST mailbox folder. For a more reliable and efficient way to move or import HCL Notes NSF files to Outlook without concerns about data loss, consider using the Kernel for Lotus Notes to Outlook application.
Advantages of Automated Solution Over Manual Solution
- Direct method, with minimum steps
- Moves multiple NSF files simultaneously
- Flexible since it can save selective data as well using its advanced filters
- No risk of manual or human based errors
- Do not require installation of the Notes application
- A detailed preview provided before saving data to destination
- Supports local NSF files, Domino Server and SmartCloud Notes
- Complete NSF mailbox data migration with no loopholes
- Imports NSF data to PST and Exchange Server as well
Now, download the trial version of the tool for free from the website and experience hassle-free HCL Notes to Outlook 2019, 2016, 2013 migration.
Steps to Migrate Notes to Outlook
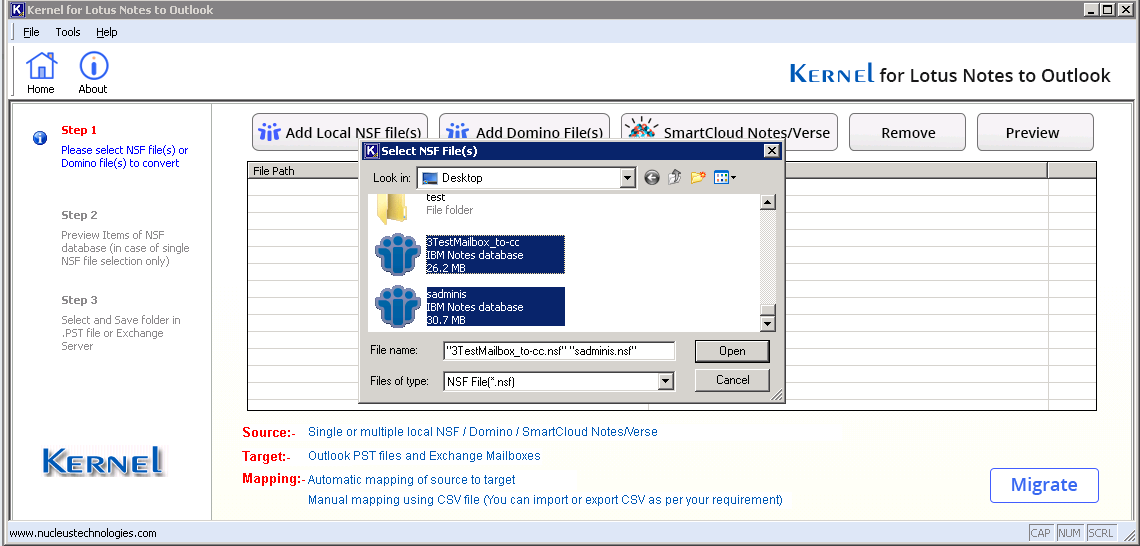
- Launch the import Notes to Outlook application. Then click on Add Local NSF file(s).
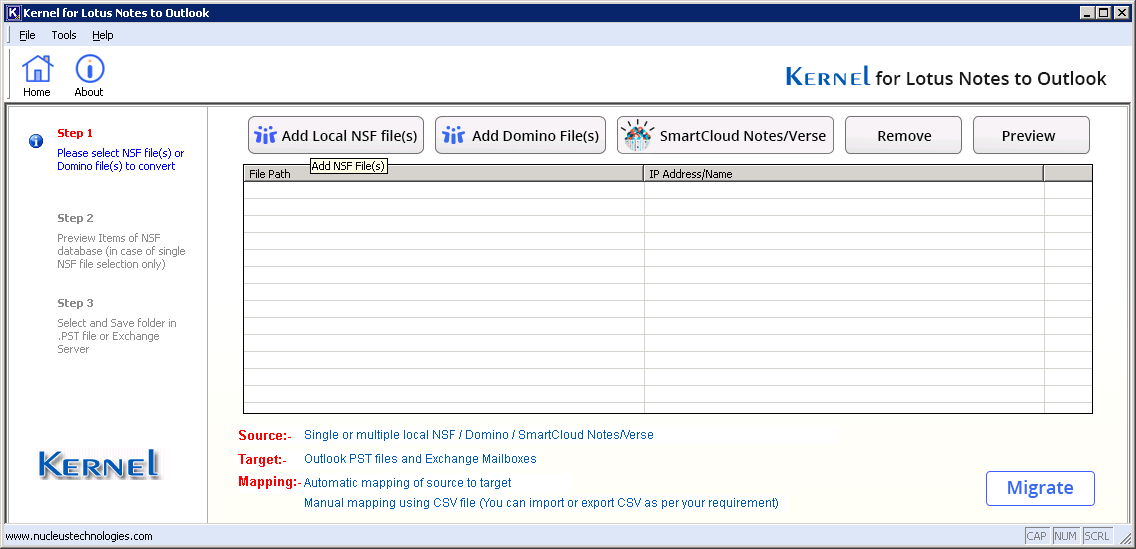
- A browsing window will get open. Select the number of NSF files for migration and add them for migration.
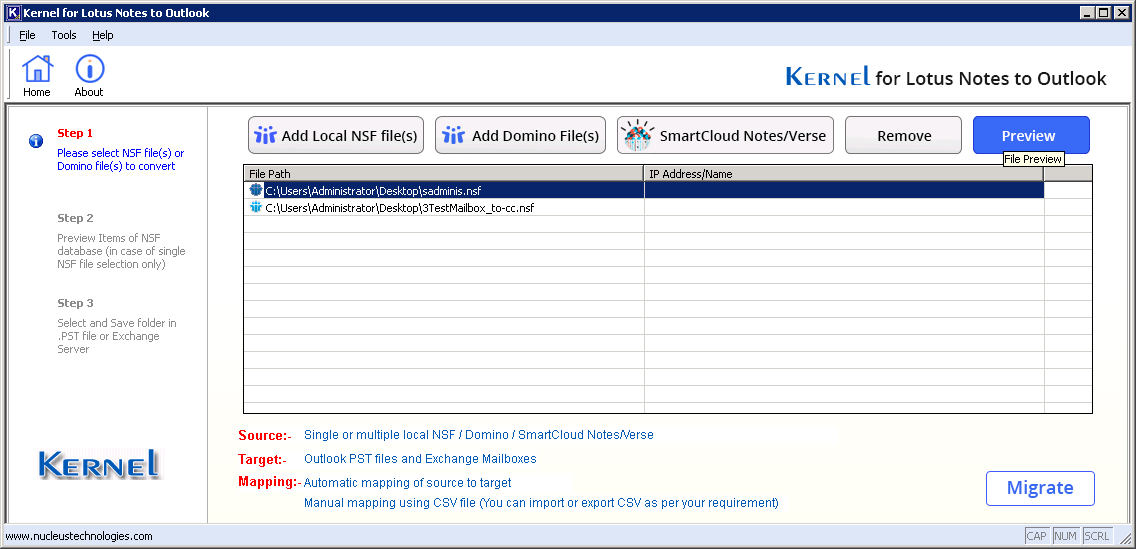
- To view the preview of NSF file content, select an added NSF file, and click Preview.
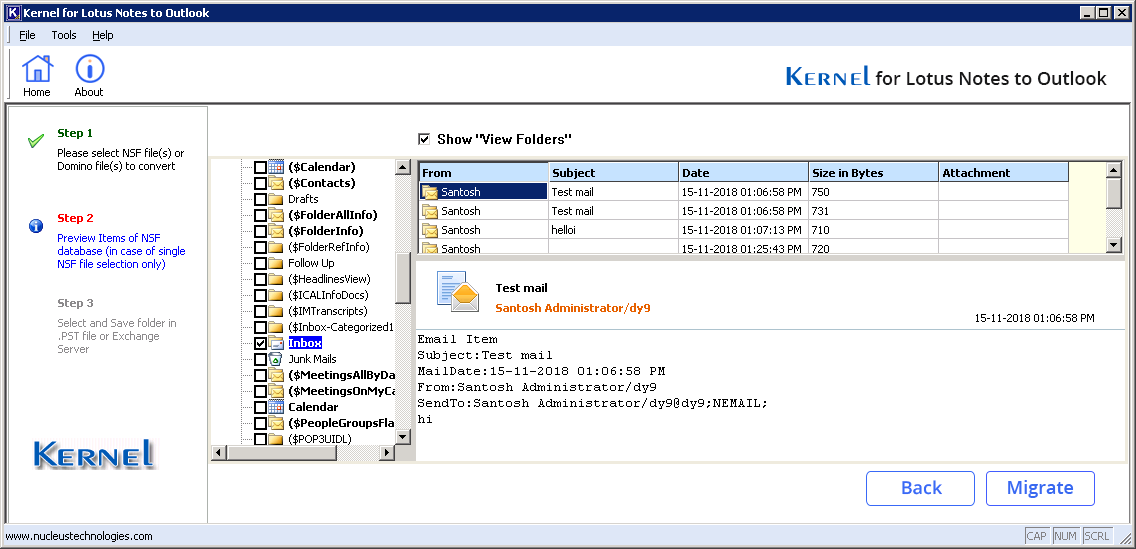
- The NSF file mailbox, with its hierarchy, will get displayed along with all its mailbox folders. Click any folder item to view the items within it. After viewing the desired content, click Back option.
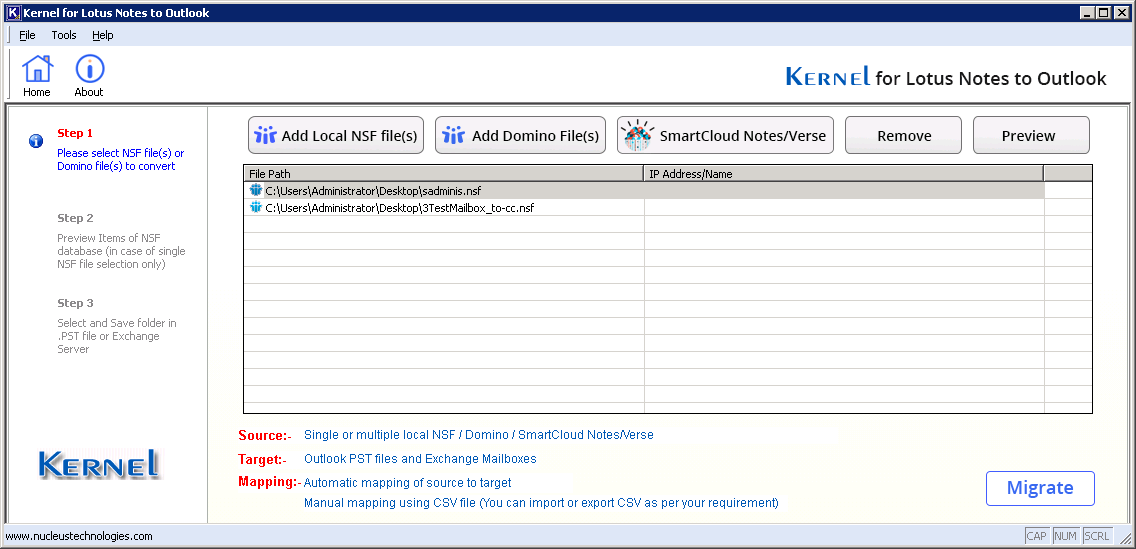
- To initiate the migration process, click Migrate.
- Now, select Outlook PST as the saving option and click OK.
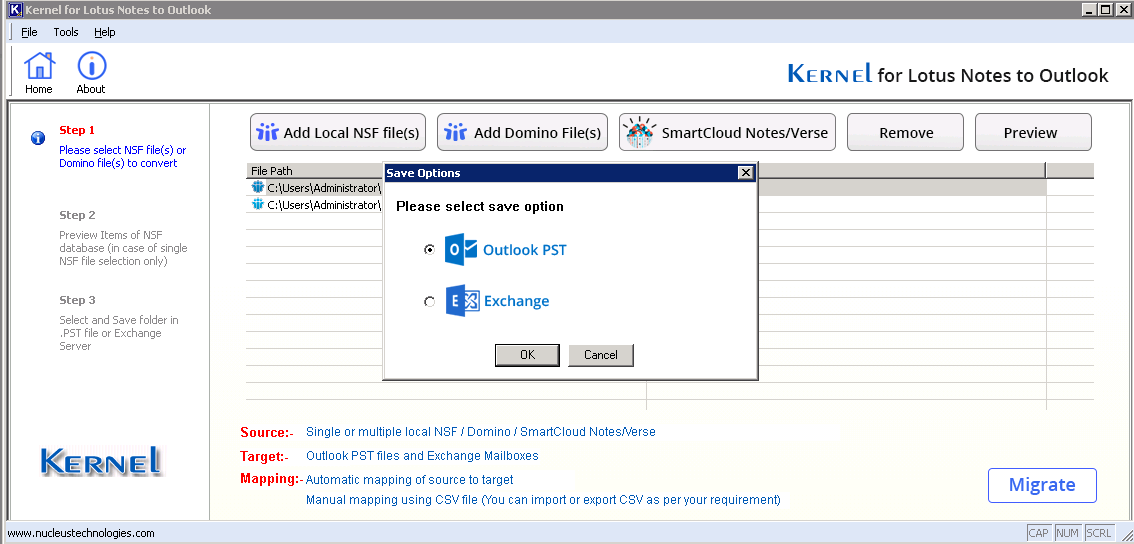
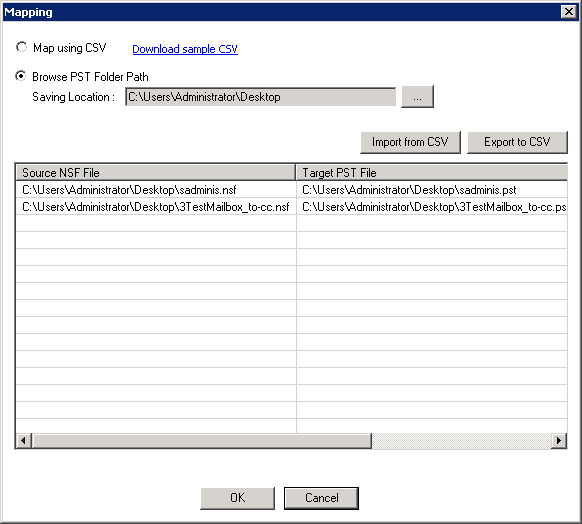
- Add the destination for the PST files on your system and click OK.
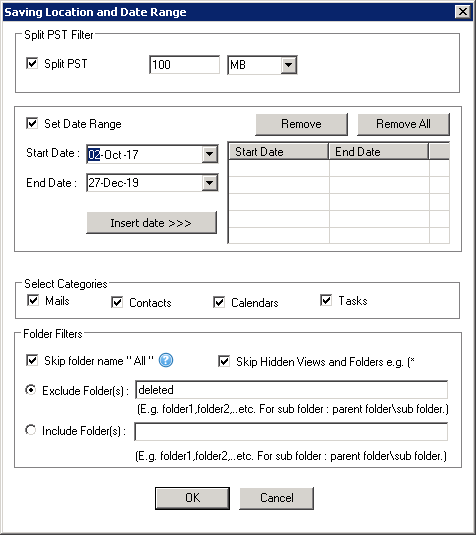
- You can apply filters like Split PST, Date Range, Categories, Folder Filters, etc. Click OK.
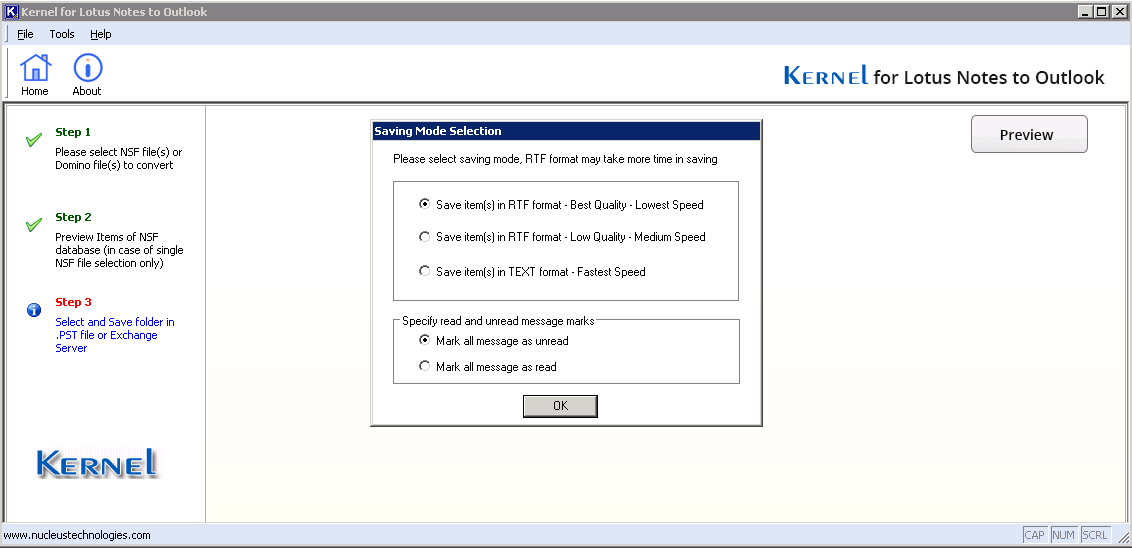
- Select the saving mode and message read/unread options. Click OK.
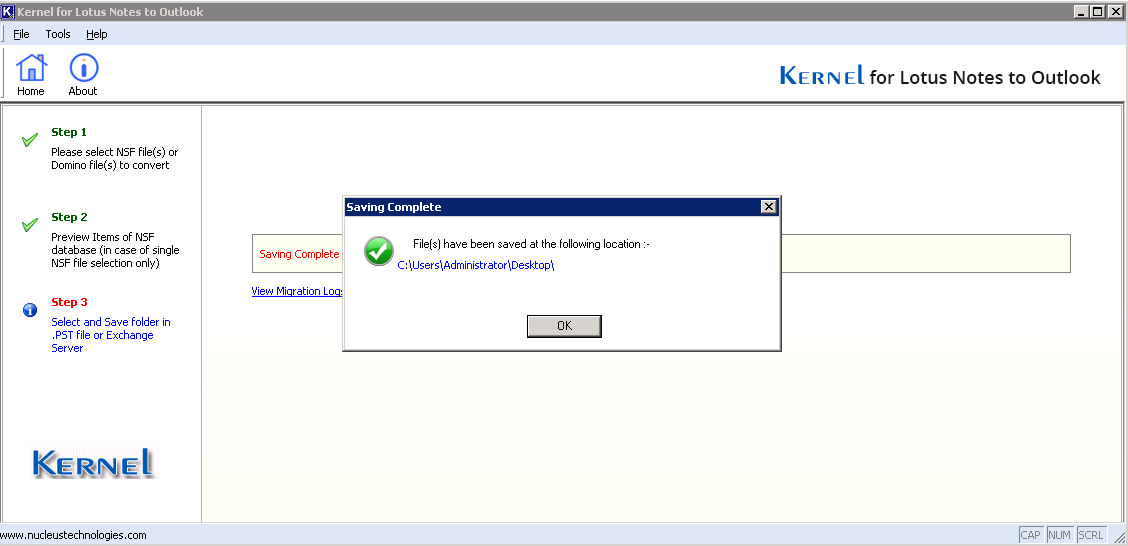
- The migration process will start and gets completed within a few minutes. Now, you can find the PST at the defined location which you can use in your Outlook application.


As a result, the migration of NSF files to Outlook becomes a straightforward process. This advanced tool is compatible with all versions of Outlook and Windows operating systems, ensuring a smooth transition.
Conclusion
While the manual solution is straightforward, it lacks the ability to handle nuances in the source account. Even a single incomplete or blank section in the CSV file can result in an unfinished migration. To achieve optimal results with minimal effort, consider using a professional email migration tool like the one mentioned above. Such software can significantly enhance the quality of your email management.