

Read time 8 minutes
User query –“I am a new Outlook user and hence not aware of a lot of technicalities associated with this application. Today, as I opened Outlook, I realized that a few of my emails were missing; I was shocked by seeing this change at first, but I didn’t try anything because of the fear of losing them permanently. Why is it happening, and how can I fix this?”
Similar to the above user, someday, you too may surprisingly find out that some of your emails are missing from your Inbox folder. These emails can be recent or older ones, of a particular subject or by a specific person, and so on. Considering this major issue, our experts have tried and tested many solutions and come up with the best solutions that will fix any such email disappearing issue in no time. Read our expert insights and recover all the disappeared emails from your Outlook mailbox.
Why do emails disappear suddenly?
There are several reasons because of which your emails are missing from your mailbox. Let’s discuss all the possible reasons and then move to the solutions to fix this issue.
- Issues in configuration settings
There might be some issues in the POP or IMAP settings of your account. If you have made any mistakes while configuring them, you may face this issue. - Accidental deletion of emails
Sometimes, you might delete emails accidentally and not realize it. Hence, they might disappear from your account. Let’s say you have Outlook configured on your mobile, and it is synced. Unaware of this sync, you are deleting emails, and they are getting deleted from your account, not just from your mobile. - Inactivity
If you have been inactive for a long time, then also, you can face Outlook incoming emails disappear issue. - Applied wrong filters
Sometimes, because of the wrong filter selection, you are unable to read or access emails that are a few days old, which results in the email disappearing issue. - Hacked Outlook account
You can also face this issue if your Outlook account is hacked or misused by someone. In that case, try changing your password.
As we have discussed, there are many reasons why emails may disappear. To solve this problem, we are going to discuss some of the most suitable manual solutions. Let’s check them out:
If you can’t find a few messages in your Inbox in Outlook, then probably you have deleted those emails accidentally. The emails you deleted from the inbox actually don’t get eliminated right away. Instead, these emails get saved in the ‘Deleted Items’ folder. So, to recover deleted items, go to the Deleted Items folder and recover emails from there.
Even if you can’t find emails in the deleted items folder, you can still recover them. Here are the steps to follow:
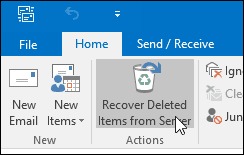
- Open Outlook, and in the Home menu, click on Recover Deleted Items from Server.
- Choose the mail items you want to restore and tap OK. Make sure to select the Restore Selected Items option.
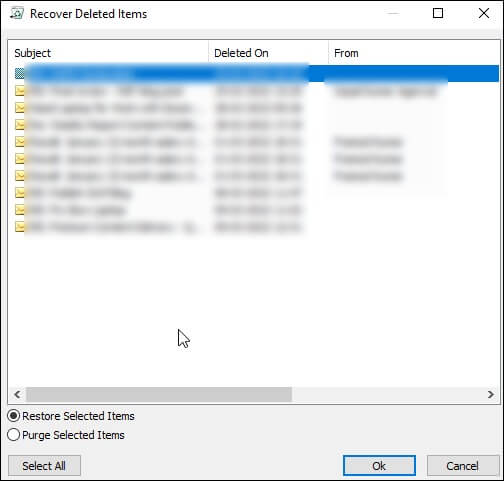
- In the Deleted Items folder, you’ll find restored mail items. Now, you can move them to the Inbox folder.


Sometimes, filters can be a major reason why emails are disappearing. So, try to make changes in the filter settings. To change the filter setting, follow the below-mentioned steps:
- Open Outlook and click on the View tab.
- In the current View area, click on the View Settings option.
- In the new Advanced View Settings dialogue box, click on the Filter option.
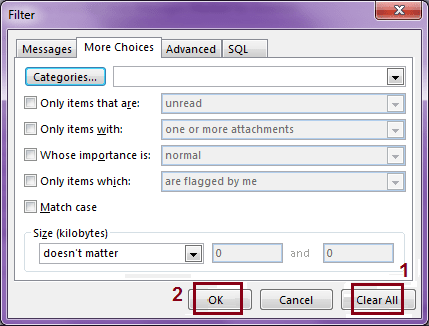
- Now, in the new Filter dialogue box, go to the More Choices tab.
- In this category, see if any filter box is checked; if yes, then uncheck all and click on OK.

If you can’t find some of the emails that were there before in your inbox, try searching them with the Advanced Find feature of Outlook. To do so, follow the below-mentioned steps:
- Open Outlook and go to Inbox.
- In the top section, click on the Search box to activate the Search Tools tab.
- Now, expand the search tools drop-down and select Advance Find.
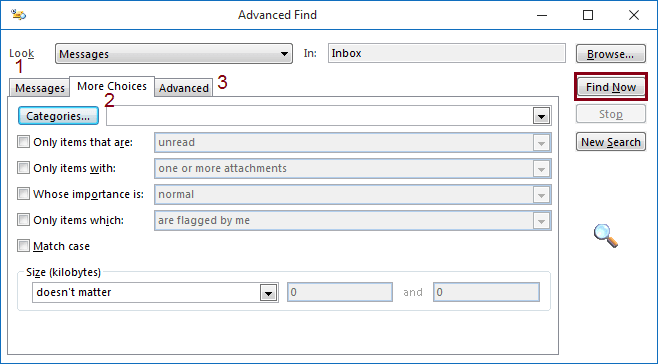
- Now, in the given columns, enter the suitable details of the emails you want to search. There are three categories, and you can select the one that suits you.

Step 1- Go to the mailbox and click on the Gear icon.
Step 2- Now go to More mail settings.
Step 3- Here, go for Find Managing your account, select POP, and then delete downloaded messages.
Step 4- Now click the Save button.
Review Inbox and identify any misconfigured rules that divert messages. Access the Rules settings and, upon detecting any rules incorrectly moving messages from your inbox, use the “Edit rule” option to make necessary adjustments or delete the problematic rule altogether. This proactive approach guarantees that your email rules are correctly configured and prevents unwanted email diversion.
Follow the steps to know more:
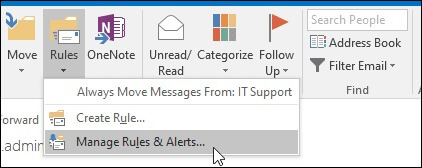
- Access Outlook and navigate to Rules. Choose the option Manage Rules and Alert.
- Verify whether all the defined rules are correct or not.
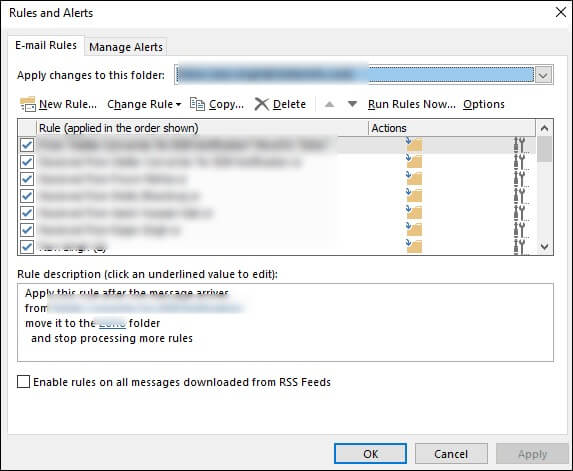
- Double-tap on any rule to open more details and alter various conditions to resolve any incorrect rule present.


When the ‘Focused Inbox’ feature is active, messages may reside in the “Other” tab. Access the “Other” tab to look for the message. If you find the message that is mistakenly placed in the ‘Other’ tab, take an appropriate action by selecting the message and choosing “Move to > Move to Focused inbox” to relocate it accordingly.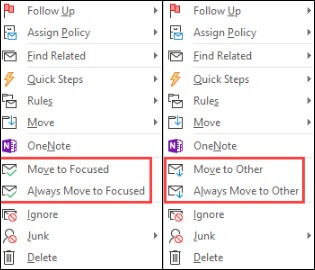

By exporting old emails and then importing them to a new Outlook profile, all the disappeared emails can be brought back to your mailbox. Let’s discuss all three processes in a detailed way:
- Export old mail history To export old mail history, follow the below steps:
- Open Outlook, click on the File menu and select Open & Export.
- Now, click on the Import and Export Wizard and select Export to a file option. Then, click on Next.
- Select Outlook data file (.pst) and click on Next.
- Select the email account you want to make changes to and make sure the ‘Include Subfolders’ option is checked. Then, click on Next.
- Now, Browse the location to export the file and select the “Replace duplicates with items exported” option. Then click on Finish.
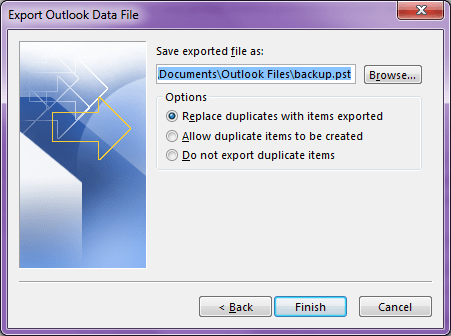
- Once finished, you must be able to see those disappeared emails again.
- Create a new Outlook profile
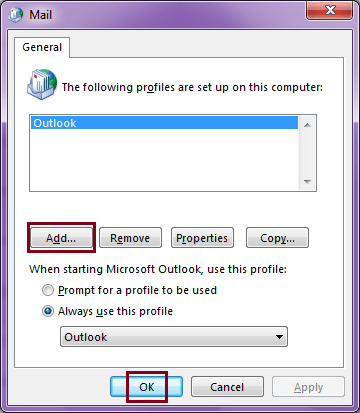
To create a new Outlook profile, follow the below-mentioned steps:- Open the Control Panel, locate the Mail icon, and click on it.
- Once the dialogue box is open, click on the Show Profiles option.
- Now, click on the Add button to create a new profile.
- Add a profile name and click on OK.
- Now follow the on-screen instructions and provide the necessary details to create a new Outlook profile.
- Import old mail history
Now, import the old mail history to the newly created Outlook profile. To start with this process, follow the below steps:- Open Outlook, click on the File menu and select Open & Export.
- Now, click on the Import and Export Wizard and select Import from another program or file option. Then, click on Next.
- Select Outlook data file (.pst) and click on Next.
- Now, in the next step, click on the Browse button.
- Search the file that you saved while performing the export function, select it, and wait for the history to sync properly. Once the wizard notifies you that all folders are up to date, you can check your Outlook profile for the newly imported emails.


This was the last of the three steps; after performing which you will be able to bring all your disappeared emails back to the new Outlook profile.
If the methods mentioned above are a bit complicated and time-consuming for you, we recommend an automated PST repair tool. Use Kernel for Outlook PST Repair to recover permanently deleted emails or fix corruption in the PST file. Try its free trial version to get an idea about its features and working. Here is a screenshot of the tool where you can see an option to save deleted emails only.
Conclusion:
In this blog, we have mentioned both manual techniques and advanced software to fix the incoming Outlook email disappear issue and recover emails. If the manual method does not recover the data, then you can use Kernel for Outlook PST Repair software that will recover all the emails, including the deleted ones. Later, you can save the emails in a new PST file.