
Read time 6 minutes
In recent years, Microsoft Outlook has evolved into an indispensable tool in our daily lives. It enables us to effortlessly send and receive emails, manage calendar events, create tasks, schedule meetings, maintain journals, and much more. All of this valuable data is automatically stored in dedicated data files created by the Microsoft Outlook email client
Outlook data files, which encompass comprehensive mailbox data, often serve as the foundation for creating additional data files with various purposes such as categorization, archiving, and backup. Are you familiar with the process of adding Outlook data files? This guide presents straightforward methods for creating data files (PST), removing them, and closing them successfully.
What All is There in a PST File?
While most of us are familiar with PSTs and have experience working with them, not everyone is fully aware of all the components that make up a PST file. Let’s delve into the various elements that comprise a PST file:
- Inbox: Where you receive all your incoming emails.
- Outbox: It is a folder where all your sending emails are held temporarily until they are sent without any issue.
- Sent Items: A folder where all your sent emails are stored.
- Drafts: A folder where all your incomplete or unsent emails are stored to resume working with them later.
- Deleted Items: A folder where all your deleted items (not just emails) are held for a fixed period.
- Junk Email: A folder where all your spam and junk emails land.
- Search Folder: A virtual folder that contains all the emails in categories depending on the search criteria.
- RSS Feeds: This folder contains all the latest feeds you have subscribed to.
- Calendar: A calendar is used for scheduling and creating appointments, meetings, events, etc.
- Contacts: Here you can save all your contacts with their names and email identities for quick access.
- Tasks: Here you can create tasks and keep tracking them until they are done.
- Notes: Notes are the quick reminders of certain things that you can make without interrupting your email flow.
- Journal: A feature that can track your work activities during your working hours.
So, this is a detailed list of what a PST file holds. You can always have multiple PSTs for different purposes or just separate your data.
You can add or create PST file in MS Outlook 2016, 2013, and 2010 through different methods. The methods are mentioned below to help you perform the task successfully.
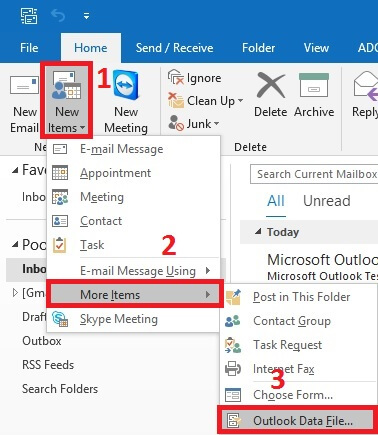
STEP 1: Start any version of MS Outlook 2016, 2013, or 2010.
STEP 2: Click New Items >> More Items >> Outlook Data File, see the screenshot for a better understanding.

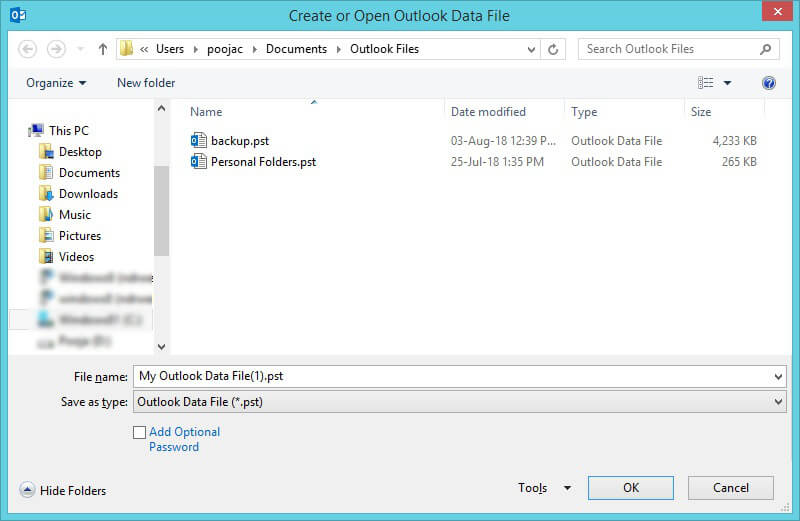
STEP 3: A dialogue box will appear, you can Create or Open Outlook Data File and enter a new name of the data file in the File Name field as per choice. Click OK and the newly created data file will appear in the left pane of Outlook 2016, 2013, & 2010.

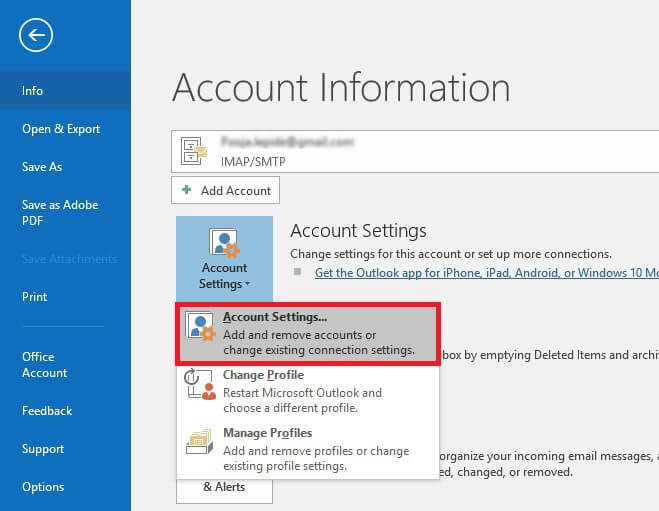
STEP 1: Start MS Outlook, click File >> Info >> Account Settings.
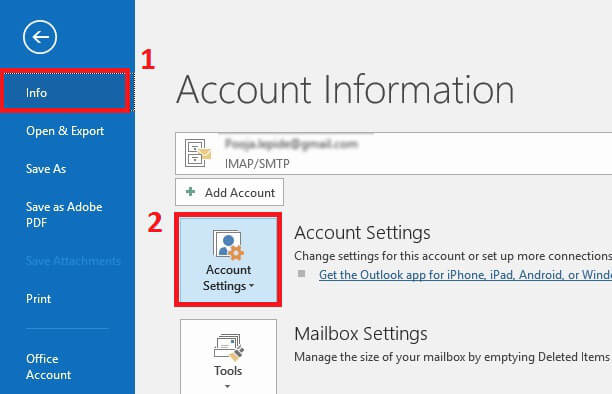

STEP 2: Click Account Settings and choose Account Settings from the drop-down options.

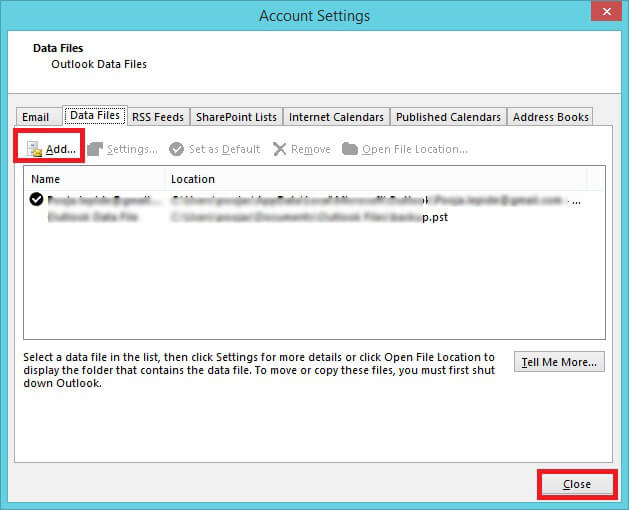
STEP 3: Choose Data Files from the menu and select the Add button.
You can add an existing Outlook data file from your local machine, or you can create a new data file using the File Name field.
Click the Close button after you have added the file.

You have the flexibility to add multiple data files to your Outlook profile whenever you need to access data from backed-up files stored on your personal computer. Once you’ve retrieved the necessary information, these data files may no longer be necessary. Therefore, you can choose to close them from the left navigation pane, ensuring that your Outlook profile remains uncluttered.
To do so, follow the simple steps to close the Outlook data file from 2016, 2013 & 2010.
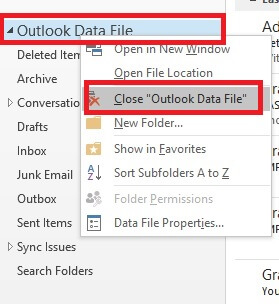
STEP 1: Open MS Outlook and select the data file you want to close from the left navigation pane.
STEP 2: Right-click on the data file and click Close “Outlook Data File” from the drop-down list.

Sometimes, you want to remove the data file completely because it is not required anymore. Use the below steps to remove the data file:
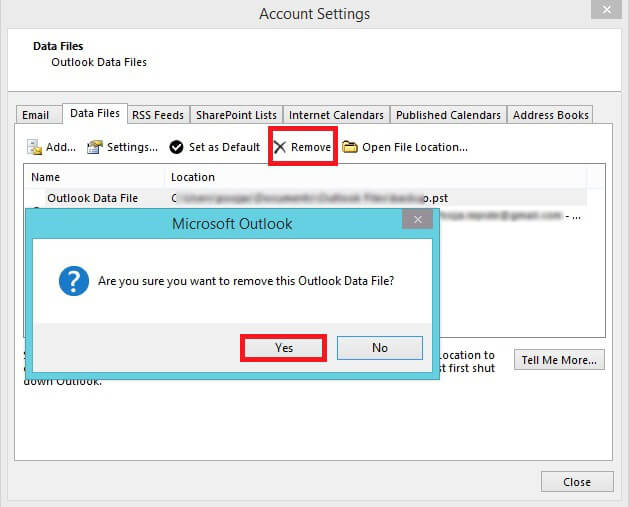
STEP 1: Start MS Outlook, go to File >> Info >> Account Settings >> Account Settings
STEP 2: Select the desired data file that you want to remove and click the Remove button. From the popped-up dialogue box choose Yes.

Apart from adding, closing, and removing the data file, one can also perform other tasks like archiving emails to PST.
Using this method one can save the selected items in a separate archive folder.
Step 1- Go to the Info tab in Outlook
Step 2- Click the Mailbox setting and then click the Archive option.
Step 3- Now choose among the various options to take the archive and browse a folder location for the archive folder.
Step 4- And finally click on the OK button
Final Words:
All of these methods are user-friendly and do not demand advanced technical skills. Furthermore, in the event that you encounter corruption issues with your saved PST files or they become inaccessible for any reason, you can employ a third-party tool such as Kernel for Outlook PST Repair for repair and recovery. This tool provides robust features designed to effectively recover complete data from any corrupt PST file.