
Read time 7 minutes
In contemporary times, organizations lean towards utilizing SharePoint 2013 personal libraries, commonly referred to as OneDrive for Business, as their chosen platform for storing and distributing corporate work documents. Once these documents have been successfully transitioned to OneDrive for Business, users gain the ability to access these files from virtually any location outside the corporate network.
As OneDrive for Business continues to gain prominence and wield greater influence, individuals are increasingly motivated to transfer their data from traditional file servers to the more sophisticated OneDrive platform. Nonetheless, transitioning from a file server to OneDrive is not a straightforward process, and the prospect of data loss can turn this migration into a daunting endeavor. Nevertheless, careful planning can help navigate these challenges smoothly. Here are some typical issues that arise during the process of migrating from a file server to OneDrive:
- Problems in migrating File Server structure
- OneDrive for Business has limitations in file paths, number of files, and file names
- The structure of the File Server and the usernames in Office 365 are not in agreement with each other
A tool such as Kernel Migrator for SharePoint can significantly simplify and enhance the migration process. Utilizing this tool, the transition from a File Server to OneDrive becomes a seamless and efficient procedure, requiring only a few clicks. This tool offers a straightforward pathway, guiding you through any challenges that may arise during the migration.
Step to Migrate File Server to OneDrive for Business
- In the “File” menu, add a new site item, and then in the Add New Destination, click on “Add OneDrive.”
- After opening Add OneDrive for Business, the following wizard will occur.
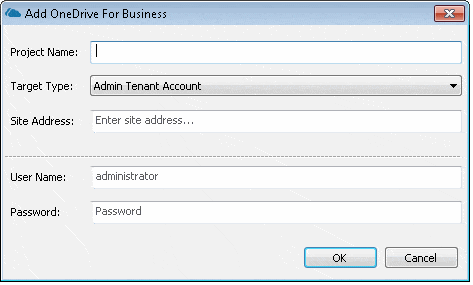

Enter the desired details:
Project Name: Enter the name of the project.
Site Address: Provide the URL of the OneDrive Site.
User Name: Enter the username with administrative rights over the provided site.
Password: Enter the password.
Target Type: Target type drop-down contains two options, i.e., Admin Tenant Account and Personal User Account.
- Admin Tenant Account: This is an administrator account; it will count all users on which this account had privileges
- Personal User Account: This will add the personal account of a user
- Add File System in the “File” menu and then click on “File System” in the Add New Source.
- Add New File System will display the following wizard.
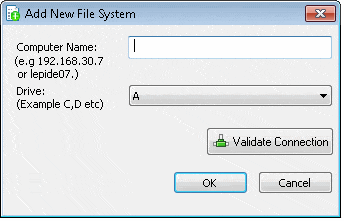
- After filling the details, click on validate connection. This will validate the connection.
- After a successful connection, the software may ask for login credentials.

Enter the desired details:
Computer Name: Enter the computer name or IP Address.
Drive: Select a drive that needs to be connected as a File System for the software
In case of wrong parameters, “Add File System” wizard will terminate with an error.
Step 3: File System to OneDrive for Business Migration
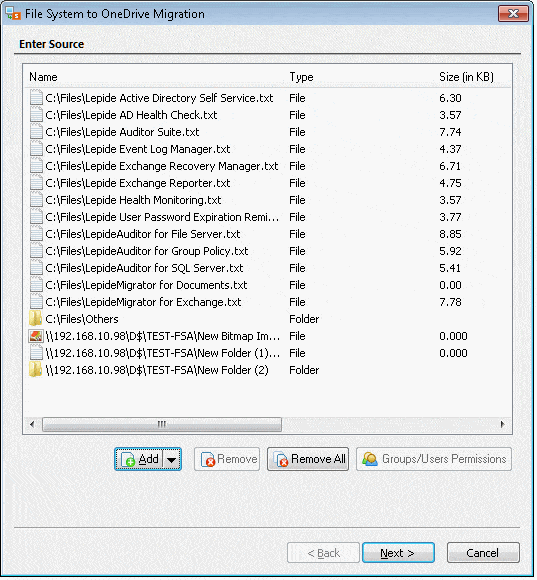
- In the “File System,” select “File System to OneDrive Migration.” It will display the following wizard:
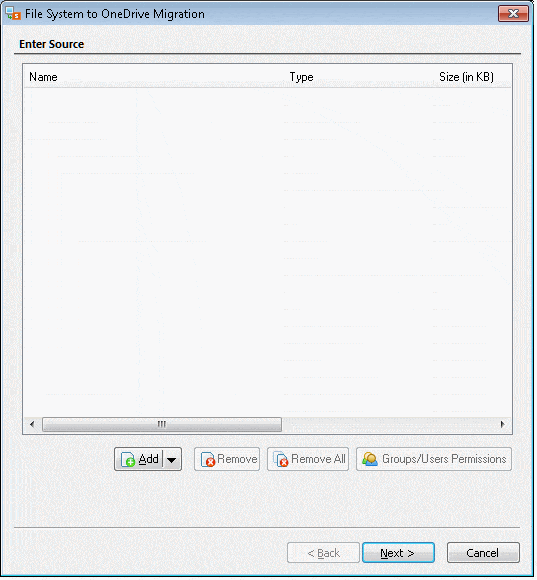
- The “ADD” tab will show the following options:
- Add the required files/folders from the local or remote file system.
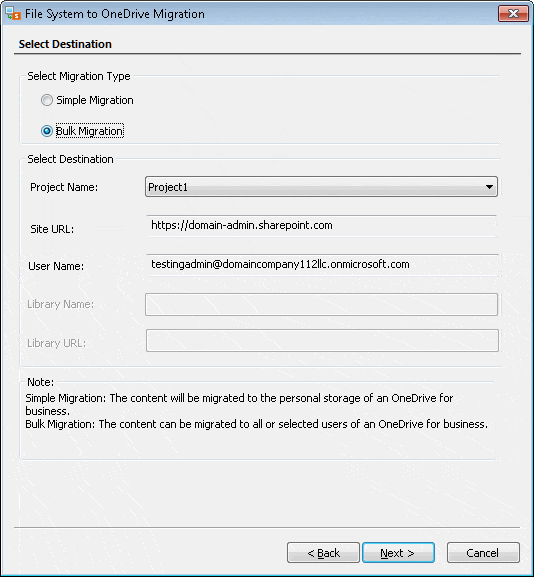
- The next step is to select the destination and the type of migration.
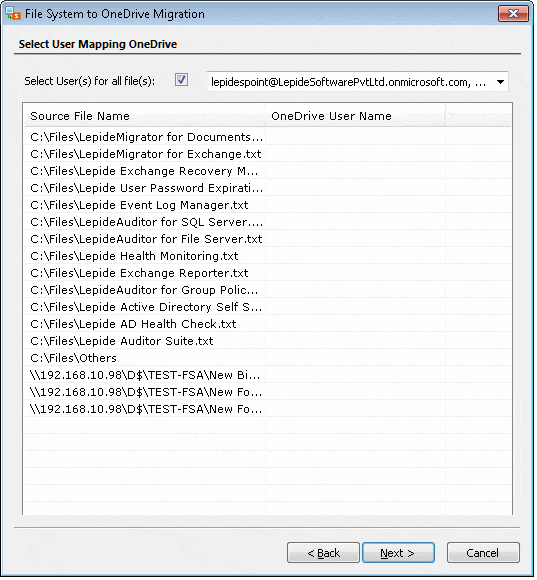
- The next step is to select the user accounts where an item will be get migrated.
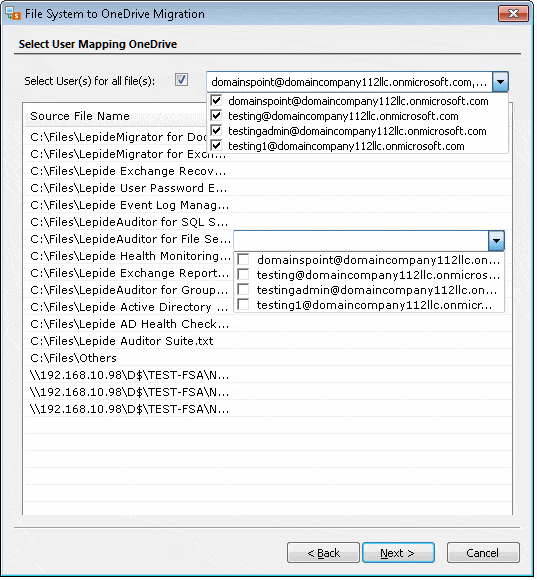
- Here is a snapshot of account list options for items.
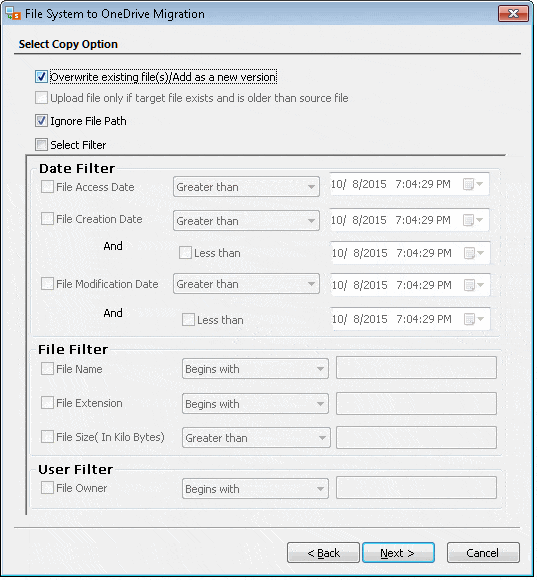
- By clicking next, a wizard will open, displaying the options for the file server to OneDrive migration. Here, you can also add a filter to your migration process.
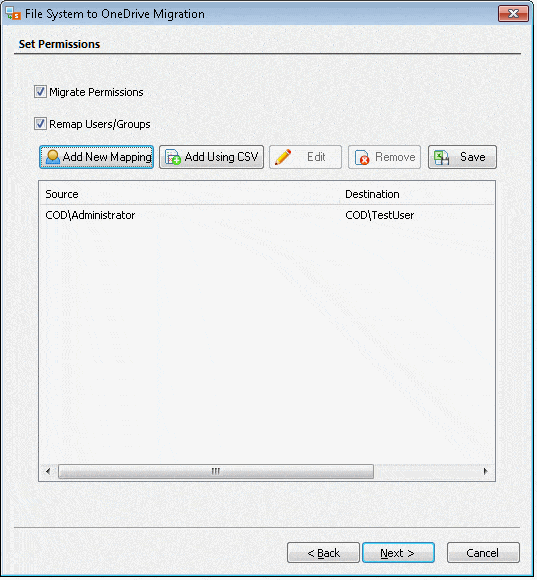
- The next step will provide you with an option to migrate the permissions. You can also enable the Remap Users options to map the users.
- To add a new mapping, click on the Add New Mapping button, then enter the Source User Name and Destination User Name.
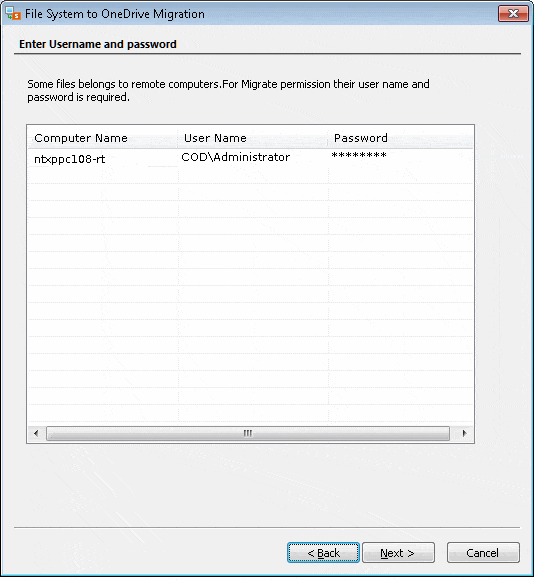
- After clicking next, if you’re migrating the files/folders from the Remote File System, you must specify the login credentials of the authorized user.
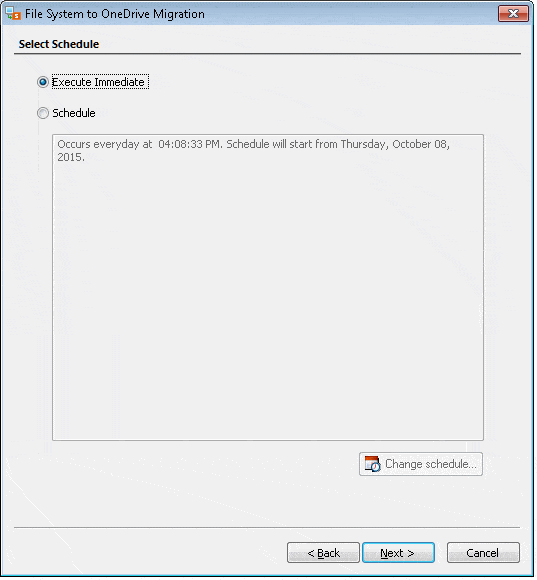
- In the next step, you can immediately execute the File Server to OneDrive for Business migration or schedule it later.

Add Files: This will add files from the local computer.
Add Folders: This will add a folder from the local file system.
Add Remote Files: This will add the files from the remote system.
Add Remote Folder: This will add the folders from the remote file system.
After selecting the files, all buttons will be activated.
Remove: It will remove the selected files/folders from the migration list.
Remove All: It will remove all files and folders from the migration list.
Groups/Users Permissions: This button will show the permissions of groups and users on any selected item.
In bulk migration, Under the Project Name, select a project that contains an Admin Tenant Account.
You can also select similar user accounts for all items or different accounts for different items.
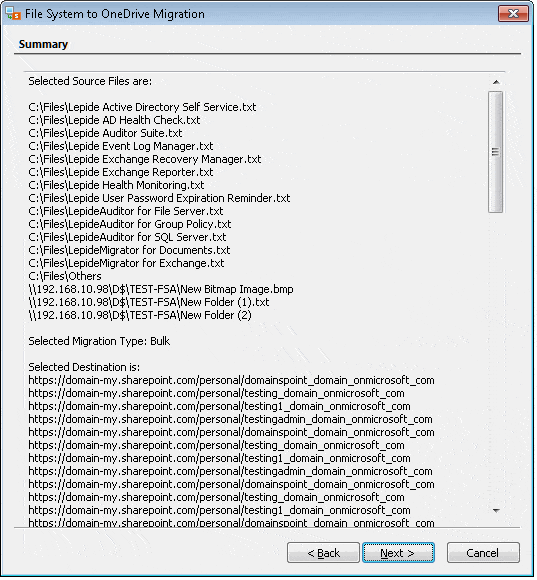
Here is the Summary of the migration job.
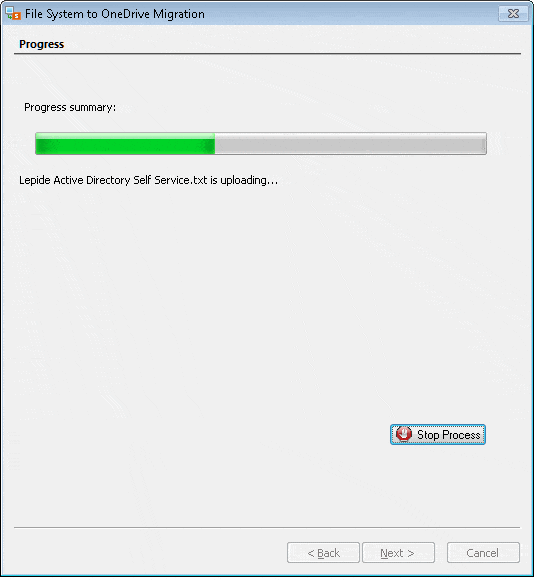
Migration done successfully!
SharePoint Migration, streamlines the process of migrating files from a File Server to OneDrive, requiring just a few straightforward steps for success. While native methods exist, they are often fraught with reliability issues and demand a substantial amount of technical expertise and coding skills to execute a migration successfully. Consequently, SharePoint Migration proves indispensable in such migration scenarios, offering reliability, efficiency, speed, cost-effectiveness, and a headache-free migration experience.