

Read time 7 minutes
Microsoft 365 continually enhances productivity and collaboration. A significant innovation in team collaboration is Microsoft 365 Groups, enabling seamless information sharing among team members. It empowers collaborative tasks like email communication, document creation, spreadsheet collaboration, project planning, contact management, and scheduling meetings.
The Administrator does not require to add permissions to each member since they get all the permissions once they are added to the Group.
The Group feature in Microsoft 365 serves as the central hub for information sharing among colleagues. It’s available in plans including Exchange Server and SharePoint Online. Administrators can create, add members, and manage permissions. Team members collaborate on projects and documents, resolving queries. Admins must safeguard Group data by saving Office 365 emails to their desktops.
If Office 365 Groups are accidentally deleted, there’s no need to panic. Microsoft employs a “soft-delete” policy, ensuring the Groups aren’t permanently erased, and you can easily restore them.
NOTE – What is the retention policy for Microsoft Groups?
Data within a group isn’t promptly deleted. Instead, it’s retained for 30 days by default, even after group deletion. This 30-day period is termed a “soft delete,” offering an opportunity for restoration. However, once this grace period expires, the group is permanently and irrevocably deleted.
An administrator can use the retention policies and restore the following content:
- Complete Team information
- Entire Planner details
- SMTP address of the group
- SharePoint sites and files
- Exchange Server message, contacts, and calendar
- Complete Azure Active Directory (AD)
Manual Process to restore the deleted Office 365 Groups
You can easily restore the Office 365 Groups within the Office 365 Admin Center with the help of following steps:
- Login to Office 365 with the Administrator credentials.
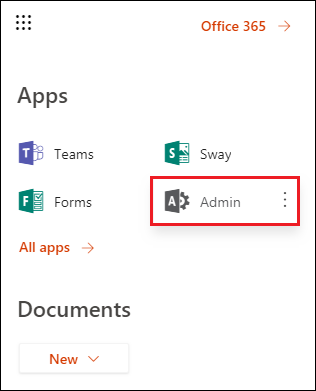
- Click Admin icon in the menu list.
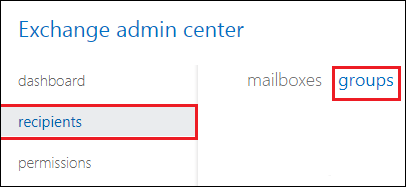
- Under the recipients category, go to the groups tab.
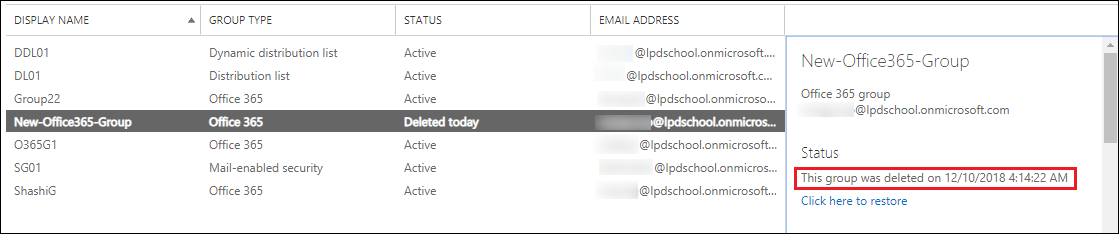
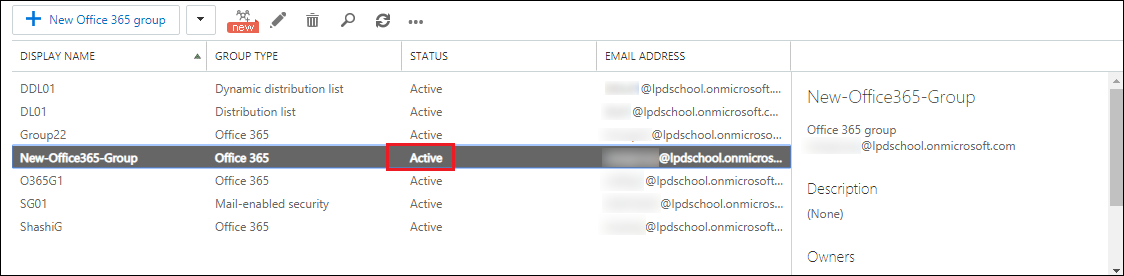
- In the list of Office 365 Groups, if any group is deleted, then its Status will display brief information about the deletion.
- Now, click the restore icon from the toolbar.
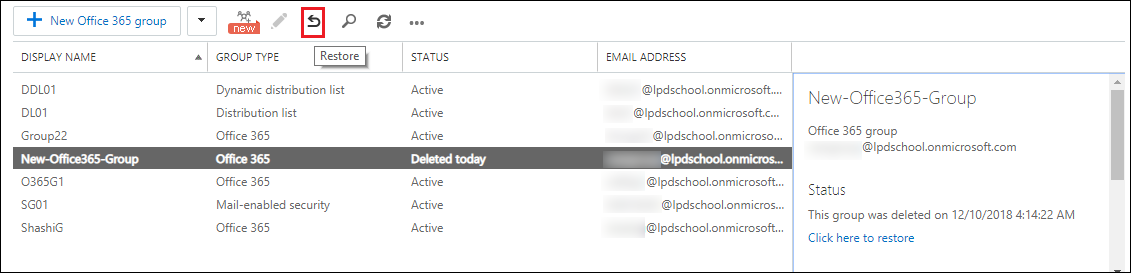
- A pop-up message will give you information about the changes after restoring the group.
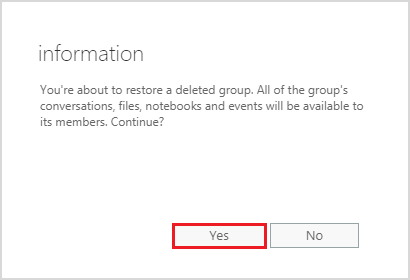
- As soon as the office 365 Groups is restored, its status will change to Active.


Using this simple procedure, you can easily restore the Office 365 to Active status. After the 30-day retention period, the group will be deleted permanently along with all its messages. That’s why it becomes mandatory for you to constantly save the content from Office 365 Groups to a secure location, so that it does not get deleted accidentally. To take a free Office 365 backup, you can try the manual saving or use a professional Office 365 backup & restore tool to conduct the job easily.
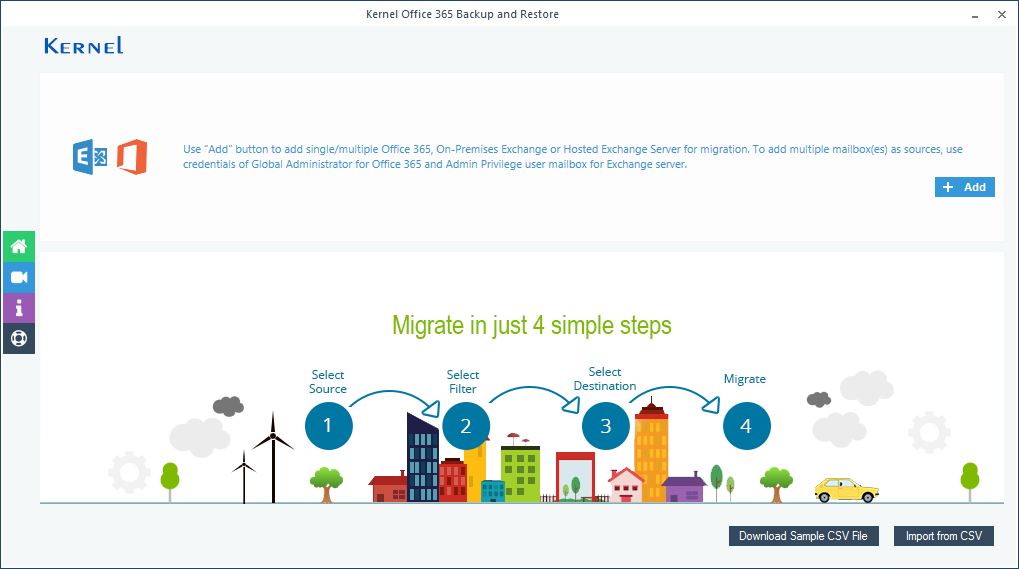
Kernel Office 365 Backup and Restore is a simple and efficiently designed tool which can access each mailbox from Office 365 account and save it in a PST file. It also retrieves the content from Office 365 Groups and places it in a PST file. Let’s go through the backup procedure of through this tool –
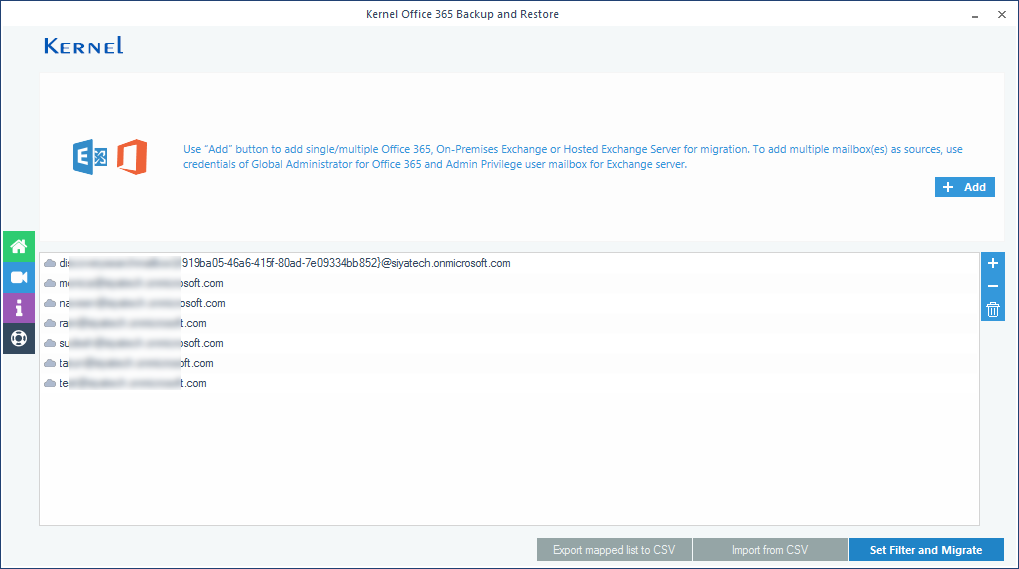
- In the home page, click the Add button to add an Office 365 mailbox.
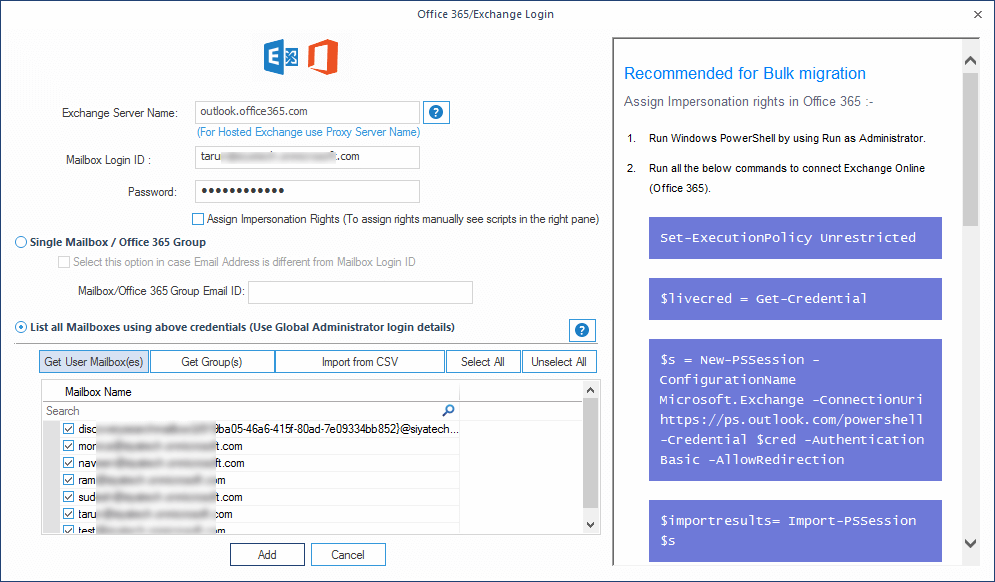
- Input the Office 365 credentials. If you want to backup multiple mailboxes, use an administrator account with complete authority over the other mailboxes. Then select “List All mailboxes using above credentials” and then click Get User Mailbox(es) button.
- The tool will show you the selected mailboxes. Click Set Filter and Migrate.
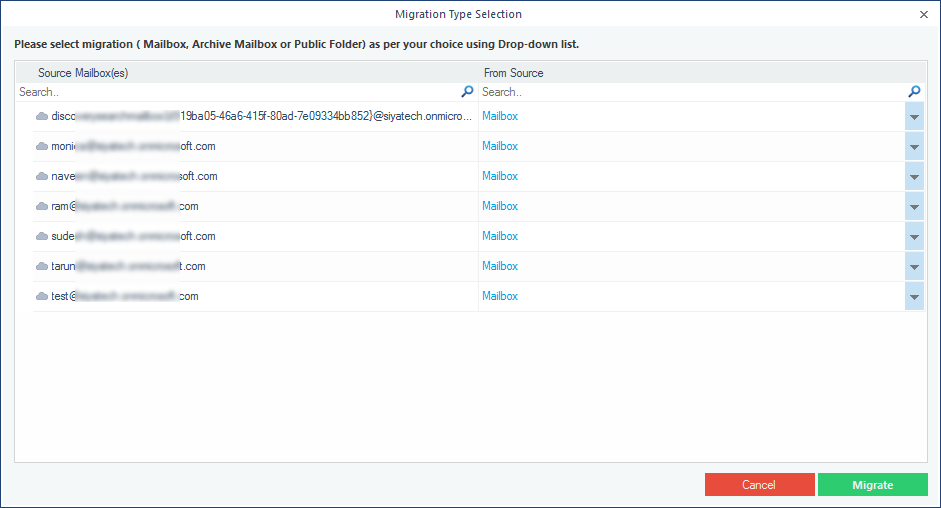
- You can select between Mailbox, Archive mailbox, and Public Folder from a drop-down list. After making your selection, click Migrate button.
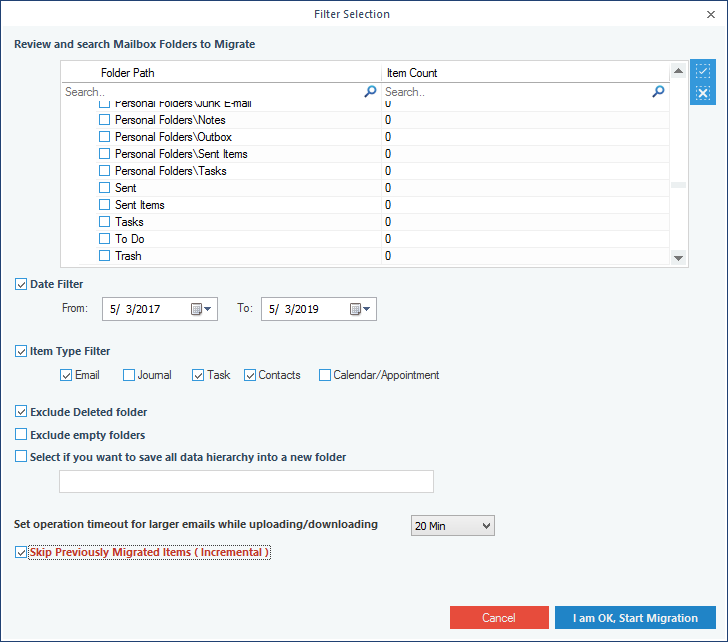
- The next page will provide multiple filter options which you can apply as per your requirement (Date Filter, Item Type Filter, Exclude Deleted Folder, Exclude Empty Folder, Save All data hierarchy in a new folder, Set Operation timeout, & Skip previously migrated items). After completing the filter options, click I am OK, Start Migration.
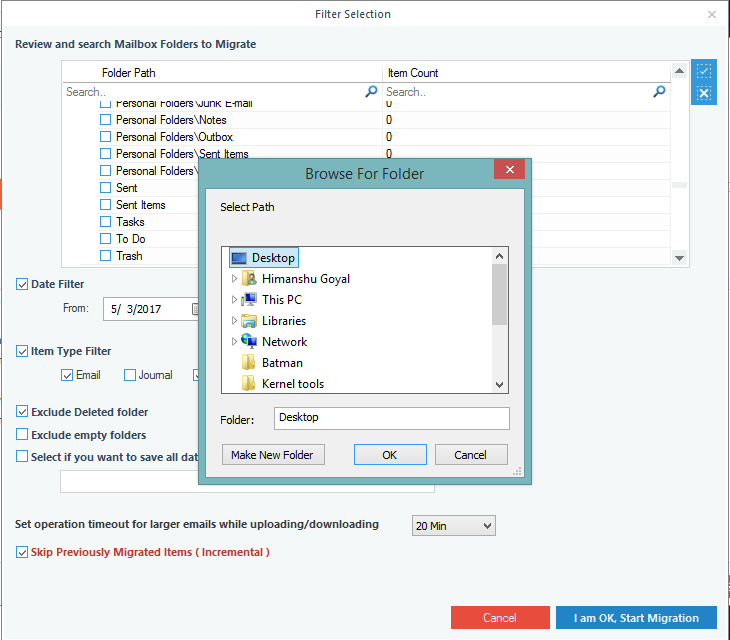
- Select the destination folder and click OK.
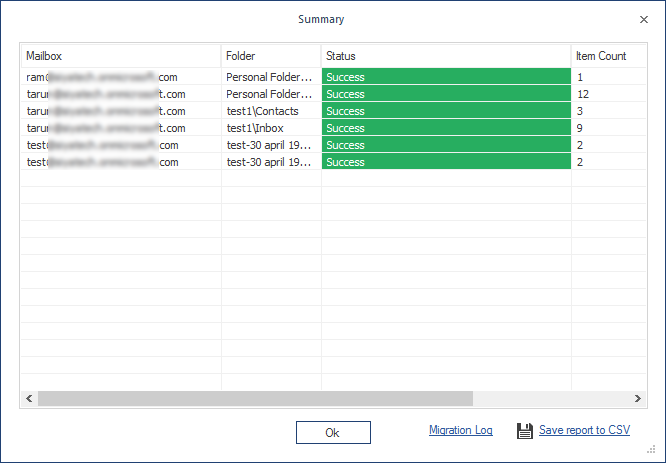
- As soon as the migration completes, a message is prompted. Click OK.
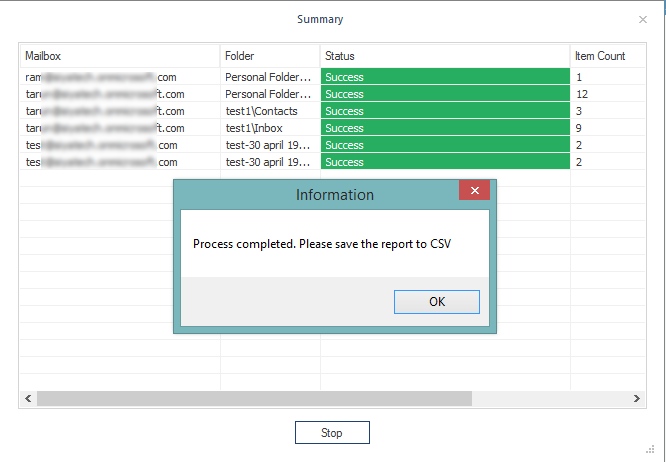
- Click Save reports to CSV option to save the complete migration report in a CSV file. Finally, click OK.


Conclusion
Office 365 Groups offer valuable advantages for organizations, facilitating seamless communication, idea sharing, and resource management within Exchange Online and SharePoint Online. You can always recover a group and its content for 30 days if they have been accidentally deleted. After that, there is no way to recover the data unless you use the professional Office 365 Backup and restore tool to save Office 365 mailboxes to PST or other formats, including the Office 365 Groups. You can save the information in the PST file which is instantly accessible in Outlook.