
Read time: 3 minutes
SharePoint has over 200 million users globally due to its unique collaborative and content management system and utilities. Multiple users can collectively upload and work on files and documents on SharePoint sites. A document library provides a secure place to store all this data.
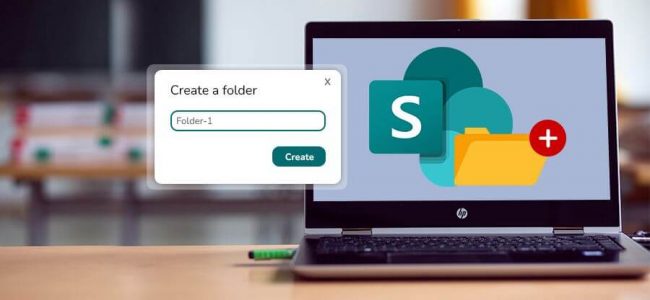
However, several documents can create clutter leading to confusion, and it is better to arrange them orderly. You can create a folder in SharePoint to avoid overcrowding files. It ensures finding the correct data instantly and allows sharing it with others.
How to enable permission to create a new folder in SharePoint?
All the folders are created under the document library on a site. The permission to create them is turned on by default. However, if you can’t see the Folder option, your Site Owner or Administrator has modified the SharePoint site access permissions. You can only proceed further once the Folder creation permission is enabled.
Follow these steps to enable folder creation permission in SharePoint-
- Open the Site and move to its document library.
- Click on Settings in the top-right corner and select Library Settings.
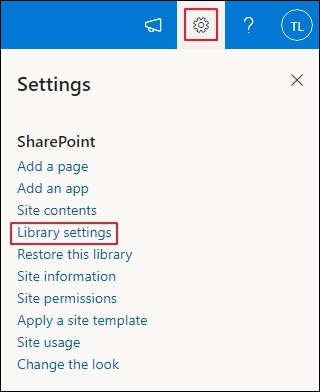
- Click on Advanced settings.
- Move to the Folders section and select Yes for the ‘Make New Folder command available?’ option.
- Click on OK, and now you can create a new folder.

Creating a folder is a simple process, but the steps can vary depending on which version of SharePoint you use. Here are the detailed procedures for SharePoint Online, SharePoint Classic, and SharePoint Server 2019, 2016, and 2013-
- Open the SharePoint site on which you need to create the new folder.
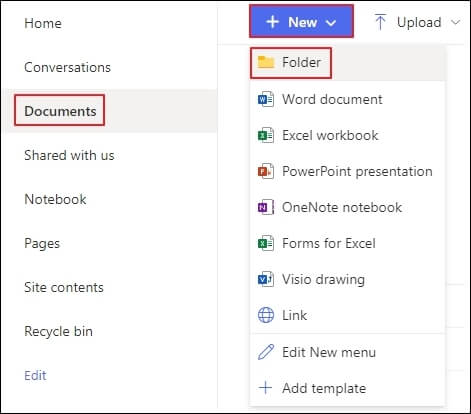
- Move to the document library.
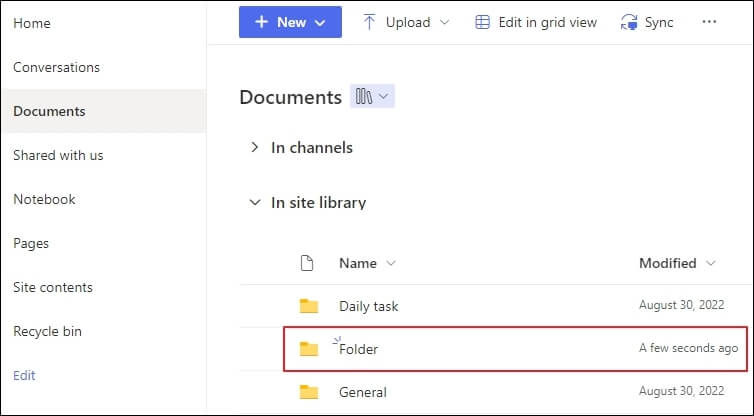
- Click on the +New option in the menu bar and select Folder.
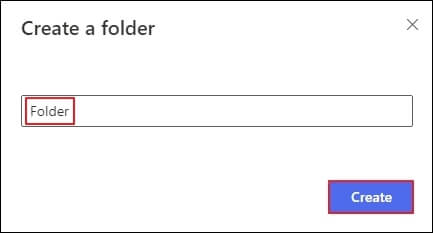
- Mention a suitable name for the new folder and click on Create.
- Refresh your browser; the newly created folder will appear in the document library, and you can add files and other content.

Note: If the Folder option is not visible, you must enable its command.

Note: You have the option to change the name later.

- Open the required SharePoint site.
- Select the library’s title from the Quick Launch bar to open it.
Or click on Settings and select Site contents. Now, select the document library where you want to create the folder. - Move to the Files tab. Select the New group and click on the New Folder option.
Note: If the Folder option is not there, you must turn it on. - Enter an appropriate name for the folder and select Create. You can click the Invite People option to add others to collaborate in the folder.
- The new folder is created successfully.
Migrating data between SharePoint versions is a common practice now. But the responsibility of protecting the data while migrating lies in your own hands. A safer migration route protects you from malicious attacks and avoids data loss during or after the process.
To ensure that, you need to rely on a secure platform, and what better than Kernel Migration for SharePoint? It is designed with powerful algorithms which enable you to migrate the entire or selective data between various versions of SharePoint. The Scheduler utility allows you to schedule migrating data in bulk at any suitable time. While using the tool, you won’t require any additional assistance.
Conclusion-
A folder is created in a site’s document library to segregate data and avoid confusion due to unorganized data. It ensures proper SharePoint document management. There are simple methods to create a folder for SharePoint Online, Classic, and Server 2019, 2016, and 2013. However, you must ensure you have the required permissions for creating new folders. To keep your SharePoint content secure while migrating it, you can opt for SharePoint Migrator tool to a professional and automated utility.