

Read time: 6 minutes
A whitelist is a curated list encompassing email addresses, IP addresses, domain names, or applications, strategically employed in cybersecurity. This list serves as a protective shield against potential threats capable of disrupting local networks or the broader internet. It is meticulously crafted and managed through stringent policies and access permissions overseen by IT administrators.
Frequently, emails from our clients or partners end up in the spam folder due to various filters or inadvertent blacklisting. This results in emails from specific domains being incorrectly labeled as spam. Another common reason for emails being marked as spam is their origin from unknown sources, leading to neglect of SPF or DMARC checks. To prevent these issues, it’s essential to add specific domains and all associated email addresses to the whitelist.
Exchange Online’s whitelist serves as an exception to the established security configuration but can be circumvented by the program’s anti-spam mechanisms.
There are instances in Office 365 where you might want to whitelist emails:
- Whitelist the whole domain in Exchange Online to bypass spam filtering for your customer or partner. By mistake, blacklists or filters classify emails from this domain as spam (false-positive). In this situation, you can add a certain domain and any associated email addresses to the whitelisted exceptions.
- Multiple online services that send emails on your behalf, such as Mailchimp, ConverKit, GetResponse, ActiveCampaign, and others, should be whitelisted in Exchange Online. These services send emails to your readers or clients using your email account. Due to the fact that these services are utilising your email address while sending you emails, they can be identified as a potential danger. To ensure that emails from Mailchimp and other email providers do not end up in your Junk folder, you must add them to your whitelist.
How to Whitelist a Domain using Mail flow rules in Microsoft 365
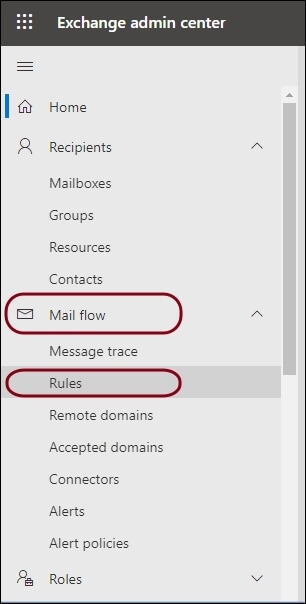
- Go to the Exchange Admin Center and expand Mail Flow.
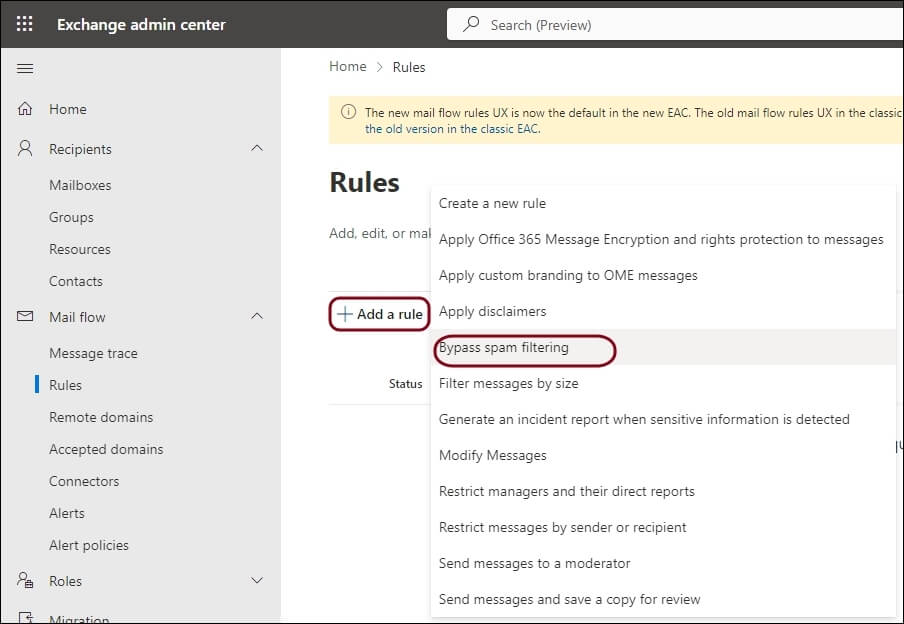
- Now select Rules and click on the plus icon
- Here, choose Bypass Spam Filtering.
- Now enter the name for the rule, and Under Apply this rule if select Sender, and in the next column, choose Domain is from the drop-down list.
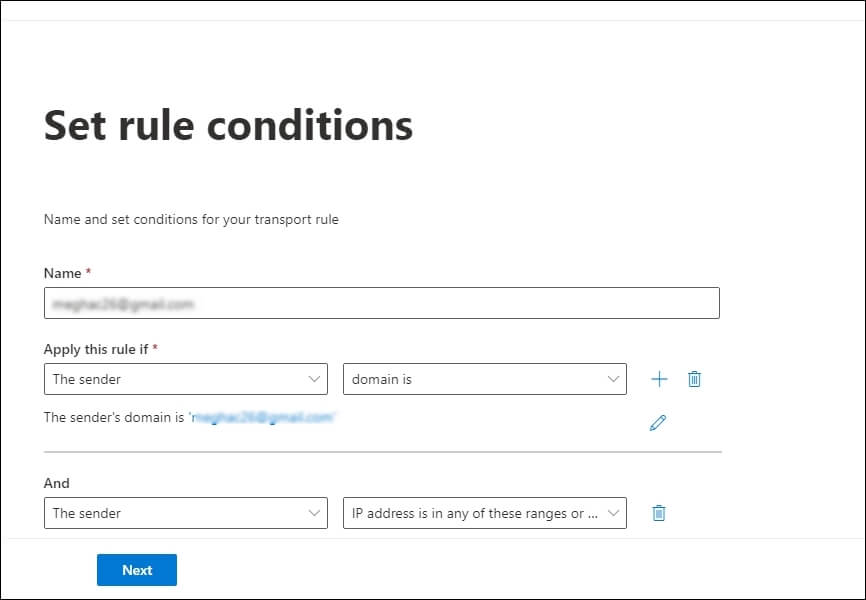
- Here user can also opt for some additional conditions-
- Now go to the Add Action and select Set a message header
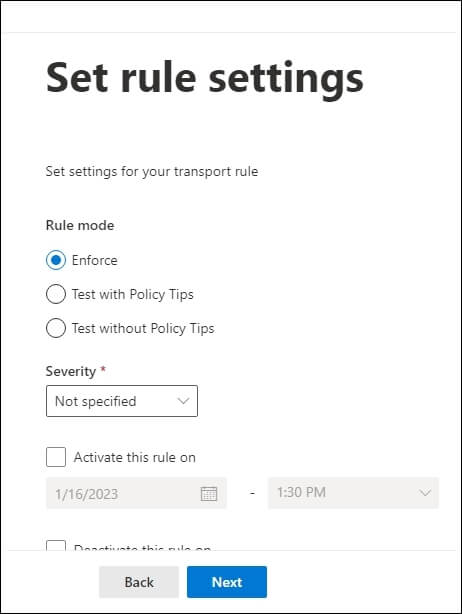
- Set the Rule Setting and click on the Next button
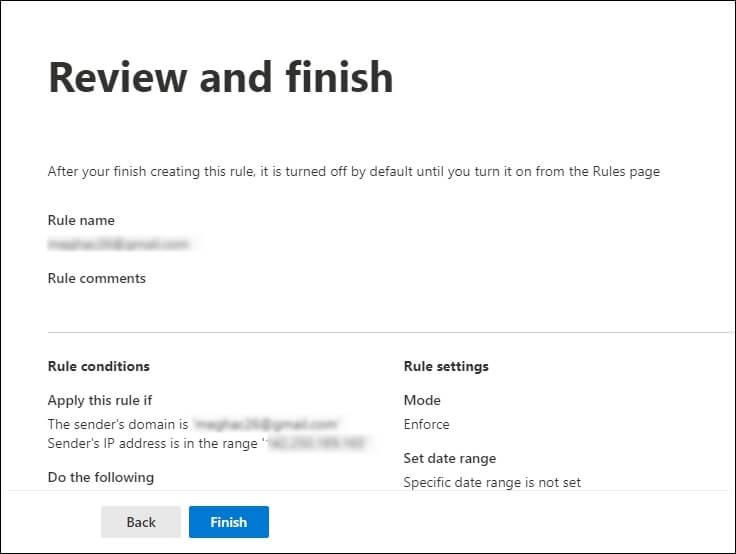
- Finally, Review And Finish.


If the user wants to filter the emails based on Words in the Subject, they can go for this-
The Subject or Body and next Subject include any of these words
If a user wants to prevent spoofing of an allowed domain, they can go for this
A Message header and next includes any of these words.
Now under “Enter text” and dmarc=pass under “Enter words….” Add Authentication-Results
Here put the header to X-ETR and the value to Bypass spam filtering for the Domain.


In this process, we will utilize Microsoft 365 Defender, which allows the domain to bypass spam protection and sender authentication in order to whitelist it.
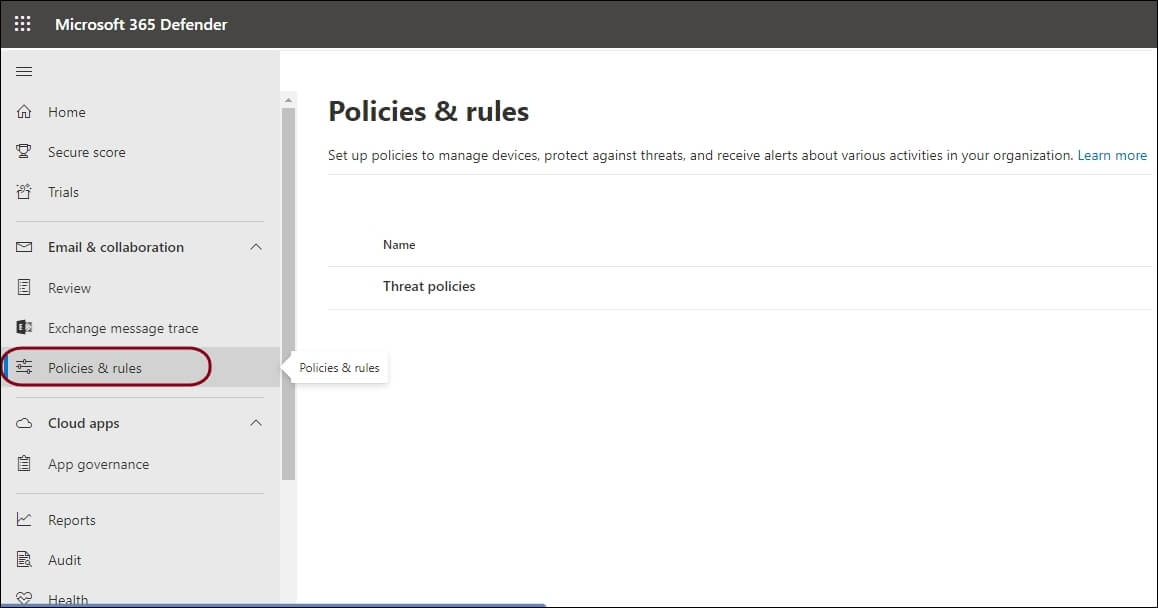
- In Microsoft 365 Defender, go to the Policies & Rules
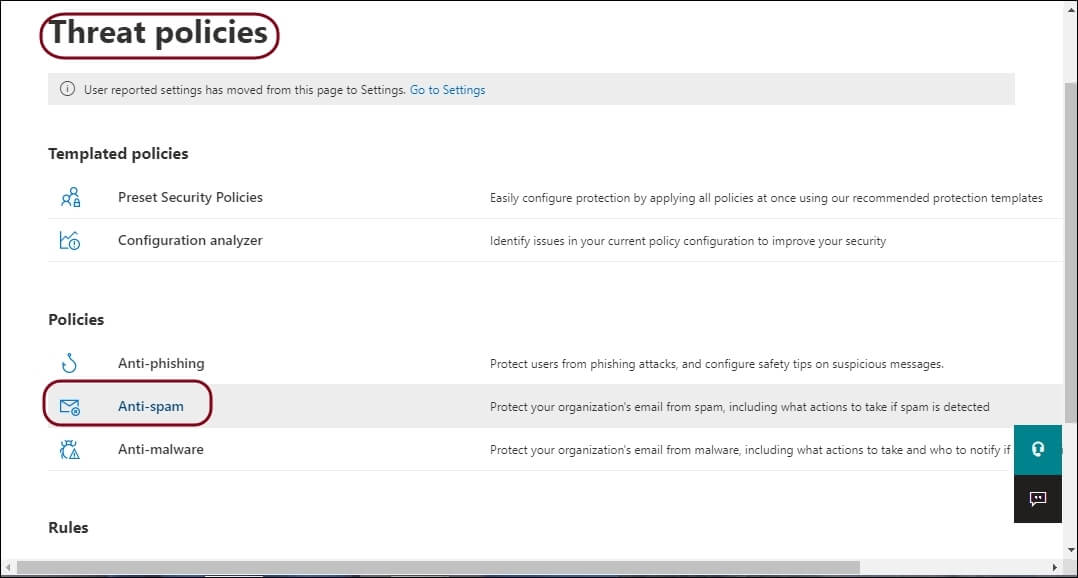
- Now select Threat Policies and Open the Anti-Spam Policies
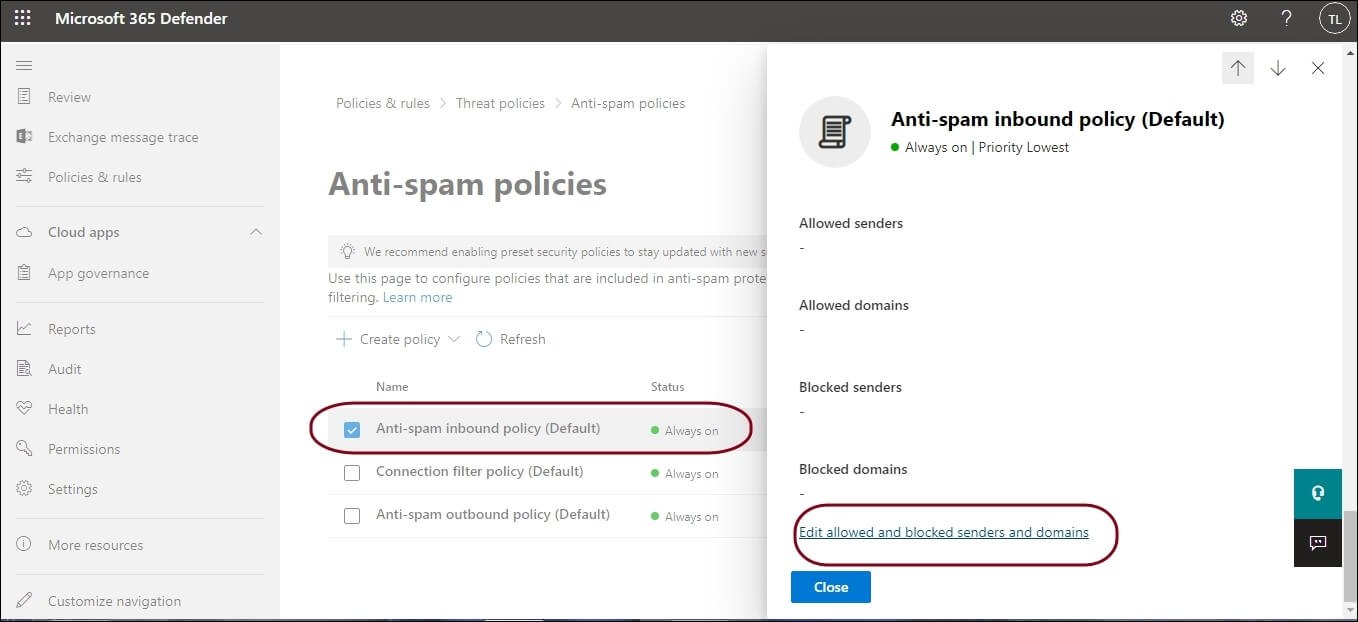
- Select the Anti-spam inbound policy
- Now, scroll down and click on Edit allowed and blocked senders and domains
- Now click on Allow domains and add the domains

- Click on the Save button to save the changes.


Whitelisting a domain is a valuable measure to prevent your essential messages from being marked as spam. However, there are instances when even after whitelisting, messages end up in the spam folder without your awareness. To ensure the safety of your important data, it’s advisable to maintain backup copies of your files. For this purpose, we recommend using a professional Office 365 Backup tool, such as Kernel Office 365 Backup & Restore. This tool is designed to back up entire mailboxes, and you can explore its functionality through a free trial version, simplifying your backup process in just four easy steps.
Summing up
Now that you’ve learned how to whitelist a domain in Office 365, you can explore additional articles of mine that provide insights into Exchange Online, Microsoft Outlook, Microsoft Teams, and SharePoint Online, helping you further enhance your understanding.