

Read time 8 minutes
When an organization using Exchange Server on-premises wishes to migrate their mailboxes to Office 365, the cutover migration method is often the preferred choice. This approach is compatible with Exchange Server versions from 2003 onwards and is ideal for migrating mailboxes containing fewer than 2,000 items.
The Migration Dashboard in Exchange Admin Center
During the cutover migration process, administrators have the ability to monitor the migration’s progress by accessing the Exchange Admin Center and viewing the migration dashboard. In this article, we will explore the steps for performing an incremental sync following the completion of a cutover migration, outlining a straightforward procedure for accomplishing this task.
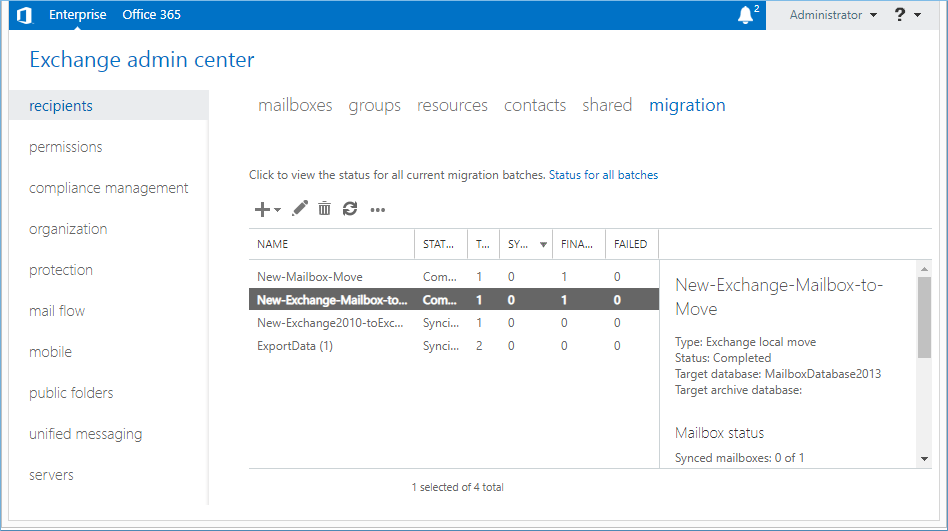

The Migration Dashboard provides an organized list of all currently active migration batches along with their respective statuses. If you encounter the “Syncing” status, it indicates that the migration process has commenced and is currently in progress.
The Migration Dashboard simplifies the management of migration batches through a comprehensive set of cmdlets. Upon selecting a migration batch, you gain access to a wealth of essential details.
- Name: The name of the batch you have created.
- Status: The status of each batch. Initially, it shows ‘Syncing’ and after the migration is shown ‘Synced.’
- Total: Total number of mailboxes present in the batch.
- Synced: It shows a total number of mailboxes successfully migrated.
- Finalized: It shows a total number of mailboxes successfully migrated in total batches.
- Failed: It shows the number of mailboxes from all the batches where migration failed.
Note: If a commad is not available(it is is either dimmed or not displayed), it means that migration batch is in a status state that isn’t supported by it.
There are a variety of PowerShell cmdlets available for modifying the status at different points during a migration batch.
- Stop-MigrationBatch cmdlet: When the batch has started, it shows its status as ‘Syncing.’ It means the mailboxes are being migrated. You can run the Stop-MigrationBatch cmdlet to stop the batch.
Stop-MigrationBatch -Identity “MigrationBatchName”
The batch will stop migrating the mailboxes.
- Start-MigrationBatch cmdlet: If the migration batch has stopped working and is showing ‘Stopped’ status, then you can use the Start-MigrationBatch cmdlet to start it again.
Start-MigrationBatch -Identity “MigrationBatchName”
The batch will start migrating the mailboxes again.
- Complete-MigrationBatch cmdlet: Use the Complete-MigrationBatch cmdlet as the last step of the batch migration. It is the final step of mailbox migration when all the mailboxes are securely migrated, and you want to finalize the whole process.
Complete-MigrationBatch -Identity “MigrationBatchName” -NotificationEmails “username@domainname.com”
The command is helpful to fulfill the following conditions –
To run a final incremental synchronization.
To point the user’s Outlook account to a new domain name.
To convert the source mailboxes to a mail-enabled user account. - Remove-MigrationBatch cmdlet: When the migration is complete, and you do not need the batch anymore, then use the Remove-MigrationBatch batch cmdlet.
Remove-MigrationBatch -Identity “MigrationBatchName”
Executing batch migrations using the Cutover method involves a series of intricate steps, often leading to the unfortunate occurrence of erroneous batch migrations. On occasion, even after the batch migration seemingly concludes, it may indicate a ‘Synced with errors’ status, prompting the need for a subsequent batch run to ensure mailbox migration. These errors have the potential to cause data corruption or deletion, jeopardizing the entire migration process. To safeguard against such risks and ensure the security of Office 365 mailboxes, we recommend utilizing the Kernel Migrator for Exchange. This migration tool prioritizes the protection of your data and conducts migrations with the utmost safety and reliability.
Kernel Migrator for Exchange is a versatile solution that seamlessly connects to Office 365, including on-premises, hosted, and cloud-based mailboxes, enabling direct migration to destination Office 365 mailboxes. This tool isn’t limited to Exchange migration alone; it also proves invaluable for facilitating Office 365 migration across various versions. It effectively maps source and target mailboxes while offering a wide array of filtering options to enhance the migration process. Below, you’ll find a comprehensive overview of its migration procedure:
Step: 1. Run the Exchange Migration tool and click the option ‘Add Project’.

Step: 2. Provide a name to the project and click OK.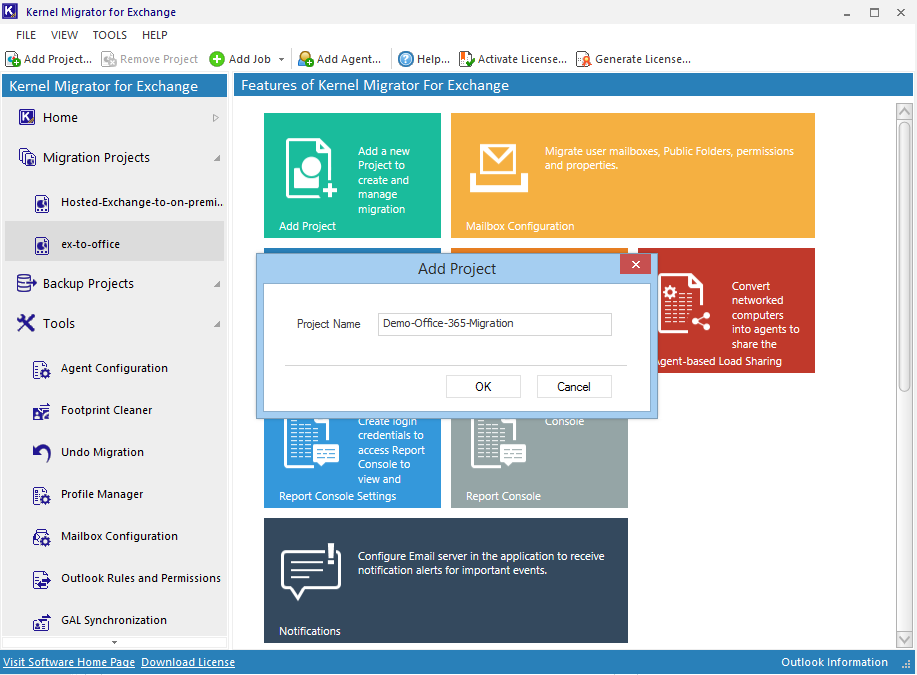

Step: 3. The software creates a project. Now, click the Add job for Mailbox for migration job.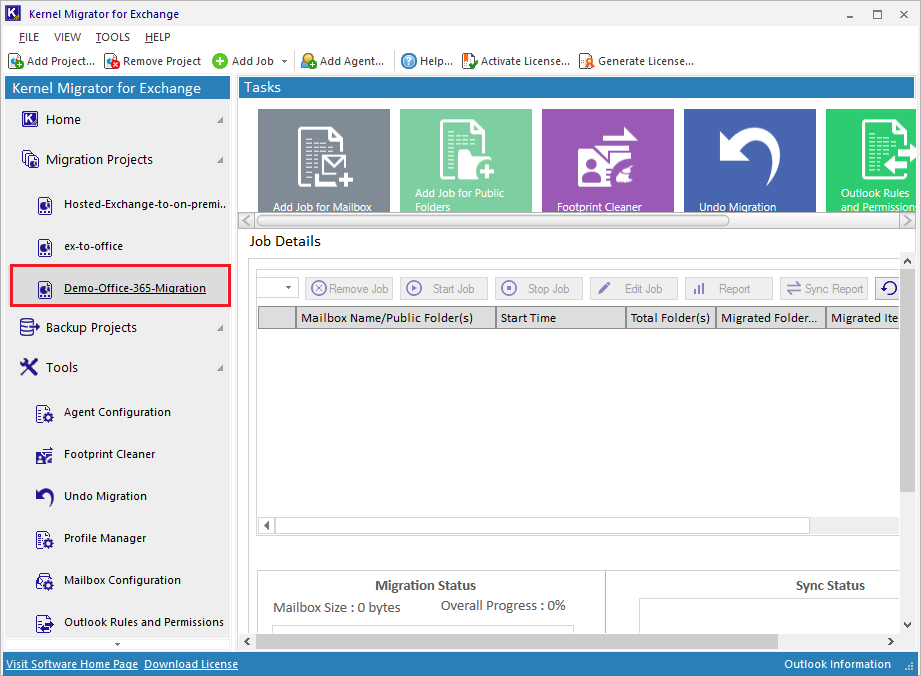
Step: 4. Select the project name from the drop down and input a new job name. Then click Next.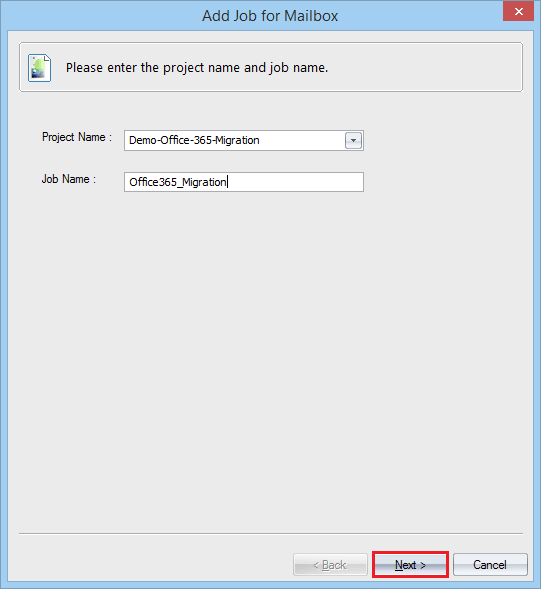

Step: 5. Select the Office 365 from the drop-down. Input the username, password. Select the existing profile and check the option to delegate full access right to this user. Then click Next.
Step: 6. Add the mailboxes to migrate. Then click Next.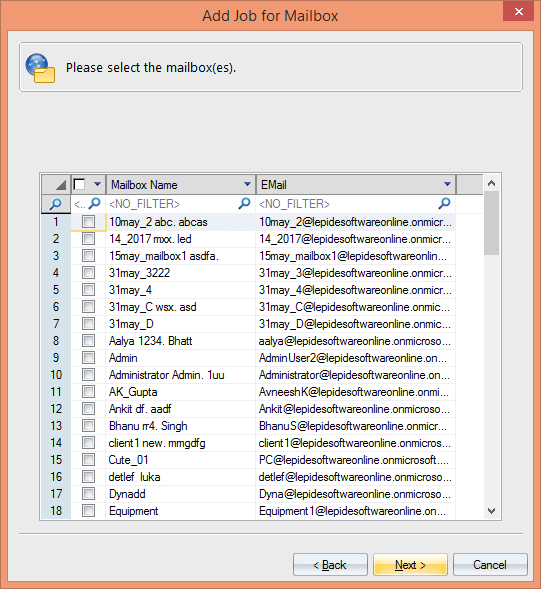

Step: 7. To select the target Office 365 account, select Office 365 from the drop down and input the username and password. Then click Next.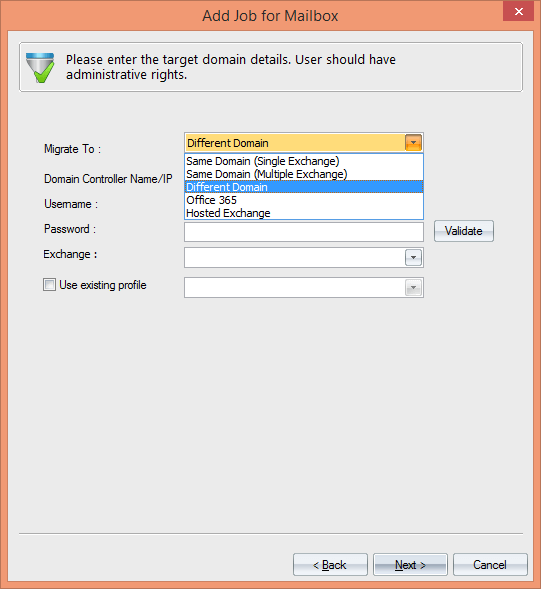
Step: 8. Apply the appropriate filters. Then click Next.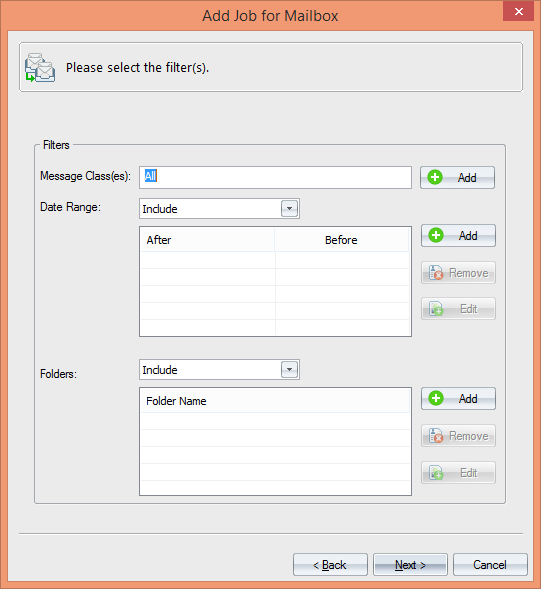
Step: 9. Map the source and target mailboxes from both Office 365 accounts, then click Next.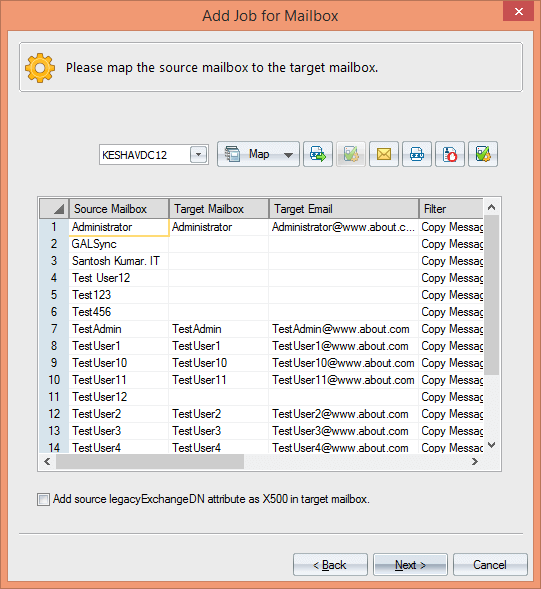
Step: 10. Provide a limit to the bad items during migration. Then click Next.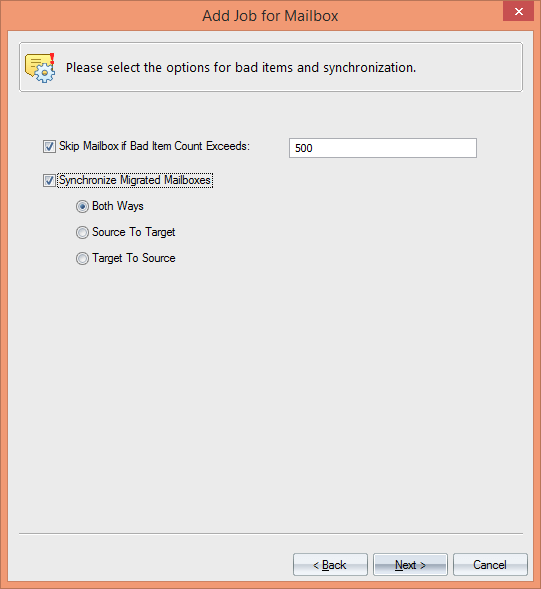
Step: 11. Input the multiple accounts to receive the notifications at multiple levels of migration. Then click Next.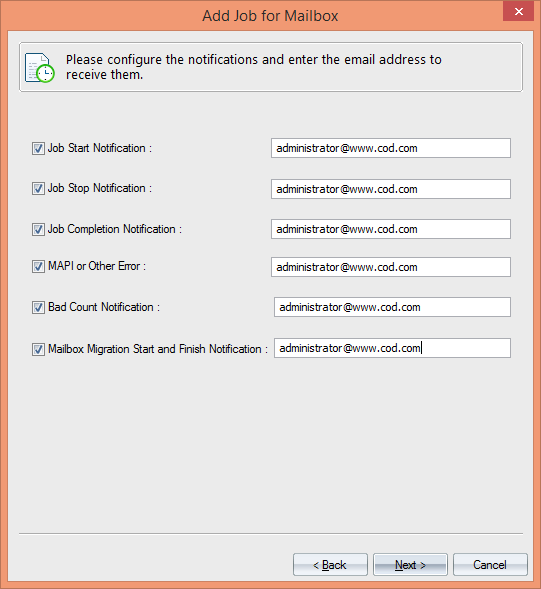
Step: 12. Choose to run the migration at a scheduled time. Then click Next.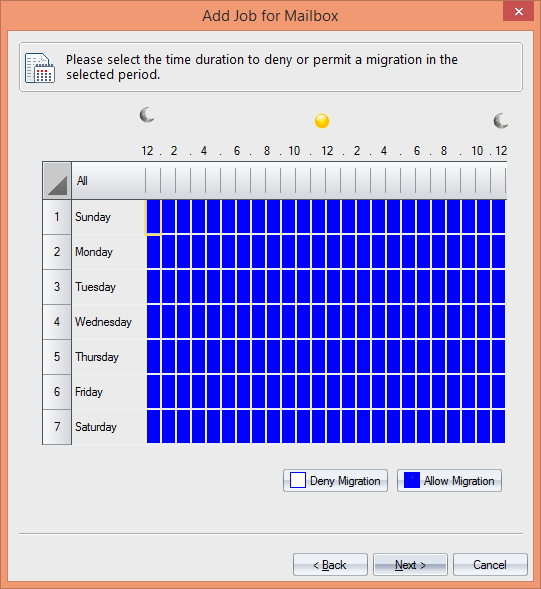
Step: 13. Input the scheduled time for migration and select the option for report console. Click Next.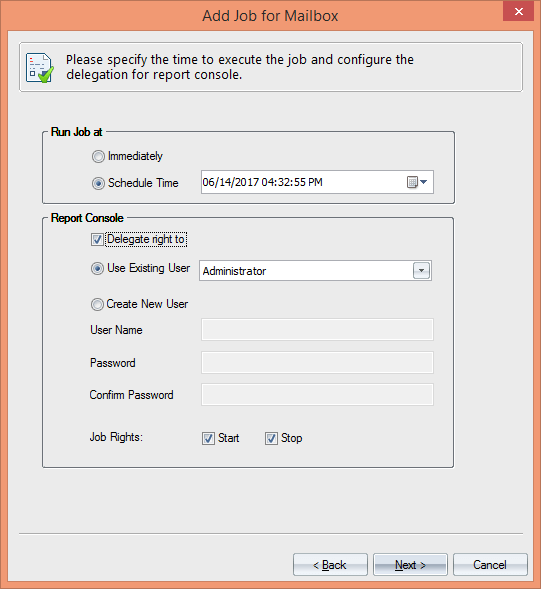
Step: 14. There will be a brief summary of the migration. Click Finish.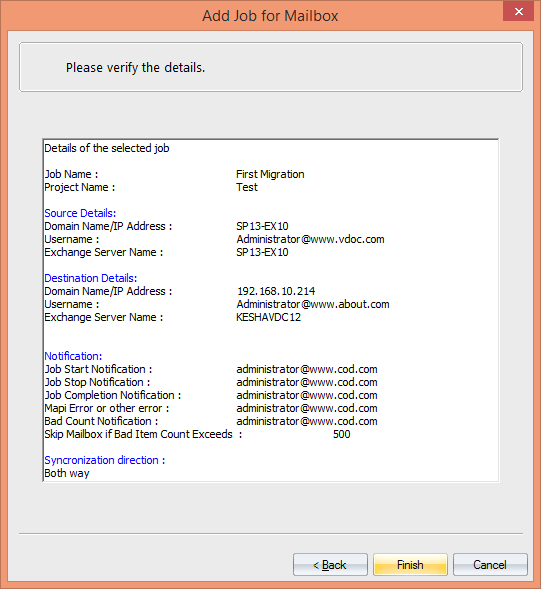
Step: 15. Now you can go to the job details page and see the status of each mailbox items for migration.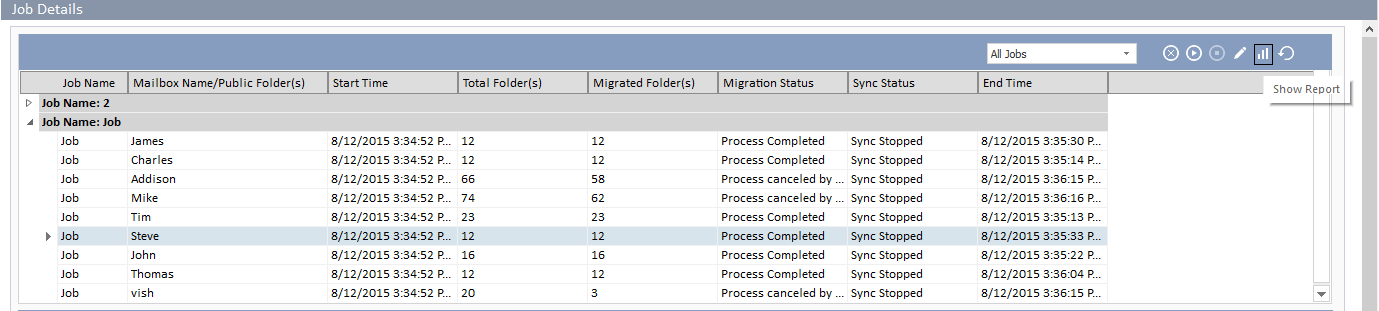

Conclusion
Kernel Migrator for Exchange stands out as a premier migration solution, eliminating the necessity for cumbersome cutover migrations while seamlessly transferring entire mailboxes with unmatched speed and precision. With this powerful software at your disposal, the likelihood of needing any subsequent incremental sync operations post-migration is greatly reduced when moving from Exchange to Office 365.