

Read time 6 minutes
The article that you are going to read is basically a help blog to suggest manuals solutions for removing or detaching a VHD from a Windows PC.
Virtual Hard Disk is like a portable storage disk which a user can create on a virtual machine or a PC drive. It acts as a physical drive and contains partitions and file systems to store data. Apart from storing data, it can be used for other purposes like image management, backup, recovery, and transfer of data.
Sometimes, after creating a VHD file and utilizing it for the desired purpose, we feel it is no longer required. At that time, we would like to remove it to free up the storage space. You can try the options explained here to remove the VHD from your computer system.
Methods to delete VHD from Computer System
- Through Command Prompt
- Through Disk Management Console
This method involves removing the Virtual Hard Disk from the system by detaching the VHD file using CMD commands. Let us understand this method in detail with these steps.
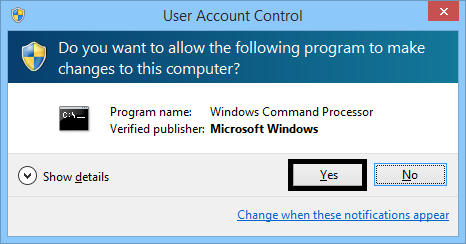
- Search for Command Prompt application by typing cmd, right-click on it, and select Run as administrator option.

- Click Yes to continue.
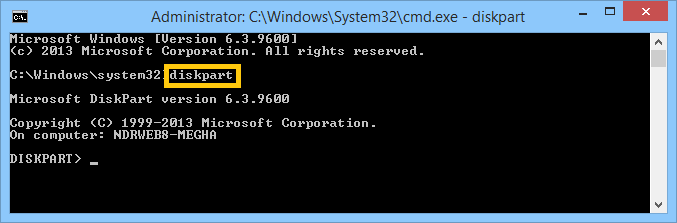
- In the opened Command Prompt screen, run diskpart command to reach the disk partition mode.
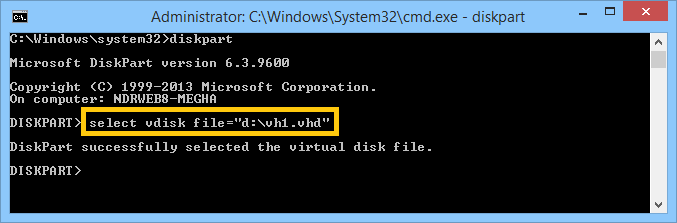
- Next run the command is to select the VHD file for further action.
select vdisk file= “<enter VHD file path location>”
- Now, detach this VHD file from the disk location using this command.
detach vdisk

- Finally, exit the Command Prompt window using the exit command.
exit
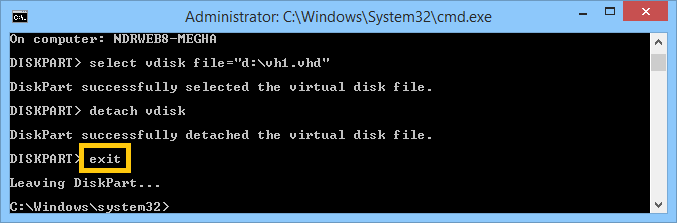
- Hence, the VHD file is successfully detached from the disk partition.


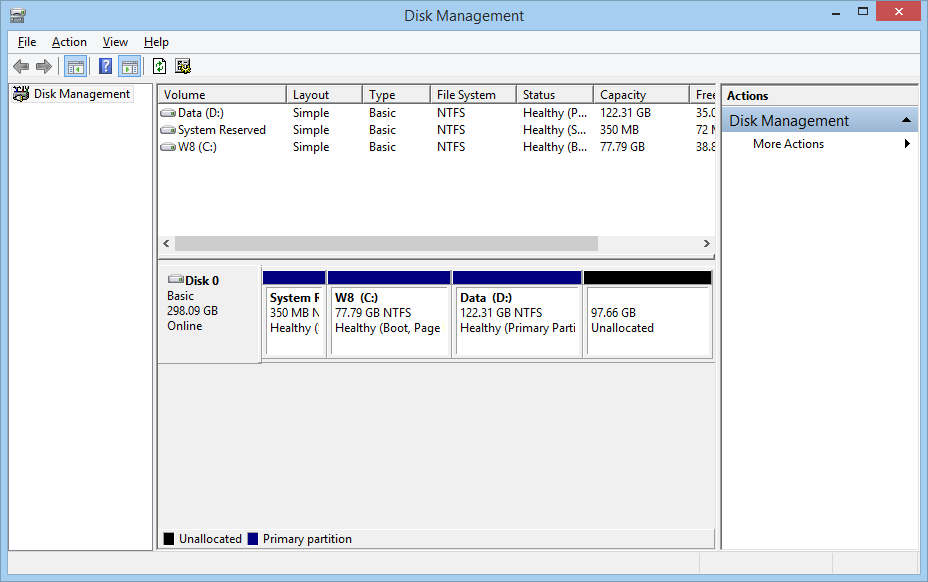
Through Disk Management Console
It is an alternative to remove the VHD file from the system location. This method utilizes Disk Management Console which is simpler to execute and can be carried out with few sequential steps described below.
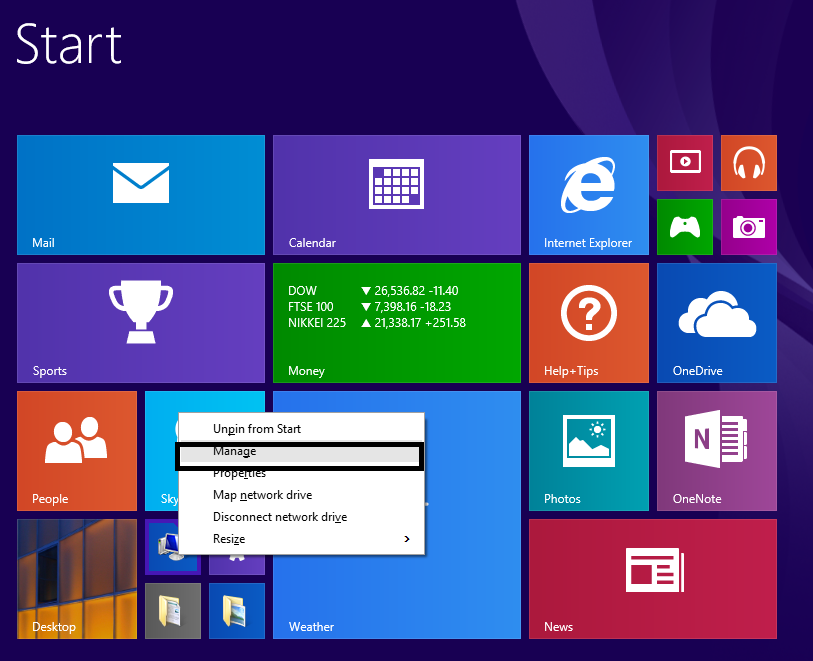
- In Start, go to your PC icon, right-click on it, and select Manage option.
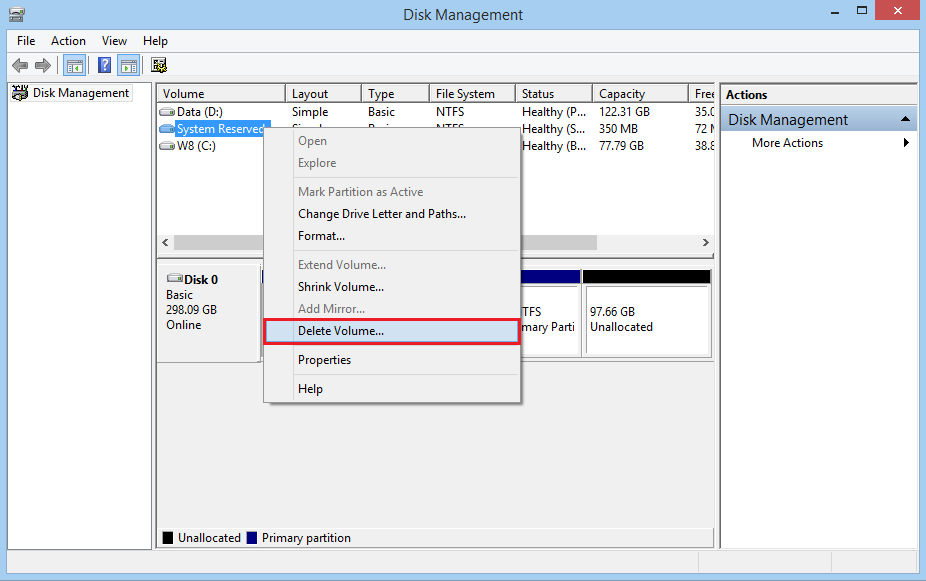
- On the Computer Management page, go to Storage and select the Disk Management option. Here, you can view the disk drives and VHDs.

- Select the VHD drive which you want to delete, right-click and then click Delete Volume option.
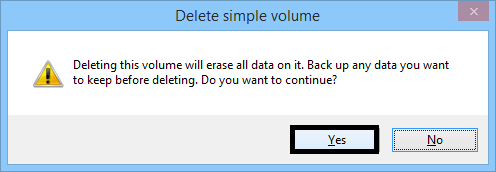
- A notification for confirmation appears. Click Yes to continue.
- Next, you will find the status of VHD disk is changed from Online to Unallocated. You still need to detach the VHD to completely remove it from the Disk Management system. Right-click the VHD disk icon and select Detach VHD option to detach the VHD file.

- Finally, the VHD file is removed from the system drive.


So, you can go for any of the methods explained above to remove the VHD file from your system drive. Thus, you can get rid of the unwanted VHD files anytime.
But if you are unable to access the VHD/VHDX files due to corruption or other issues, we do have a perfect solution for you which is Kernel for VHD Recovery tool. The tool can recover data from any VHD or VHDX file, display its data and let users save it to the desired location. You can go to the website of this advanced tool and try the demo version for learning more about the tool.