Read time 9 minutes
Being an Exchange Server Administrator is challenging for a person as there are multiple threats which loom over the Exchange server environment all the time. Exchange database has all the user mailboxes of the organization, and that is why it becomes so vital to have a disaster recovery plan in case the Exchange Server faces any problem. Identifying the common threats and rectifying them is the core of a disaster recovery plan; it also includes the restoration of deleted or corrupt mailboxes.
Whenever an Exchange server faces a crash, the natural option of the Exchange Administrator is to retrieve the data from the backup. But backup may not be having the complete data always. Also, it may take too much time in making the mailboxes accessible again. That is why the first attempt should be to restore the mail flow.
Here are some exercises for Exchange Server 2019, 2016, 2013, & 2010 which we should follow in case of Exchange disaster so as to recover deleted mailboxes in full health:
- Check for the consistency of the Exchange database: Before committing changes to the database, they are written to the transaction log file which is a sequential set of logs. When all the logs are committed to a database, then the database is in a consistent state. Such a database is ready to get mounted on the Exchange Server. A database should be in a consistent state if you want to mount it on the server.
But when all the changes are not committed, the database is in an inconsistent state. Such a database cannot be mounted. So, if you are not able to mount a database, you should bring it back to a consistent state. - Upgrade your hardware: Most of the time, the Exchange server crashes due to a hardware failure like abrupt shutdowns, frequent power failures, hard drive corruption, or any physical damage to the physical components. So, the Exchange administrator should update the hardware routinely. Here are some common hardware components which can be changed periodically:
- Power supply cables
- Memory
- Processor
- RAID controllers
- NIC (Network Interface Controller)
- Adjust the Exchange Server settings: There are several settings which the Exchange server administrator can configure to stabilize the Exchange environment:
- Save the transaction log files in RAID volume.
- Increase the retention settings under the data retention policy.
- Increase the deleted mailbox retention under data retention policy.
- Run a mock drill of Exchange Server disaster recovery: Running a mock drill of an Exchange server disaster will help you in earning some valuable inputs and make you prepare for an actual emergency. You can also get to know that whether your recovery methods are efficient enough to recover the data.
- Use Exchange recovery utilities: There are some inbuilt features in Exchange Server 2019, 2016, 2013, 2010 & other previous versions to repair a corrupt database. You can use these tools in case of severe issues. The most popular one is ESEUTIL which is a command-line tool that uses the transaction log files to recover the data and restore it to its previous state.
You can find the ESEUTIL tool at the following location –
The ESEUTIL has multiple switches which the administrator can use as per the corruption level in the database file. Let’s go through the steps of repairing the EDB file using the ESEUTIL tool
Defragmentation allows the administrator to reorganize the database in a completely new order. It improves the performance of exchange mailboxes.
First, dismount the database with the following cmdlet:
After running the command, you will be asked to confirm your selection by clicking “Y” to dismount the database.
Now run the Eseutil /d switch to defragment the database
After completing the repair process, you can mount the database back to its previous state
Before repairing the database, it is wise to take a secure backup of the database in case the command does not work properly or data is lost.
Now, run the following cmdlet:
After this, you can check the status of the database. If it shows a clean status, then you can mount the database.
If the normal repair with the Eseutil does not recover the data, then you can go for the hard repair option. But it is advisable only in some extreme situations, as the hard repair can further delete the data.
Step 4: After completing the repairing process, mount the database back to Exchange server
Although ESEUTIL is quite famous among Exchange Administrators, it is not always successful in repairing the database completely, and there is no way to recover the deleted data. To get the complete data in the proper structure and format, you can take the help of a professional tool.
It is an Exchange EDB Recovery tool which eradicates the corruption from the Exchange database (.edb) and restores the complete data in its original form. Here is the brief step-by-step procedure to use the software:
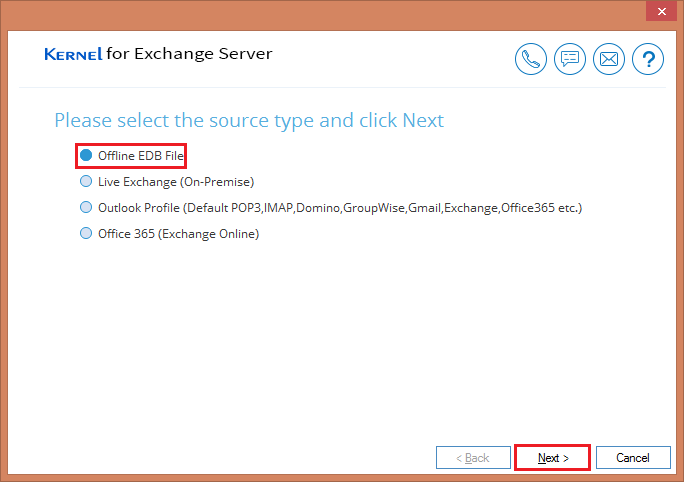
- Run the software and select the first option of Offline EDB.

- Select the first option of Offline EDB file and click Next.
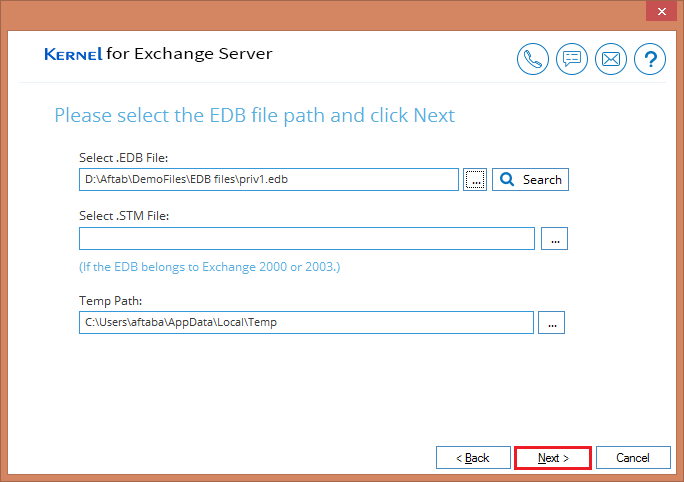
- Browse the corrupt EDB file. If you are unaware of the database file, then you can choose to Search it from any drive or folder.
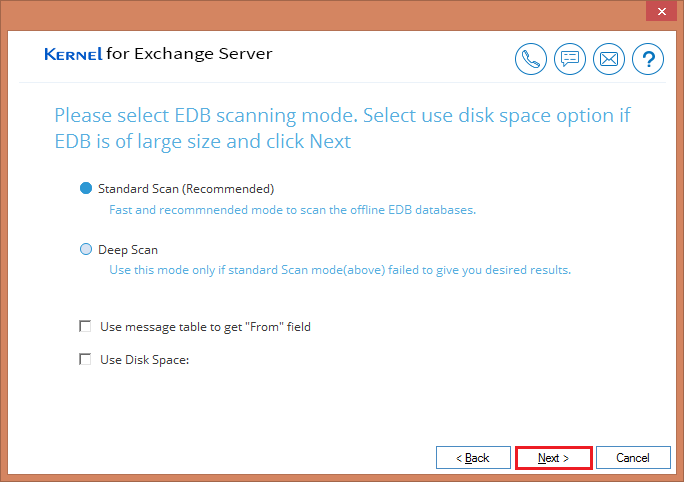
- Select the scan mode as per the corruption. The Standard Scan is selected by default. Click Next.
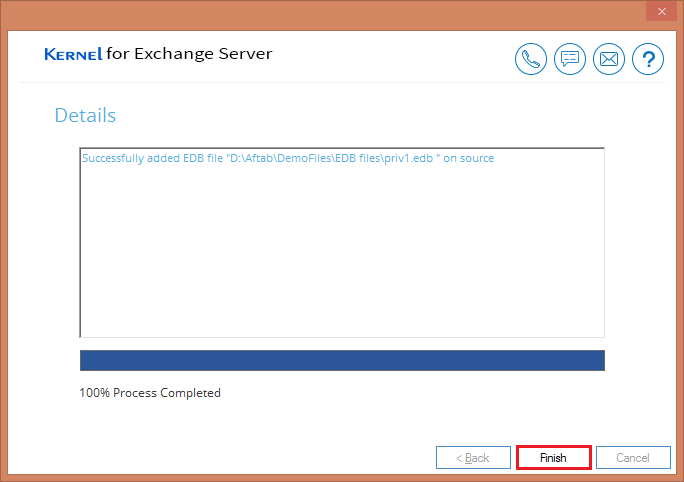
- Wait till the EDB file gets added as the source.
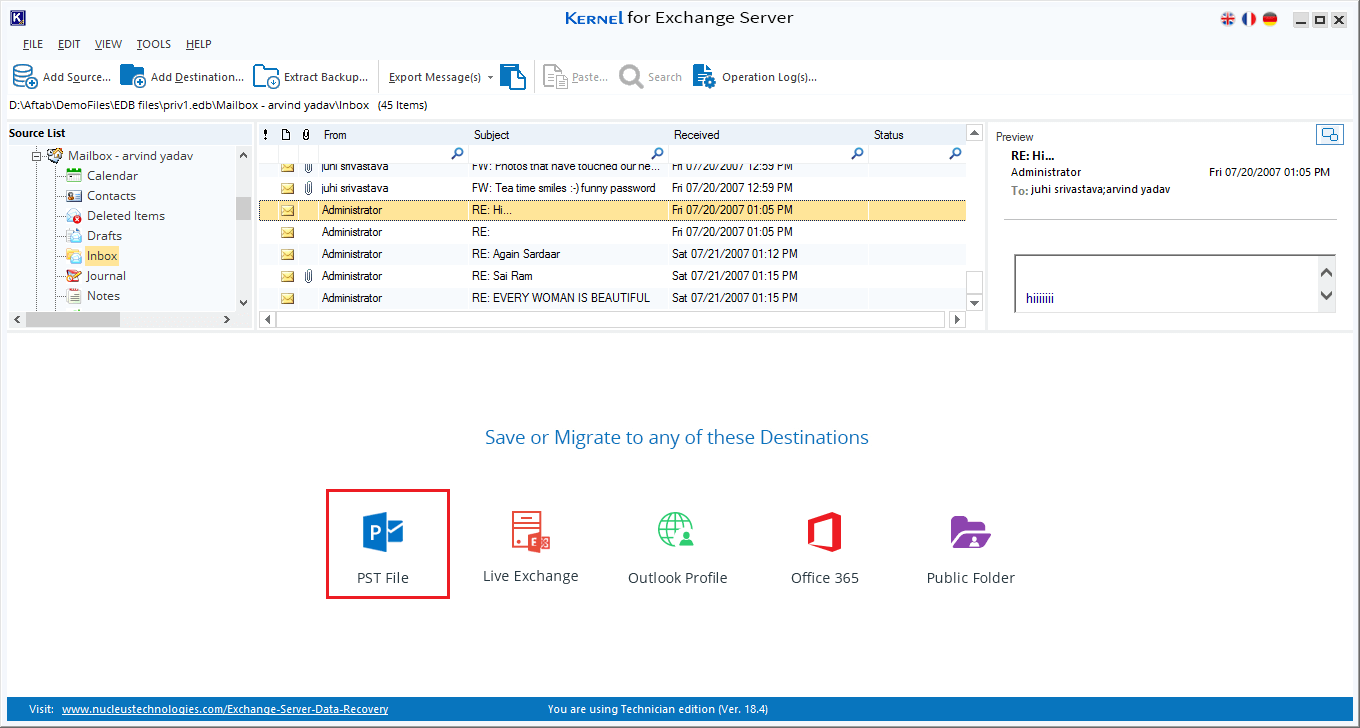
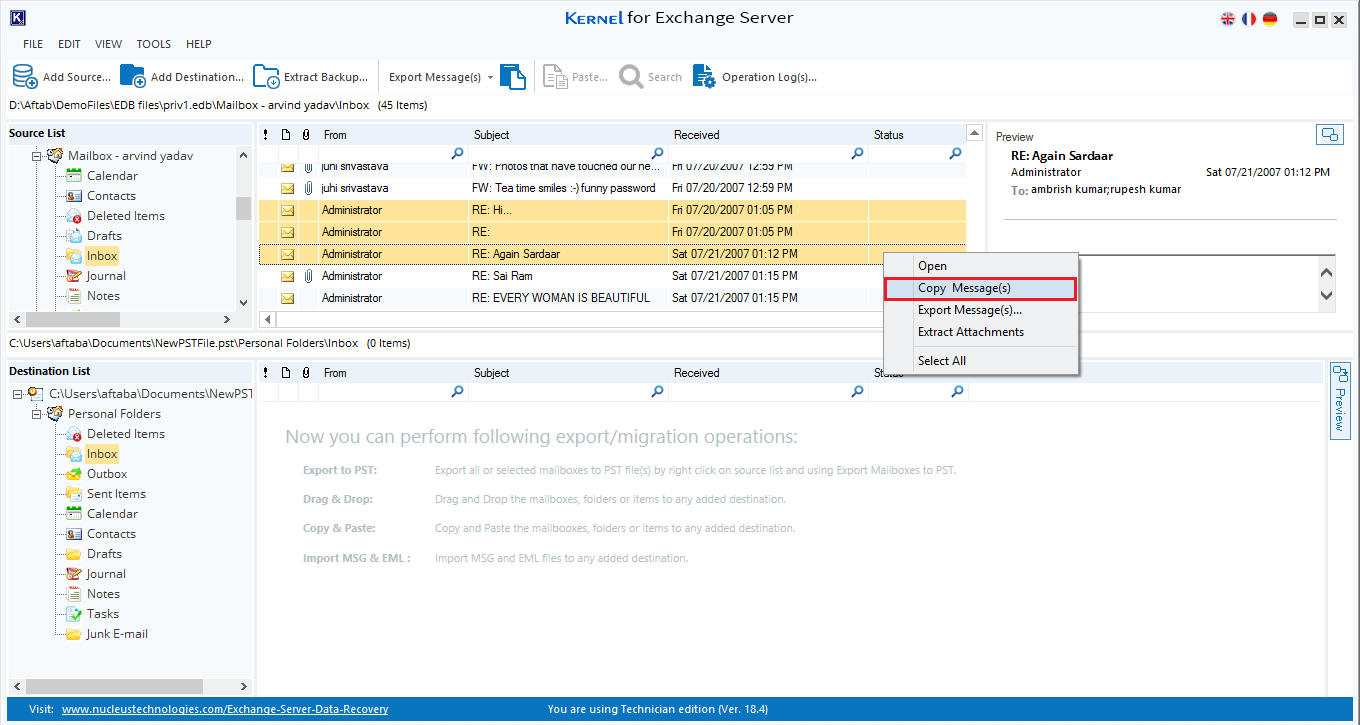
- The database file gets listed in a proper tree structure where you can find any mailbox and see its content by clicking the Preview button. After watching the preview, click PST file option to create a new Outlook file.
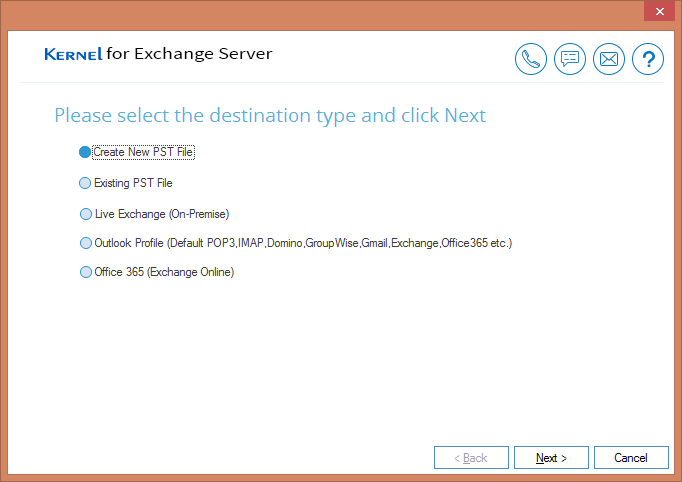
- Select the option either to create new PST file or save in an existing PST file. Then click Next.
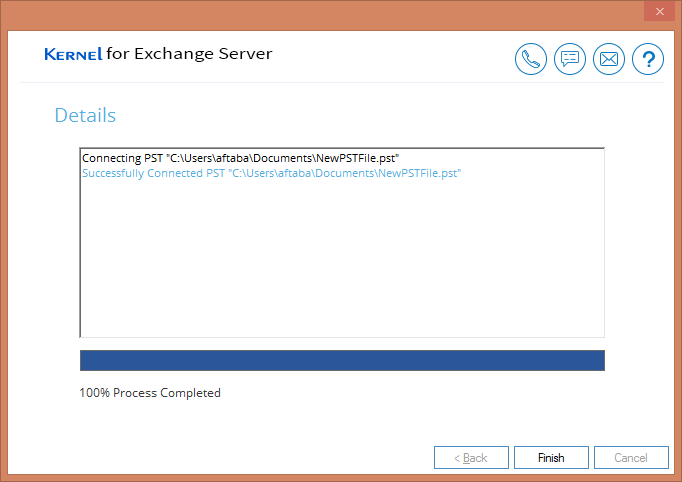
- Provide the destination and also enter a name for the file.
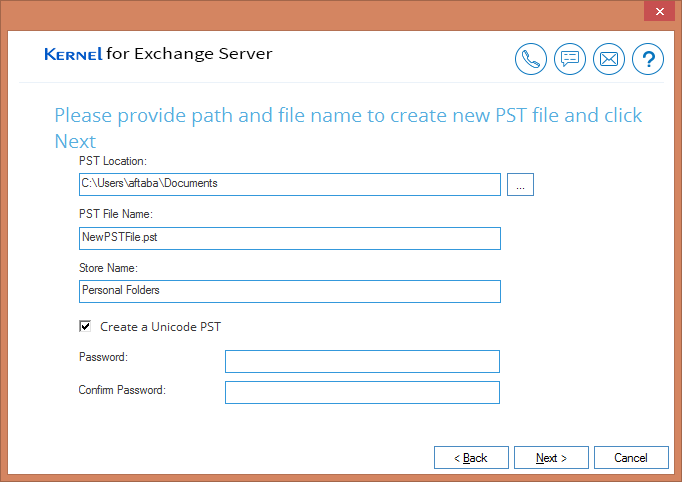
- A new Outlook PST file is now created in the destination.
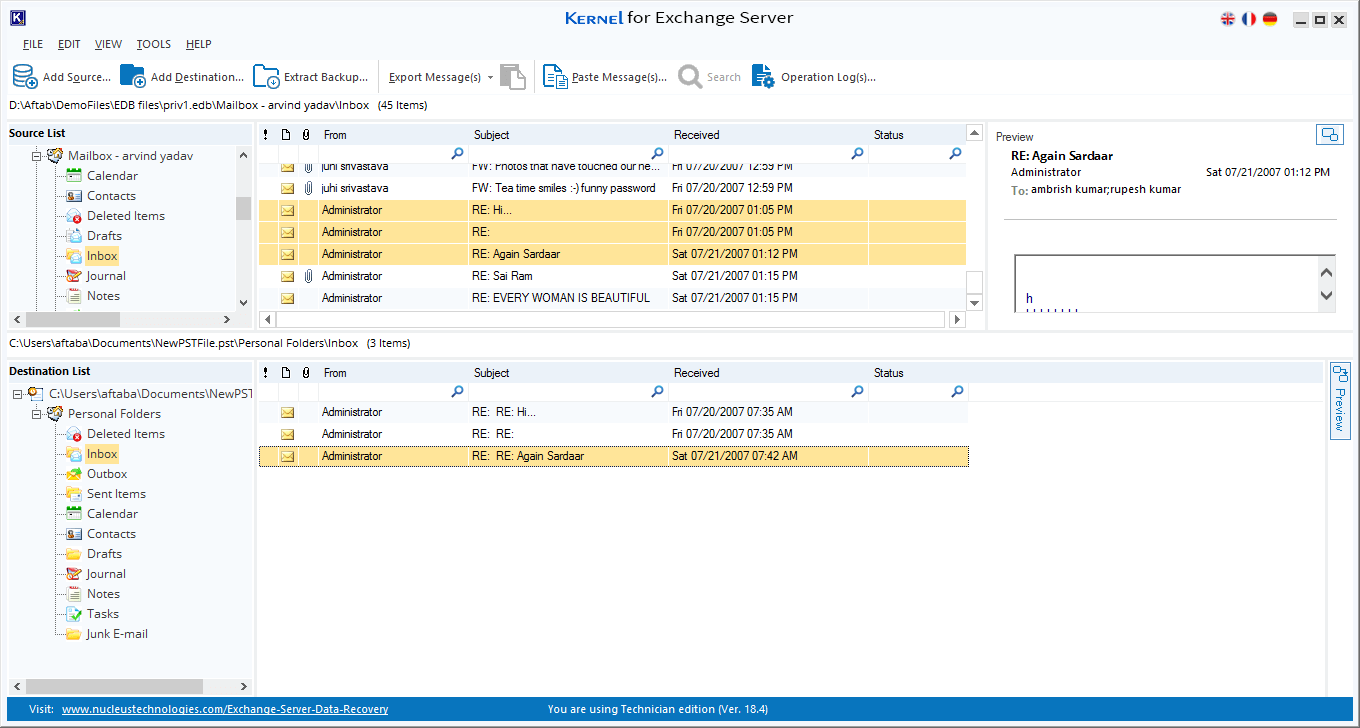
- After creating a new PST file, you can easily export the message from a source to destination by copy-paste, drag-&-drop, or copy-paste folder.
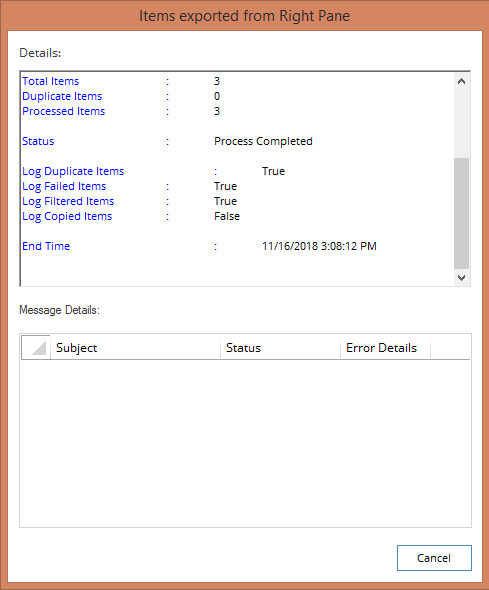
- After exporting the message, the tool will provide a complete report to you.
- The exported files are efficiently saved at the destination.


Conclusion
After getting complete information about Exchange Server corruption and various recovery methods, you can choose a proper method in case of Exchange Server disaster for any version of Exchange Server 2019, 2016, 2013, 2010 & other (previous versions). But if you want to get your data back in the minimum time and with complete health, then you should go for the tool. It accepts EDB file as the source and saves the recovered mailboxes from EDB to PST files, live Exchange, Outlook, Office 365, and Public Folder.