

Read time: 6 minutes
A collection of information or items stored as rows and columns forms a list in SharePoint. A SharePoint list is very much similar to a Microsoft Excel spreadsheet. Items stored in a list are metadata, fields, or properties, while the rows are referred to as the list. SharePoint has multiple templates for creating a list, such as a recruitment tracker, employee onboarding, travel requests, asset manager, and more.
There are circumstances when it’s crucial to migrate a list from one SharePoint site to another. It can be due to any reason, for example, a business merger, moving tenants, or migrating data to a new site. What’s important is to take care of the data, which you can’t lose at any cost while moving the list.
The article shares a trusted and tested process to move SharePoint list to another site on the server.
What does SharePoint list migration mean?
SharePoint list migration helps to move a list from one site to another without any hassle. When you move data, configurations, and settings with the list, you ensure that the information is available on the new spot as well.
When migrating a list, you must consider factors like customization, permissions, and workflow to avoid disruptions in the functioning of the lists.
With careful planning and preparation, moving lists is not a big task and will keep business operations as efficient as ever. You can transfer a list in SharePoint by exporting it from the source (in Excel or CSV file) and then importing it at the destination. Use PowerShell cmdlets or third-party migration tools for the transition.
- Check for the required permissions
It is essential to have access to both the source and destination sites, including permission to create lists and libraries on the target. With appropriate permissions, it will be easy to avoid hindrances in the transfer. - Clean and optimize data
Data optimization is an essential step when you want to migrate SharePoint list to another site. It helps in segregating data into valuable and unnecessary. Before migration, get rid of all the lists that are of no use to you. Restructure your list to make it compatible with the new site. - Revise all links and references
Revise links and references on your current site before migrating to the new site. This helps to ensure that the new site does not have any broken links once migrated. - Perform pilot migration
Test migration is helpful in identifying errors and resolving them before moving to the new site. Perform tests on small batches of data and fix the errors so that the actual migration is free from all the errors.The customizations available on the existing site will require you to move manually. Therefore, take care of all the customization and configuration in the new site before you move SharePoint list to another site.
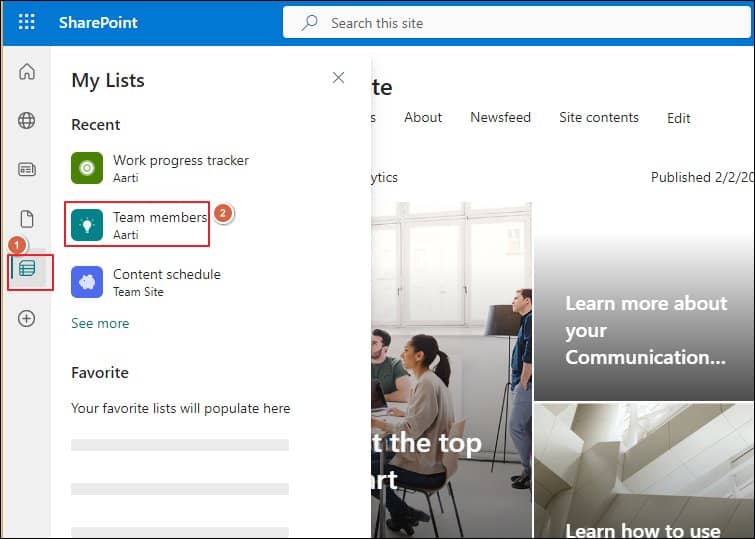
- Go to the source site and click My List in the ribbon on the left. Open the list you want to move to another site.
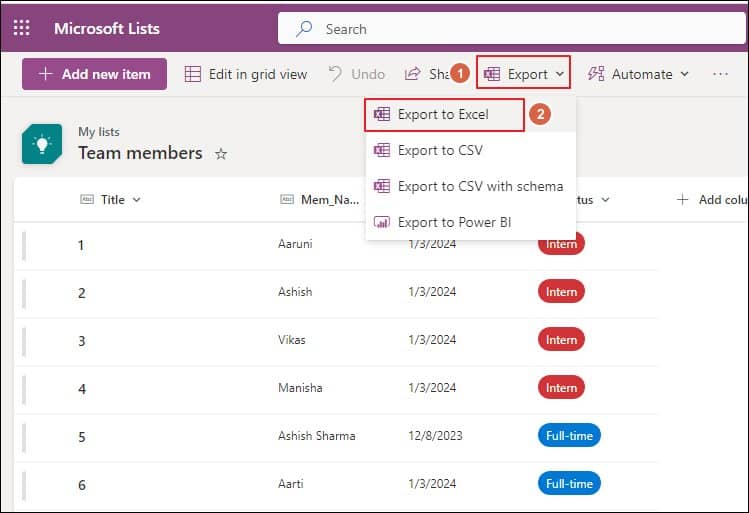
- Go to Export>Export to Excel and save the list as an Excel file on your computer.
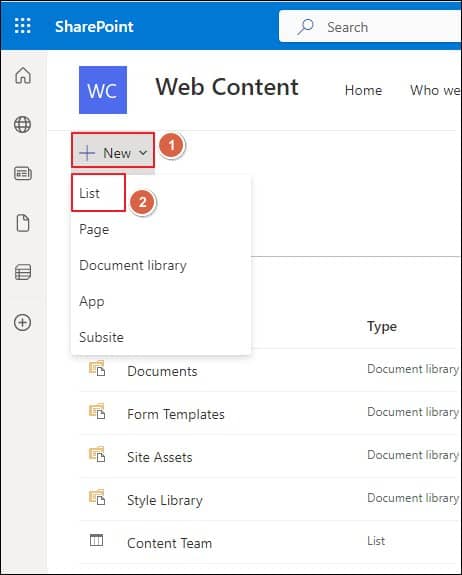
- Visit the destination site. Create a new list with columns precisely as the source list. To do this, select New, then List under Site Contents.
- Open the new list and paste here the data from the Excel file (exported from the source site). Once done, save the changes.
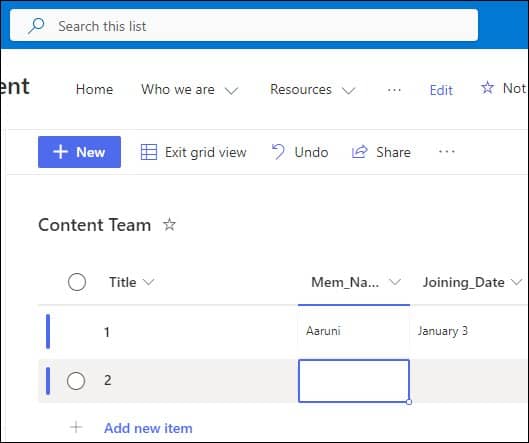
- Review formatting to ensure it is identical to that of the original list. Make amendments to the list if needed.
- Check each item in the migrated list to ensure its accuracy.
- Test workflows, search capabilities, permissions, and all functionalities of the list.


PowerShell scripting will help to do this task automatically with the cmdlets. It helps in saving time when you need to transfer lists with massive datasets. These steps will help you move SharePoint list to another site.
Remember that testing and data verification are crucial to ensure the data is the same at both the source and destination sites. As the permissions and access were also migrated during the process, check if all the users have the appropriate permissions and roles assigned.
- Edit, add, or delete items in the list to assess the functionality.
- Compare both lists for any missing or duplicate data.
- Inform your stakeholders and other users about the change and train them to use it accordingly.
- Update the customizations, workflows, and fields.
- Regularly monitor the list for any error and fix it if found.
Do not forget to have a proper backup and restore strategy in place before you move SharePoint list to another site. Doing this helps in avoiding data loss or corruption.
Limitations
When you move your lists using the manual steps, the data transfer will take a long time to copy and paste from the source to the destination list. This can lead to data redundancy, or you might miss a few of your data in this process. Therefore, we can’t rely on this method entirely for moving a SharePoint list.
Conclusion
Moving a SharePoint list is easy if done precisely. If you need to move immense data, use Kernel Migration for SharePoint. It has a lot of features to make the transition seamless. The tool comes has a user-friendly dashboard where you need to follow some simple steps, and the list is successfully migrated. Once migrated, the SharePoint migration solution will generate a report with all the details.
With the steps mentioned in the article, you will be able to perform SharePoint migration smoothly. It will guide you on how to transfer data without losing its integrity and security.
FAQ’s
A. There are several ways to migrate a list. With the steps and the tools shared above, you can migrate your list to a different site. In the permissions and management section of the List settings, select Save as Template to export the list as a template.
Now, go to the destination site and create a new list using the template saved earlier.
A. Yes, with the help of third-party migration tools such as Kernel Migration for SharePoint or with the steps above, one can migrate a SharePoint list without the use of templates.
A. When you use the Save as Template method for the move, only the structure of the list is migrated from one site to another. However, if you use SharePoint migration tools or the Export/Import method, the data of the list is also transferred.
A. There is no defined time of the migration process because it varies according to the variation in different factors. The factors include list size, complexity, internet bandwidth, and the methods to migrate.