

Read time 8 minutes
One of the most annoying issues many PC users face is duplicate files. Though users can get rid of these files by deleting them directly, it is difficult for them to locate these duplicate files if they are large in number. Also, ignorance of duplicate files on your system might lead to complexities as you may get confused between original and duplicate files.
One of the most annoying issues many PC users face is duplicate files. Though users can get rid of these files by deleting them directly, it is difficult for them to locate these duplicate files if they are large in number. Also, ignorance of duplicate files on your system might lead to complexities as you may get confused between original and duplicate files.


Try Kernel Duplicate File Finder Software to find duplicate files in Windows 10. The software supports MS Office formats like DOC, DOCX, XLS, XLSX, PPT, PPTX, etc.
How to find duplicate items using Windows features
Users can identify the duplicate files on their systems manually by utilizing some Windows features and options. Here are some valuable points that users should keep in mind.
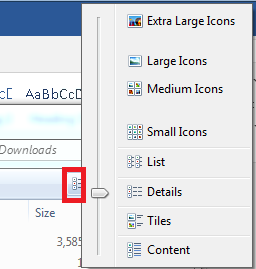
- Utilize Windows Views: Windows Explorer provides different views like Large Icons, Small Icons, Medium Icons, Extra Large Icons, List, Details, Tiles, & Content to help in effortlessly identifying the duplicate files. Preview pane and other file details like creation date and time can also help here.
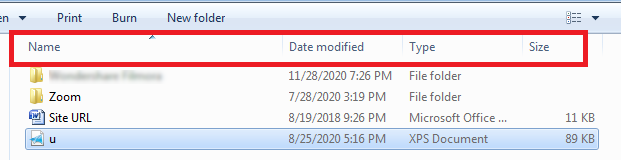
- Sort Files with Explorer Details Pane: Getting knowledge about multiple duplicate files can become a little tough if you go manually through the details pane of your files like Name, Date Modified, Type, Size details. But you can sort the files using these parameters to identify duplicates quickly.
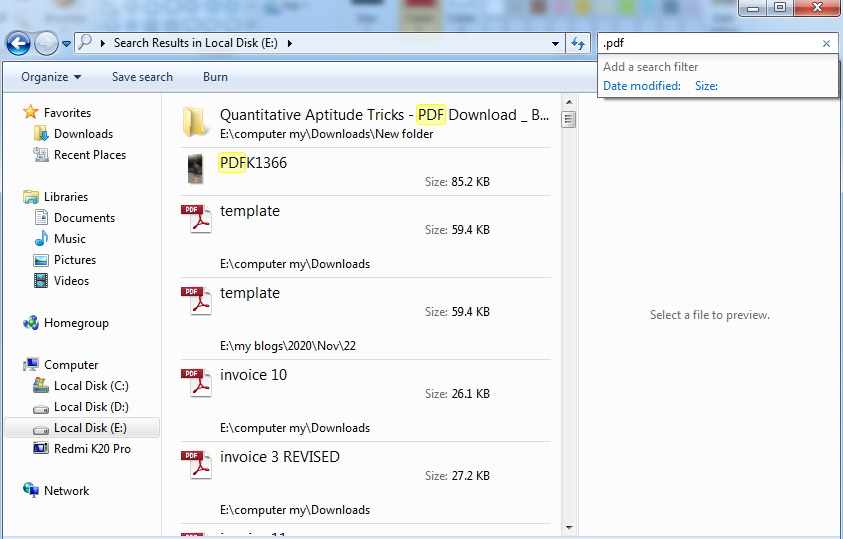
- Search Feature for Finding Specific Files: This Search feature in Windows explorer is useful when the user has some prior information about the name of the files. It can help in finding the files by typing the file extension in the search bar.


With the advanced Kernel Duplicate File Finder utility, you can find duplicate files in your drive folders and then perform a suitable action to manage data as per your need. The method is direct and automatic as the user just needs to add the system drive or folder, and the tool takes care of the rest of the process.
Let us understand it in a better way by following its working.
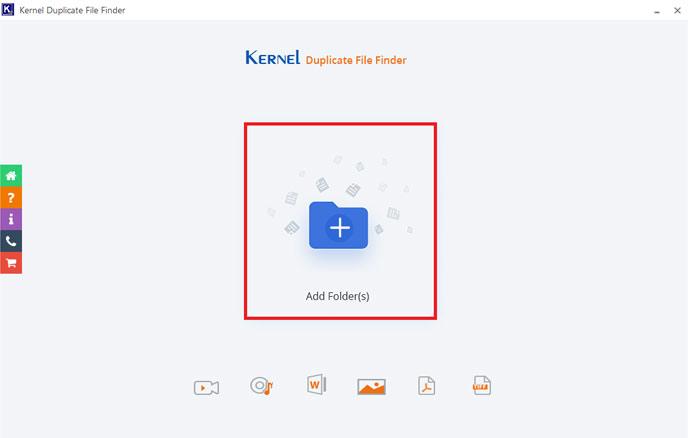
- Launch the installed Kernel Duplicate File Finder software on your system.
- Click the Add Folder(s) or plus icon on the welcome screen of the tool to browse and add the drive or folders.
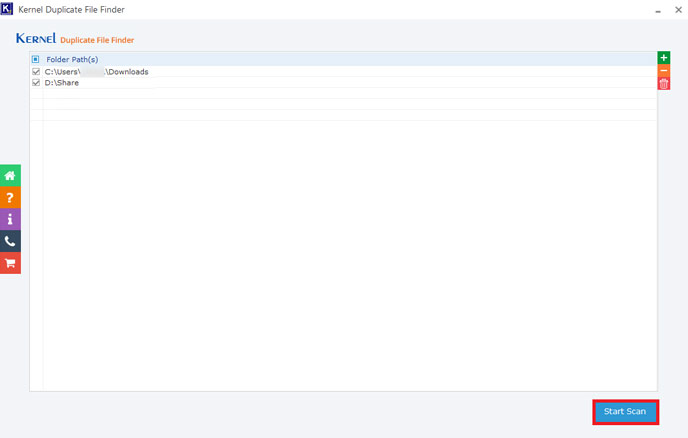
- The folders will get added like this. You can add more folders by using the plus icon as shown.
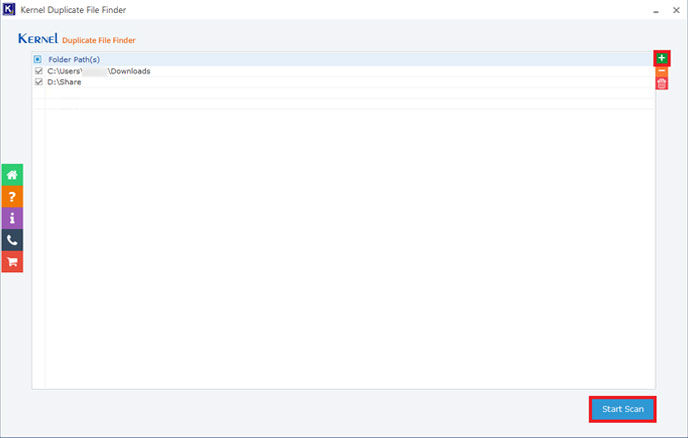
- Select the folder and click Select Folder to add it.

- Now that all the desired folders are added click Start Scan for the scanning of the folders.
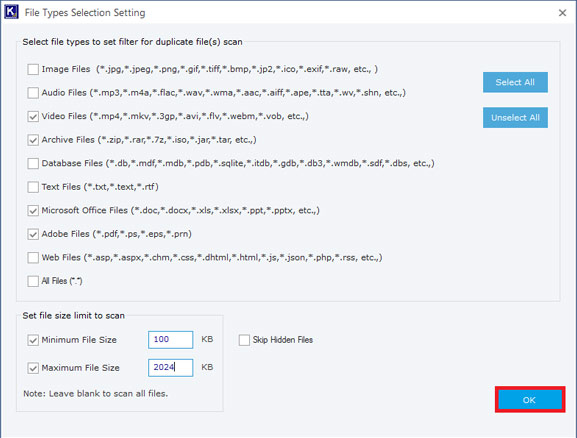
- The File Types Selection Setting page will get opened. Here you can select the file types and file size limits to set filters, or you can leave the options blank to scan all files. There is an option to skip hidden files. Click OK to continue.
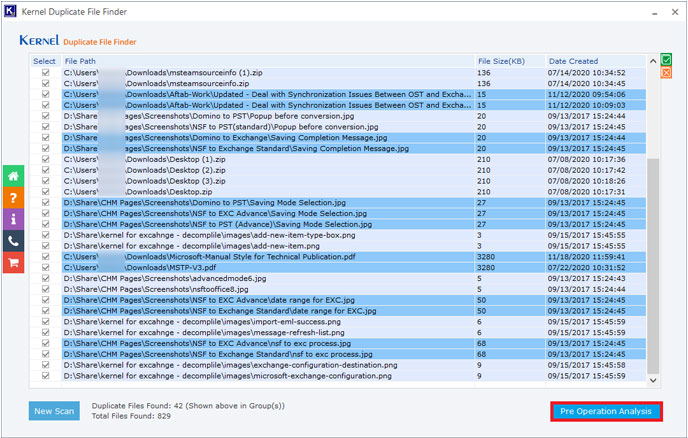
- After completing the scanning, the tool will list the duplicated files of the selected folders in blue color. Have a view and click on the Pre-operation analysis option.
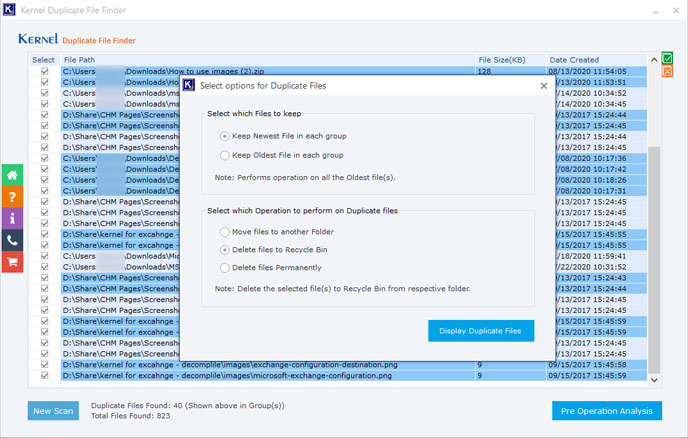
- On the Select options for Duplicate Files page, select which files to keep (newest or oldest) and which operation to perform on duplicate files (Move to another folder, Delete files to Recycle Bin, or Delete files permanently). Choose your options and click on the Display Duplicate Files button.
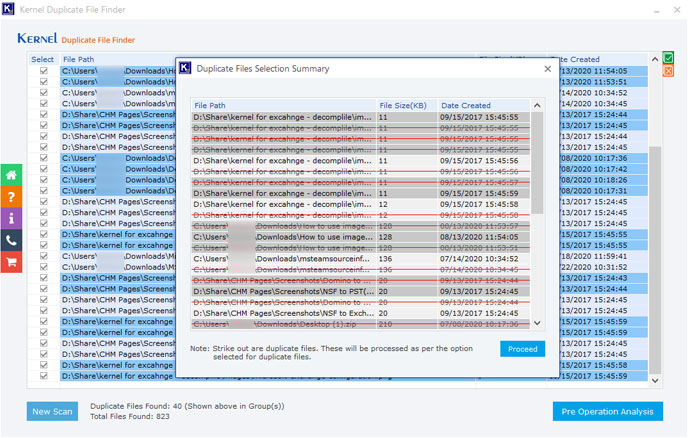
- You can view the effect of the specified actions on the duplicate files. Click Proceed.
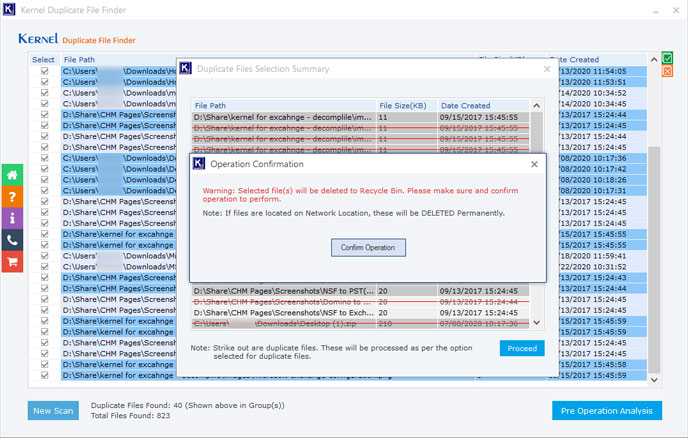
- A warning message will prompt for the confirmation of the selected operation. Click Confirm Operation to move further.
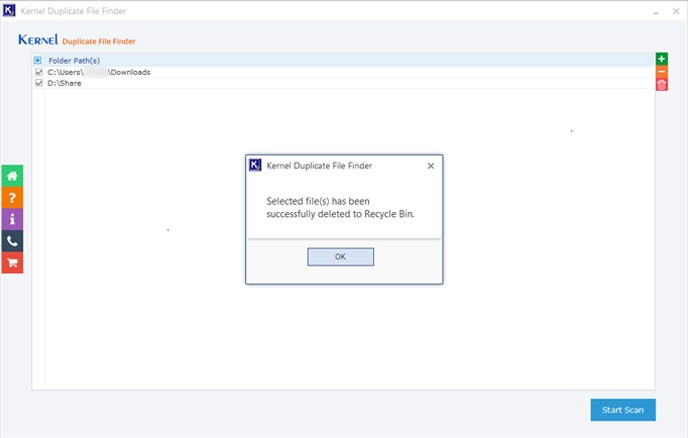
- Finally, click OK.


Thus, duplicate file management is quite easy with this professional utility.
It is a fact that there are multiple utilities available in the market to find duplicate items, but we recommend Kernel Duplicates File Finder due to its numerous advantages.
- Finds all popular file types – images, audio, video, archive, database, text, MS Office, Adobe, or web files
- Any file/folder size – No limitations on file size or folder size
- Advanced filters – Filters duplicate files by file type, size range in KB, etc. (skips hidden files if needed)
- Action on duplicate files – Allows retaining older or newer versions of the file; Also, it allows to act on the selected version – to move to another folder, delete to Recycle Bin, or delete permanently.
- Ease of use – Simple, interactive GUI with a clear description of steps.
- Easy identification – Lists and highlights scanned duplicate files in blue color.
- Support – Support to all Windows Operating System versions, including Windows 10.
If you are still undecided, you can take a free trial of the Duplicate Files Finder software by downloading it from the official website.
Don’t waste time; get a complete and convenient solution to manage the unwanted duplicate files on the system drives and folders.
Final Words
The blog discusses issues due to duplicate files on system folders. It also introduces the most trusted Duplicates File Finder solution to scan, find, and manage duplicate files of any format. It can be tried as a demo version too.

