

Read time 9 minutes
When businesses undergo data migration between cloud platforms, the main focus is typically on migrating essential data like emails, contacts, and documents. Calendar entries are often overlooked, but manually creating them can be time-consuming and prone to errors. If you’ve switched from G Suite to Office 365, there are no straightforward methods to migrate mailbox items, including emails, contacts, notes, and calendars.
Migrating calendar events, meetings, and appointments is crucial for businesses to save time and ensure a smooth transition when switching to a new platform. Many users prefer Office 365 (now known as Google Workspace) for its robust collaboration features, synchronization capabilities, extensive range of business applications, flexibility in plans and features, advanced security measures, and more. This blog will discuss the importance of migrating calendar data from G Suite to Office 365 and the methods to achieve it efficiently.
To manually migrate your calendar data from G Suite to Office 365, you can follow these steps:
Export Calendar from G Suite (Google Workspace)
- Login to your G Suite/Google Workspace account and go to the Google Calendar app.
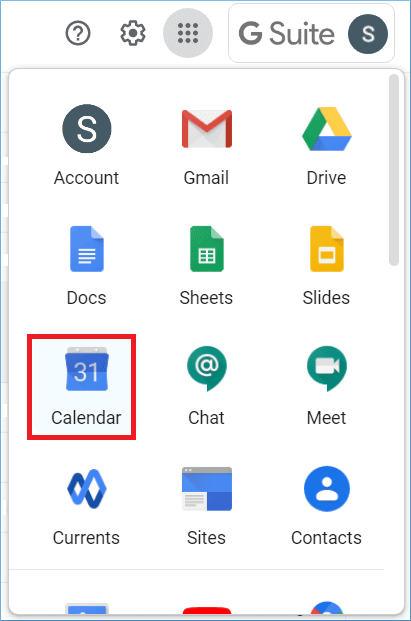
- There may be multiple calendars that you have created a different calendar based on your business requirements. Choose any calendar and click the three dots against it. Then click Settings and sharing.

- In the Calendar settings, you can provide a new name, description, and Time zone. Then click Export calendar.
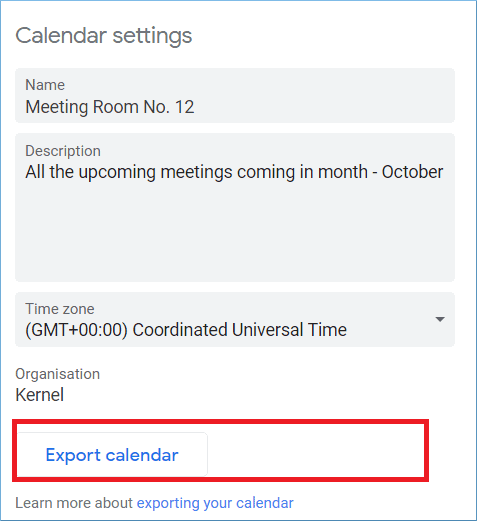
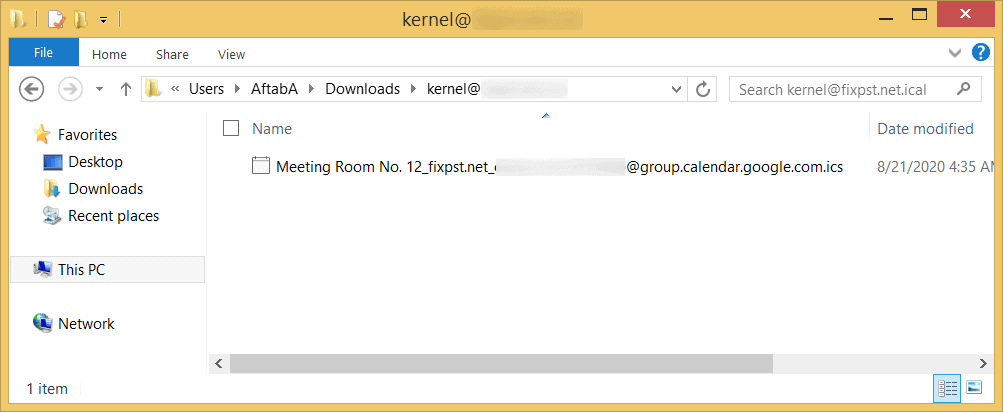
- A new file in .ics format is created, with your calendar details.


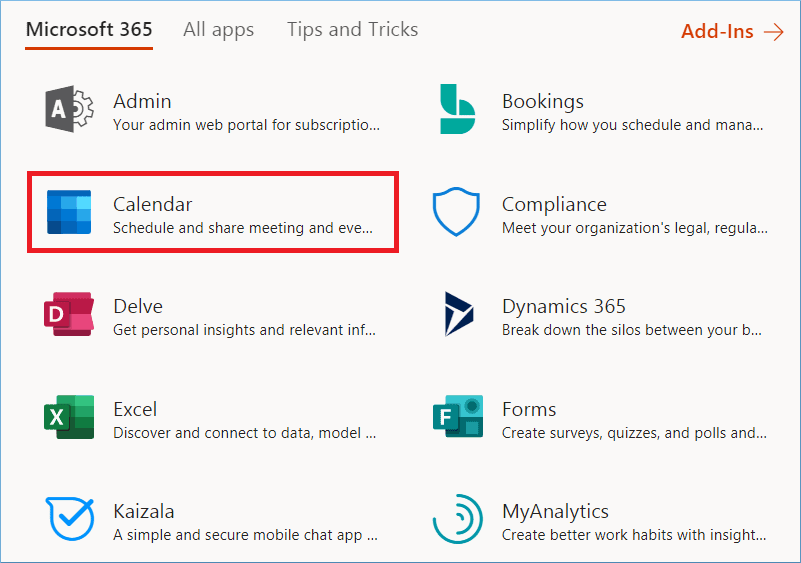
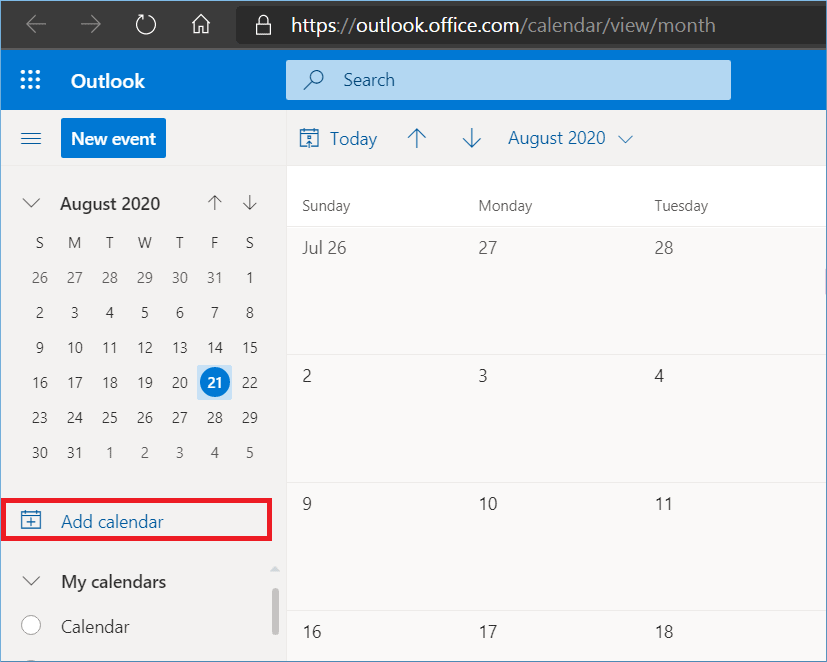
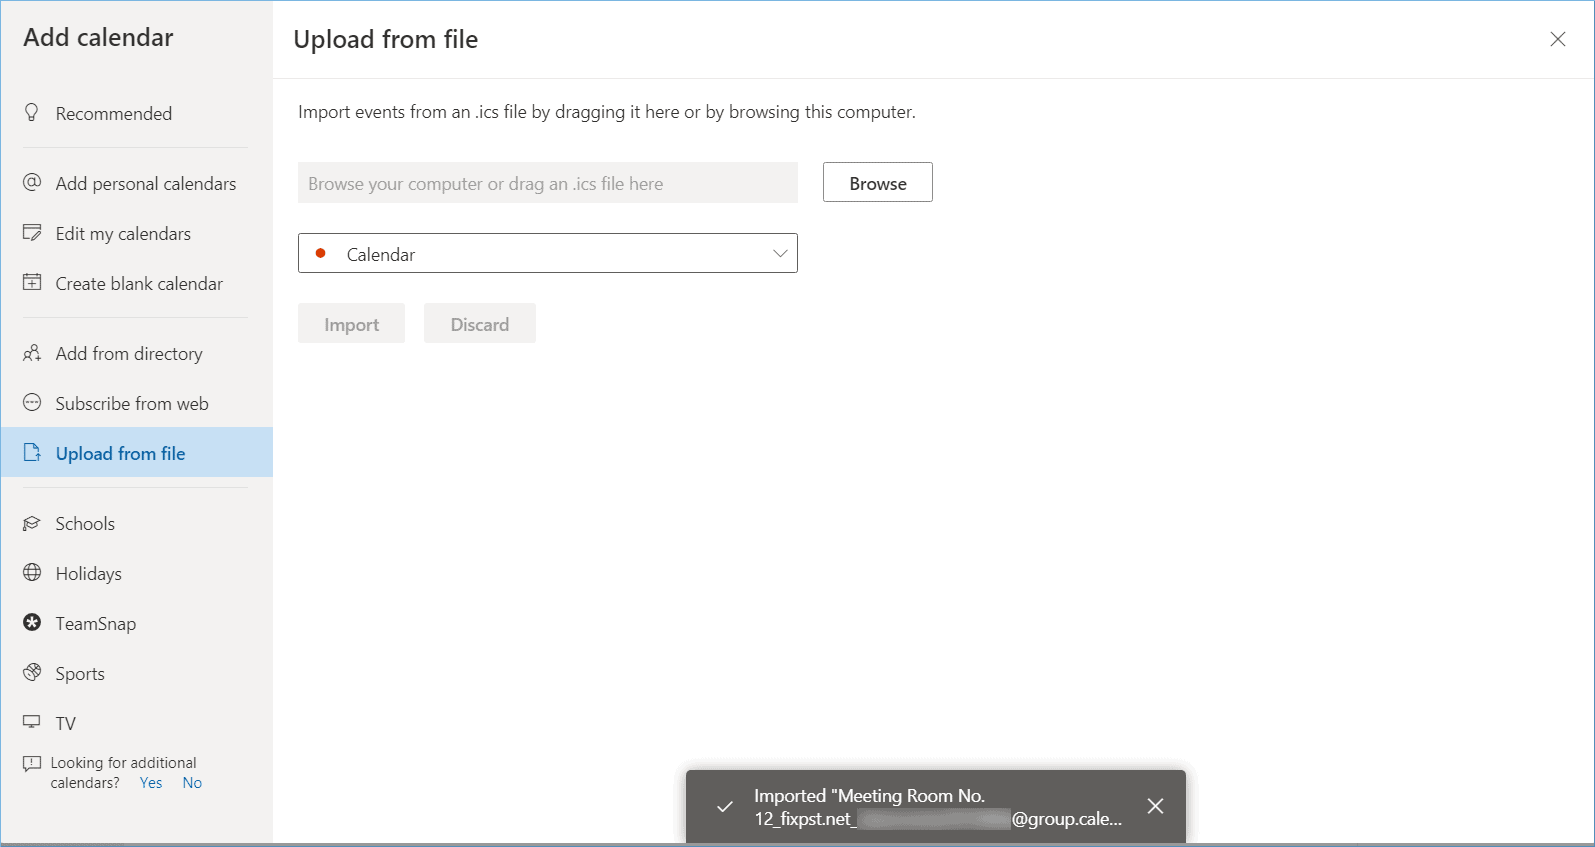
- Log in to the Office 365 account and open all the apps. In the list, you can see the Calendar app; click it.
- Click the option to add the calendar.
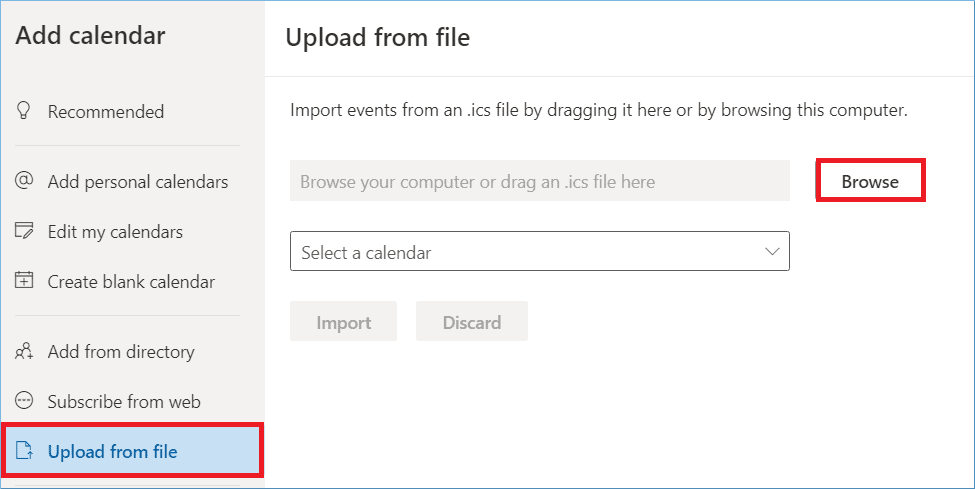
- Choose the option to Upload from file and then click the Browse button to select the ICS file.
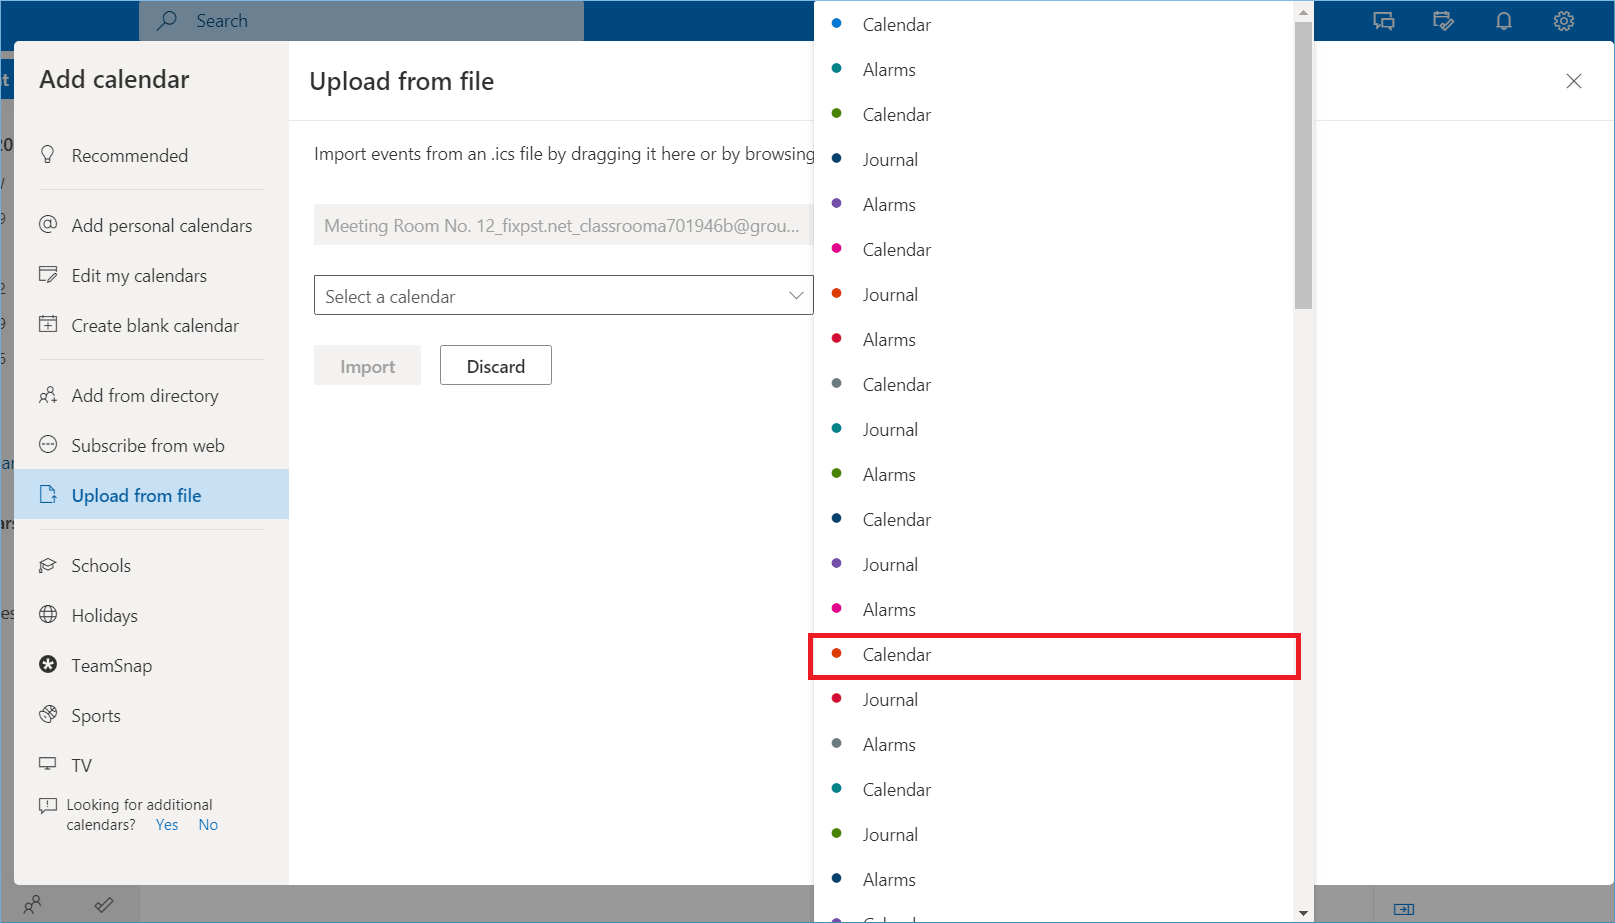
- In the dropdown, you can choose a suitable color icon for your calendar/appointment for easy recognition.
- Finally, click the Import button.
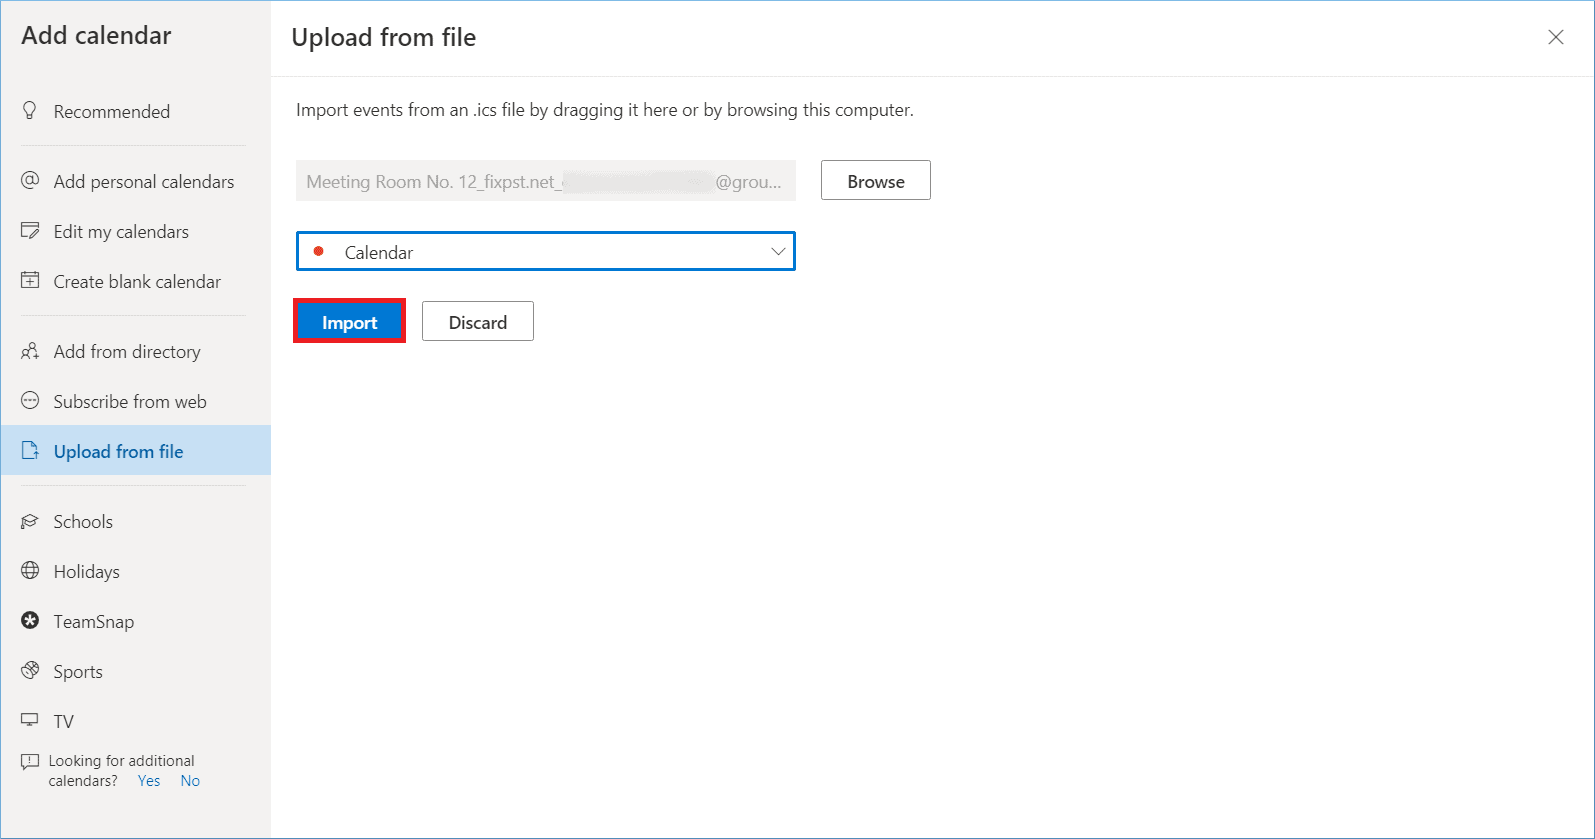
- The calendar is imported into your account.


- Only a single calendar from the G Suite account can be migrated at a time. If there are multiple calendars in your account, then you will have to migrate them separately.
- You can migrate only a single account’s calendar to other individual accounts.
- The settings of the calendar cannot be changed.
- You cannot filter the content of the calendar.
- There are chances of issues when the ICS is imported to the wrong account.
For a comprehensive and efficient migration of your G Suite calendar data to Office 365, it’s recommended to use a professional tool like Kernel G Suite to Office 365. This tool allows you to migrate an unlimited number of mailboxes, including all their contents. You can apply filters to select only the calendar data for migration while excluding other items such as emails, contacts, and documents. This approach gives you total control over the migration process and ensures a seamless transition of your calendar events and appointments to Office 365.
- Migrates data from multiple mailboxes quickly
- Facilitates automated migration with CSV file
- Easy to perform the migration
- Migrate to individual Office 365 folder, mailbox, and group
- Provides advanced filtering options
- Can migrate Calendar/Appointments separately
- Migrate G Suite Contacts to Office 365 in Bulk
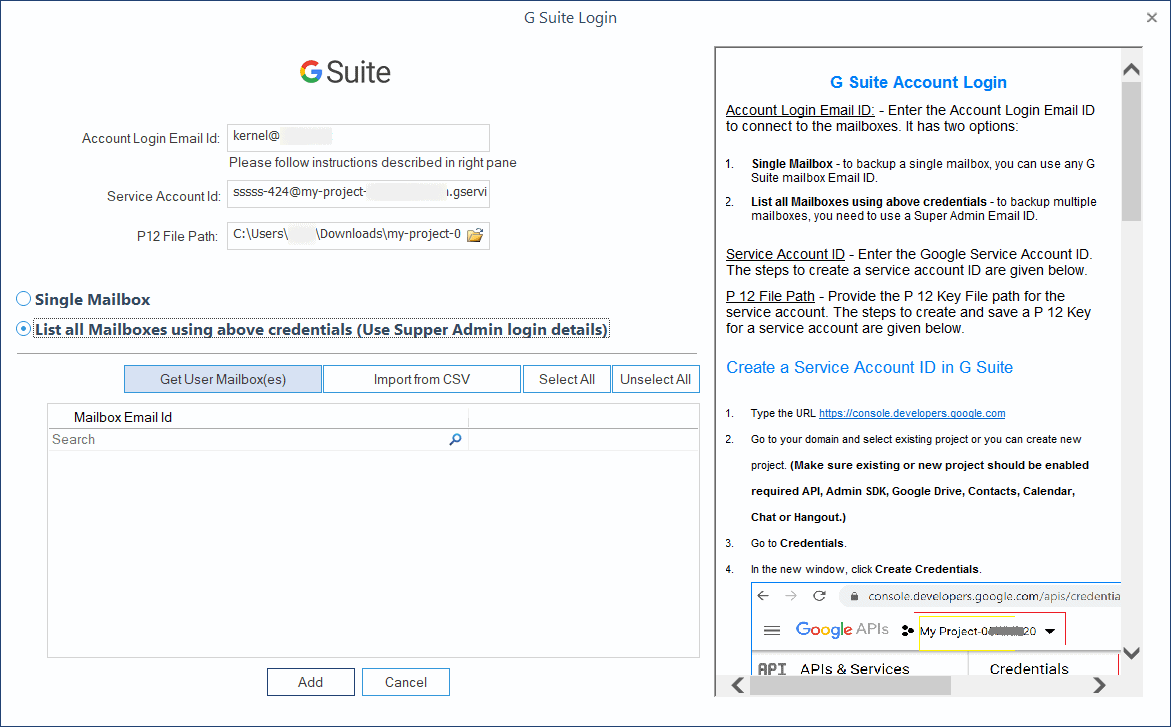
- Start Kernel G Suite to Office 365 tool and click the Add button in the Add Source section.

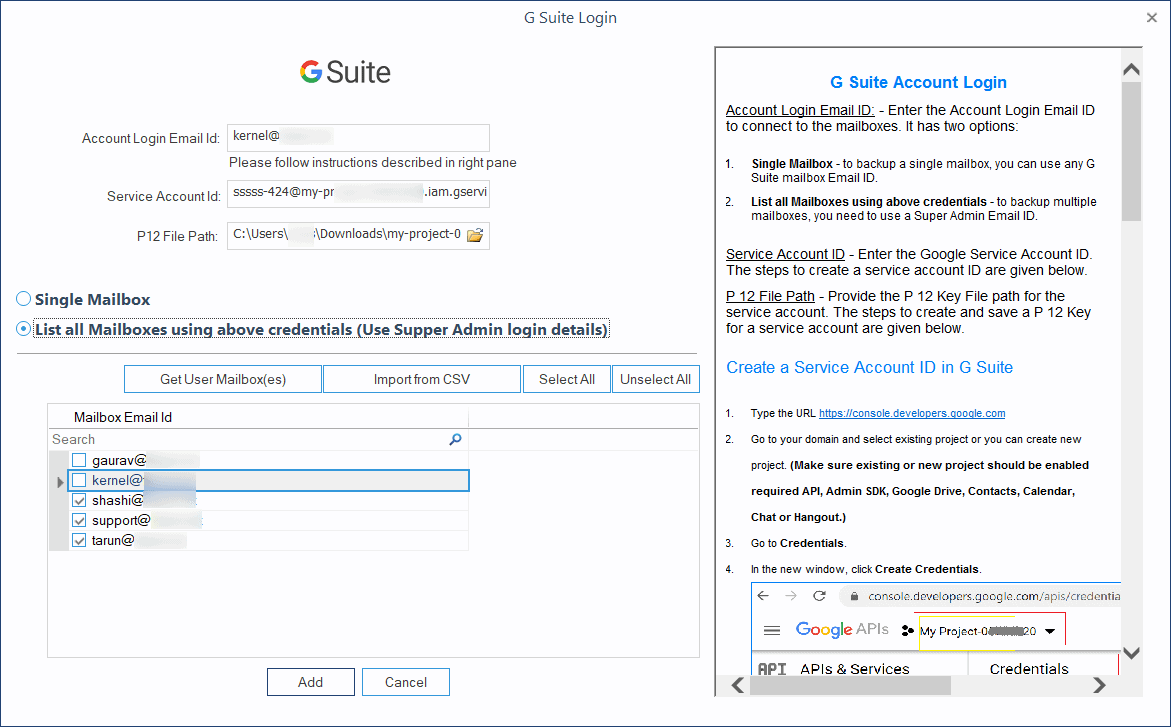
- Please input the email ID of the super Administrator, its service account, and the P 12 key. As you want to migrate the calendar of multiple accounts, choose the second option to list all mailboxes using the above credentials. Click Get User Mailbox(es).
- Choose such an account whose calendar you require to migrate. Then click the Add button.
- In the Add Destination section, click the Add button.
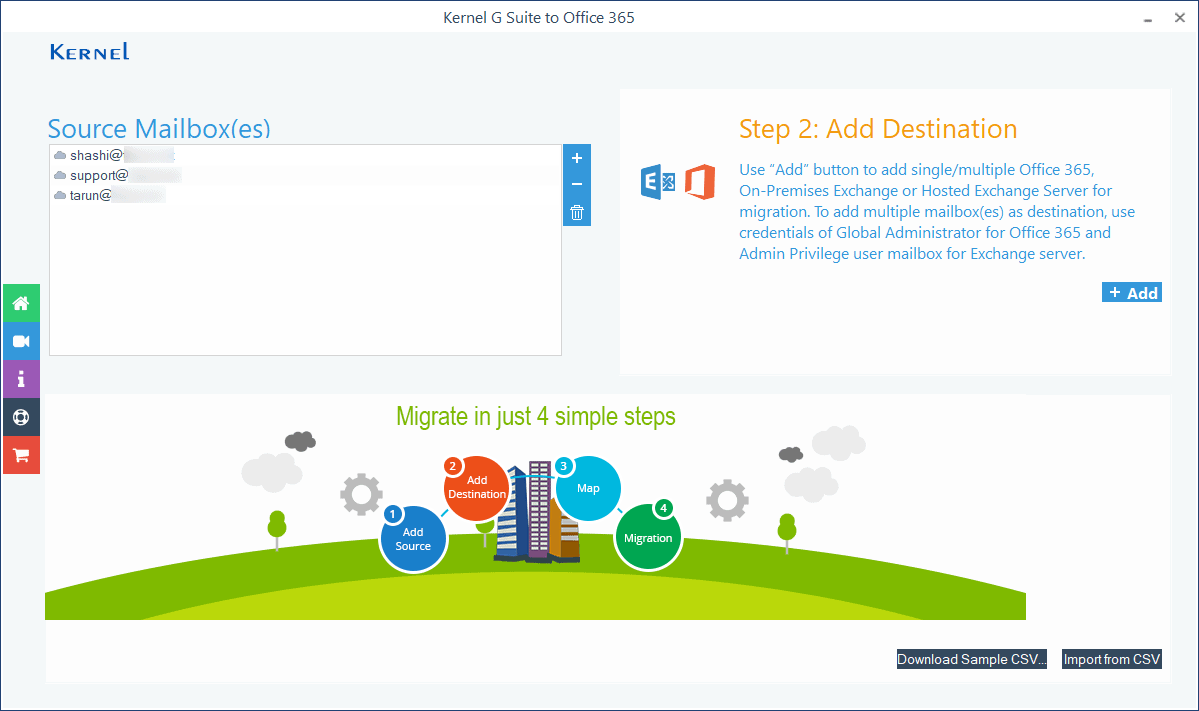
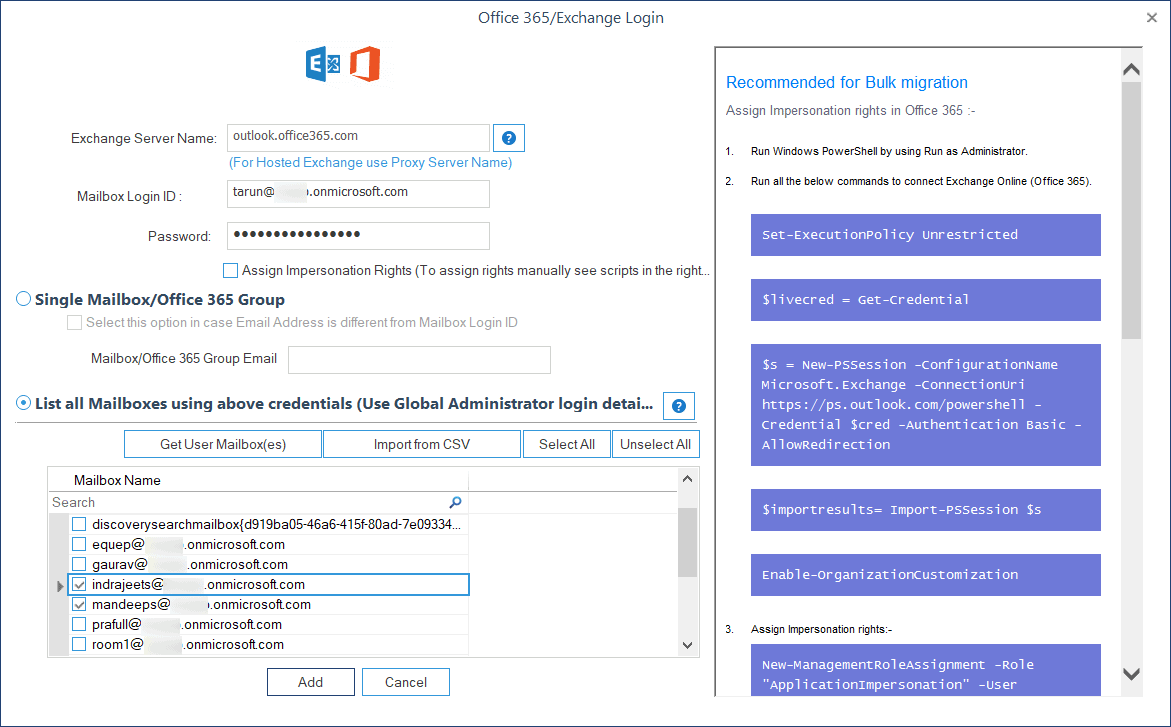
- Input the Office 365 Administrator credentials and go to the second option to list all mailboxes using the above credentials and click Get User Mailbox(es).
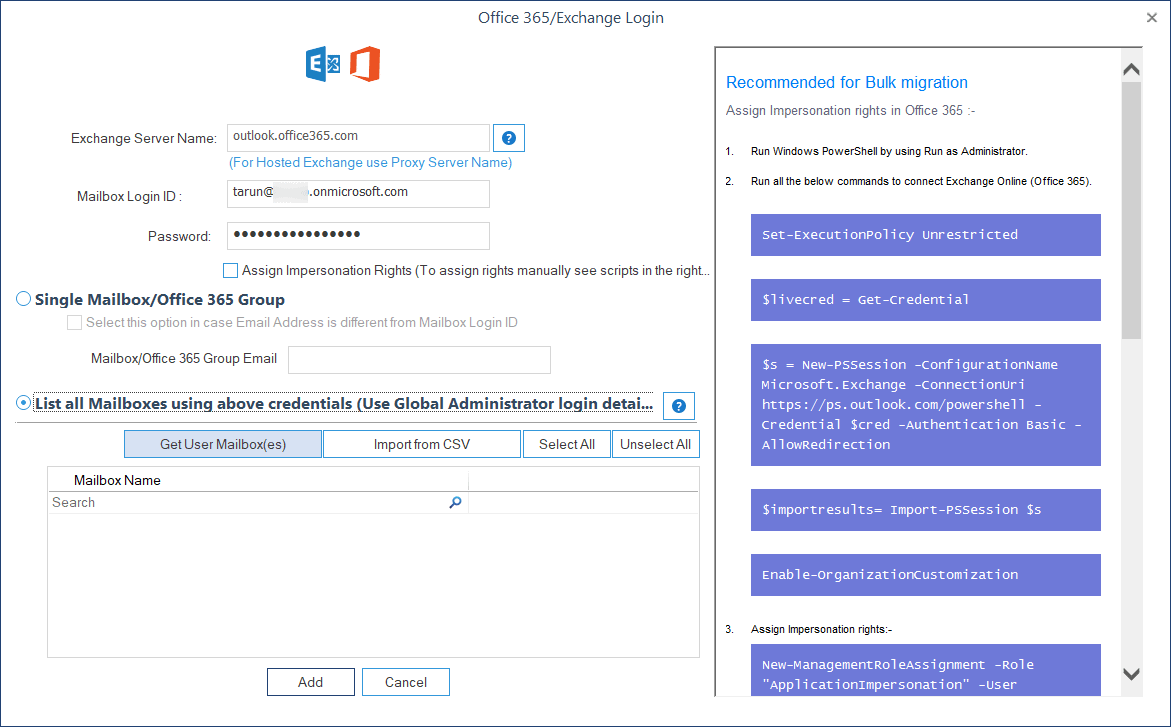
- Choose multiple Office 365 accounts and click the Add button.
- A precise mapping is required between source and destination accounts for efficient migration. For this, use the dropdown menu on the destination side.
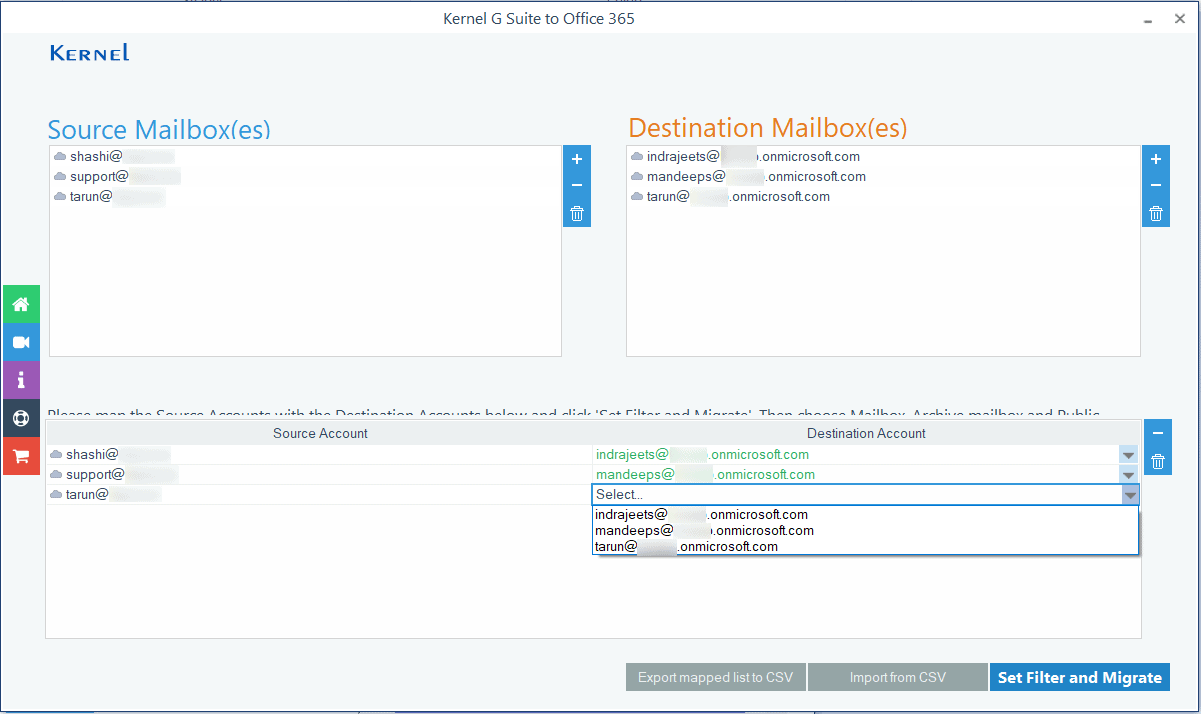
- Click Set Filter and Migrate option.
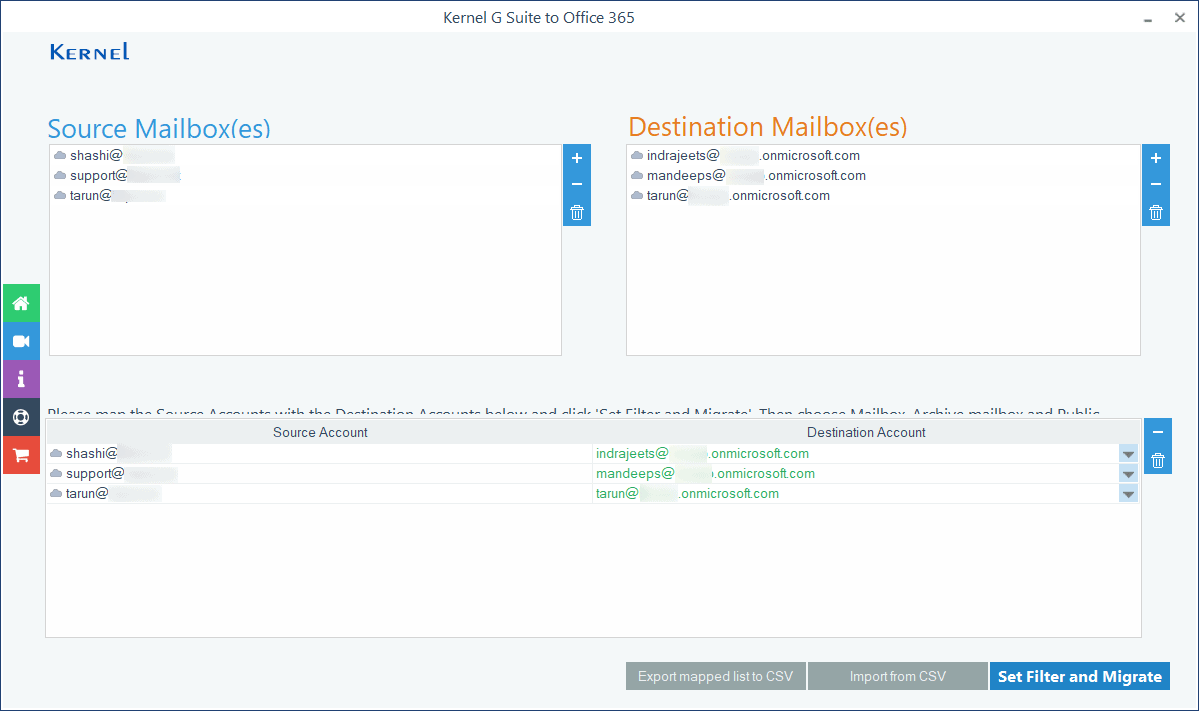
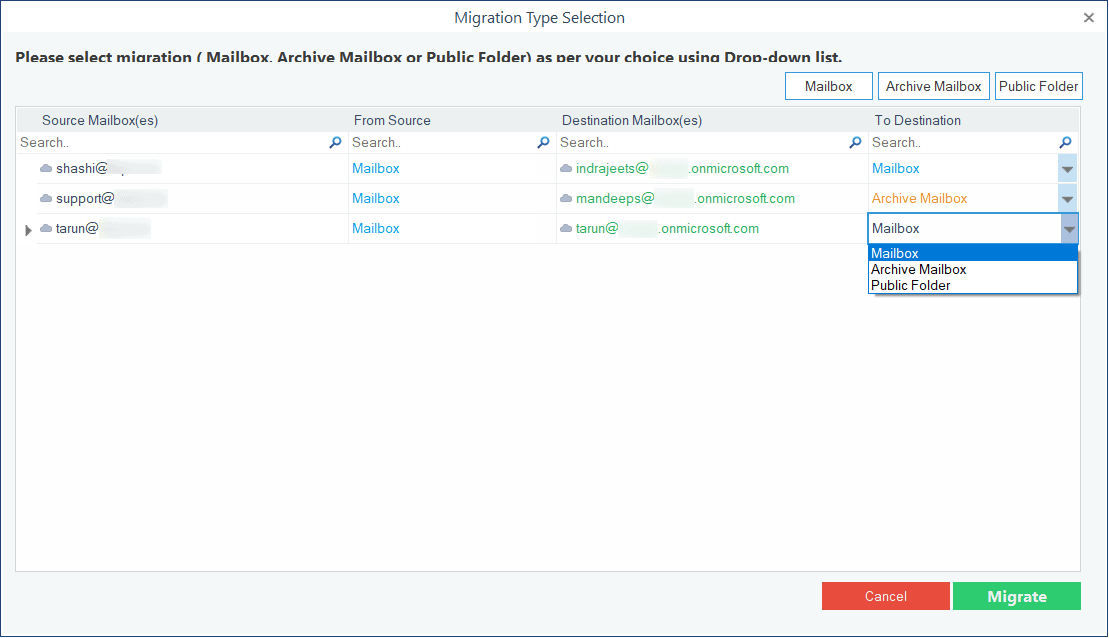
- Each account will have a dropdown menu where you can select between primary mailbox, public folder, or archive mailbox. Then click Migrate.
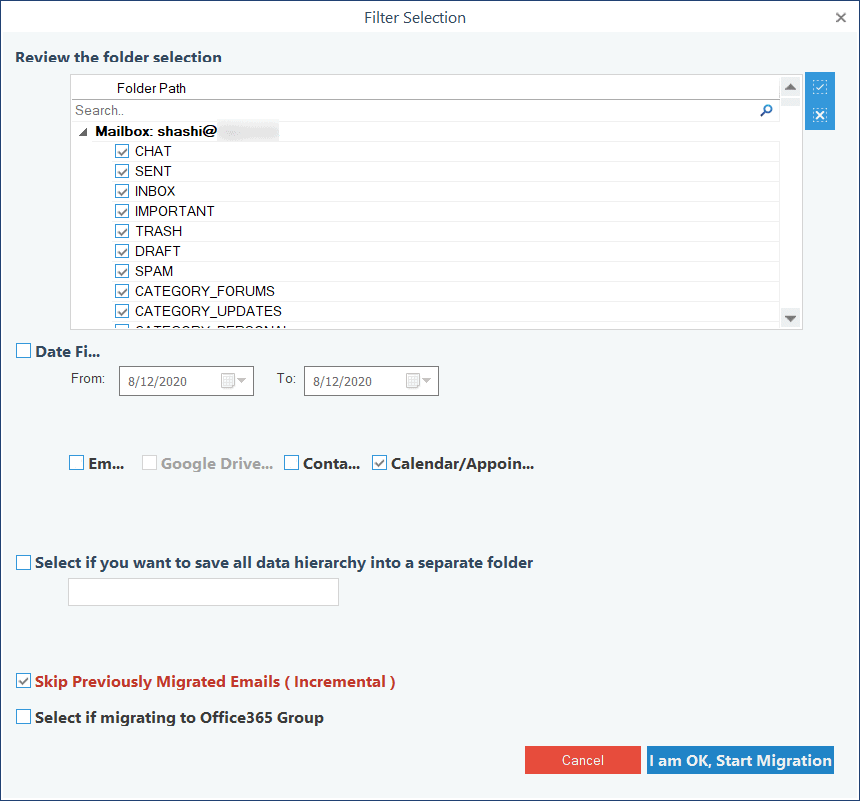
- On the Filter page, you should choose your options – you should click the checkbox in front of Calendar/Appointments and uncheck the others. If you want to migrate to other mailbox items, then you can also select them. Then click I am OK, Start Migration.
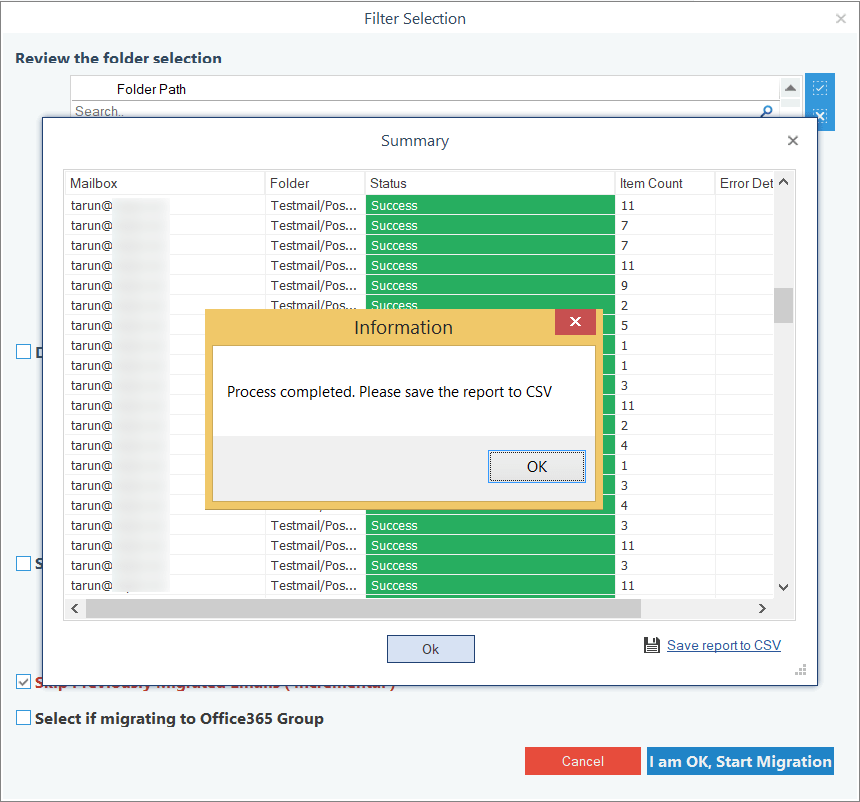
- All the selected items are migrated successfully, and the process is complete. Click OK.
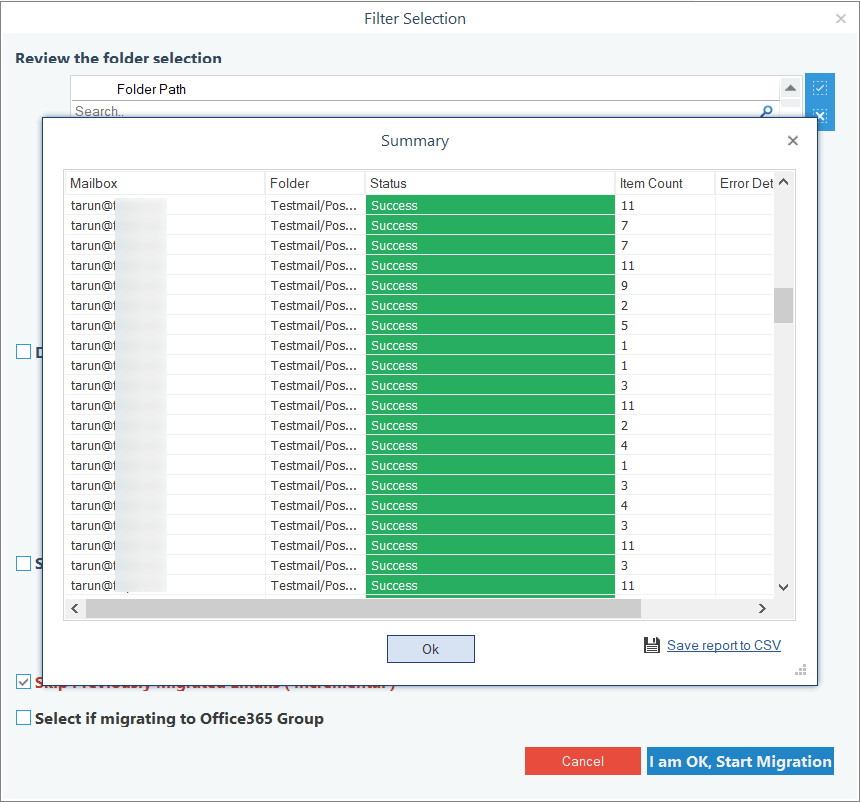
- Save your migration report in CSV format. Finally, click OK.


Conclusion
When migrating crucial G Suite appointments to Office 365, the recommended approach is to use Kernel G Suite to Office 365. This tool ensures a secure and efficient migration of all your data, including Calendar and Appointments, to your new Office 365 environment. Simply purchase an Office 365 subscription plan and use the tool to perform the migration, allowing your business to seamlessly transition to Office 365 and resume operations without interruption.