

Read time 5 minutes
High-quality photographs capture precious memories that shape our identities. History may not be erased, but it often echoes through our lives in mysterious patterns. This underscores the significance of photographs, as their loss can result in a substantial part of our essence slipping away. Consequently, our current article aims to inform you about the process of recovering deleted JPG files, assisting you in preserving those cherished moments you thought were lost forever.
What Is a JPG Format?
With that being mentioned, it’s important to recognize that various file formats are used to store photos on your computer, and one of these formats is JPG. What distinguishes JPG is its ability to significantly reduce file size while sacrificing a minimal amount of image quality. What sets JPG apart is its capability to achieve compression ratios of up to 10:1 without any noticeable loss in image quality. This is why JPG images are well-suited for both web usage and everyday photography.
Various factors can lead to the removal of JPG photos. To explore these factors, please read the following paragraph:
- If you have been formatting the device that contains your JPG files, it may delete the JPG photos. When you connect an external device to your computer, you receive the following messages: “Drive <X>: is not formatted. Do you wish to format it?” In case you click on the “Yes” option, the entire drive will be formatted, and in the process, your data may be lost.
- The majority of your cameras offer a “Format” option. If you happen to click on this option while searching for something in your camera, it will lead to the deletion of all your photos, including the important ones, resulting in the loss of your cherished memories.
- Utilizing a single memory card across multiple cameras can result in either the need to format the card or the corruption of the file system, ultimately leading to data loss.
- In case you accidentally have selected the ‘Delete All’ option while you have been previewing images, all your images will be deleted. You might accidentally delete these photos also by using the ‘Shift’+ ‘Delete’ keys.
If you’ve deleted your photos using any of these methods, don’t worry. There are various ways to retrieve deleted JPG files. To do that you need to use a third-party Photo Recovery software. That is where the Kernel Photo Recovery software comes in handy. The software is advantageous in many different ways. Some of its advantages are given here below:
- Is capable of retrieving photos in different formats, including JPG, JPEG, and so on
- Is perfect for the recovering permanently deleted photos
- Is capable of deep scanning of the hard drive to recover images
- Gives preview of each image before saving
The tool can be used, in some straightforward steps such as:
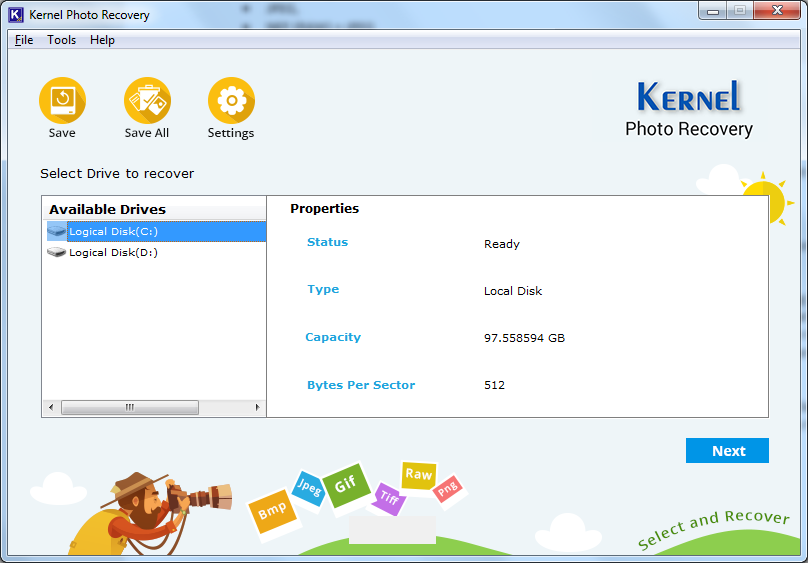
- If you don’t already have the software, begin by downloading and subsequently installing it. Next, initiate the Photo recovery tool. Upon launching the tool, select the desired drive under ‘Select Drive to recover’ as your recovery source. Then, proceed by clicking the Next button.
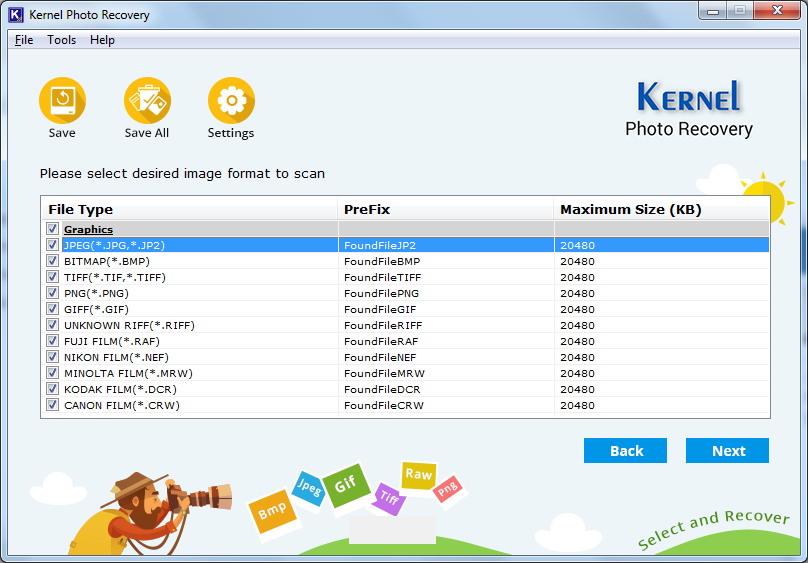
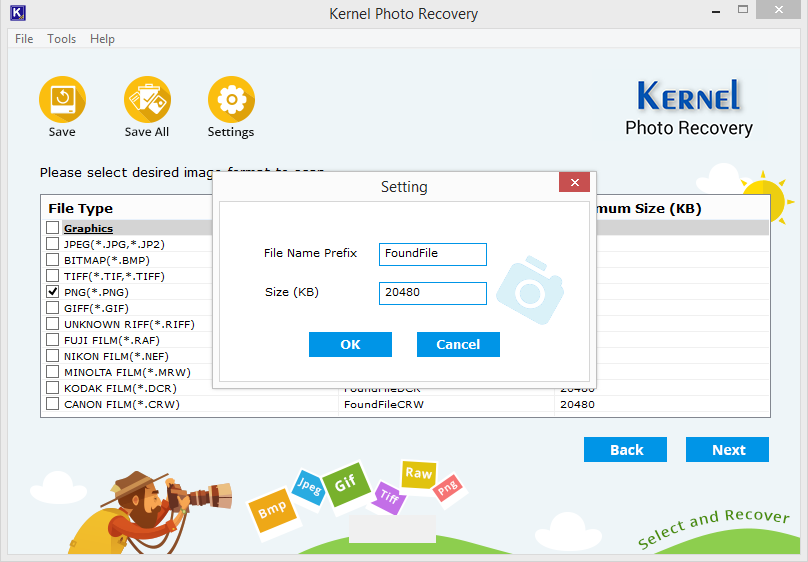
- After completing the steps above, choose the necessary files by specifying a particular file extension and estimated size. Click the “Next” button. (Please keep in mind that you can easily adjust the file size as needed).
- After the end of the scan, preview those recovered files. This you may do by selecting the file type on the pane on the left.
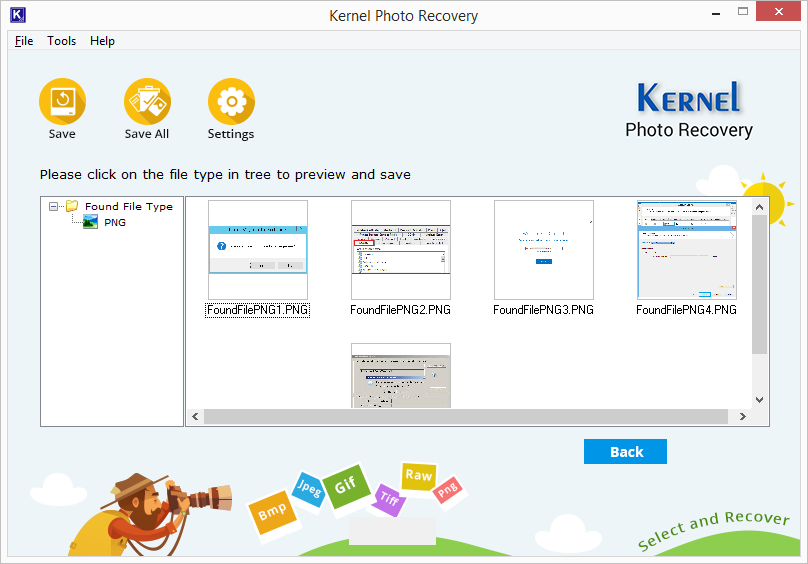
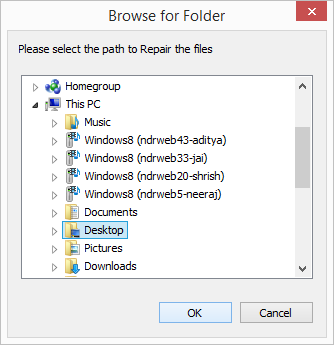
- To complete the process, first, choose the specific photo(s) you wish to restore, then click on Save. If you prefer to save all your photos at once, simply select the Save All option. Next, a window will appear prompting you to select a destination for saving. Click Ok to proceed.


Conclusion
Your cherished photographs hold immense value, and our aim is to assist you in safeguarding them. I trust that the previously outlined steps on “How to Retrieve Deleted JPG Files” offer you the necessary guidance to recover your photos if they’ve been accidentally deleted. Additionally, to learn more about the Kernel Photo Recovery tool, please visit our website. If you’re still uncertain about purchasing the full version, you can explore the free trial version to evaluate its capabilities at no cost.