

Read time 5 minutes
In the contemporary era, digital media, particularly photos, serves as the heartbeat of today’s generation. Our paramount concern revolves around ensuring the safety and security of these digital treasures. Now, picture the distress of witnessing these precious digital memories being accidentally deleted or lost! Undoubtedly, many of us would experience a momentary heart skip in such a predicament. Enter the scene of a critical situation, and a photo recovery tool emerges as the knight in shining armor, aiding users in overcoming this potential crisis.
Attempting to recover lost images on your own is not advisable. Opt for Kernel Photo Recovery, the top-notch tool for image recovery. With numerous positive feedback and success stories from users worldwide, this tool has reached unprecedented heights in the media recovery market.
Let’s know why it is the best choice and what made it the best photo recovery solution:
- Crafted using cutting-edge technology following extensive market research, this is why it encompasses every facet of photo recovery.
- Recovers permanently deleted photos without any trouble.
- Able to recover multiple formats like JPG, JPEG, PNG, TIF, BMP, GIF, RIFF, etc.
- Recover popular camera formats from Kodak, Canon, Minolta, Nikon and Fuji Film.
- Comes with an option to choose the format of images which you want to recover; hence, saves a lot of time and effort.
- Recovers photos as per the set size, hence totally customizable.
- Allows the preview of the images before saving them.
- Allows you to select pictures individually to proceed with saving.
- Compatible with all versions of Windows.
How does Kernel Photo Recovery Work?
We’ve delved into and compiled a wealth of information regarding Kernel Photo Recovery. Now, it’s time to dive into the workings of this tool and explore the steps involved in the process.
- After successfully downloading and installing the software, launch it. Once the tool is active, choose the desired partition for the recovery process. Click on Next after selecting.

- During this phase, choose the image formats you wish to retrieve. If uncertain about the precise format, feel free to opt for all formats. Then, proceed by clicking on Next.
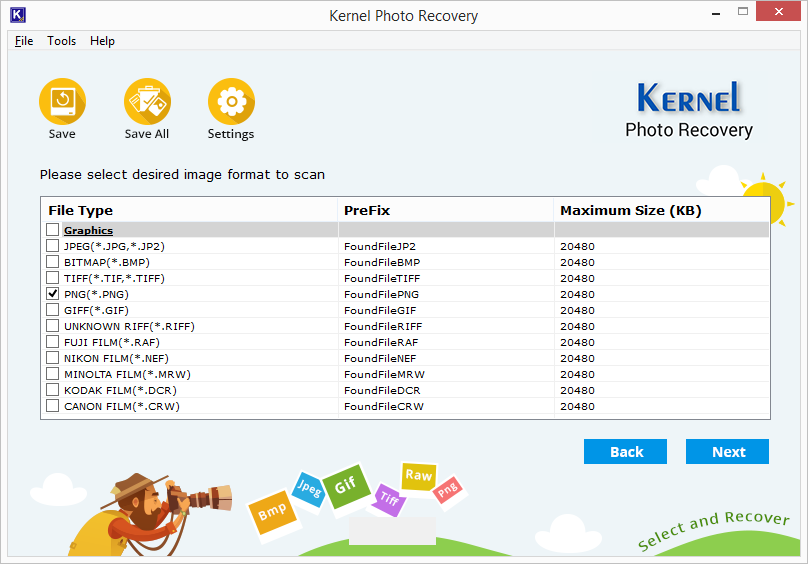
Note: At the tool’s uppermost section, you’ll spot a Settings option. Simply select this, and you’ll be able to configure both the prefix and size for image recovery. Once you’ve made your adjustments, just click OK.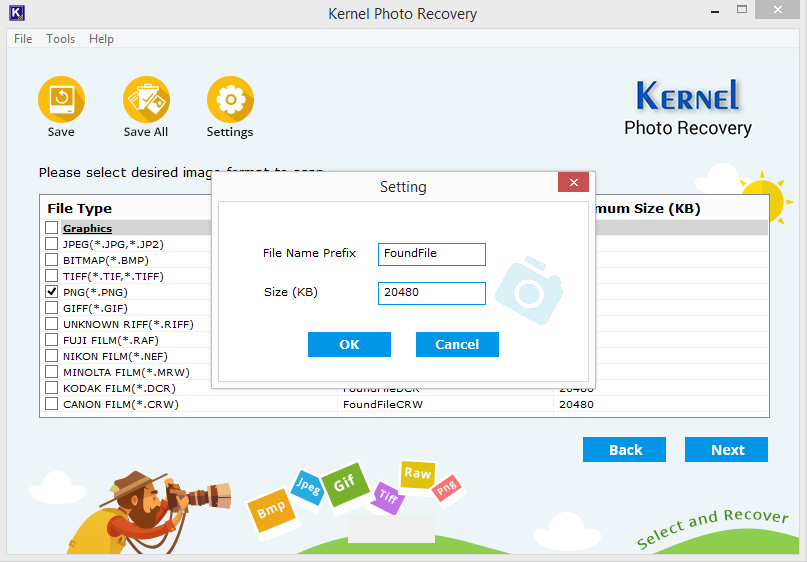
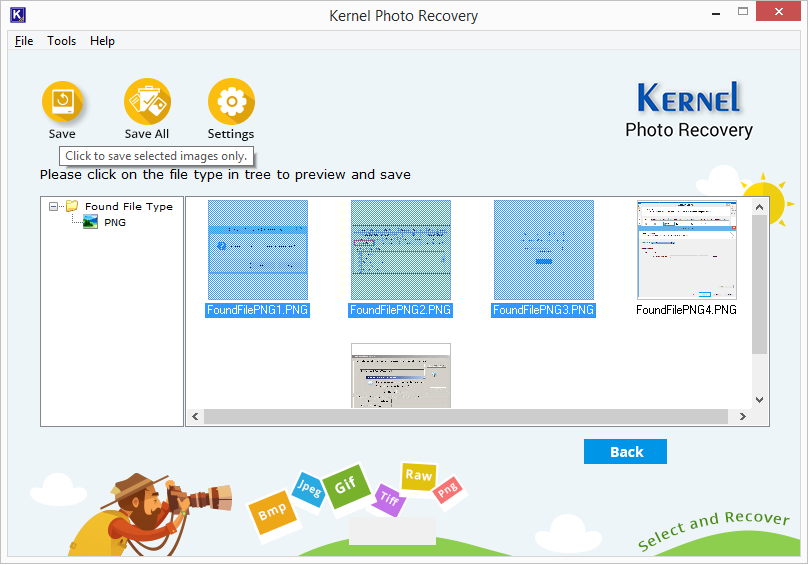
- Once you hit the Next button, the scanning process kicks in. Be patient as it completes, and soon after, the results will pop up on your screen. From there, you can pick formats using the folder tree on the left and preview images in the selected format.

- Now, select the images you want to recover and click on the Save button on the top. Or you can save all the images by click on the Save all button.
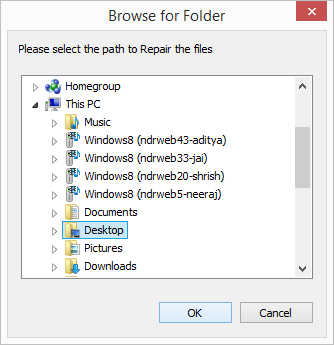
- Now, you need to provide a destination for the recovered images. Select a destination and click on Ok.


Conclusion
Kernel Photo Recovery tool matches all the standards of an extra-ordinary photo recovery tool. Congratulations! You’ve found the ultimate photo recovery solution right here. This tool swiftly restores JPEG, JPG, PNG, TIF, GIF, BMP, and RIFF files. Moreover, it’s compatible with image formats from leading camera brands.