Overview
Kernel for OLM to PST
Convert OLM to PST to access Outlook for Mac emails, contacts, & calendar in Windows Outlook. It helps you retrive corrupt or inaccessible OLM files with all metadata/properties. Both Mac and Windows experts recommend this tool for Outlok for Mac to Outlook migration.
- Exports OLM files to Exchange Server, Gmail, Domino, or GroupWise
- Migrates OLM files to Outlook Web App, Outlook.com & Office 365
- Saves large OLM files to multiple PST files, facilitating selective saving
System Requirements
Before you start installing Kernel for OLM to PST, make sure that your computer meets the following requirements:
Operating System
- Windows 365, 11, 10, 8.1, 8, 7, Vista, XP
Processor
- Intel® Pentium Processor compatible (x86, x64) or equivalent
Memory + Hard Disk
- 512 MB Minimum + Minimum 50 MB of disk space
Help Guides
Install Kernel for OLM to PST
The software is easy to install and involves few simple steps to configure it. But, before installing it, make sure that the setup file is available with you. If it is not, you can get it by downloading from the site https://www.nucleustechnologies.com/olm-to-pst.html
After downloading the installer file, execute the following steps to install the software:
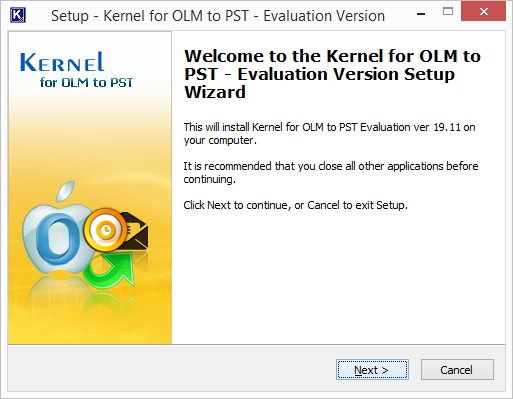
- Double-click the downloaded installer file to start the installation.
- Click Next to proceed to the next step.
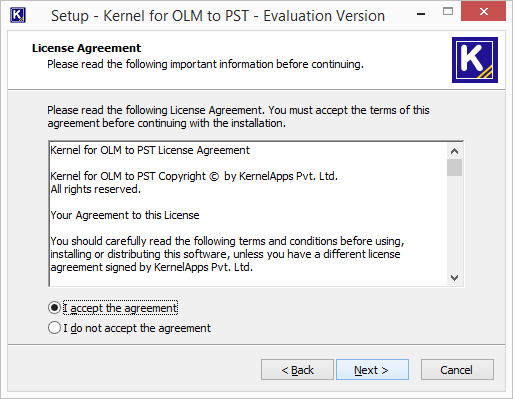
- It is recommended to read the license agreement carefully before installing the software. If you agree to the license agreement and want to continue the installation, then click I accept the agreement and click Next.
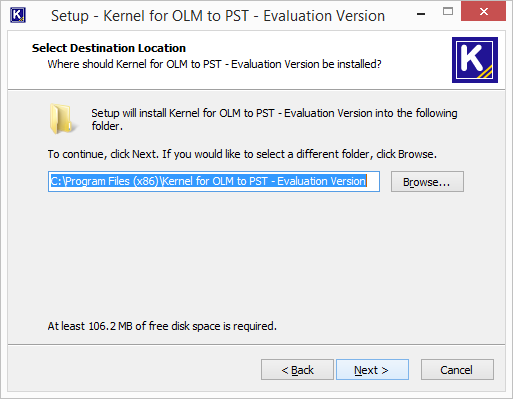
- The following screen appears, which allows you to modify the destination. If you want to modify the installation location, click Browse and select the desired location. Click Next to proceed further.
- Here, you can customize the location of the shortcuts folder in the Start Menu. Click Browse and select a different location to modify the location of the shortcuts folder in the Start Menu. Click Next to use the default or customized shortcuts folder.

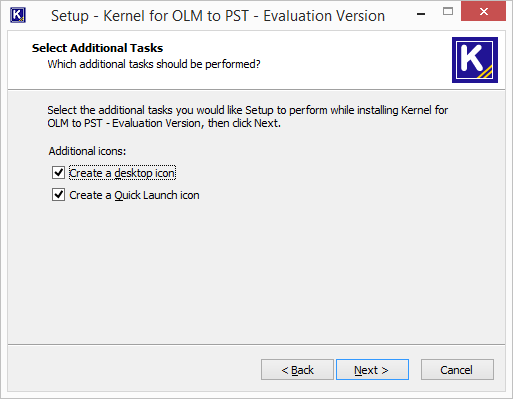
- The next step displays the option to create the additional shortcuts. Check the boxes titled Create a desktop icon and/or Create a Quick Launch icon if you want. Click Next to proceed to the next step.
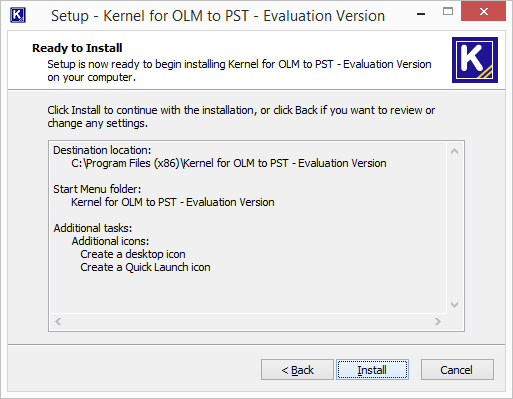
- Click Install to begin the installation procedure.
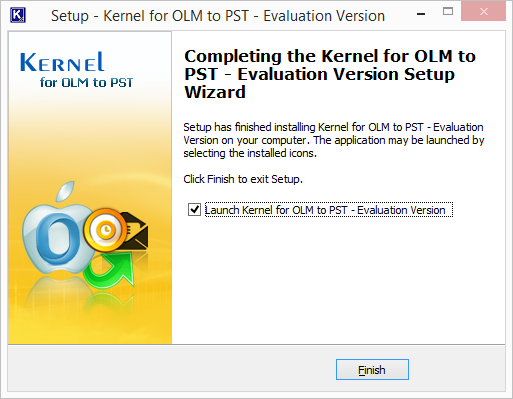
- When the installation process is completed successfully, the user receives the following message. Click Finish to complete the process. It will launch the software if you have kept the option Launch Kernel for OLM to PST checked.
Uninstall Kernel for OLM to PST
Kernel for OLM to PST software can be uninstalled from your computer system by using one of the following two methods:
- Go to Start → All Programs → Kernel for OLM to PST, click Uninstall Kernel for OLM to PST.
- Click Start → Control Panel. Launch Add/Remove Programs or Programs. Select Kernel for OLM to PST and click Remove.
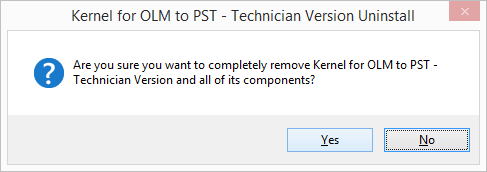
- Following any of the above methods displays a warning message. Click Yes to uninstall the software.
 Note: If a scheduled migration job is running while uninstalling the software, you will receive a warning. Click Yes to stop the job and to uninstall the software.
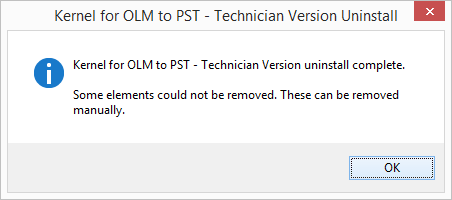
 - When the software is removed, the following message box appears onscreen.
Click OK to finish the process.
After following the above steps, Kernel for OLM to PST will be uninstalled successfully from your computer system. By default, the software is configured to retain the license file, behavioral data to handle source and destinations, and other settings in the program installation folder.
To remove the remaining elements, delete its program installation folder manually and then empty the Recycle Bin as well. Kindly do not remove this folder if you want to retain the license file and/or have to reinstall the same/upgraded version of the software. The default path of the program installation folder is %ProgramFiles%\Kernel for OLM to PST – for both 32-bit and 64-bit OS.
Video
Kernel for OLM to PST
Release History
Witness the latest and the best version of Kernel OLM Viewer which is now available as the version 19.8 in the market. After so many customer feedbacks and rigorous research, this new version is far better, provides unmatched results in terms of performance, and is totally free. Be on it!
The updated version (18.1) of Kernel for OLM to PST Converter gets released. This tool, with its newly added features, helps OLM users to migrate OLM to PST in a hassle-free way. Also, the new version offers improved performance and faster conversion. Users can use the new version even with the latest versions of Outlook for Mac and Outlook.
Lepide Software Pvt. Ltd. launches the compatible and enhanced version 15.9 of Kernel for OLM to PST software. With this latest enhancement, the software effectively facilitate the migration of OLM to PST with much agility. The latest updates now allows the tool to operate on advanced Mac Outlook 2016 and MS Outlook 2016 editions. Furthermore, the tool can now also function equally well on the improved and rich Windows 10 Operating System.
Lepide Software Pvt. Ltd. releases the updated version Kernel for OLM to PST software 15.0. The new released version now provides options to save the items recovered from OLM file in PST, DBX, EML, MSG, MBOX, IMAP, TXT, RTF, HTML, MHTML, email servers, or web mails. In addition to this, now the software can also generate four types of File Analysis Reports and at same time supports Windows 8.1 operating systems. Adding to that, to install the software, now the system must have Pentium Class Processor, at least 512 MB RAM and 50 MB free disk space.
Lepide Software launched Kernel for OLM to PST Version 14.07.01. The updated version of Kernel for OLM to PST is now available with better migration ability for MS Outlook 2013. Moreover, the software now also supports Windows 8.1.
Lepide Software Pvt. Ltd, has successfully launched the updated version of Kernel for OLM to PST Conversion Software. The revised edition 13.06.01 now consists of powerful advanced set of features that instantly repair any OLM file. Few minor bugs that were present in the earlier version have successfully been removed and the software now ensures complete and accurate OLM to PST Conversion instantly!
Lepide Software Pvt. Ltd. announces the release of updated version of Kernel for OLM to PST. The new revised version operates fast and effective enough to export all the attachments without any hitches. Integrated with advanced technology, the new version 13.04.01 can now handle all the attachments while conversion from OLM to PST. Smartly programmed, the new version is very user-friendly and doesn't require technical assistance to operate.
The new version of Kernel for OLM to PST conversion software (12.07.01) comes with enhanced efficiency to conduct efficient OLM recovery and repair corrupt OLM file. The software offers effective email conversion to recover emails, calendars, email attachments and other elements to restore them in new PST file. In addition, the tool is compatible with 32 and 64 bit Windows operating system and supports all versions of MS Outlook and Outlook for Mac email systems.
Download Trial Version
Download the free version and learn more about the tool. It allows you to add OLM files and recover data from them. It supports OLM files of all Outlook for Mac versions. Later, you can buy the full version.
- Add OLM files for exporting to Outlook PST
- Preview OLM emails, contacts, calendar, etc.
- Save 25 OLM items to Outlook PST
Purchase Software
Purchase the full version of Kernel OLM to PST and use all its features and functionalities without any restrictions. The full version supports all Windows versions and Outlook for Mac versions.
- Saves all OLM items to PST/Exchange
- Exports emails, contacts, calendar, & other items
- Supports all Windows & Outlook for Mac versions
Online Support
Customer support is not a service, it’s an attitude.
Our dedicated team is available 24x7 to provide fast responses to all of your queries. For any technical support you can register or submit a ticket here.
- Register
Register a new account to submit tickets. click here. - Submit a ticket
Submit a new ticket for your query. Our support team will contact you. click here. - Knowledgebase
Search support helpful articles and find answers to frequently asked questions. click here.
Kernel for OLM to PST - A Step-By-Step Guide to Import OLM Emails to Office 365
Guide to Import OLM Emails to Office 365
Kernel for OLM to PST is a powerful tool that can be used to import OLM to Office 365. It offers some great features to its users, some of which include:
- Migration of emails, contacts, hyperlinks, calendar, email attachments, etc.
- Retrieval of data from normal as well as damaged OLM files.
- Saves OLM files to Office 365, MS Exchange, GroupWise, and company IMAP account.
- Migrate emails to Gmail, Google Apps, Yahoo, AOL, Hotmail/Live Mail/Outlook, and iCloud.
- Supports all versions of Windows, MS Outlook, and Mac Outlook.
The working process of this tool is very straightforward. For better understanding, let’s have a look at its working process.
- Download OLM to PST Converter and install it on your system.
- After launching the tool, a window will appear on your screen. Browse OLM files from your system and click Next
 Note 1: From this section, you can also choose multiple OLM files.Note 2: If you don’t know the specific location of the OLM file, then hit the Search button. It will automatically search and display all the OLM files in your system drives. Select the desired OLM file and click Next.
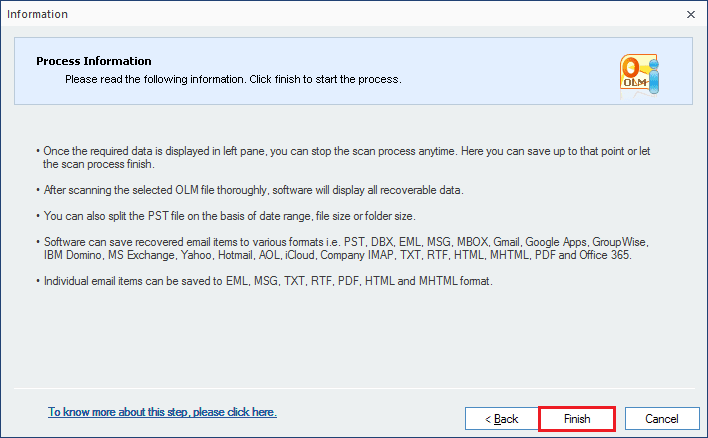
 - In the next step, some vital information will be displayed on the screen. Read the information and click Finish to complete the process.
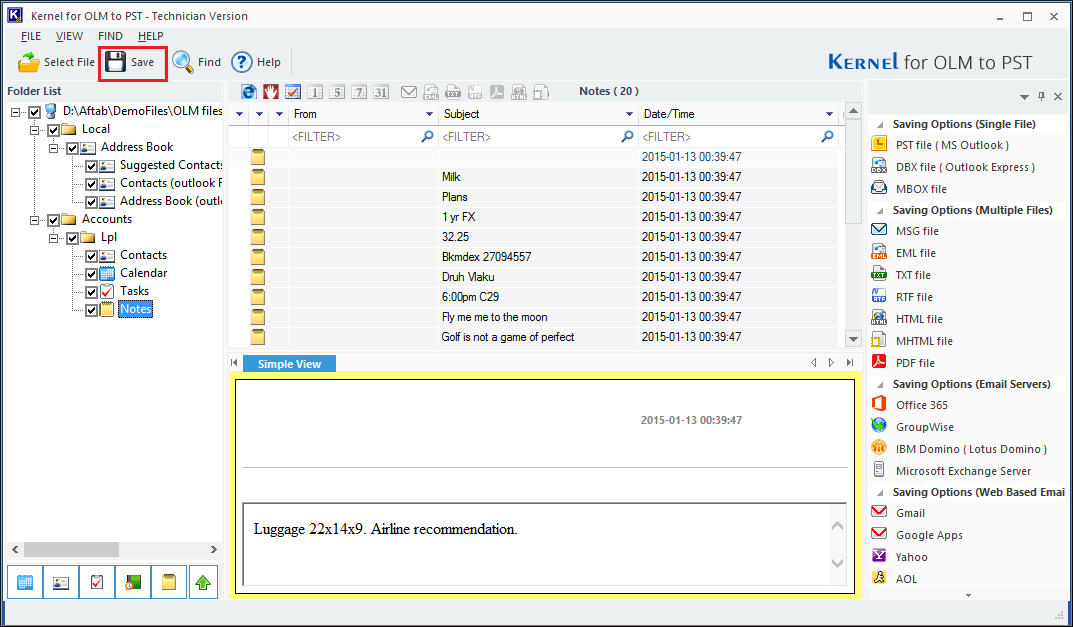
- Once the process is complete, you’ll be able to see all the folders of the OLM file in the tool. Select any folder and click on it to preview its emails/items.Preview OLM files
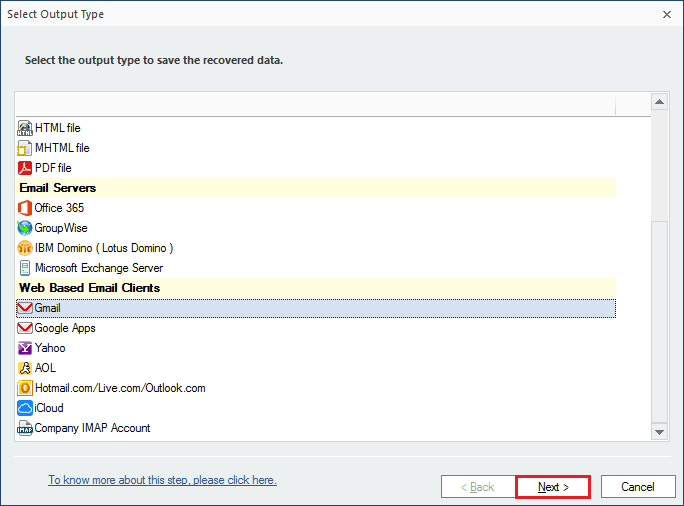
- Now, to import these emails/items to Office 365, click the Save button in the upper left corner of the tool. A new window will open on the screen displaying all the saving options for the file. Select the Office 365 option and click Next.Click Import OLM files to Office 365
Kernel for OLM to PST - Simple Steps to Import OLM files to Gmail
Steps to Import OLM files to Gmail
Microsoft Outlook is available for both Mac and Windows operating systems. In Mac OS, the Outlook for Mac desktop client saves the email items in OLM format while in a Windows OS, the email items are saved either in an OST (Exchange) or a PST (Offline) format.
It is often difficult to migrate your mailbox from one platform to another, such as migration from Outlook for Mac to Exchange, Office 365, or a webmail client like Gmail, Yahoo, AOL, etc. You need to execute specific manual steps, which turn out to be a tedious and time-consuming task. This is where the need for a third-party tool comes in. So, are you looking for a reliable tool to import OLM files to Gmail? Then look no further as Kernel for OLM to PST Converter software is an advanced utility that offers smooth and hassle-free migration experience.
Now, we will go through the detailed step-by-step demo of the Kernel for OLM to PST software to import OLM to Gmail Account.
Here is the Process to Import OLM Files to Gmail Account:
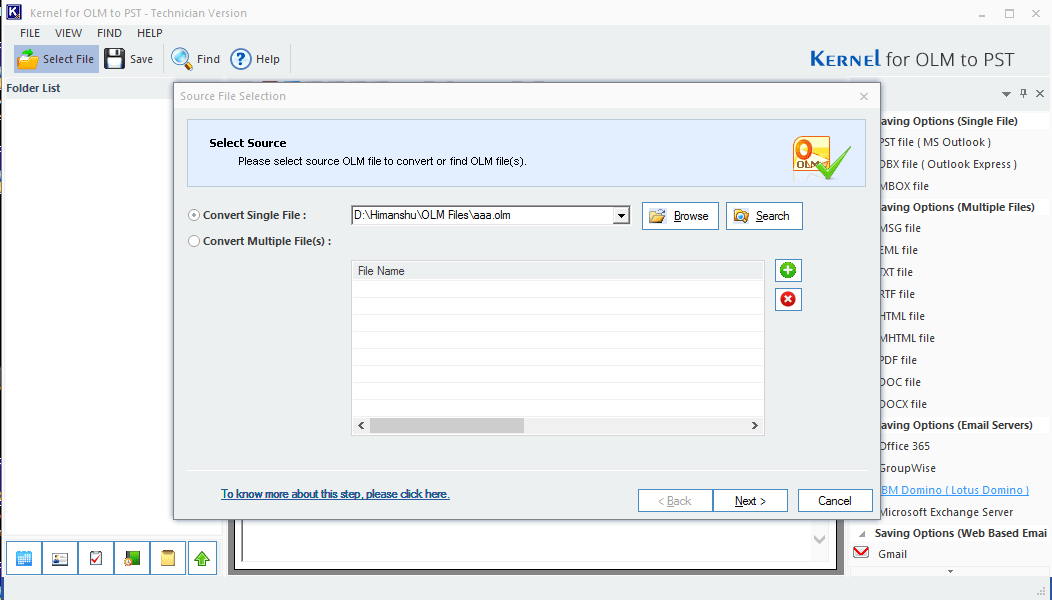
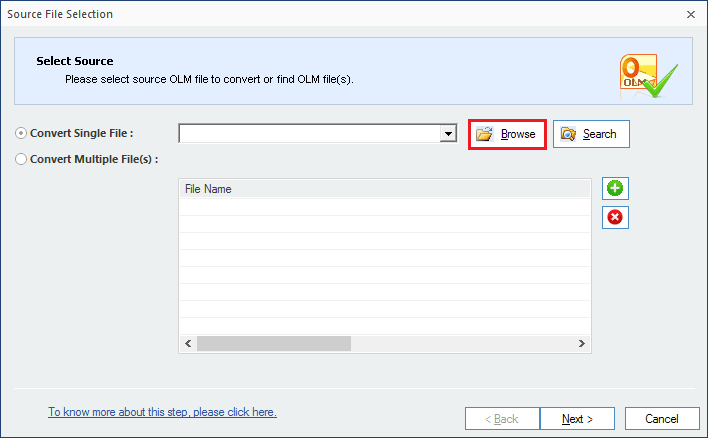
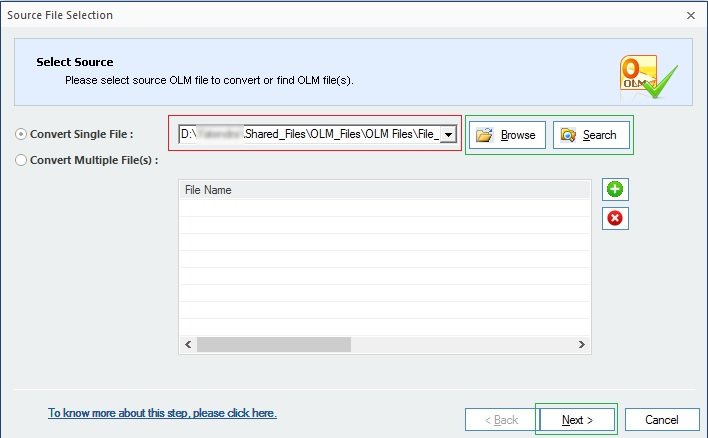
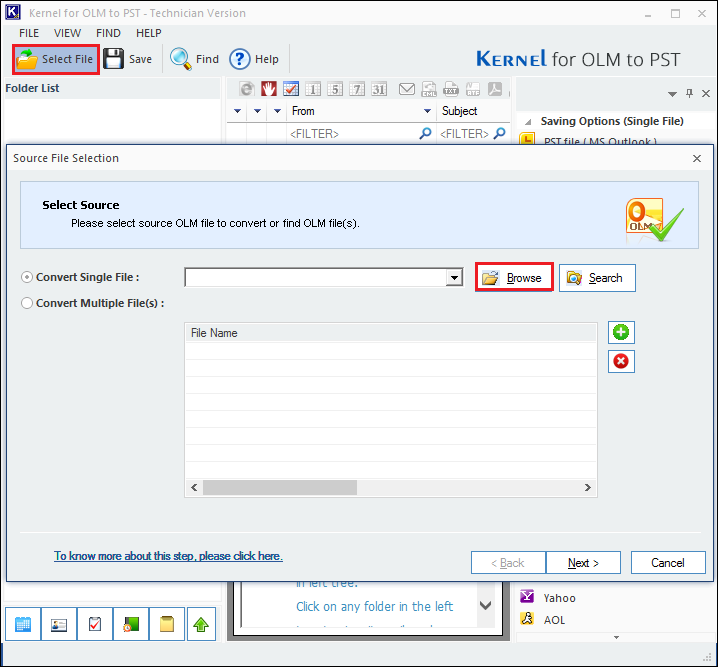
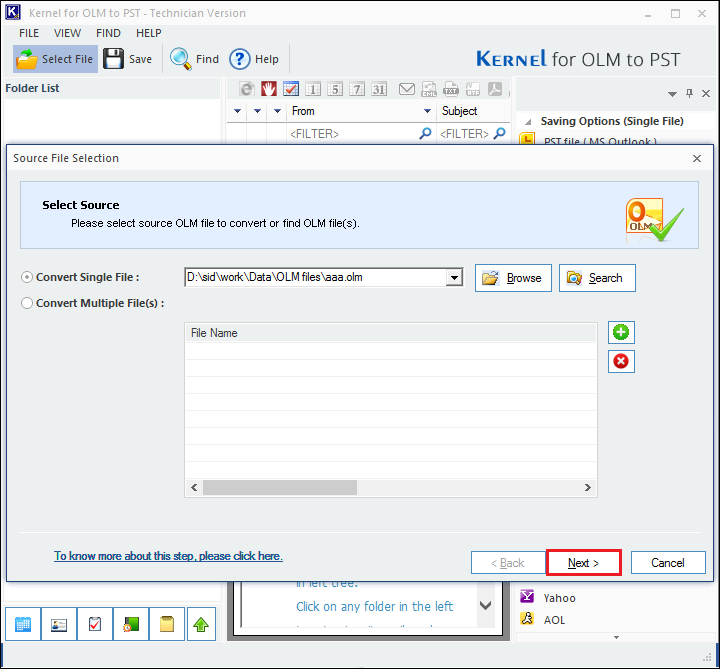
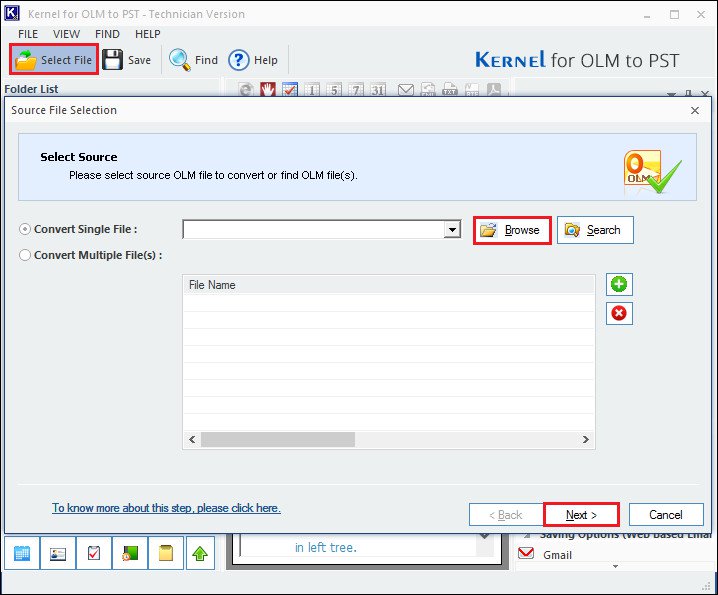
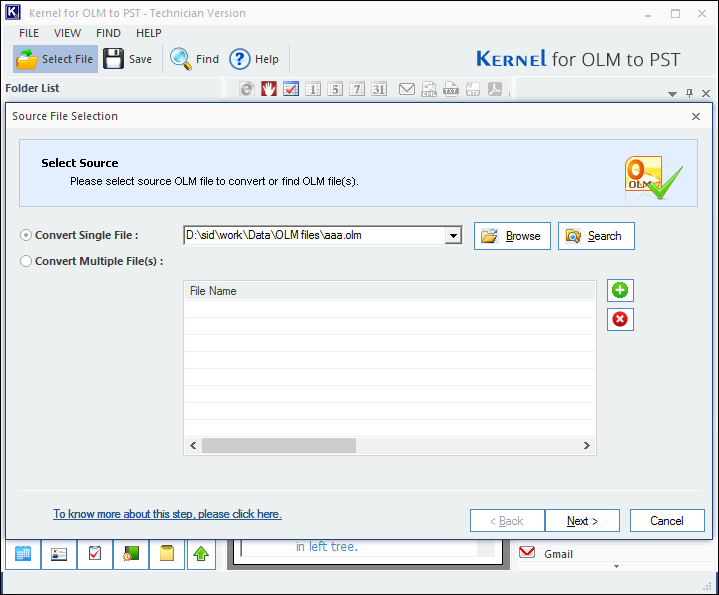
- When you run the software, the Source File Selection wizard opens up. You can choose the option to convert a single file or multiple files. Then click Browse.
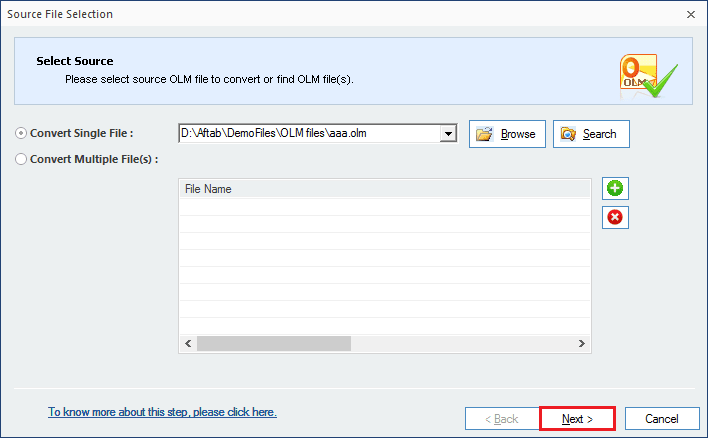
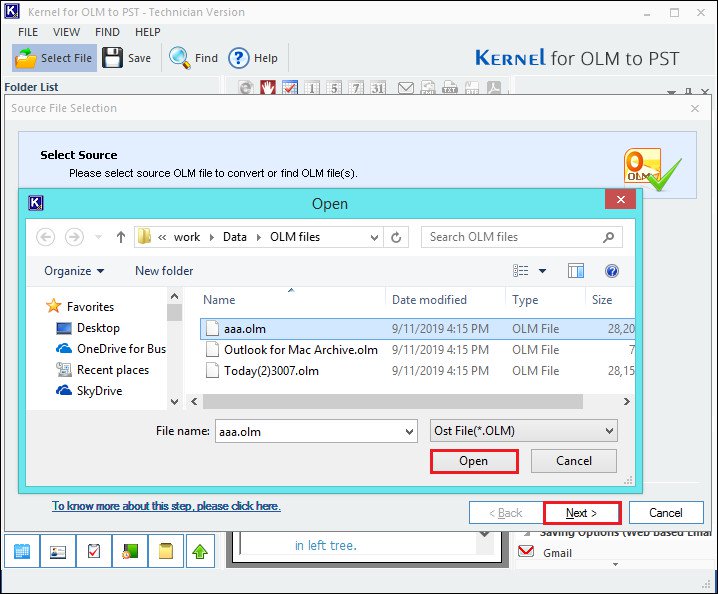
- After selecting the OLM file, click Next.
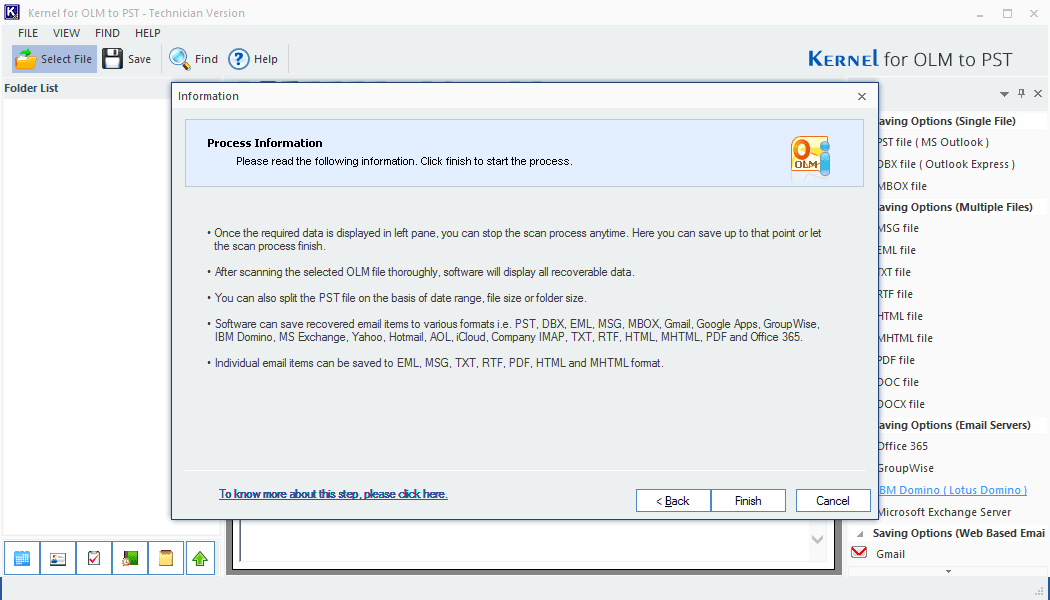
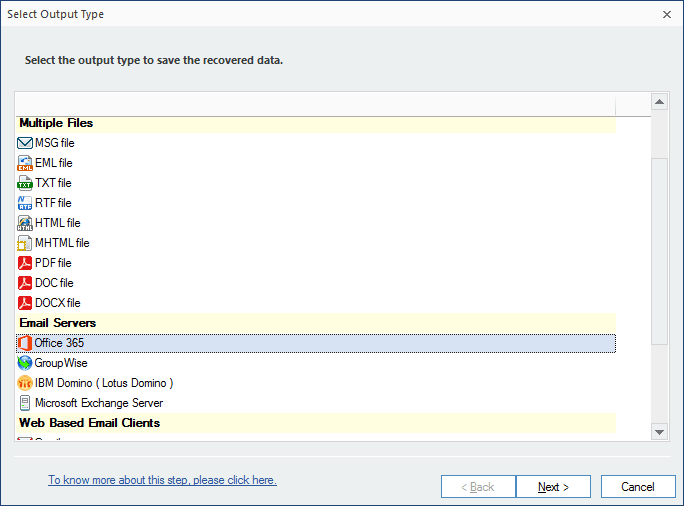
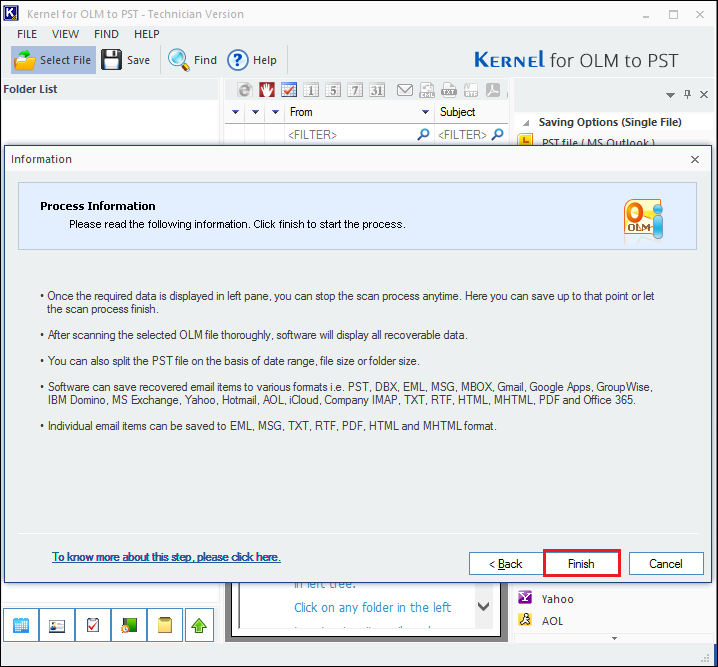
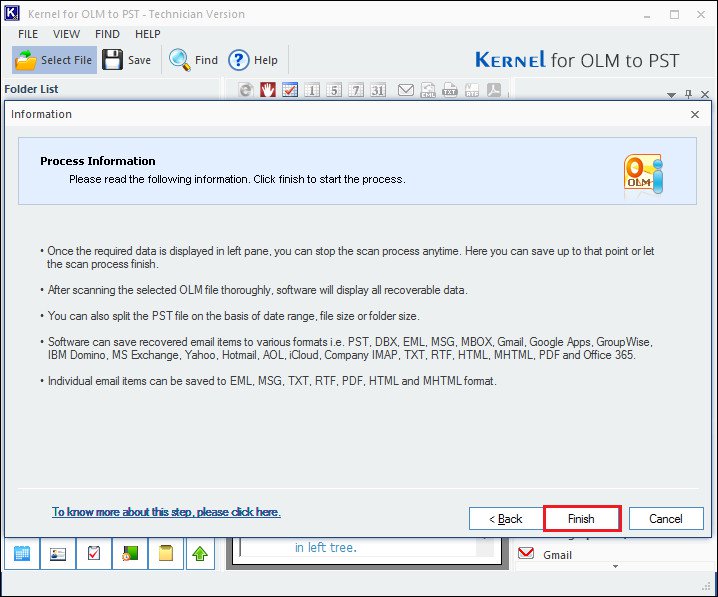
- An Information window tells you about the various output formats which you can choose for your OLM file. Click Finish.
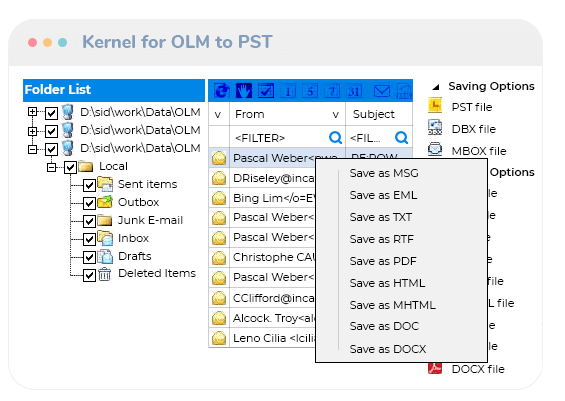
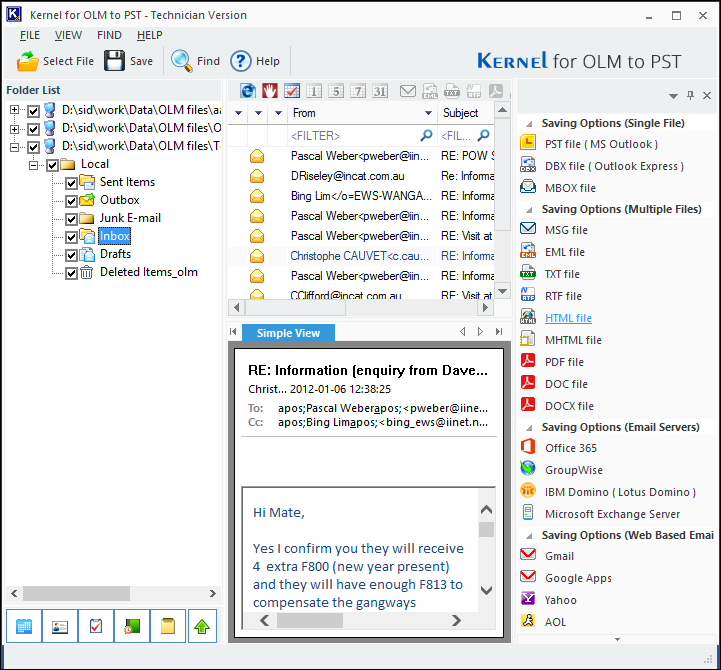
- The tool displays the OLM mailbox and presents you with all its folders. You can select any file and gets its preview. Then click the Save option.
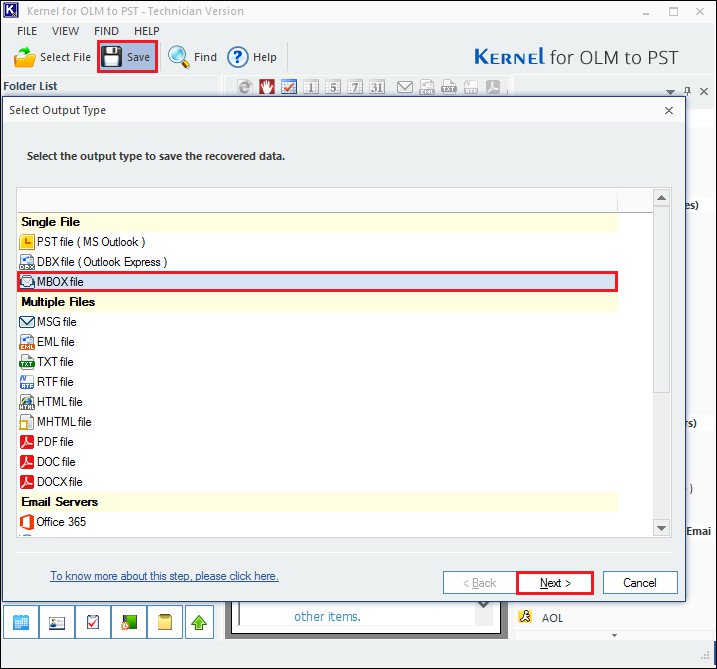
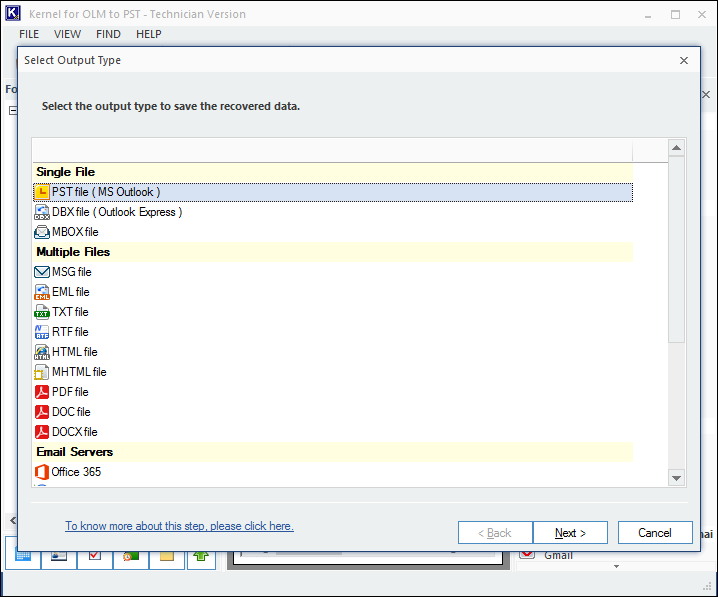
- On the Select Output Type window, choose the Gmail option, and click Next.
Kernel for OLM to PST - Convert OLM to EML and Access in Windows Live Mail
How to Convert OLM Files to EML?
For successful email migration from Outlook for Mac, you need OLM data files and a unique tool for the conversion (OLM to EML). But find & save your OLM Outlook files to an easily accessible location before proceeding any further. To find where the OLM files are saved on your Mac (Apple machine), navigate through the following Locations:
- /Documents/Microsoft User Data/Office 2011 Identities/Main Identity/
- /Documents/Microsoft User Data/Office 2011 Identities/Main Identity/Data Records
Kernel for OLM to PST converter tool for Windows allows to migrate data of OLM files and save in numerous formats. Using the same software tool, you can convert OLM files to EML.
Steps to Convert OLM to EML:
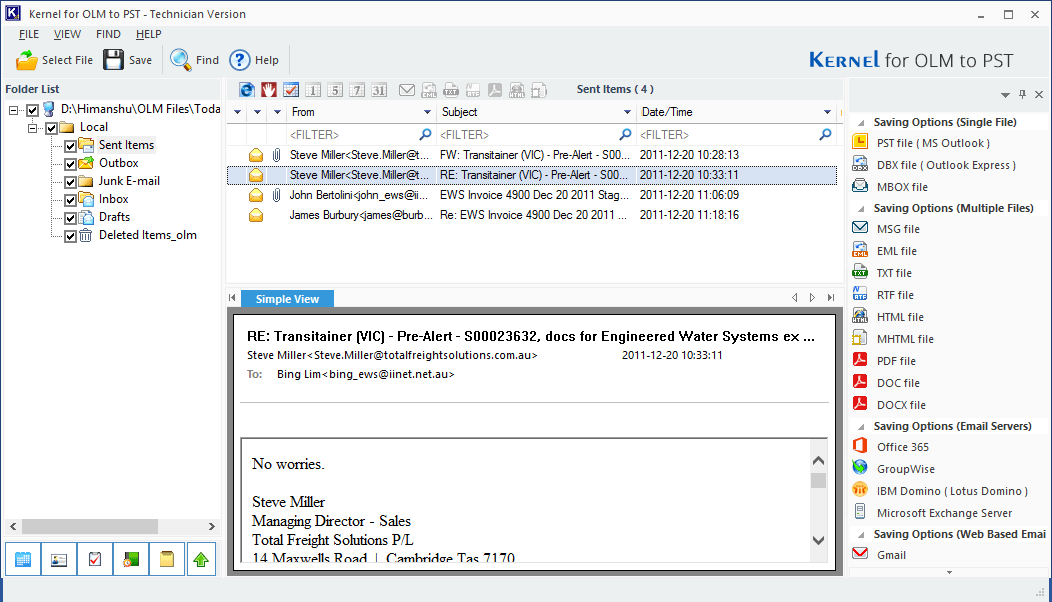
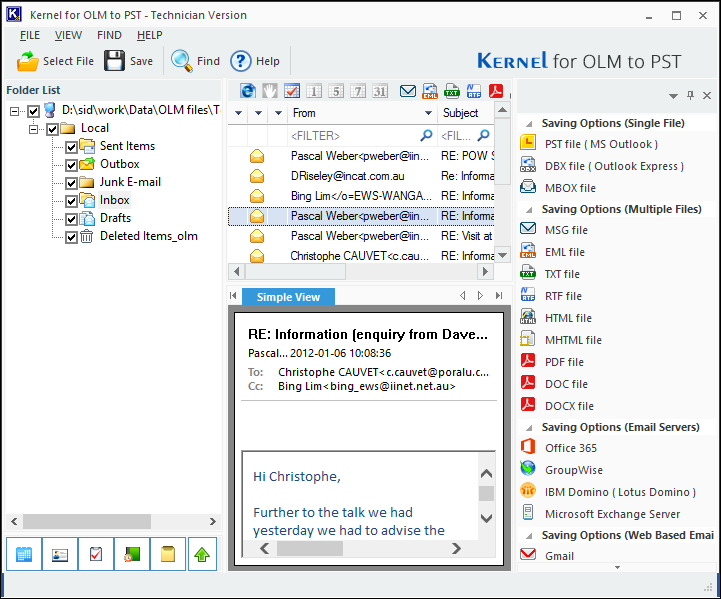
- Launch Kernel for OLM to PST converter tool. Below is the user interface of the tool which is very basic.
The interface of Kernel for OLM to PST Converter has four sections. Section 1 (left-pane) where the tool lists the file folders, Section 2 (mid-top) where you can see the content of each folder, Section 3 (mid-bottom) where you can preview the item, Section 4 (right-pane) where you can see a list of file formats available for file conversion/exporting/migration.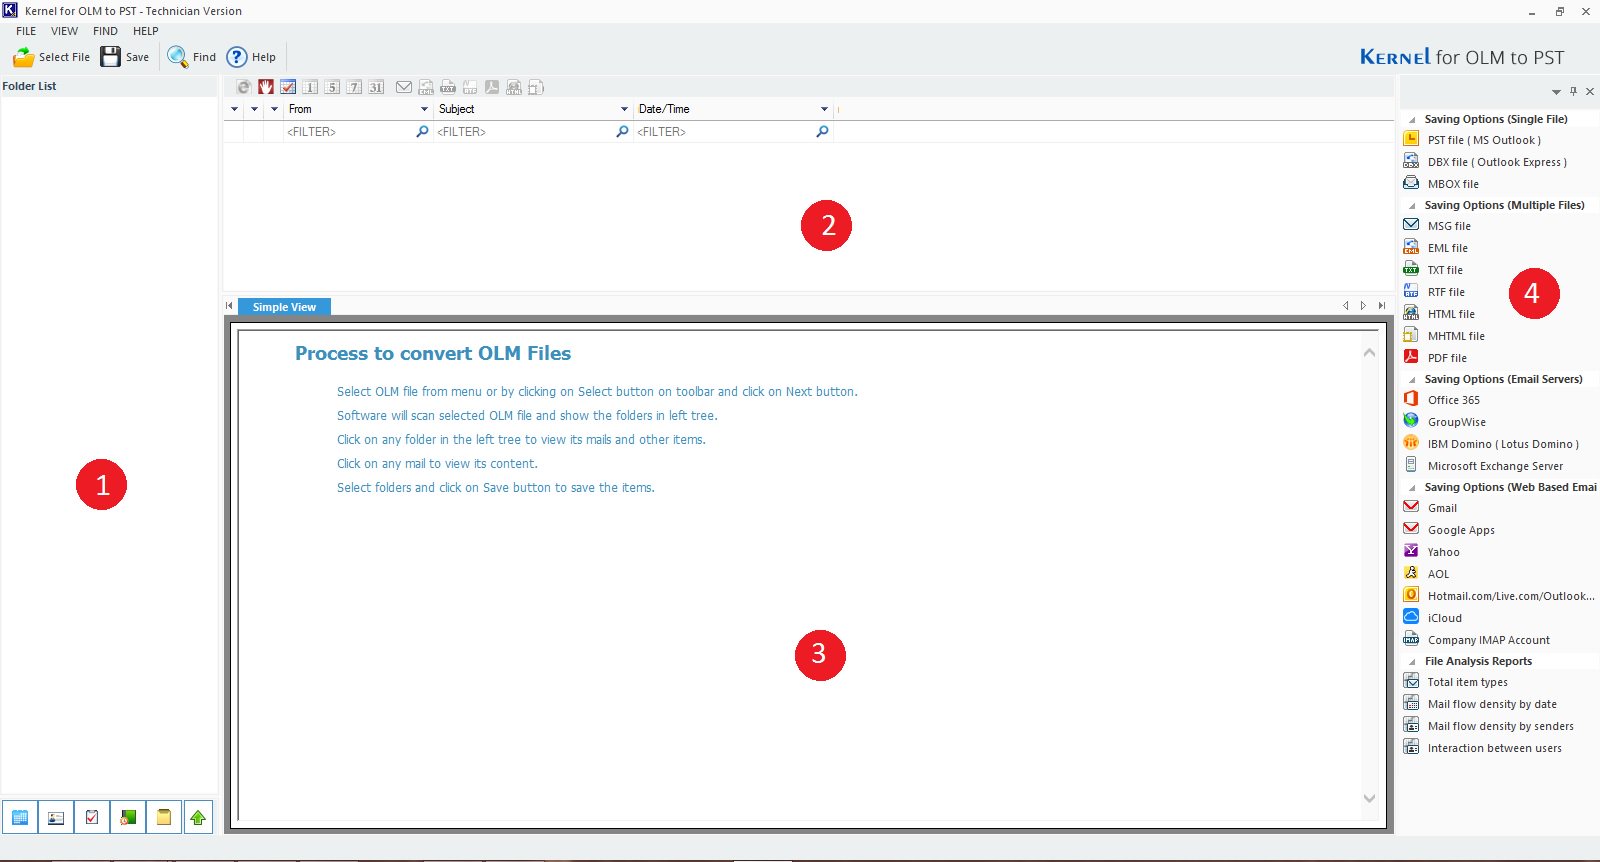
- Browse the OLM data file clicking the Browse button or search in a specific location. Click Next,
 Note: If you need, then you can opt for converting multiple OLM files at a time using the Convert Multiple Files radio button.
 - The next screen would inform you about the process. Once you have read it, click Finish.

Kernel for OLM to PST - Outlook for Mac – How to Import PST files and Export to PST Files?
How to Import a PST file to Outlook for Mac?
For transferring messages and other items from a Windows Outlook to Mac Outlook, users can use the import feature of Outlook for Mac. Please note that only UNICODE supported PST files can be imported in the Outlook for Mac application.
- Transfer the PST file to your Macintosh system.
- On the Outlook for Mac File menu, select Import.
- Select Outlook for Windows Data File, and then click the right arrow.
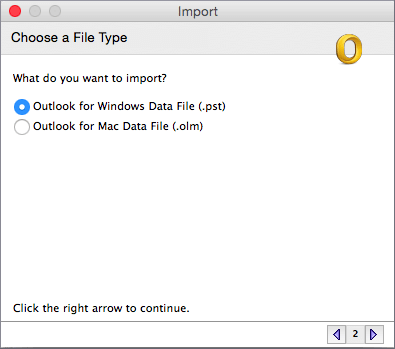 Import Windows Outlook file to Mac Outlook
 - Locate the data file on your computer, and then select Import.
- Once the import process is complete, select Done. The imported items will appear in the navigation pane listed under On My Computer.
How to Export OLM files to PST?
At times when a user needs to access the Mac Outlook data in Windows Outlook, then the OLM files require to be converted to PST format. There is a free way to convert OLM to PST file, but the process may be a bit lengthy.
It is advised to backup OLM file first using Export option in Outlook for Mac to save it into archive file format at the desired destination.
The method is given below:
- Begin by creating an IMAP Account (for example, Gmail).
Kernel for OLM to PST - How to Access Your Outlook for Mac Emails in Gmail?
How to Manually Migrate from Outlook for Mac to Gmail?
As earlier mentioned, there can be several reasons why anyone would want to migrate from Outlook for Mac to the web-based client such as Gmail. Manual migration can be accomplished in three simple steps- prepare your Gmail account, configure your Gmail account with Outlook on Mac and, move your OLM data to the Gmail account. These steps are described below in detail:
Step 1: Prepare Your Gmail Account
- To set up an IMAP account, log in to your Gmail account.
- Click on the Cogwheel (top right) and select Settings from the list.
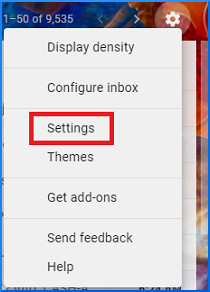
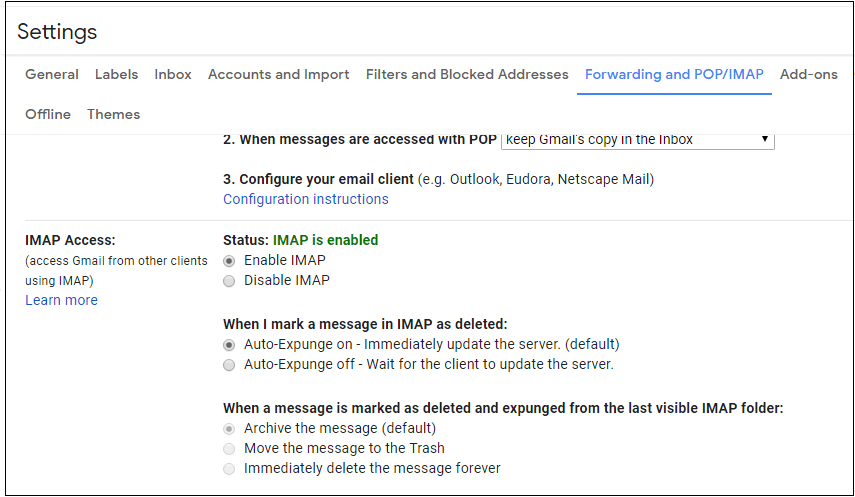
- From the Settings menu, select Forwarding and POP/IMAP.
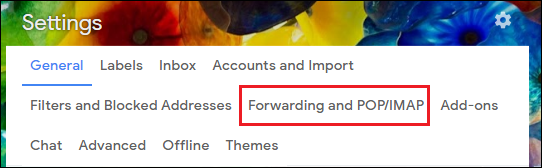
- In the IMAP Access section and select Enable IMAP option.
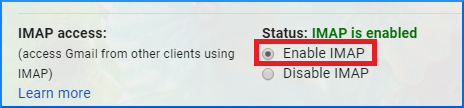
- Scroll down and click on Save Changes.

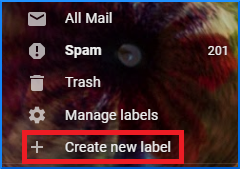
- In the left menu, pane click on Create new label and name it, say OLM files.
Step 2: Configure Your Gmail Account with Outlook on Mac
- Open Outlook on Mac and select the Accounts option.
- Now, select the Email option.
- Next, you need to provide your Gmail credentials to configure your Gmail account with Outlook on Mac.
- Click on Add Account option.
- Exit from Outlook for Mac.
Kernel for OLM to PST - Why and How to Convert Mac Mailbox to MS Outlook?
OLM to PST Converter
Microsoft has not added any in-built tool in Outlook for Mac that allows conversion of OLM file into MS Outlook. You must use a third party migration tool such as OLM to PST converter to export your Outlook for Mac mailbox into MS Windows. This software can repair large number of OLM files in a single cycle.
OLM to PST conversion tool support UNICODE characters. It restores email with its original text formatting, properties and order in the converted file. This software also generates a preview list to show all recovered items. OLM to PST converter provide options to save recovered mailbox folders in PST, EML, DBX or MSG format. The demo version of OLM to PST tool provides overall idea about the software features. Free version export the limited number of Outlook for Mac emails in MS Outlook. You must purchase the full version of OLM to PST converter that allows saving of all mailbox data either in local system drive or portable devices.
Get a brief on how you can export Outlook for Mac emails to Outlook PST very easily with the efficient Kernel OLM to PST Converter. Follow the steps as given below:
- Start the software and select the option to convert single or multiple files as per your need. Click on the Browse button.
 Note: With the Search option on the same page, you can perform the search operation by just entering the drive name. All the OLM files residing in that drive will automatically get fetched.
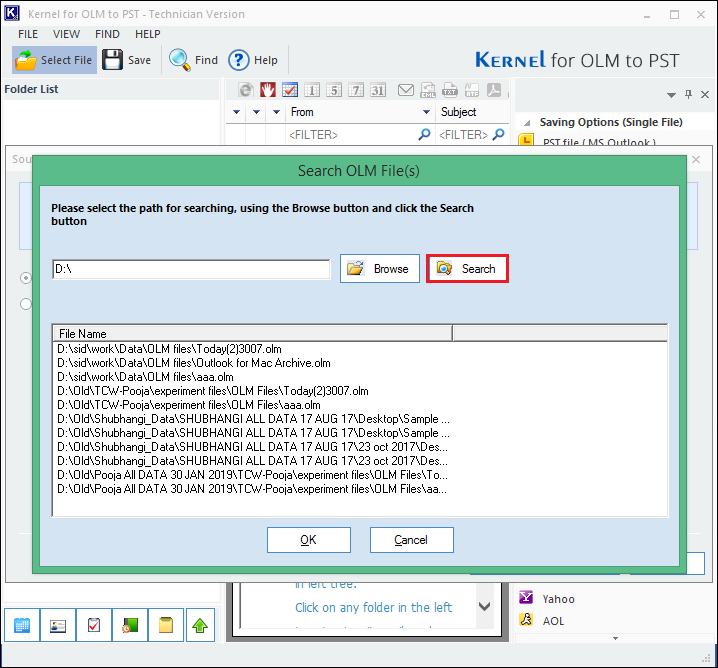
- Select and add the OLM file(s) from the system drive
- When your file is selected, click Next.
- See the process information and click Finish.
- You can have a preview for the selected file item in the retrieved OLM data.
Kernel for OLM to PST - Easily Convert OLM Files to MBOX with no More Hassle
OLM to MBOX Conversion
The manual conversions of OLM to MBOX is next to impossible, or the process is very tedious that requires a lot of technical knowledge. That is why a third-party tool like Kernel for OLM to PST Converter is recommended for it. This utility will help you convert OLM files to the MBOX format recognized by Apple Mail and many open source email clients like Thunderbird.
Process for Convert OLM Files to MBOX File Format
Follow the simple steps given here to convert OLM files to MBOX format:
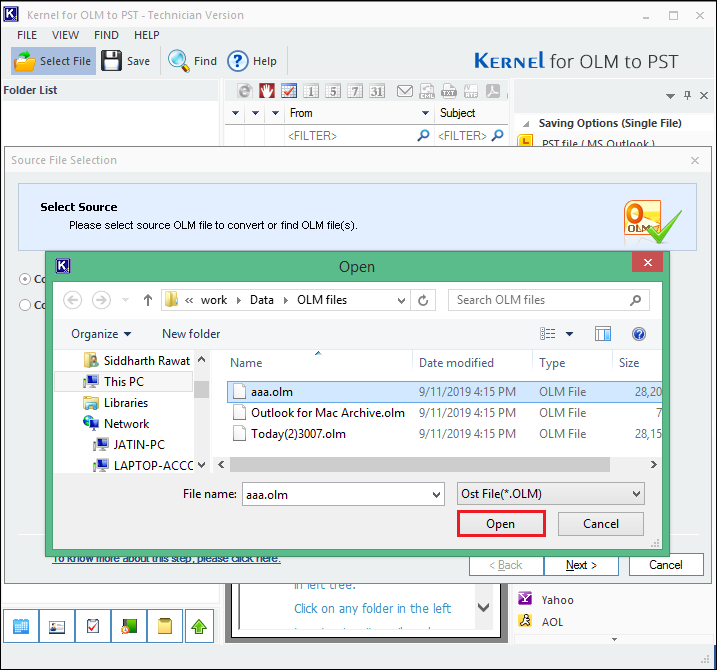
- STEP 1: Launch Kernel for OLM to PST Converter tool, click Select File from the toolbar, click Browse button to choose OLM file from your machine, and click Next.
- STEP 2: A small window will appear. Choose the OLM file that is required to be converted to MBOX file format. Click Open and then click Next.
- STEP 3: In the Process Information page, click Finish.
- STEP 4: Now, click Save and a dialogue box with multiple file saving options with appear on the screen. Select the MBOX File option and click Next.
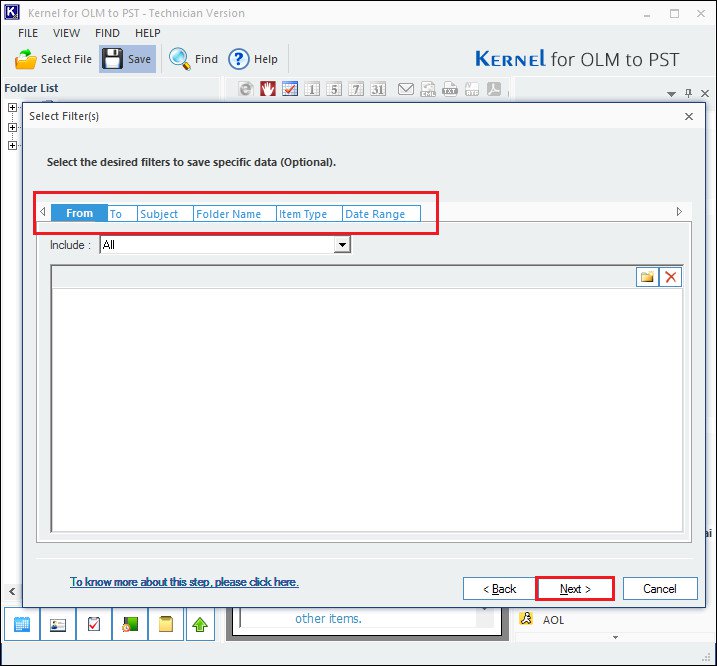
- STEP 5: Here, you can select the filters, if the user requires to convert only specific data from the OLM file to MBOX. Select the filtering options and click Next.
Kernel for OLM to PST - How to Export Outlook for Mac Emails/Items to an Archive File?
Export Outlook for Mac Emails/Items to an Archive File
If you’re using Outlook for Mac and want more free space in your Inbox, then the best way is to archive your emails, contacts, and other items. You can archive OLM data to anywhere on your system. Follow the steps below to export mail items to an archive file in the latest versions of Outlook for Mac.
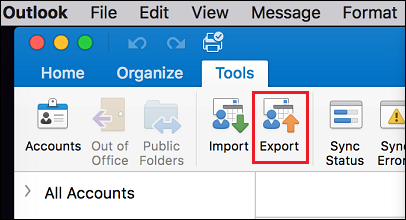
- Open Outlook for Mac on your Mac and go to the Tools tab and select Export.

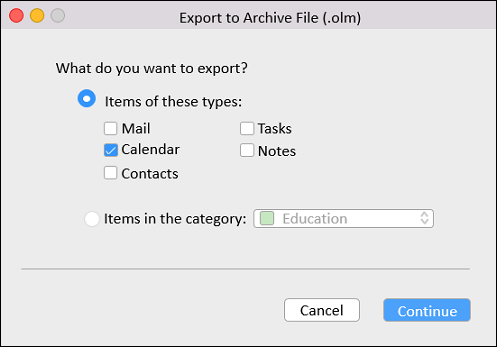
- A new wizard Export to Archive File (.olm) will appear on the screen; select the items that you want to export to the archive file and click Continue.
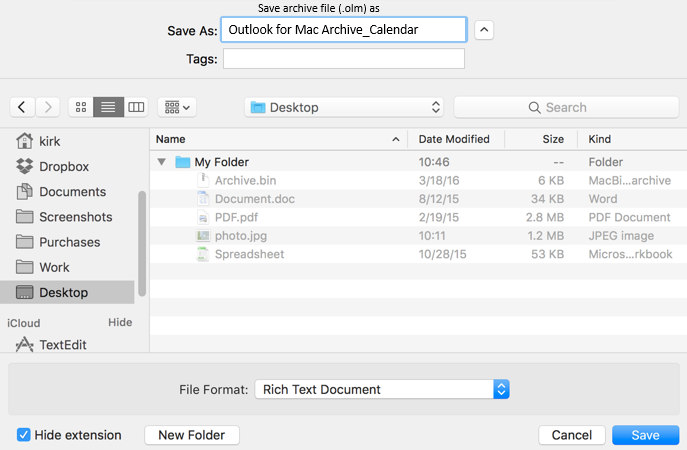
- Now, in the Save as box, select the Downloads folder, and click the Save button.

- It will take a few seconds to export the data; once it’s done, you’ll receive a notification. Click Finish to complete the process.
Using this technique, you can easily export your mail items to Archive in an OLM file.
How to Backup OLM Files to PST Files?
If the manual method to convert OLM to PST is not enough for you to export data from Outlook for Mac data files, then you can export your data to PST files easily. Kernel OLM to PST converter is the most reliable tool to convert your OLM files to PST.
The working process of this software is very simple. Upload the OLM file to the tool and start the scanning process. Once scanned, you’ll be able to see all its content in the tool; you can then save/export the file in the desired format. Let’s see the working process of this tool:
- On launching OLM to PST converter software, a window will appear on the screen; select the file that you want to convert and click Next.
- Once the file is scanned, it’s folders will be visible on the left pane of the tool. Click any folder to preview its emails/items and preview them in the Simple View.
Kernel for OLM to PST - Import Outlook for Mac OLM Emails to Outlook 2019, 2016 & 2013
A Simple Way to Import OLM File to Windows Outlook
A simple step-by-step guide is here to take you through the import process of Mac Outlook OLM files into Windows Outlook 2019, 2016 & 2013.
- Section 1: Export Outlook for Mac Data (OLM File)
- Section 2: Converting OLM Files to Outlook PST (By Using Kernel for OLM to PST Converter)
- Section 3: Import PST Files to Windows Outlook
- Section 4: Convert OLM to PST via IMAP Email Server
Section 1: Export Outlook for Mac Data (OLM File)
- Click on the Tools tab, select the Export option to export Outlook data to OLM file format.
 Please Note: Don’t see the Export button? Make sure you have the latest version of Outlook.
 - In the dialog box Export to Archive File (.olm), select the items you want to export (from Mail, Tasks, Calendar, Notes, and Contacts), and click Continue.

- Now, from the Save Archive File (.olm) as dialog box, look for Favorites in the left pane, choose Downloads folder, and click Save.
- Finally, your data will be exported to the specified location, and you’ll get a notification. Click Finish to complete the final step.
- Move this exported OLM file to the Windows system with the help of the external storage device such as a pen drive.
Section 2: Converting OLM Files to Outlook PST
For importing the OLM file data to Windows Outlook, you will first have to convert the OLM to Outlook PST file format. Then, the converted PST file can be successfully imported to Windows Outlook. The best solution to perform Import OLM to Outlook PST is an automated third-party tool. Hence, it is recommended to use Kernel for OLM to PST Converter tool.
Read moreKernel for OLM to PST - Steps to Export OLM to Office 365 Manually
Export OLM to Office 365 Manually
Many organizations want to take the advantage of Microsoft Office 365 as it offers all the benefits of an email client in more efficient manner on the cloud. It increases your productivity and ensures an instant email communication. When you want to move from Outlook for Mac, then you will find it hard because there are no direct methods. But due to the IMAP protocol, you can migrate the emails from OLM to Office 365.
Follow the steps below to understand the process:
- Open your Gmail and go to account settings. In the Forwarding and POP/IMAP tab, enable IMAP account, and click Save changes.
- Now, open your Mac Outlook and go to the Tools tab, and select Accounts.
- Enter the information for your IMAP account, such as username, password, incoming server, outgoing server, etc. and click “Add Account.”
Note 1: For Gmail, the incoming server is imap.gmail.com, and outgoing server is smtp.gmail.com.Note 2: Don’t forget to check Use SSL to connect for each server.The above steps will add the IMAP account to your Mac Outlook. Now, you need to synchronize Gmail label to Mac Outlook.
- Login into your Gmail account and click the gear button; in the drop-down list click Settings and select Label.
- Create a new label by pressing Create new label button.
- Once the new label is created, open the Mac Outlook account and update the IMAP mailbox by clicking the Send/Receive button.
- After updating, start synchronizing the OLM file with the IMAP email account. Transfer all the data from the OLM file to IMAP email account.
Kernel for OLM to PST - Free Ways to Convert OLM to PST File
Way for OLM to PST Conversion
Kernel has a brilliant software for converting OLM files to PST, i.e., Kernel for OLM to PST Converter. It offers complete conversion of OLM files to Outlook PST. Also, you can export OLM files directly to Exchange server, Apple Mail, and Office 365. Kernel for OLM to PST Converter is the easiest way to convert OLM to PST as it is fast, efficient and accurate. The software has no compatibility issue and supports all versions of Outlook and Windows OS.
Step by Step Procedure for OLM to PST Conversion
Go to the software website and download the trial version on your Windows system. Then install the application. Further, follow these steps to carry out the backup of emails from the Hotmail (now Outlook.com) web-based client easily.
- Open Kernel for OLM to PST Converter and add OLM files.
 Note: You can add single or multiple OLM files.
 - The software will take a minute and offers you a preview of entire OLM file; select the required folders and click Save.

- Select PST as your file saving format and then click Next
- In this wizard, you can apply filters with specific criteria like From, To, Subject, Folder Name, Item Type, and Date Range.
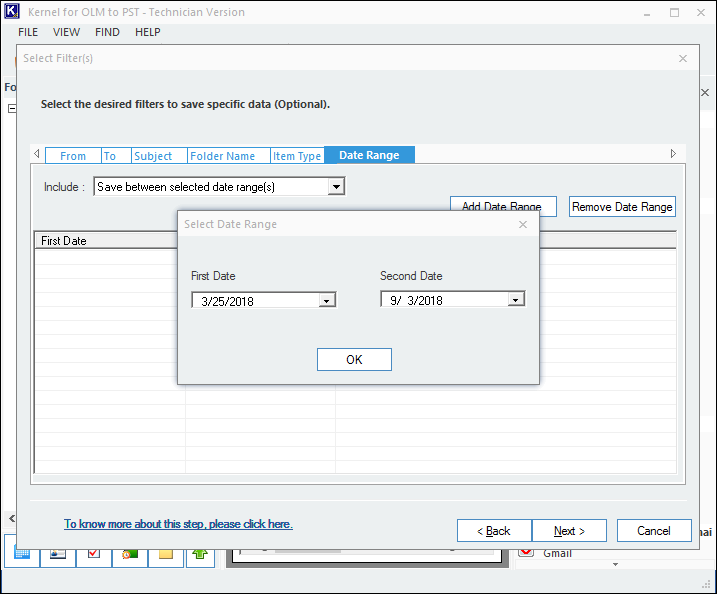
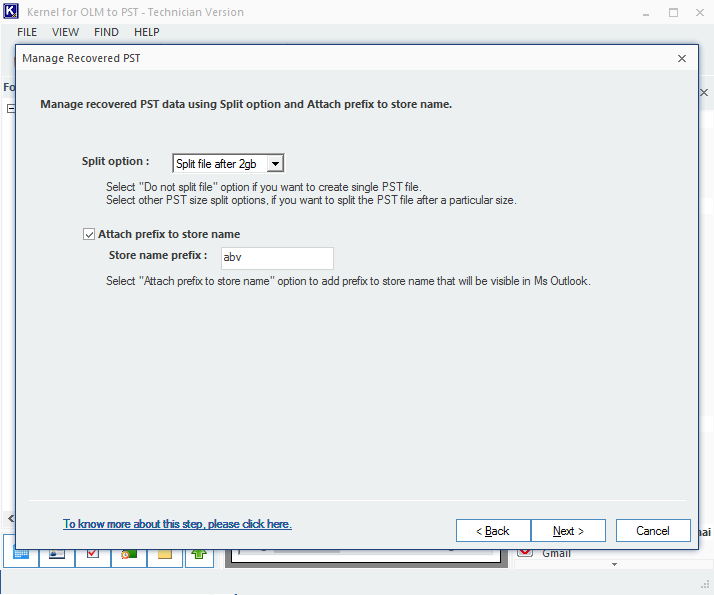
- If you have large OLM file, then you can split your data into small and multiple PST files; you can also add a prefix to the name before saving your file.