Many industry professionals commonly utilize MS Outlook as their primary email application. MS Outlook stores a user's entire mailbox information in the form of data files within a Personal Storage Table (PST). These PST files are typically located on the user's computer. However, there are instances when users need to relocate their Outlook data to a different location, such as a USB drive, network drive, or a new computer. The choice of the new location depends entirely on the individual's preference and where they wish to precisely transfer the PST file.
Scenarios when moving PST becomes the only option
We will outline some key reasons for relocating a PST file to a different computer.
- If you need to transition between different types of systems, such as moving from a desktop computer to a laptop.
- If you are transitioning from one edition of Outlook to a different one.
- If you're transitioning from one iteration of Windows to another.
- If you're transitioning from using desktop Outlook to Outlook Web Access.
These are the instances in which you might find it necessary to transfer a PST file from one computer to another.
Before proceeding, it's important to determine the location of the Personal Storage Table (PST) on your system. For those who use Outlook, it's essential to understand that Outlook stores various data types on your computer, such as emails, calendars, contacts, journals, notes, and tasks. These files, collectively referred to as Personal Storage Tables, are denoted by the .pst file extension.
Now, the locations for locating these files are detailed below:
If you are operating on the Windows XP platform, you can locate the PST file at the designated location:
- drive:\Documents and Settings\user\Local\Settings\Application Data\Microsoft\Outlook
If you happen to be operating on Windows Vista, you'll be able to locate the PST file at the designated location: - drive:\Users\user\AppData\Local\Microsoft\Outlook
If you are using Windows 7, then you can find the PST file at this given location: - drive:\Users\<username>\AppData\Local\Microsoft\Outlook
If you are using Windows 8/8.1, then you can find the PST file at this given location: - drive:\Users\<username>\AppData\Local\Microsoft\Outlook
If you are using Windows 10, then you can find the location of the PST file at one of these given locations: - drive:\Users\<username>\AppData\Local\Microsoft\Outlook.
- drive:\Users\<username>\Roaming\Local\Microsoft\Outlook.
These are the places where you can locate a PST file. Having gained some understanding of PST files, including their purpose and their locations within your system, let's proceed to explore the steps for transferring a PST file from one system to another.
Maintaining a backup of Outlook PST data is a prudent measure that safeguards users against potential data loss. In the unfortunate event of the original PST file becoming damaged or corrupted, users can seamlessly restore their data by following a straightforward set of instructions:
- Create a duplicate of the Outlook PST file for backup purposes.
- Transfer a PST file to Outlook on a different computer.
Let's discuss each one in detail:
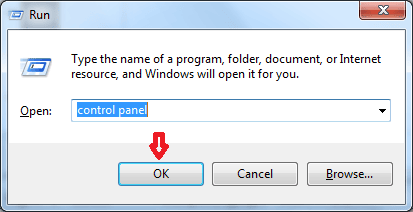
- To initiate the process, commence by clicking on the "Start" button. Next, navigate to the "Run" option, where you should proceed to input "control panel" into the provided field. Once done, confirm your action by clicking on "OK."
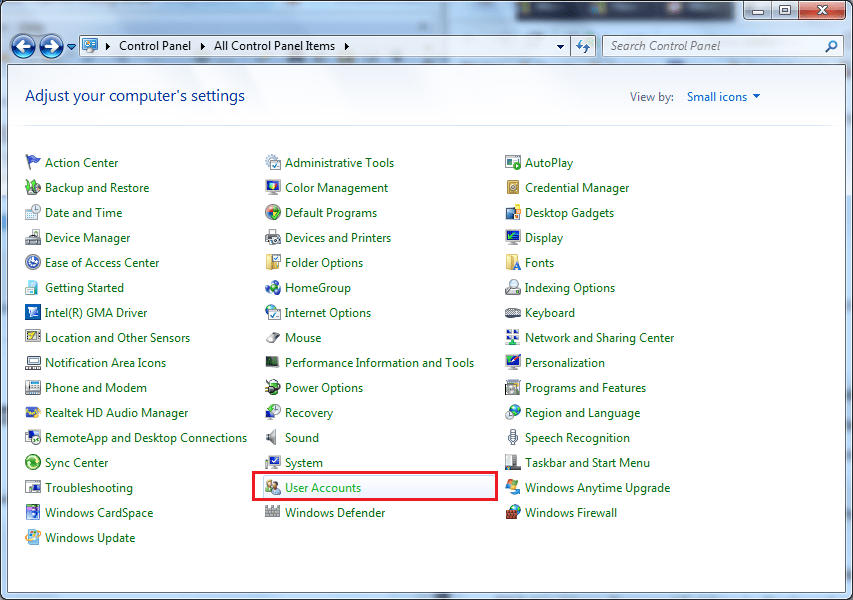
- Clicking on it will take you to the Control Panel window, where you can then select "User Accounts.".
- To open it, simply double-click on the Mail icon.
- In the mail setup window, select "Show Profiles."
- Select Properties, followed by Data Files.
- To back up the Personal folder service of your choice, simply double-click on its name under the "Name" section. Afterward, make sure to copy the displayed path name.
Note: If your profile contains multiple Personal Folder Services, ensure that you back up each PST file individually. - Please, shut all the windows, then launch Windows Explorer or My Computer. Next, paste the path into the address bar at the top and press Enter.
- Here you can see the PST file(s).
- To create a backup of a .pst file, simply duplicate and transfer it to an alternative location on your hard drive, an external drive, or any removable storage device.
Note: The typical procedure for transferring an Outlook PST file from one computer to another location or device can be summarized in the following steps. Additionally, it is advisable to duplicate the PST file(s) onto a portable or external drive and promptly transfer them to the target computer.
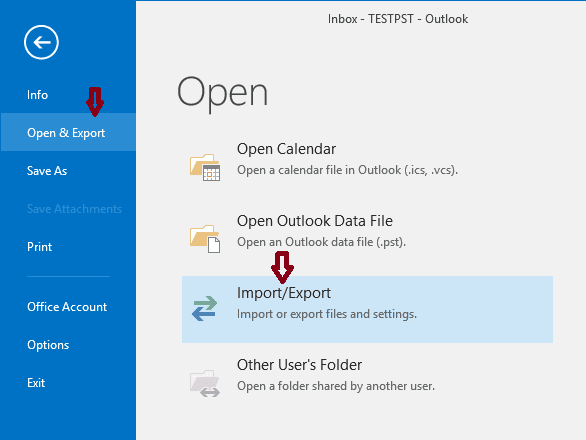
- Open the MS Outlook application, then navigate to the "File" tab. From there, select "Open & Export" and choose "Import/Export.".
- Within the Import and Export Wizard, select Import from another program or file and then click Next to advance to the next step.

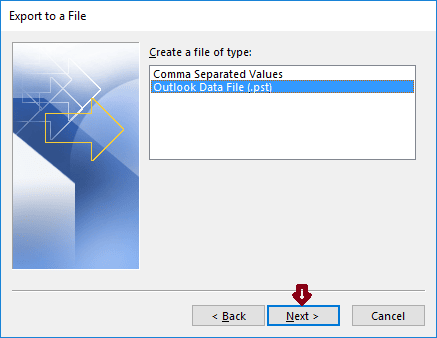
- Choose the Outlook data file (.pst) option and then proceed by clicking Next.
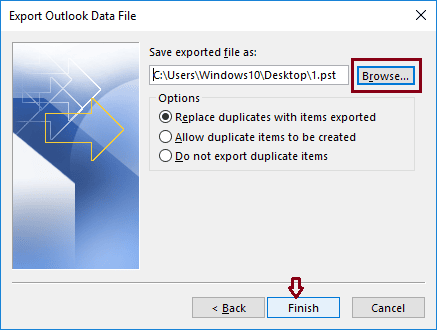
- Navigate through your PST files and make your selection. In the Options menu, choose the specific setting that suits your needs.
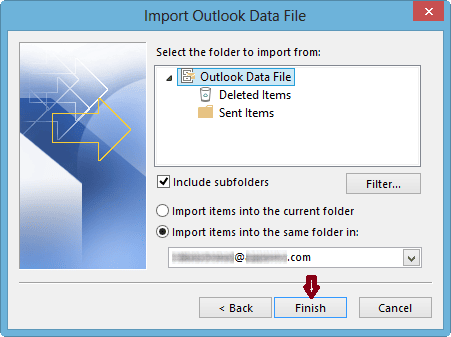
- Ultimately, choose the folder you wish to import, ensure the "Include subfolders" option is selected, and then click the "Finish" button to initiate the process.
While moving PST file from one computer to another, your PST file might get corrupted. So it is advised you to choose PST Repair tool to get rid of such issue.
Moving a PST file between two computers manually does not have a straightforward approach. To accomplish this task, you must adhere to the procedures outlined above. However, it's worth noting that this process can be quite time-consuming and complex. It's essential to proceed with caution, following each step meticulously to prevent any potential corruption of the Outlook PST file.
Conclusion:
In this blog post, we've covered the process of transferring a PST file between two different systems. We've defined what a PST file is and clarified its location on your system, depending on your Windows OS version. We've also delved into the various situations where migrating a PST file becomes necessary. Additionally, we've provided a detailed step-by-step guide for executing this transfer. Furthermore, if you encounter another common issue with PST files, such as corruption, we recommend the use of Kernel for Outlook PST, a reliable third-party automated tool designed to address severe PST file corruption. We trust that this blog post has been instrumental in aiding you in the successful file transfer process.