How to move Exchange 2016 mailbox database to a new partition or drive?
Aftab Alam
 |
Updated On - December 07, 2023
|
Updated On - December 07, 2023
Read time 4 minutes
When Exchange administrators install a new version of Exchange Server, it creates a new database by default, which is the C drive partition in a separate folder. When the size of the database grows, and it becomes tricky to manage, the user should move the database to a new partition drive, which has more space.
But you cannot just copy and paste the database to a new drive. You will need first to dismount the database, move it to a different location or drive, and mount it back to Exchange.
When you have decided to move the database, the first challenge is to get the location of the database file. An Exchange administrator does not need to interact with the database file directly because all the operations can be performed at the Exchange Admin Center. But to move the database, you need to get its location. Here is the location of the default Exchange database file.
For Exchange Server 2016
For Exchange Server 2013
For Exchange Server 2010
If the Administrator has changed the location of the database, then you should run the following cmdlet at Exchange Management Shell to get an actual location.
After running the cmdlet, you will get the details of the name of the database, the entire location of the EDB file, and the transaction log file. The transaction log file records all the activities performed in the database.
Before starting the database move procedure, you should rename the database because the default name of the different database is quite similar to that of other databases, and it will be easier to recognize the database if it has a different name.
The original name of the database will change from DB4321 to DatabaseHR. Now, you can go ahead and run the move command.
The above cmdlet will change the location of the database ‘DatabaseHR’ to a different drive and subsequent folders. Now, mount the database back to the Exchange Server and start working on it.
As mentioned in the method, the database should remain in the dismounted (offline) state, and the user cannot work on it, and the time required to complete the task will depend on the database size. Until the database is not moved entirely to the new location, the user will have to sit idle, and the productive hours will go to waste.
If you do not want to disrupt the performance of the Exchange Server, then you should create a new database at a different location and copy the mailbox data from the older database to the new database. Here is the cmdlet –
After creating the new database, go to the Exchange Admin Center and create a local move request between two databases.
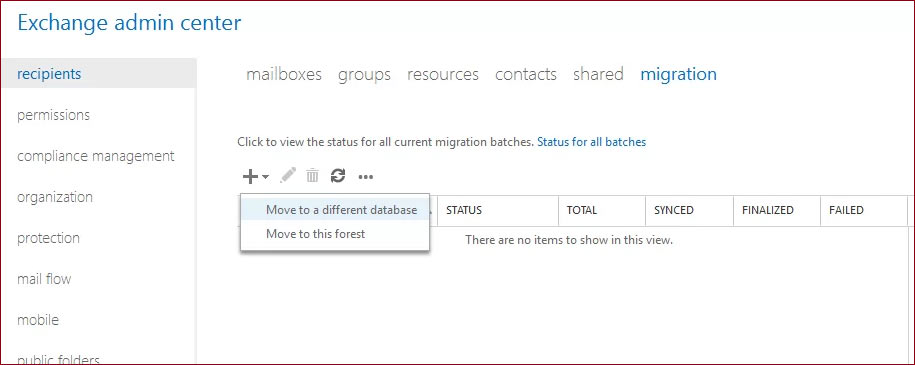
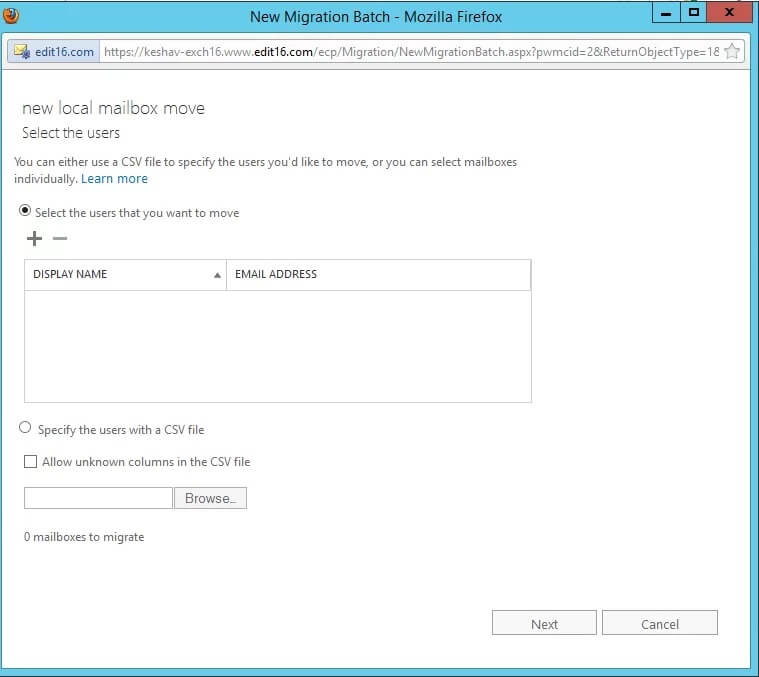
Note: Here, you can select the Target database location in the new drive or partition.
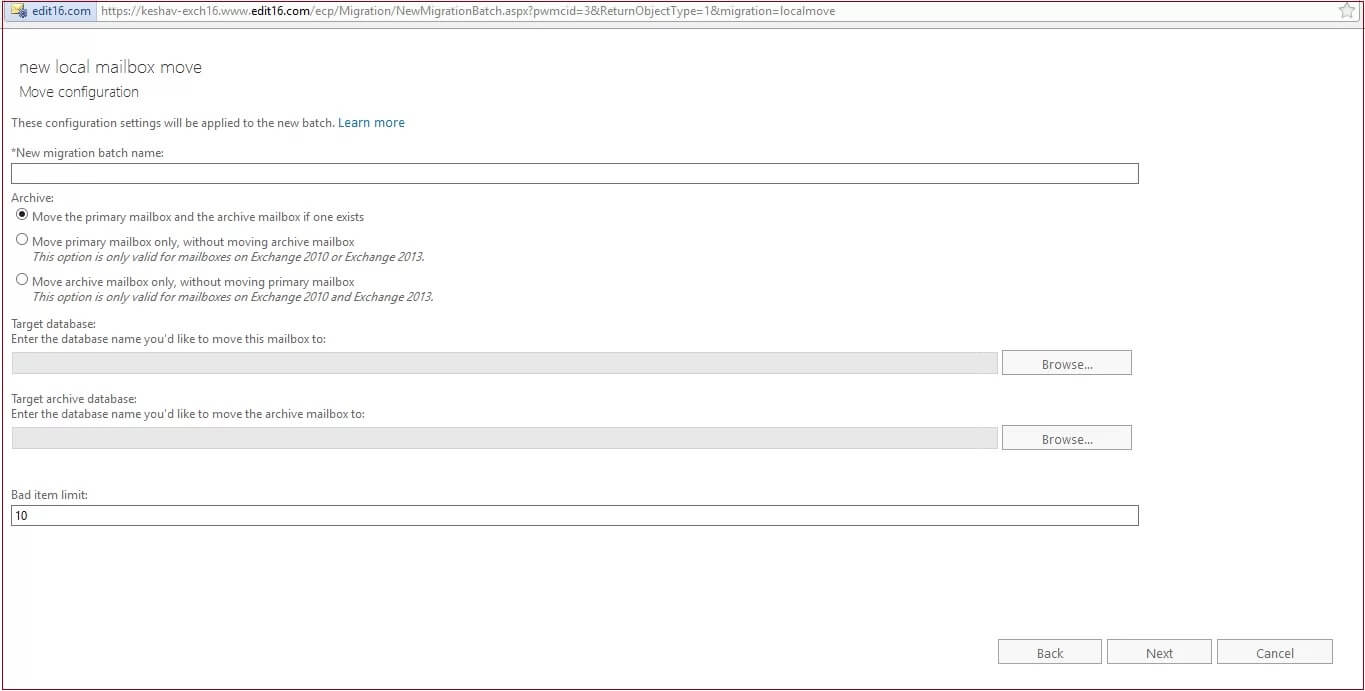

The move request will start and move the chosen mailboxes to the specified target database. The benefit of this procedure is that the user does not face any downtime.
Both the methods to move the Exchange 2016 database to a different drive or location are simple, but they are also time-consuming, unsuitable for large migrations, and pose a risk of data loss. The user must also manually restore the database to the Exchange Server 2016. That is why you should use a professional tool to transfer data and safely maintain data integrity.
Exchange Server Recovery software can access the Exchange database file, retrieve its information, and migrate to another Exchange database. The process is quite smooth, and the tool provides a full migration report after the migration where you can easily migrate mailboxes to a different database. With this tool, you can easily move EDB files or data from a live Exchange Server in this way. So, this tool is beneficial in Exchange to Office 365 migration. And it works with older versions like Exchange 2003 to newer versions like Exchange 2019.
Though the Exchange database has a default location, it can be moved to another partition or drive. The Move-DatabasePath cmdlet in the Exchange Management Shell would be best for this. Also, you can use the ‘Move to a different location’ option in the Exchange admin center. If you have a professional Exchange EDB file converter tool, you can move EDB files or Exchange data from a healthy or corrupt EDB to a different Exchange Server.